Patch assignments
Sockpuppet treats all of Disguise's layer types as fixture personalities. The Patch Assignments window is where we patch or assign our layers on our Timeline to incoming DMX values or channels. For OSC the process is slightly different.
-
Access the patch assignments window by right-click on the d3 icon in the top left corner of the interface.
-
Navigate down to the Sockpuppet tab.
-
Beneath this you will find two fields, the first will be Patch assignments and the second Bank assignments.
-
Left-click Patch Assignments to open the patch assignments window.
View Types
Left click on the view type field to open the list of available view options.
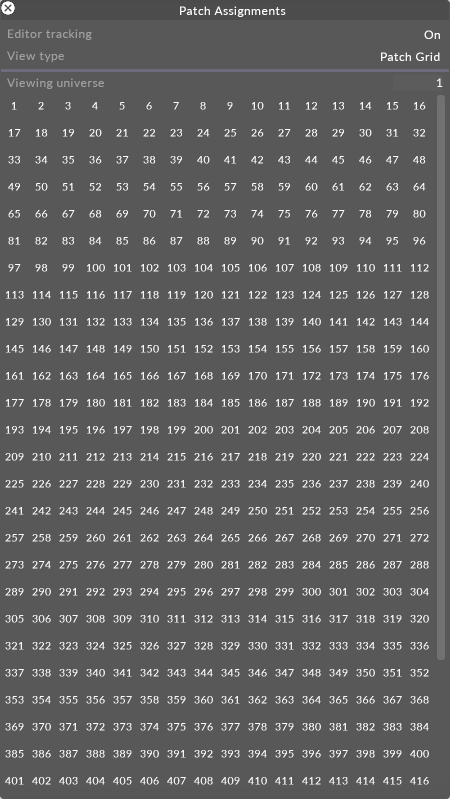
Patch grid
Displays all 512 channels in a grid format. You are able to patch to any free channels here or view which channels you have already populated with a patch. Left-click on Patch Grid to view different options to change the layout of the patch window.
Patch list
This shows us a list of all of the current layers patched and their start channels within any selected universe (selectable from the Viewing Universe field).
Global patch list
This follows the same format as the Patch List, however this will show us a full list of all layers patched regardless of which universe they start on.
Universe occupancy
This will show us in grid format which of our universes we currently have layers patched to (a blue square over any universe indicates we have layers patched).
To patch layers within Disguise software ensure:
-
The Patch Assignments window is open & in the patch grid view type.
-
The layer you want to patch is added to the Timeline. Click here for more information on working with layers.
-
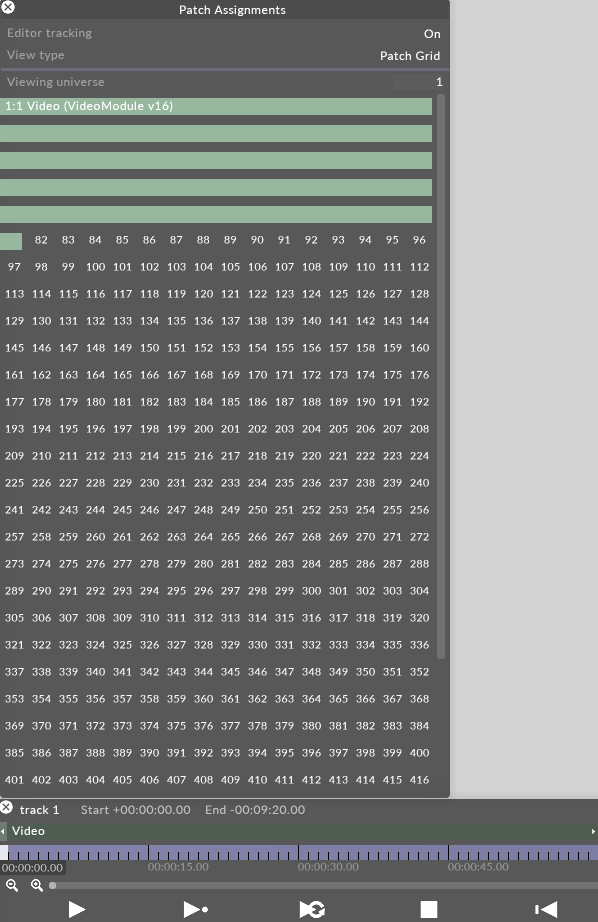
Hover the cursor over the DMX channel you want to patch to in the Patch Assignments window.
-
Select the DMX channel while holding down ALT to generate a white arrow, which should be dragged down to the layer on the Timeline that you want to patch to.

This will create a green block over the channels in our patch grid that the layer will take up, and also turn the layer on the timeline green to signify the layer is patched and only controllable through Sockpuppet DMX.
We will also be presented with some key information regarding our patch. This will include the start address, a user specified name (this will be "untitled" by default) the layer type, and the personality version.
Please note: Any previous keyframing / sequencing done on the layer will be overwritten and deleted by the default values sent from the desk once the layer is patched.
To access this patch settings menu, right click on the green patch block, this will open the patch settings.
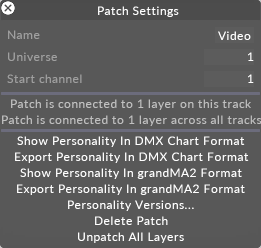
Name
Here we can give the layer a user friendly name, this might be particularly useful if we have a high number of video layers patched for example, and want to easily distinguish which ones are which.
Universe
Here we can specify the universe we want to patch our layer to.
Start channel
Here we can specify the start channel we want to patch our layer to.
Patch info
Here we are presented with some basic information as to where and how many layers our patch assignment is connected to.
Show Personality
By left clicking this, we are presented with a window displaying the layers personality. This is a table highlighting which incoming DMX channel is assigned to what function or parameter within the layer, in addition to this we are shown the default values of channels, their ranges, and the title displaying the layer type and its total footprint size.
Left clicking Show personality XML will do two things. The first will present the user with a window showing the video layer personality in XML form. The second action performed will be to create a new folder in the d3 projects folder, this will be named "output". (see the below file directory)
Computer > Media (E:) > d3 Projects > Project Name > output
This folder will be populated with an XML file containing the Personality data for the selected layer. This can then be transferred via USB stick onto your XML compatible lighting console.
Please note: You will need to follow this process for each layer type patched. A new XML document will be created within this output folder, for each new layer type that the user opens the show personality XML function on.
Here we will find an archive of the previous personality versions used in our project. A personality profile may be updated / changed with a new release of Disguise software, this function will allow you to roll back to the personality version that you originally programmed your show with, meaning you will not have to update any of the programming on your console.
By left clicking on delete patch we will remove the selected layer from our patch assignment. This will return it to its standard operating mode (controlled through the timeline & keyframable)
-
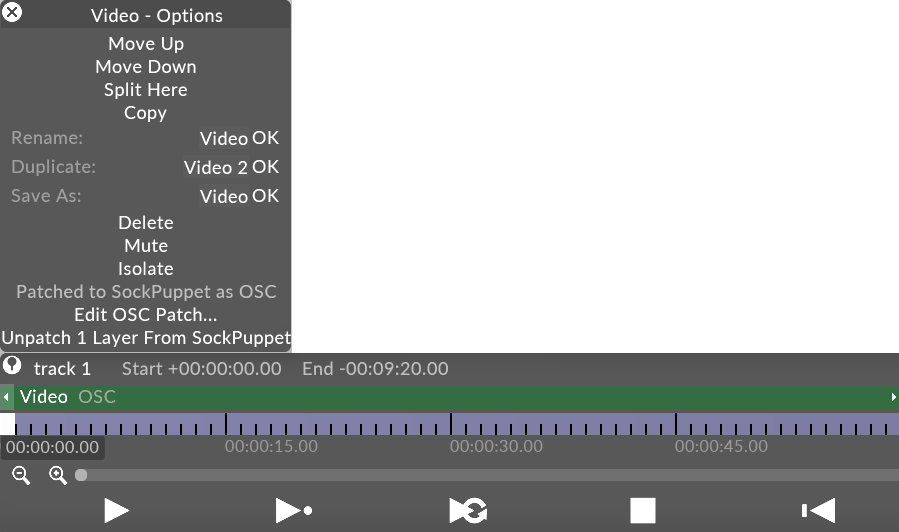
Right click a layer on the timeline
-
Left click Patch to OSC

-
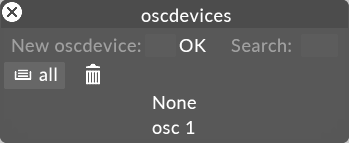
Choose OSC device
The layer will now turn green, indicating that it is controlled by an external sockpuppet system.

-
To view the personality of the layer for OSC, right click the layer and choose Edit OSC patch.
-
Left click View personality
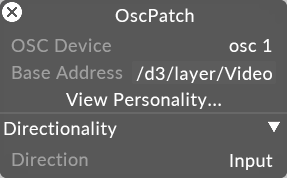
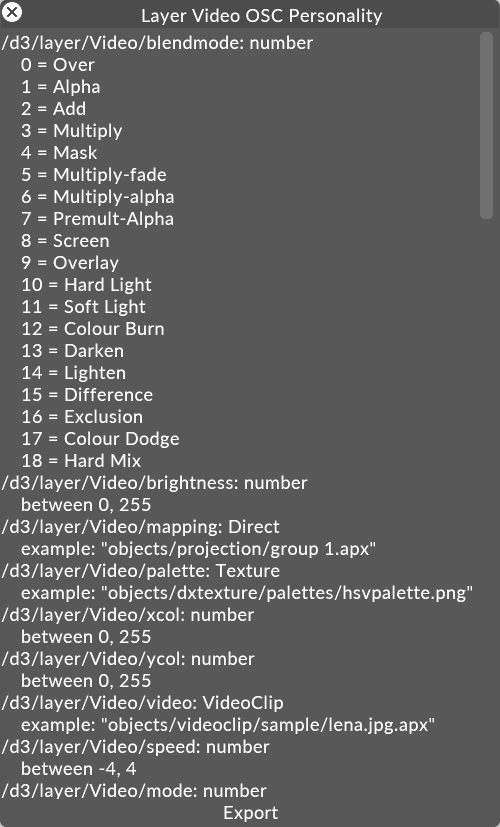
The default OSC personality opens.
-
Repeat the previous steps to view the OSC patch.
-
Once the patch is open, left click the Export button at the bottom of the window.