The Unreal Engine plugin allows a Level Sequence built within an Unreal Scene to be triggered via a RenderStream Layer. This means that if any actor is animated within the UE scene using timeline functionality, it can be controlled from within Disguise software from the timeline.
Level Sequences & Time Control
To create and configure a Level Sequence:
-
Open your UE project.
-
-
Optionally, add a new Actor you wish to animate to your scene.
-
Click Cinematics in the Toolbar and select Add Level Sequence.
-
Name the new Level Sequence and Save.
-
In the Sequencer: click the Track dropdown and set the Actor To Sequencer and select the Actor you wish to animate.
-
Add your initial keyframe for any or all Transform properties by clicking the small + button (“Add a new keyframe at the current time”).
-
Move the Playhead along the Timeline.
-
Modify your chosen property either by using the 3D controls within the scene or by updating the value directly from within the Details panel.
-
Add another keyframe in the same manner.
-
Return the Playhead to the beginning of the Timeline and play the sequence to confirm your animation is correct.
-
Open the Sequence Display Rate dropdown (fps counter) and set the display rate to that of your Disguise project.
-
Set the Clock Source to Timecode.
-
Save the Level Sequence.
-
-
-
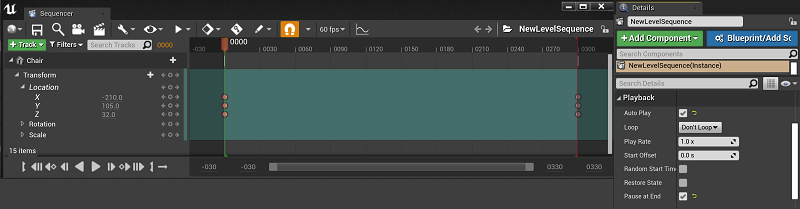
Select the Level Sequence in the World Outliner panel.
-
Navigate to the Playback tab in the Details panel.
-
Enable ‘Auto Play’ and configure other options according to your preferences.
-
Save Current.
-
-
-
Navigate to Edit and Project Settings…
-
Navigate to Engine and General Settings in the left panel.
-
Set Timecode Provider underneath the Timecode separator to RenderStreamTimecodeProvider.
-
-
Rebuild lighting if required (Unreal Engine may display errors at this point but it will recover).
-
Save and close Unreal Engine.
-
Open the RenderStream Layer in Disguise software and Start the workload.
-
Play your timeline within Disguise software.
Configure the Level Sequence:
Configure project settings: