Checkpoints are useful if you want to lock your project to a specific software version for portfolio purposes, to have a known-working state you can go back to, e.g. for demos. We recommend to create checkpoints only after a project has been finished.
Checkpoints are intended for archiving / demonstration purposes, not for running shows.
Please note: Checkpoints are not intended for - running shows - they are intended for archiving / demonstration purposes and saving project file backups; Disguise softwareautomatically saves your project file regularly and on exit.
Warning: At present, Director/Actor operation is not guaranteed to work for projects with active checkpoints. Disable the checkpoint if you encounter issues starting a Director/Actor session.
Warning: generated checkpoints do not make backup copies of media files (audio files, still images, mesh files and video files). You should make regular backup copies of the entire specific Project folder(s) and store them on an external hard drive or network store.
What a checkpoint does
A checkpoint means that:
-
A backup of the .d3 file is stored in the checkpoints folder.
-
A backup of the entire software install is stored in the checkpoints folder.
-
The project is "locked" to the version of software that you built it in. Instead of the installed version (e.g. r21), the one from the checkpoint (e.g. r18) is executed.
-
Therefore you can freely upgrade to the newest version of the software, knowing that the show will continue to run exactly the same way as the day you built it.
-
You can still upgrade the show later on (See "How to disable a checkpoint" below).
How to create a checkpoint
-
Right-click d3 from the dashboard (bar at the top of the screen). Next select Project Settings.
-
Type the name of the new checkpoint into the new checkpoint text field and hit Enter.
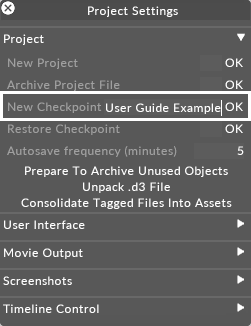
New Checkpoint property is used to create a checkpoint that allows you to open the project file in a later version of Disguise
-
Wait until a label saying d3 checkpoint complete pops up. This should not take more than a few seconds but may be longer depending on the size and number of resources of the project.
This will create a new folder called checkpoint in the specific Project folder. For information on where the specific Project folder is located please see the sub-chapter Projects location/structure. Assuming that you do not rename this folder the project will now run from this local folder, rather than the main Disguise installer.
Checkpoint folder created in the specific Projects folder when a checkpoint is saved, the project will now run from this folder.
Opening a checkpointed project created in an old release
-
All checkpointed projects created in an earlier release than r11 need to be copied to
c:/blip/data/d3 -
Open the project from thed3 Manager but make sure to add a projects folder that links to
c:/blip/data/d3
How to disable a Checkpoint
-
Make a copy of the .d3 file.
-
Rename the checkpointfolder, for example _checkpoint_old_ .
The Disguise project will now run from the main Designer installer on your system.
Please note: When you upgrade a .d3 project file, it may become incompatible with older versions of Disguise (such as the checkpointed version). If you want to go back to the checkpoint (by restoring the "checkpoint" folder) you may also need to restore a backup copy of your .d3 project file from your history folder.