Inverse LUT Method
Overview
The Inverse LUT colour calibration method builds upon the existing colour calibration workflow, with the key difference being that instead of using the calibration to adjust the colors going to the LED to match a specific color space that may not be possible with the LED, the generated Lut will be able to adjust the color of the set extension to match the LED.
Workflow
- Set up your LED screen(s), camera, and MR set as normal and continue with the regular delay and spatial calibrations.
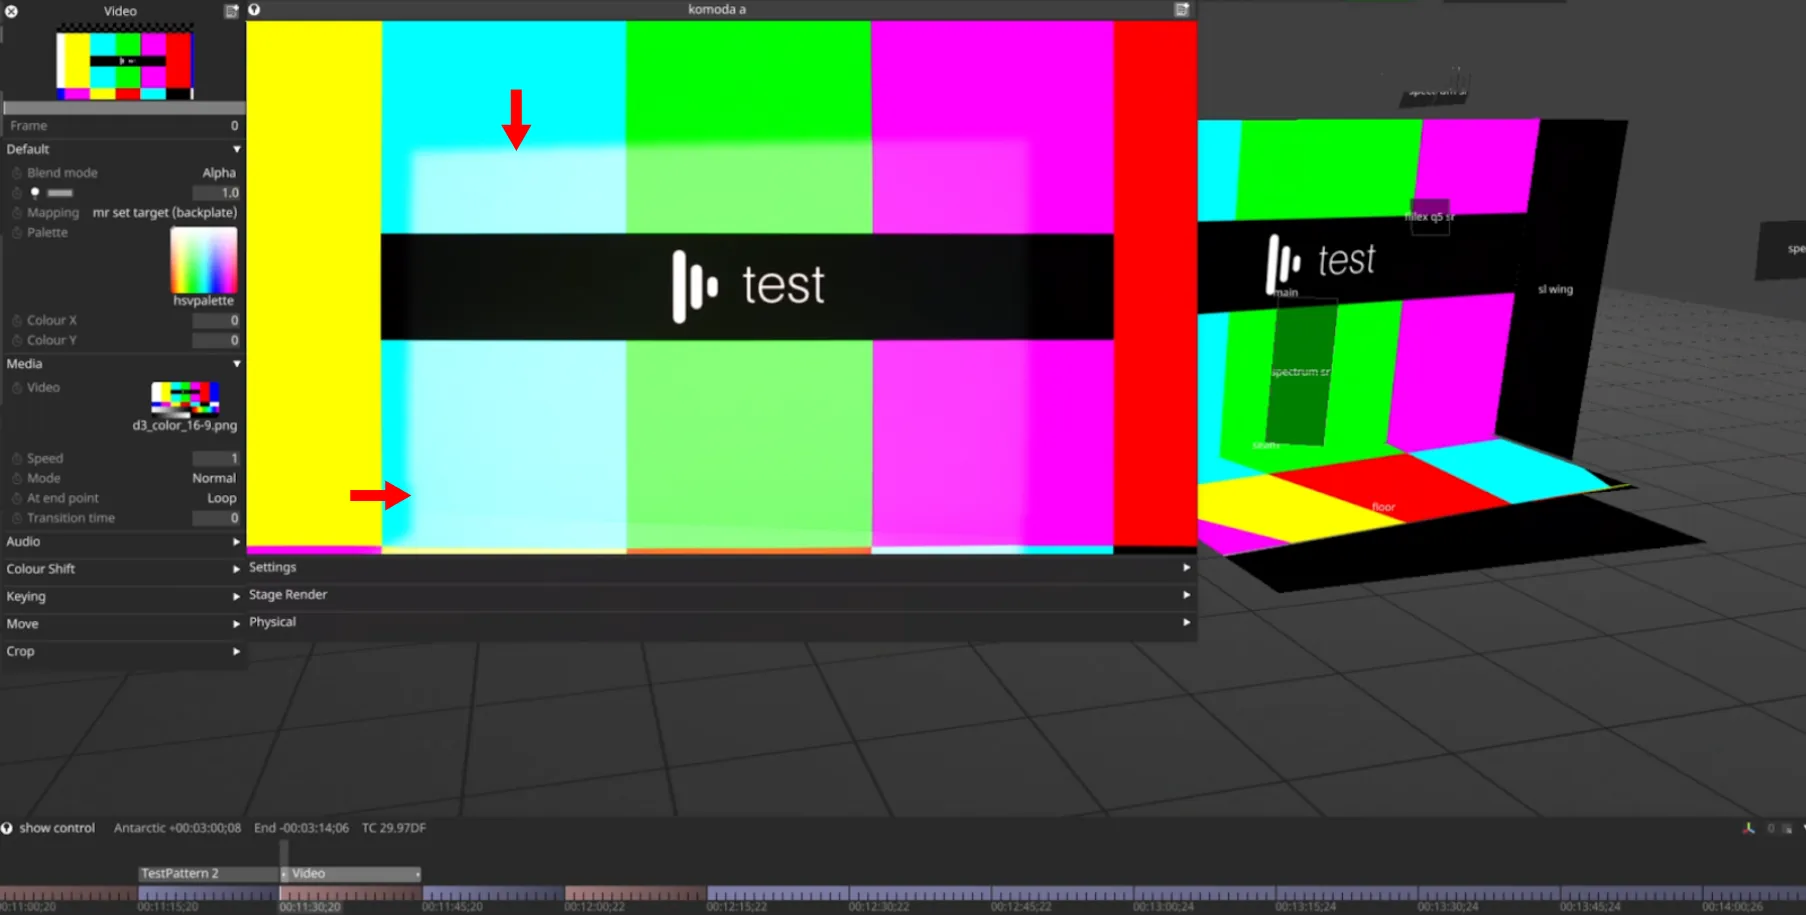
- To test the effectiveness of this process you can create a video layer with a colour test pattern selected, mapped to the MR set target “backplate”. When positioning the camera to show the set extension you will see a clear difference in color between the LED and set extension.
- Run the colour pre-calibration and calibration like normal but when completed it will automatically enable the generated LUTs to the LED screens, you will need to disable these.
- On the timeline, create a LUT layer, you will need this layer to extend anywhere where content with set extension or AR is used.
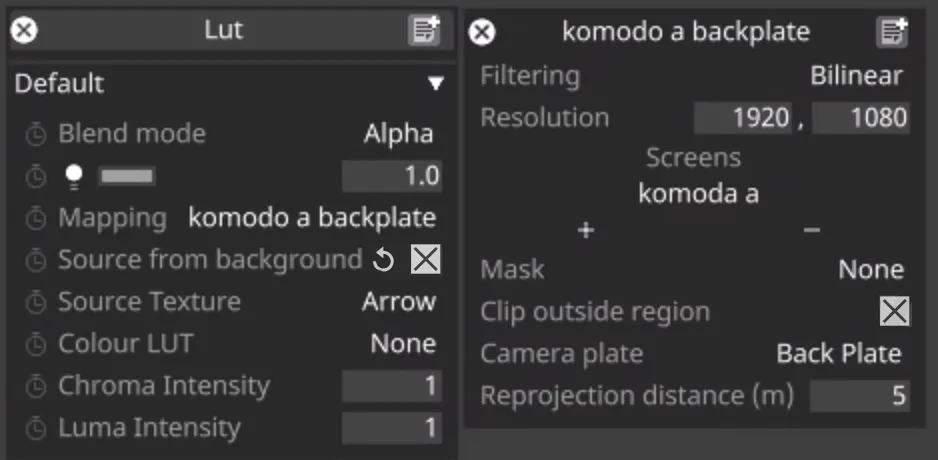
- In the LUT layer create a “camera plate” mapping with the camera added in the “screens” section, set the camera plate to back plate and enter the camera’s resolution.
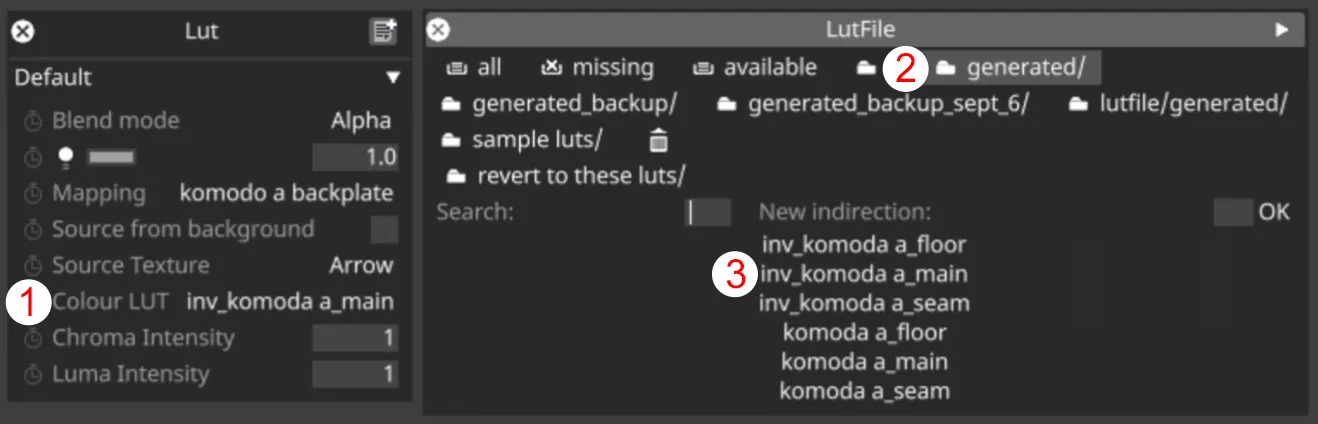
- In the “Colour LUT” section, go to the “generated” tab and for every lut created there will be an inverted LUT as well. Select the LUT labeled “Inv_(camera name)_(main LED screen)”
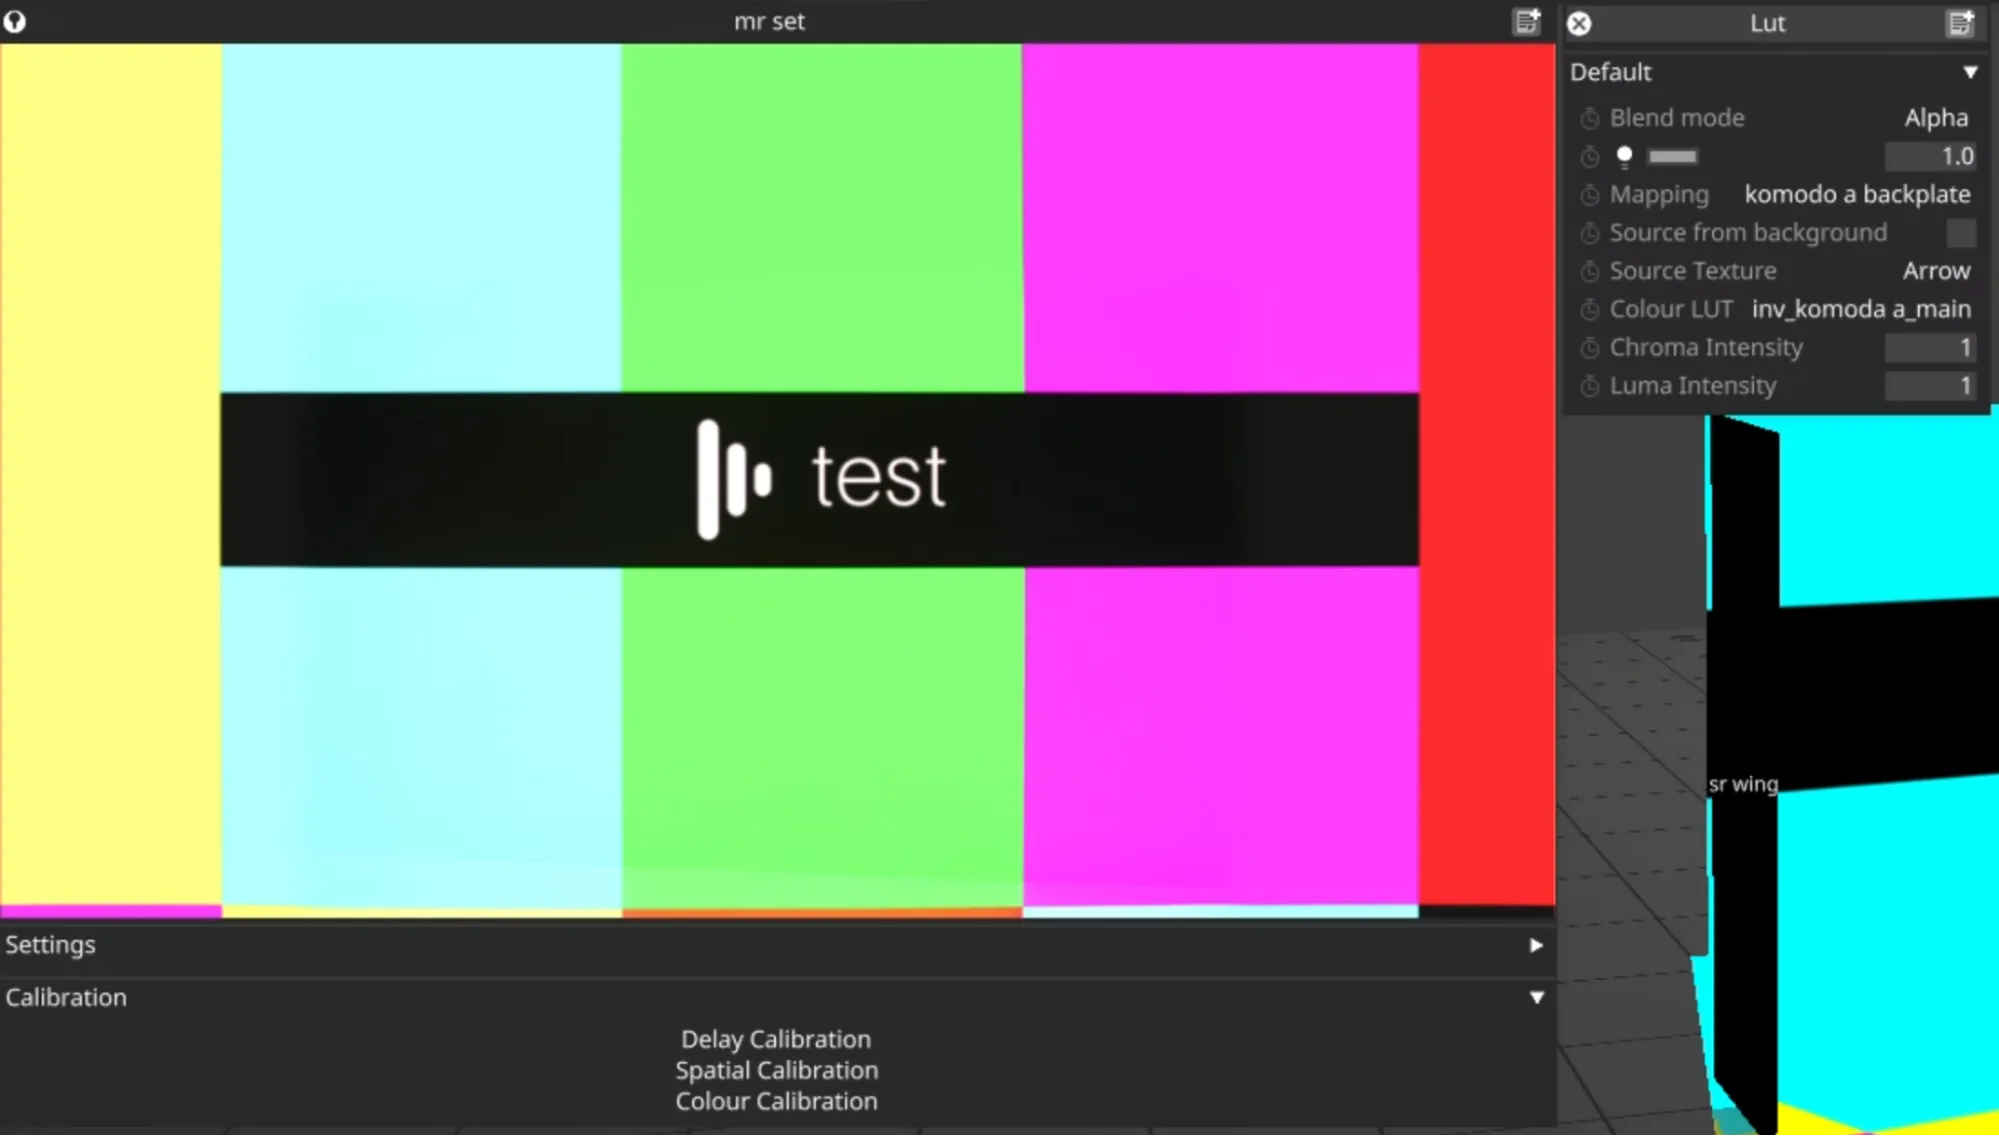
- Now the set extension will match the same colors at the LED screen. You can also play with the “Chroma and Luma Intensity” variables to fine tune your results.
- You can also create a second Lut layer with the camera plate mapping to the camera but instead selecting “Camera Plate” to “Front Plate” this will affect any AR composite elements.