VFC Card Replacement
Before replacing a VFC card it is worthwhile going over the recommended practices for how to handle them in and out of the server.
Please take necessary precautions when handling VFC cards in order to protect them against electrostatic discharge (ESD). We strongly recommend the following mitigations:
- Keep VFC cards in ESD bags and packaging when not in use. The packaging for VFC cards includes an ESD bag as standard and this is sufficient. Do not leave VFC cards out in the open.
- Keep VFC cards in ESD bags and packaging during transportation, including carrying VFC cards by hand.
- Use an ESD wrist strap when handling the IP-VFC card outside of its ESD packaging.
 VFC Card Replacement. Click on the video image to view the video in YouTube
VFC Card Replacement
Section titled “VFC Card Replacement”Users can change VFC cards as they require. You can replace one or multiple cards. The following steps are a guide to help users change VFC cards. Please read carefully to ensure best practice. If the system does not work after following these instructions, do not force the VFC cards but contact Support
Replacing a VFC card
Section titled “Replacing a VFC card”- Disconnect the system from all sources of power: remove the power cord from input and output, before changing the VFC cards.
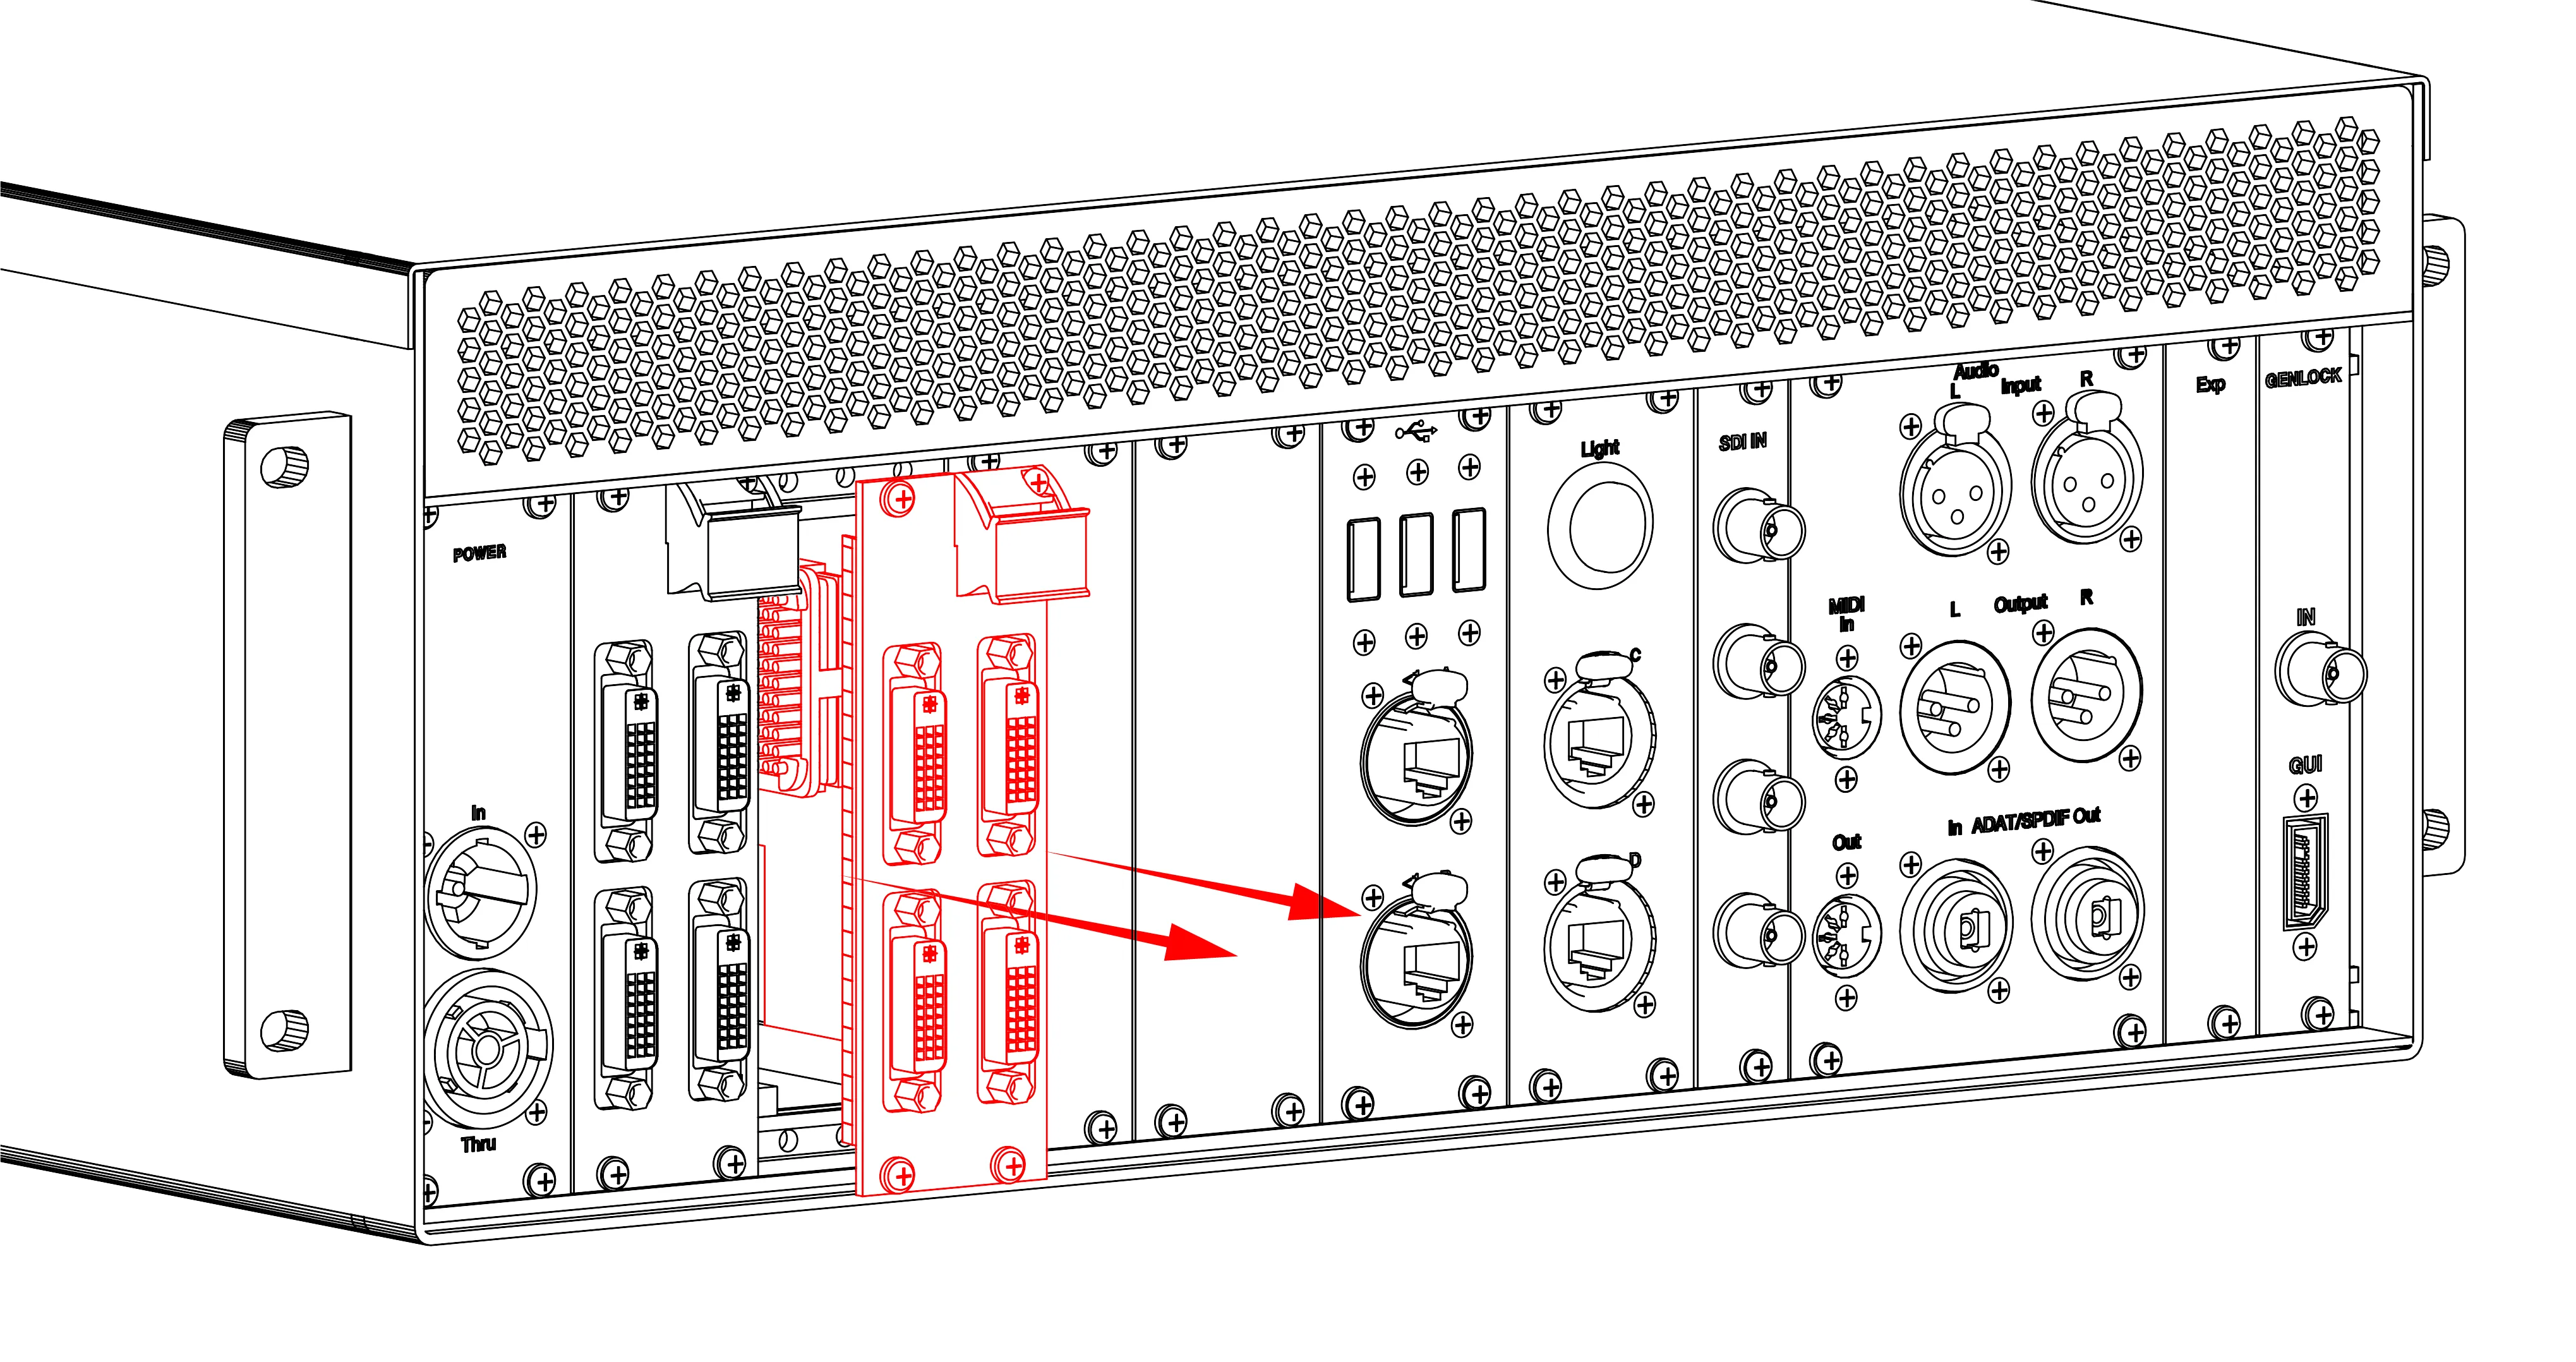
- Using a manual Phillips #1 screwdriver loosen the 4x retaining screws on the VFC card you want to replace. The screws are indicated with a red line in the image below. The VFC card should be screwed in slowly by applying each screw in increments of around 25-50% each time. The first screw should be in the bottom right followed by top-left, top-right, and ending with bottom left.
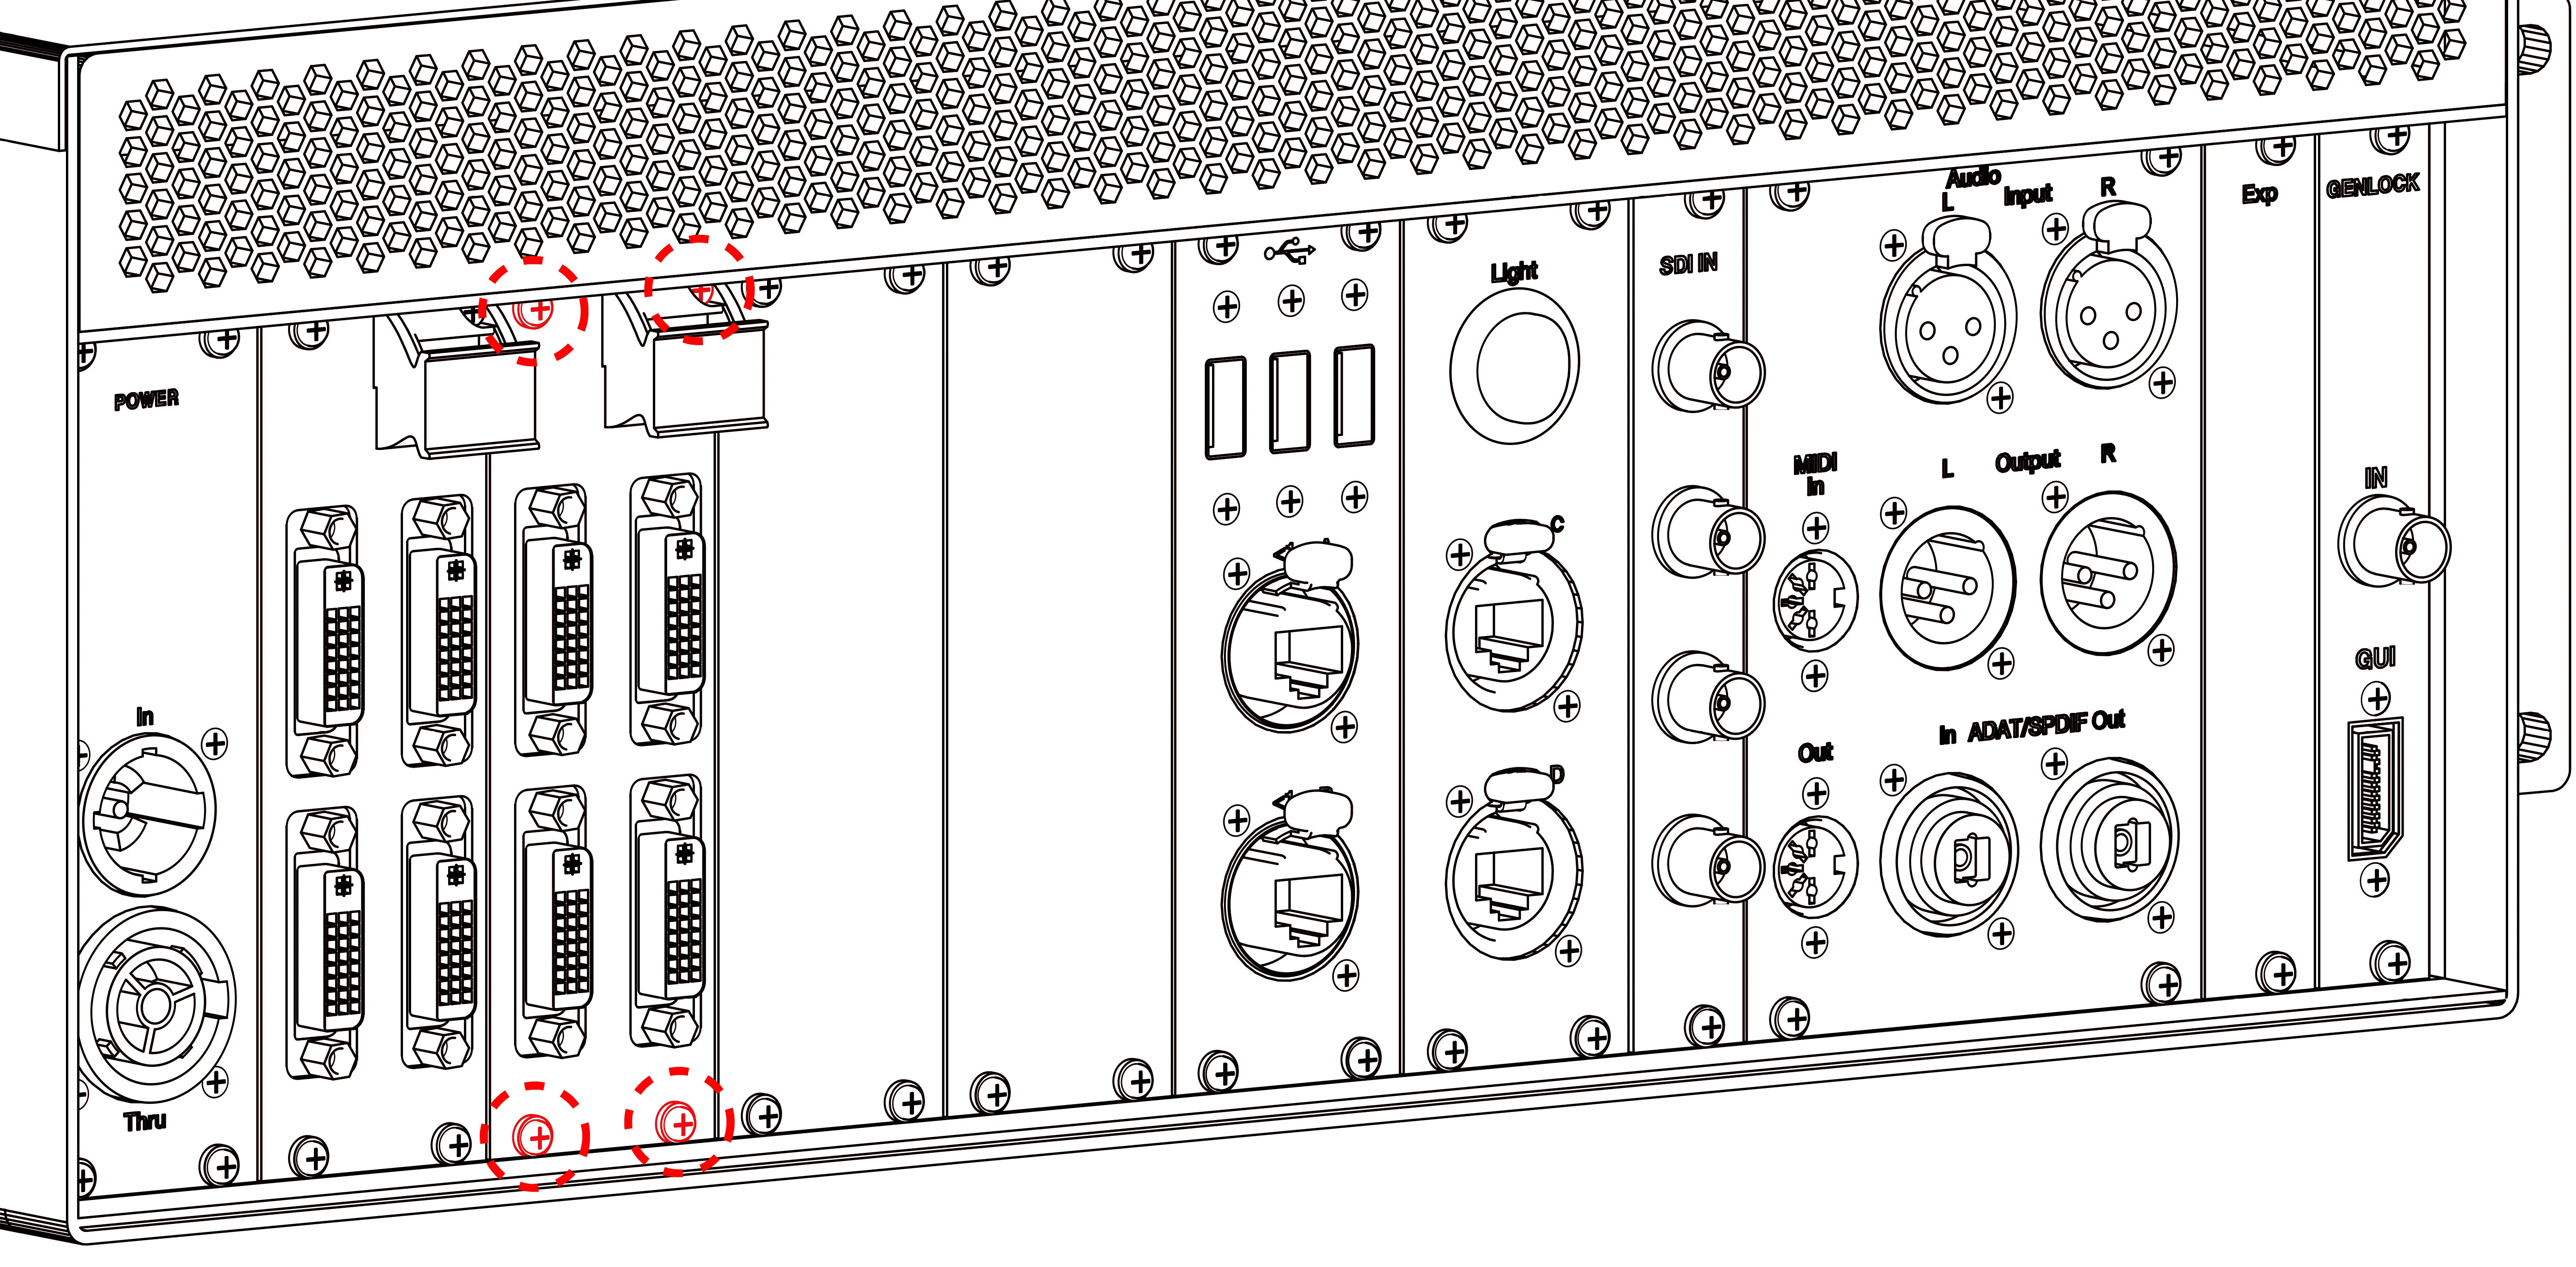 Red lines indicate screw location. Example shows Quad DVI VFC cards.
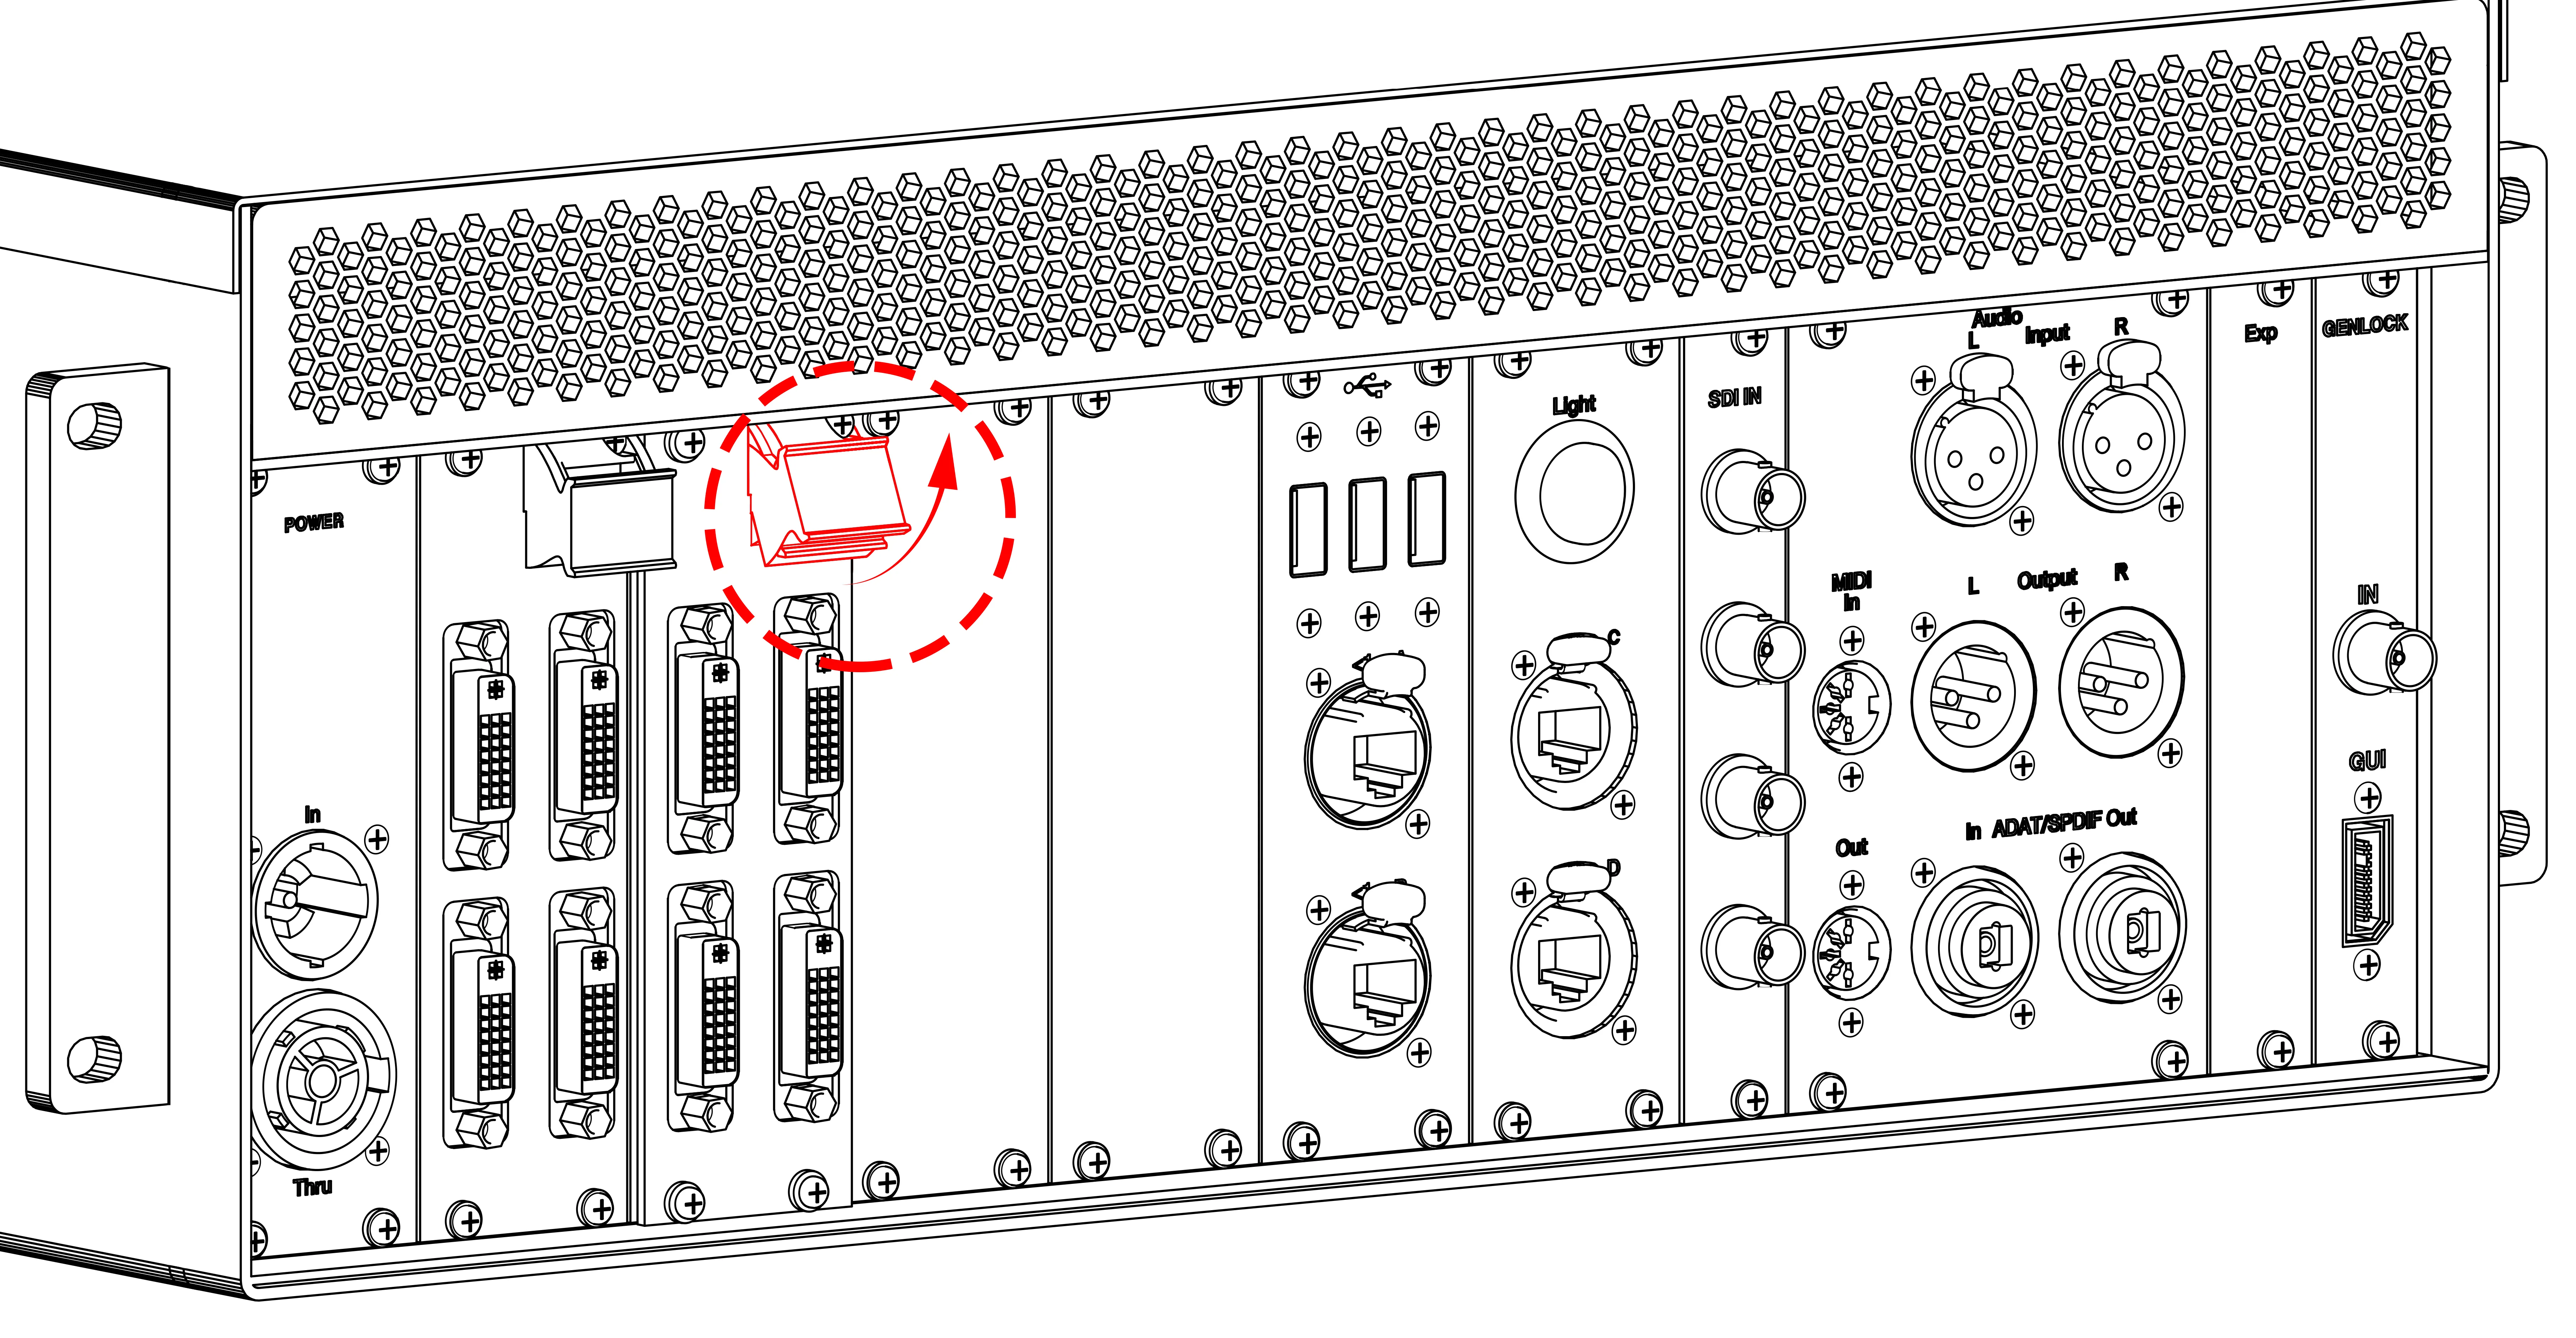
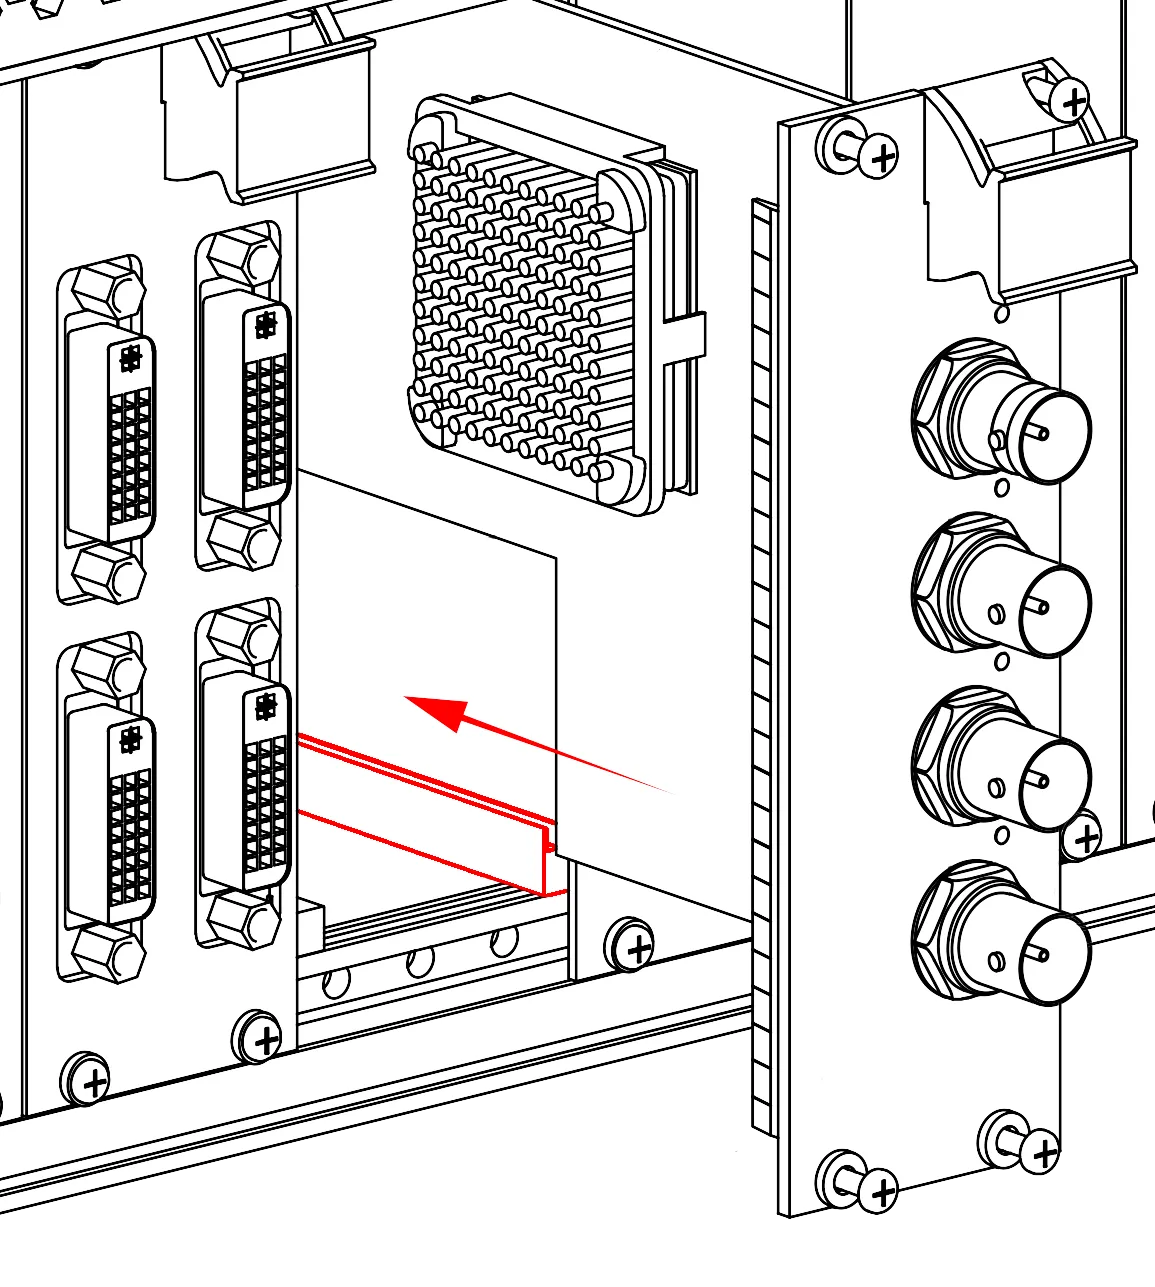
 - Lift the latch on the top right corner of the card and gently remove the card from the rear of the unit by pulling gently as shown in the images below.
- The VFC cards are fragile, be sure to pull straight not flexing the card and if under any resistance do not use excessive force. Avoid touching the exposed electronics.
- Gently place the removed card into the anti static box provided with your purchase.
- Gently insert the new VFC card into the vacant slot, being careful to line the card up with the guides both at the top and the bottom of the system, as indicated for the bottom with red lines in the image below.
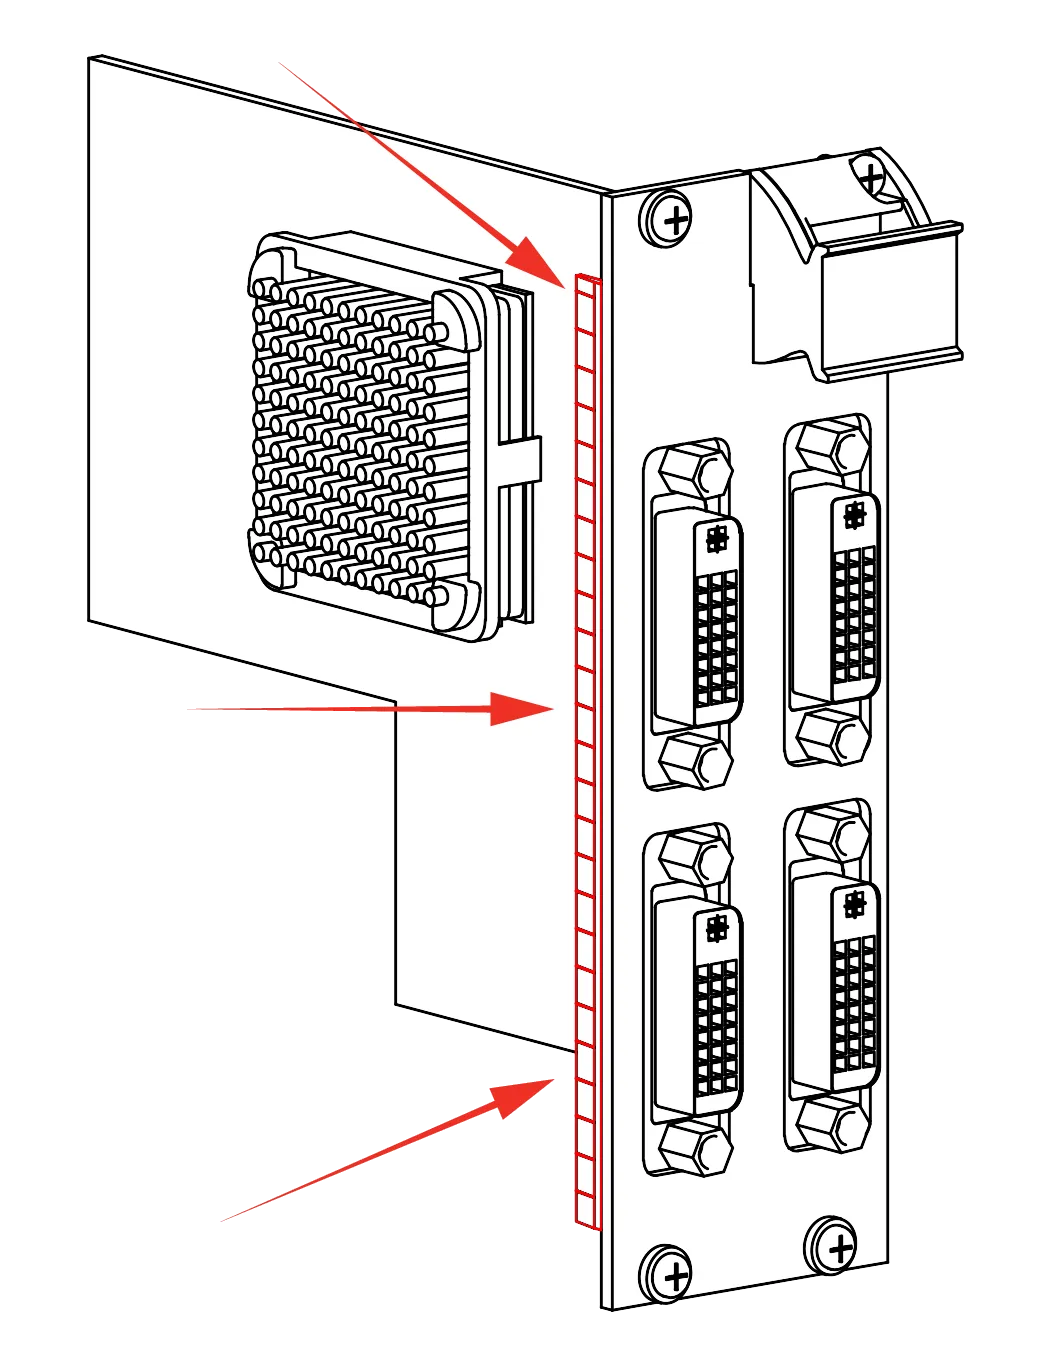
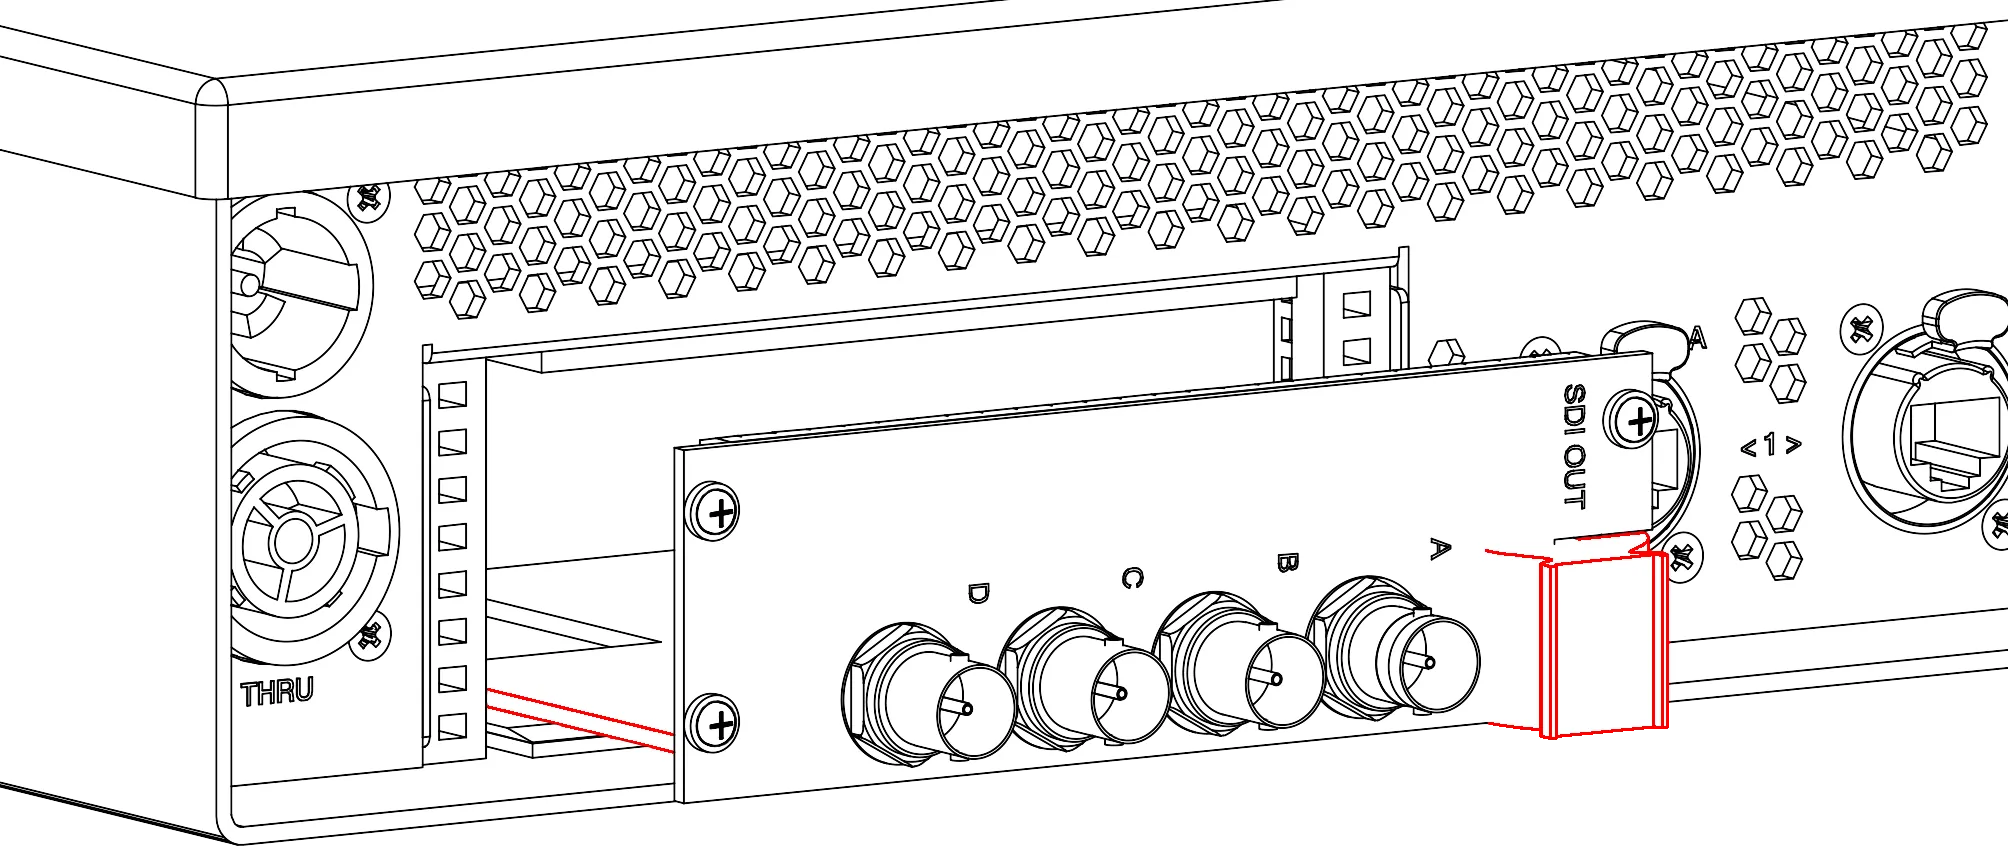 7. The top and bottom of the card needs to slide into the guides. Be sure that the grounding spring maintains its position to avoid jamming when re-inserting.
8. Once inserted into the guides, make sure the card is fully flush with the rear of the server by gently and firmly pressing in the centre of the VFC card, as indicated in the image below.
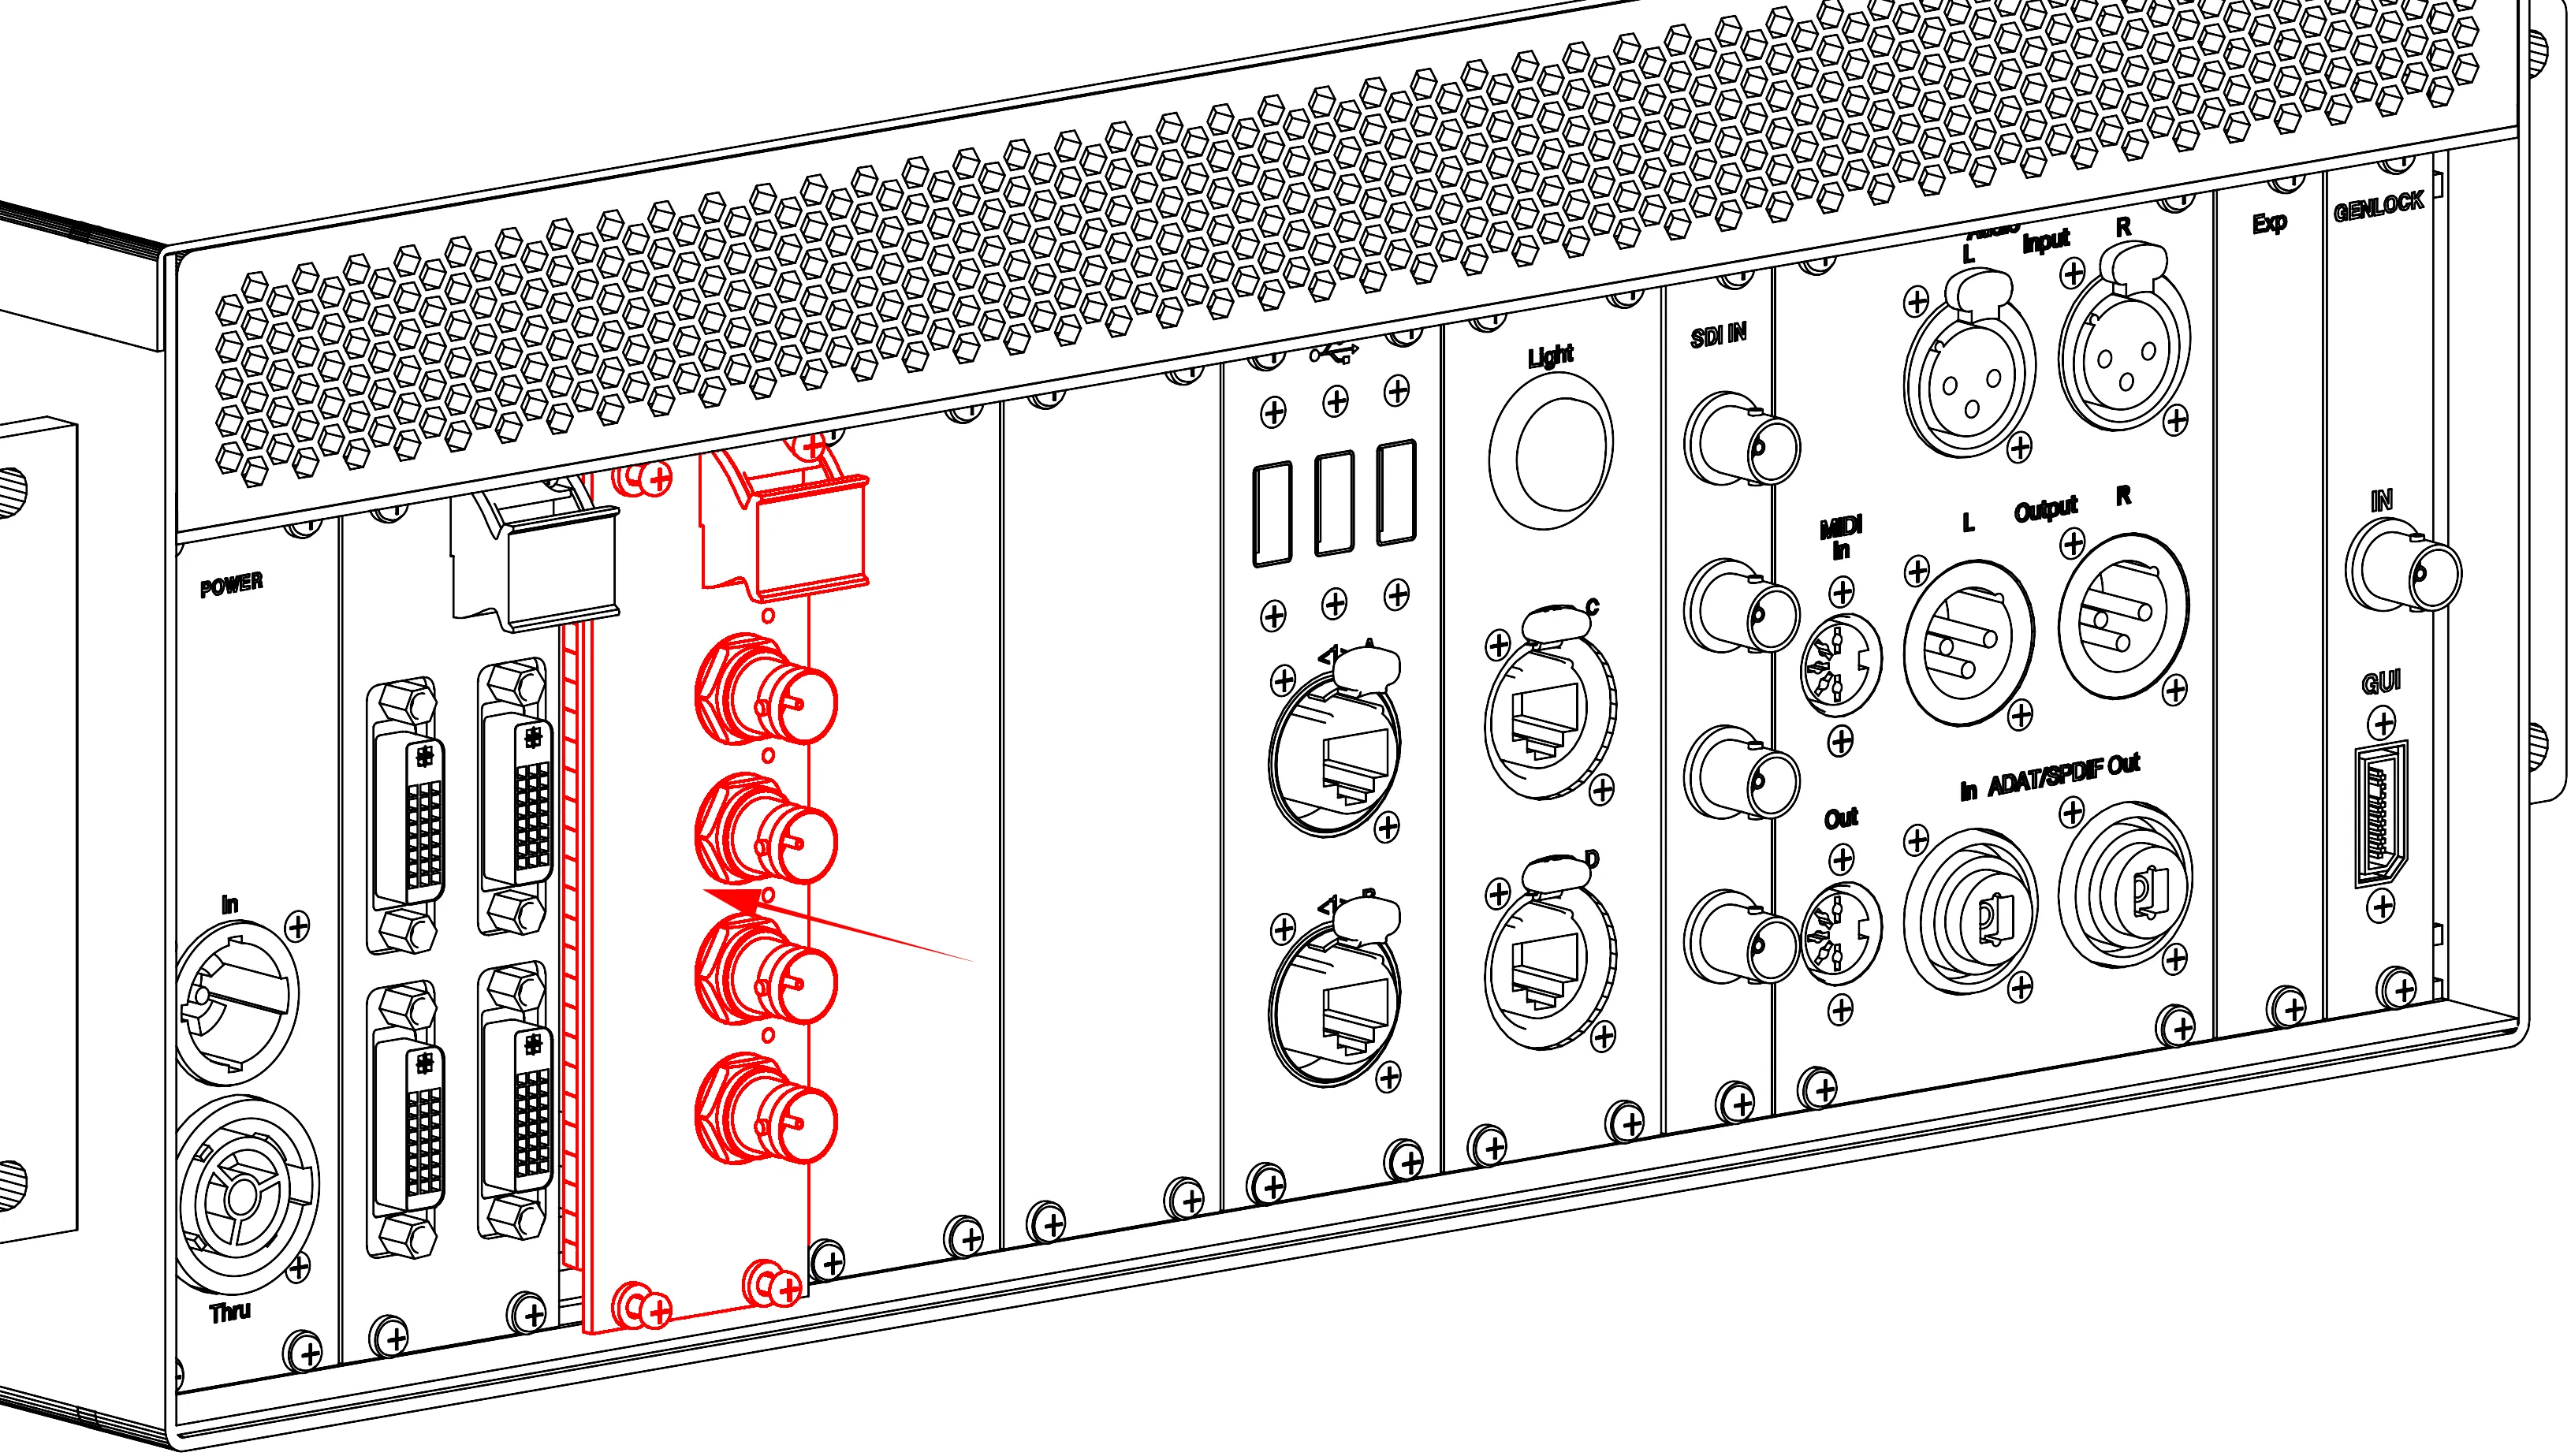 9. Fasten the four retaining screws before repeating all of the steps for the next card. To reduce the risk of damaging the threads, do not apply excessive torque to the screws.
