Mask Blending
Mask blend modes are a unique type of blend mode within Designer that applies a mask to the layer above it in the stack, unlike standard blend modes, which affect content below them. This mode enables blending operations that are independent of previously composited layers, providing granular control over masking elements. Mask blending applies across mappings.
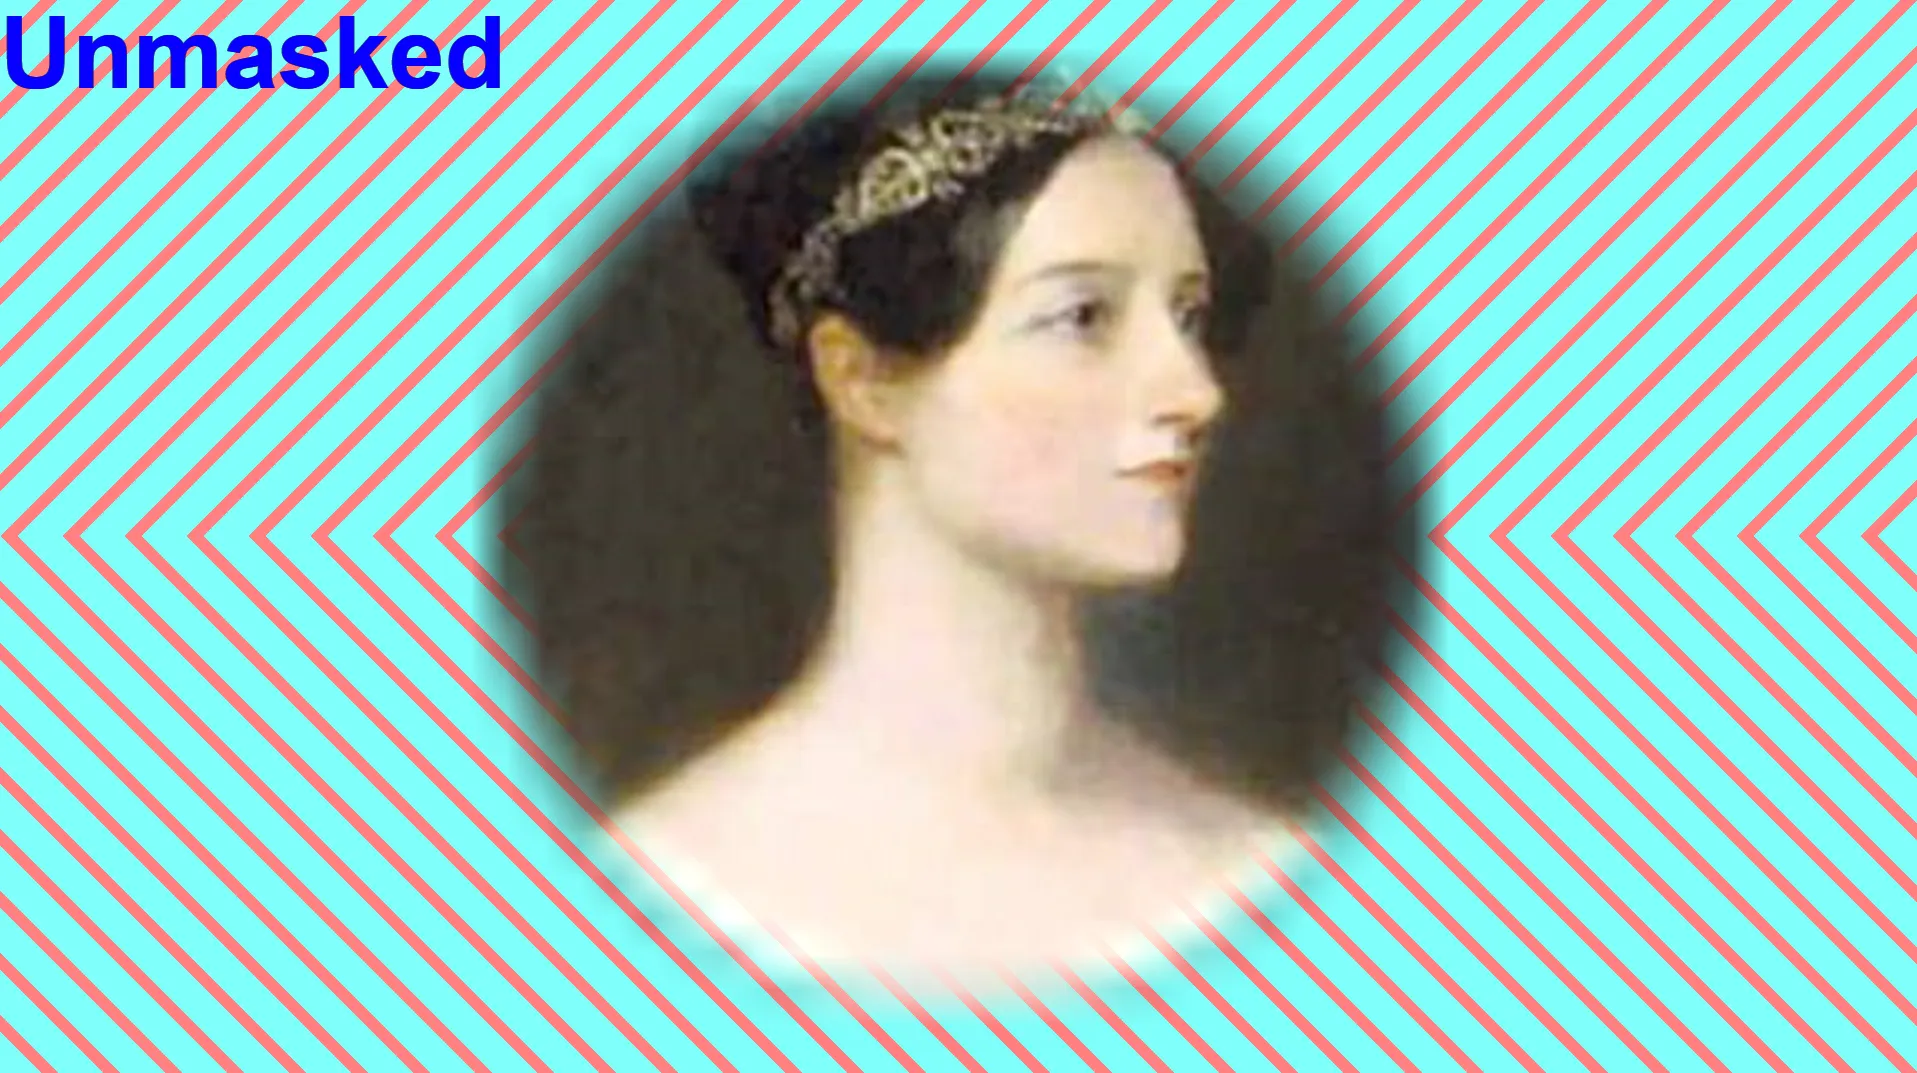
In the following example, Ada has been composited on top of the chevron background and did not have an alpha channel of its own, but was correctly blended with the background:

Pre-r34 behaviour
Section titled “Pre-r34 behaviour”In releases prior to r34, mask blending applies to all layers above the masking layer in the stack and would only affect layers within the same mapping.
To use pre-r34 mask blend mode behaviour in later releases, enable the advanced setting useLegacyMaskBlendModeBehaviour.
Masking mechanism
Section titled “Masking mechanism”Mask blend modes provide a temporary override to a layer’s mapping’s mask. This override lasts for a single layer in a given track but it does not spill over between transports in multi-transport.
The way that mapping masks work is that every channel is combined with the content - a red mask with no green and blue components and full opacity alpha would isolate just the red and alpha channels of any subsequent content applied, setting the green and blue channels to 0.
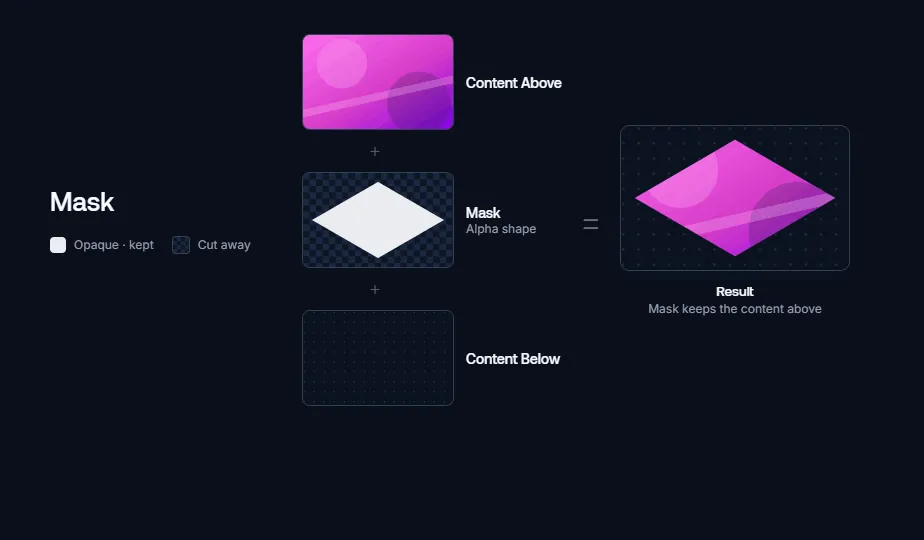
Designer currently supports 3 types of Mask Blend Mode, these are shown below:
Examples
Section titled “Examples”Mask blending
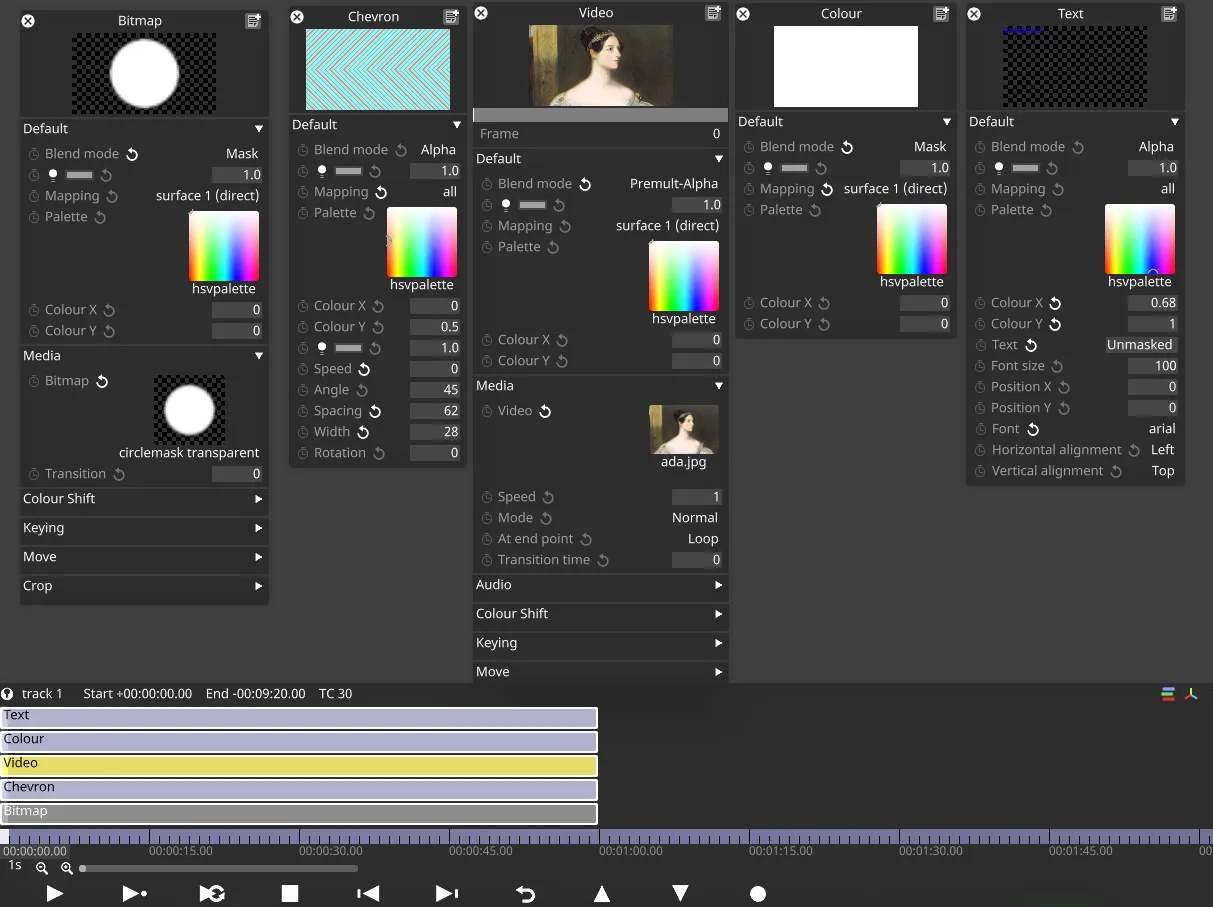
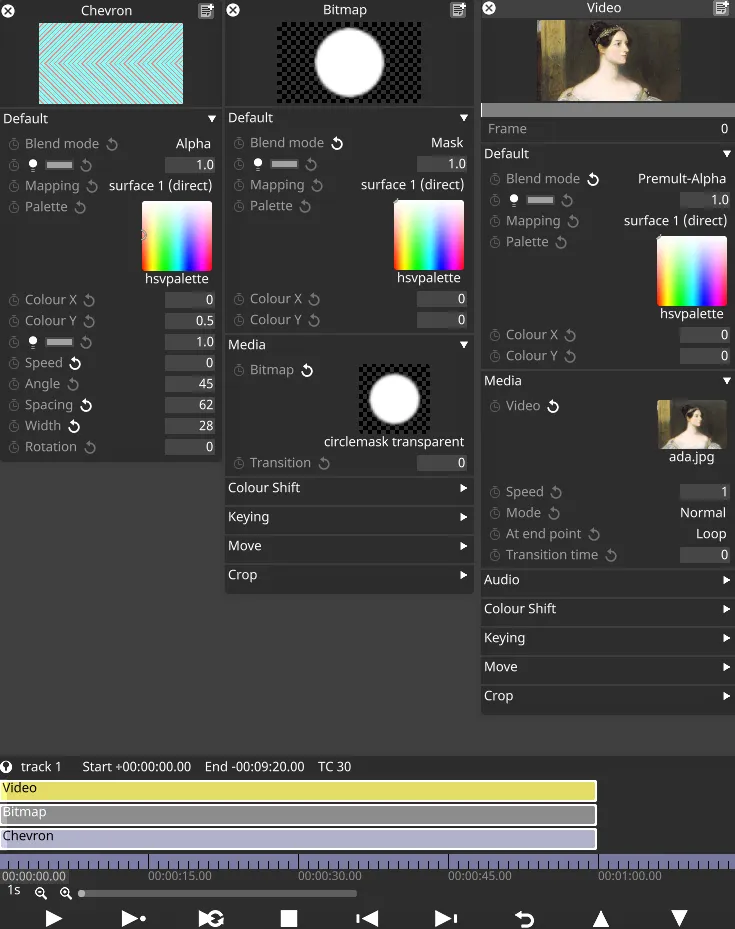
Section titled “Mask blending”For the isolated Ada example above, the following layer configuration was used.
Note the Bitmap layer is above the Chevron but below the Video layer, its mapping is set to “surface 1”, and is set to Mask blend mode, so it is setting the mapping’s mask.
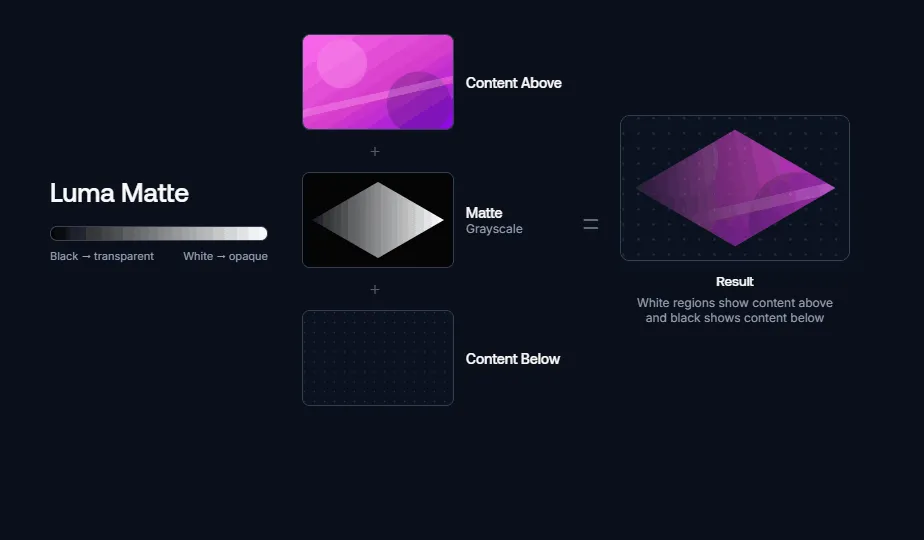
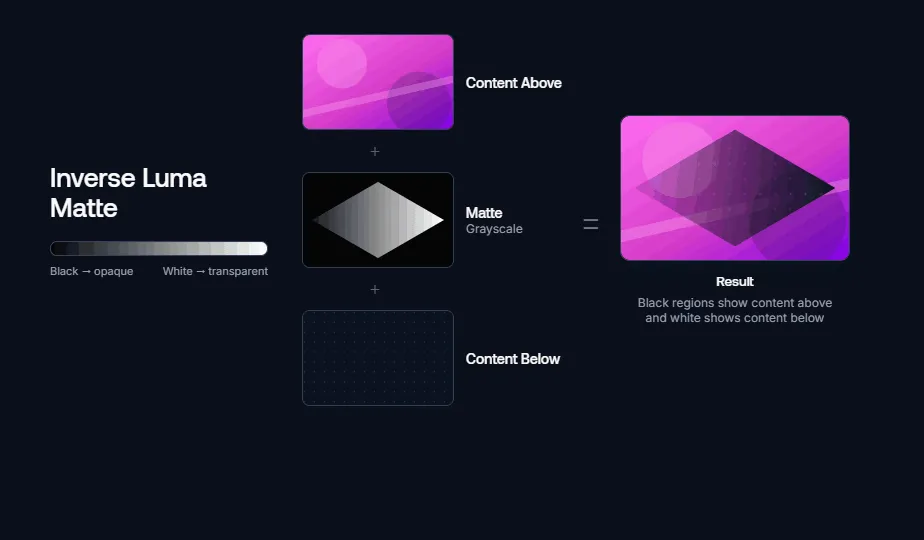
Luma Matte blending
Section titled “Luma Matte blending”
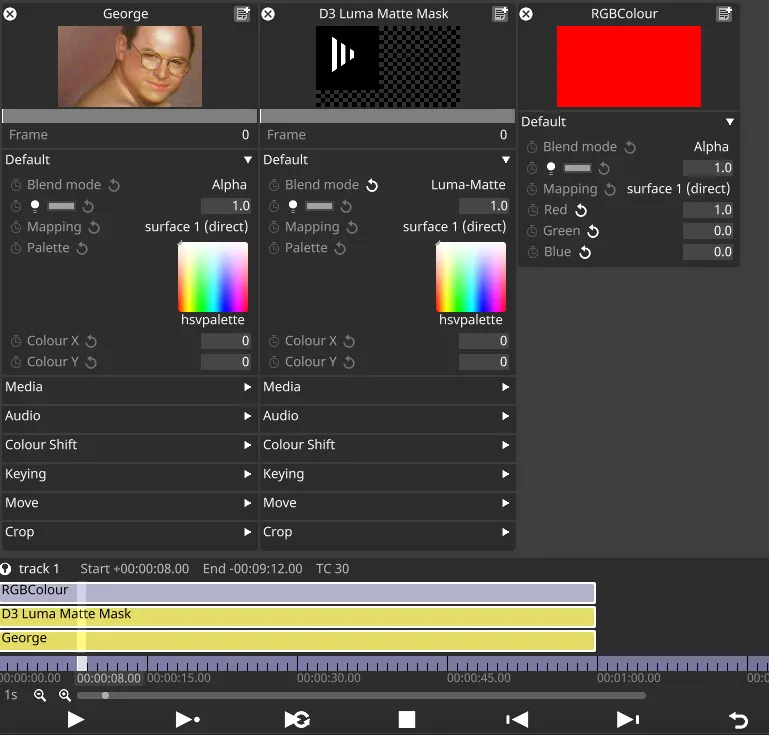
Another example of a mask blend mode is the Luma Matte Mask. In the example above the brightest regions of the matte are made opaque to the layers below (with the above layers are layered on top) whilst the black regions become transparent.
Pre r34 remarks
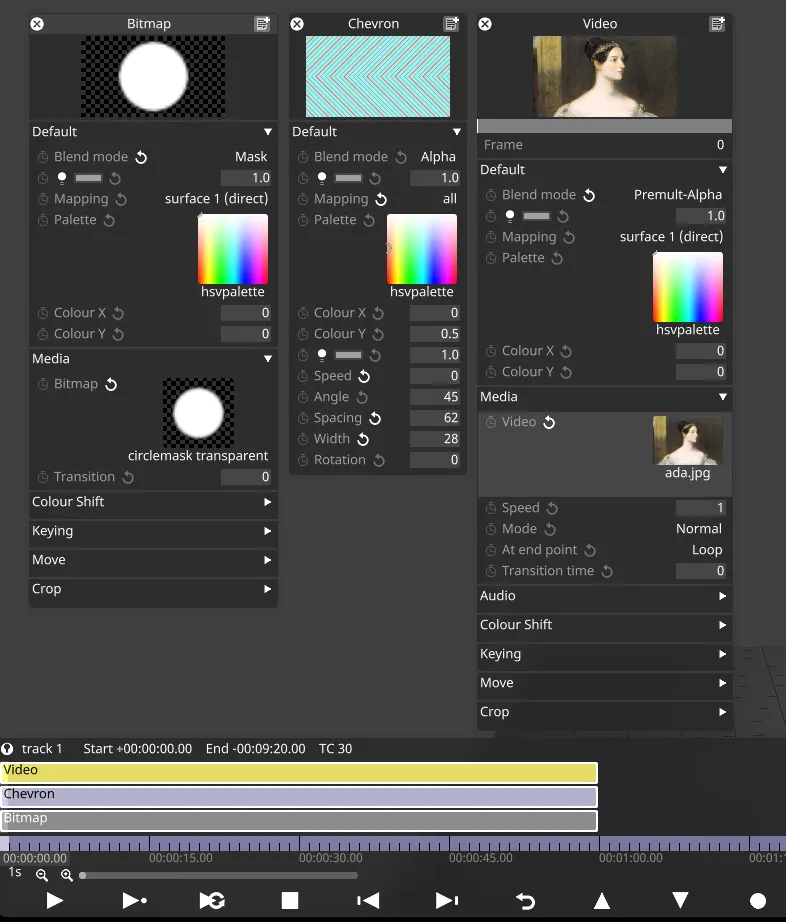
Section titled “Pre r34 remarks”Ada example setup
Section titled “Ada example setup”For the isolated Ada example above, the following layer configuration is used in pre r34.
The Bitmap layer is below both the Chevron and the Video layer, its mapping is set to “surface 1”, and is set to Mask blend mode, so it is setting the mapping’s mask. As the chevron layer is using the “all” mapping it is unaffected by the mask.
Resetting the mask
Section titled “Resetting the mask”While it’s not possible to reset the mask to the mask set originally on the mapping, it is possible to reset the mask’s effect by inserting a white Colour layer into the layer stack, set to Mask blend mode and selecting the target mapping.
In this example, the Colour layer mapping is set to “surface 1” and Mask Blend mode. It outputs full opacity white.
The text layer also uses mapping “surface 1”, and is able to appear outside the originally masked area.