Porta On Prem VM Windows Shared Folder
Setting up a Shared Folder between Porta VM and Windows
Section titled “Setting up a Shared Folder between Porta VM and Windows”Set up a mount point between VM and Windows to easily transfer files between Windows and the Porta VM.
-
Connect to the VM using SSH (replace the command below with your own values):
portavmis the username you will be connecting asVM-IPis the VM’s IPv4 address on the network
Terminal window ssh portavm@<VM-IP># Example: ssh portavm@192.168.50.9 -
In the VM, run:
Terminal window ~/scripts/setup_shared_folders.sh -
Enter the Porta VM
sudopassword when prompted. -
After the script completes, return to the VirtualBox application in Windows and set up the Windows shared folder:
- Right-click on the VM and go to
Settings → Shared Folders: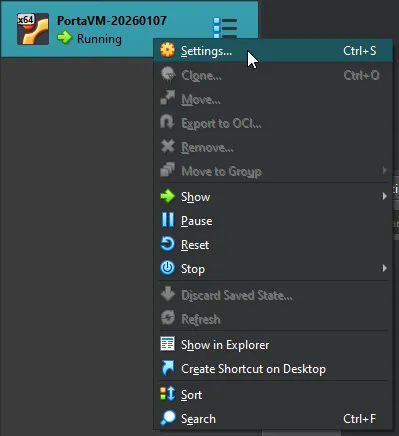

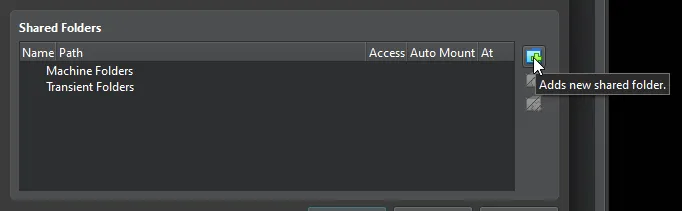
- Click the “Add new shared folder” icon:
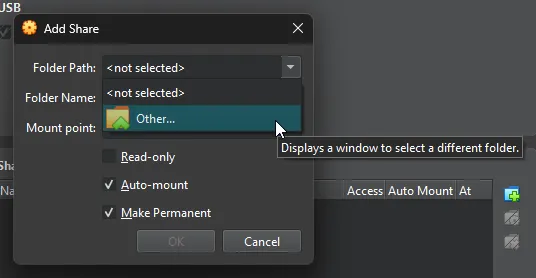
- In the pop-up that appears, enter the following details:
- Folder Path: Use the dropdown’s “Other” option to choose, or create, a folder where VM files can be exported.
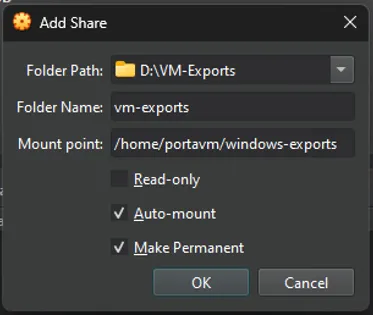
- Folder Name: Enter
vm-exports- This name is case-sensitive and must be entered as seen here.
- Mount point: Enter
/home/portavm/windows-exports- This name is case-sensitive and must be entered as seen here.
- Check “Auto-mount” and “Make Permanent” and click OK.
- Folder Path: Use the dropdown’s “Other” option to choose, or create, a folder where VM files can be exported.
- Click OK to close the settings window.
- Right-click on the VM and go to
-
You can now export files from the Porta VM to Windows using the shared folder.
Exporting from Porta VM to Windows
Section titled “Exporting from Porta VM to Windows”To export a file from the Porta VM to Windows, first, ensure you have already set up a shared folder, then:
-
Connect to the VM using SSH (replace the command below with your own values):
portavmis the username you will be connecting asVM-IPis the VM’s IPv4 address on the network
Terminal window ssh portavm@<VM-IP># Example: ssh portavm@192.168.50.9 - Run the following command, replacing
/path/to/file/to/exportwith the path to the Porta VM file you want to export:Terminal window ~/scripts/export_to_windows.sh /path/to/file/to/export - The file will appear at the Windows Folder Path that you specified during setup.