OCIO
Open Color IO (OCIO) is a colour management solution designed for seamlessly sharing colour spaces and transforms between applications, across an entire production pipeline. Artists and studios can author their own colour transforms, which are encoded within a .ocio file which is used to ensure consistent colours across all supported applications.
The OpenColorIO website contains various open source tools and instructions for building your own .ocio config files. Standard configs such as ACES can also be downloaded, although some of these are already included as built-in configs within Designer. Alternatively, studio provided configs can be loaded into Designer to maintain consistency with other production tools.
Supporting OCIO inside of Designer allows Disguise to be used as part of a colour-managed workflow alongside other OCIO-compatible software such as Adobe After Effects, Autodesk Maya, Foundry Nuke and Unreal Engine.
For more information on colour spaces and colour management please visit the colour management page.
Core Principles
Section titled “Core Principles”- The colour spaces and transforms are stored in a .ocio Config file. For instructions and tools for authoring config files, see the OpenColorIO website.
- Colour Spaces can be selected on input content and output sources to define the space to read from or write to.
- The Working Space can be set within the config editor to define the colour space in which compositing operations in Designer are carried out.
- Transforms may have configurable parameters such as exposure and gamma which are provided via Dynamic Properties.
- LUTs and CDLs can be applied in various places in Designer to transform the colours of an image. OCIO can be used to define what colour spaces these are applied in.
Support
Section titled “Support”It’s important to ensure your OCIO workflow is compatible with the OCIO library used in your specific version of Designer.
OCIO support within Designer is summarised in the table below:
| Designer Version | OCIO version |
|---|---|
| r32.2 or higher | 2.5.0 |
| r29.1 to r32.1 | 2.4.1 |
| < r29.1 | Not supported |
Workflows
Section titled “Workflows”Configs
Section titled “Configs”To set an OCIO config in Designer
Section titled “To set an OCIO config in Designer”- Right-click d3 in the dashboard and select Project Settings.
- Under Colour Management, set the Colour management option to OCIO.
- By default, the OCIO config field is set to the latest ACES studio config. Several other built-in configs are also available.
- To use a custom .ocio config file, copy the file into the project’s objects/OCIO folder, then select this from the list of available configs.

The OCIO config resource in Designer has options to allow users to set the working space and default input and output spaces.
To set the working and default colour spaces
Section titled “To set the working and default colour spaces”- Right-click on the OCIO config to open its editor.
- Change the working space in the Working space field.
- Change the default input/output spaces in their respective fields. Note that these defaults are dynamic - anything which has its colour space set to Default will always resolve to whatever is currently set in these fields.

To set the GUI output transform
Section titled “To set the GUI output transform”The GUI output transform property in the OCIO config editor can be used to set the colour space of the user interface. This enables colours to be viewed properly on monitors with wider colour gamuts than standard sRGB displays. Note that this property does not change any colours in the machine outputs.
- Load an OCIO config which has a colour space matching your monitor’s specifications.
- Right-click on the OCIO config to open its editor.
- Change the GUI output transform to the required colour space.
Colour spaces
Section titled “Colour spaces”Input and output colour spaces can be set on Resources to define the colour space a particular piece of content or output hardware is expecting. Content is transferred from input colour spaces to the working space before any compositing is done, and from the working space to output colour spaces when content is applied to the outputs.
Input colour space fields are added to the appropriate content sources in Designer, including:
- VideoClip
- DxTexture
- LogicalVideoInDevice
- RenderStreamAsset
Output colour space fields are added to the relevant outputs, including:
- LedScreen
- DmxScreen
- Camera
- Projector
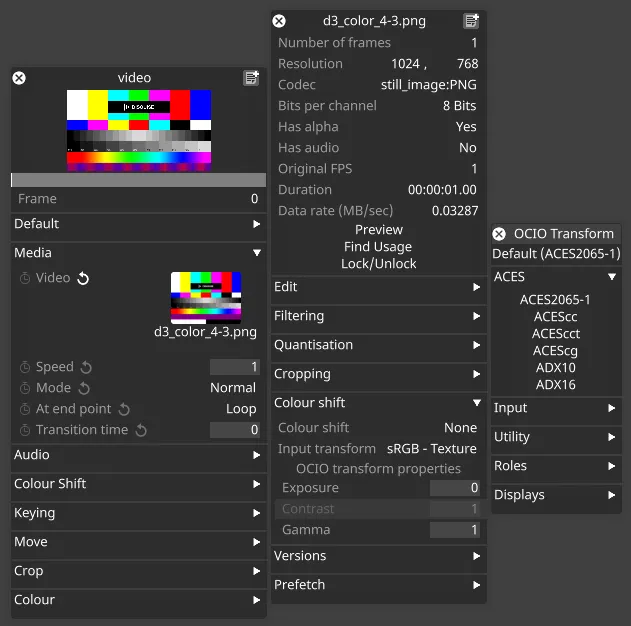
To select the input colour space for a video clip
Section titled “To select the input colour space for a video clip”- Set the colour management mode to OCIO and set up the config.
- Create a Video layer and select a VideoClip from the video folder.
- Right-click on the VideoClip to open its editor.
- Under Colour shift, click to select the Input colour space.
- By default this will be set to Default, which resolves to the default input transform set in the config.
- Select a different transform if required to match the media encoding.
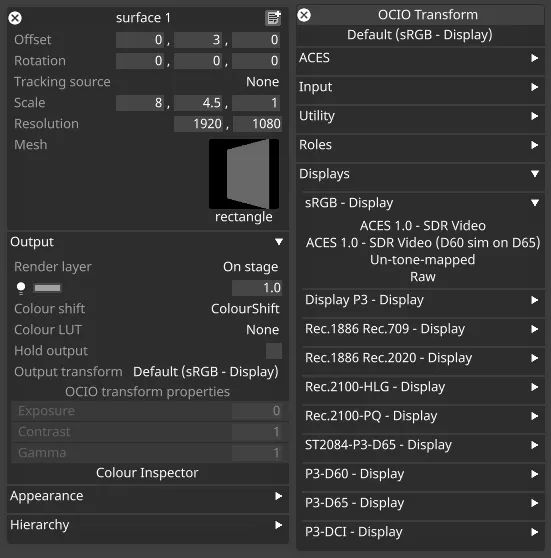
To select the output transform for an LED screen
Section titled “To select the output transform for an LED screen”- Set the colour management mode to OCIO and set up the config.
- Open the editor for the LED screen.
- Under Output, click to select the Output colour space.
- By default this will be set to Default, which resolves to the default output transform set in the config.
- Select a different colour space or display/view combination if required to match the colour space the LED processor is expecting.
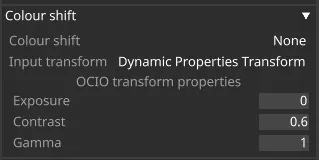
Dynamic Properties
Section titled “Dynamic Properties”Several OCIO transforms provide a number of modifiable parameters which can be used for live adjustment, similar to the exposure and gamma controls in ACES mode. These are known as Dynamic Properties and are applied using an ExposureContrastTransform. Designer exposes three values from this transform:
- Exposure
- Contrast
- Gamma
If the selected colour space does not contain an ExposureContrastTransform in the config, Designer will add one internally, placed after an input transform or before an output transform to apply the properties in working space. If an ExposureContrastTransform is included in the colour space defined in the config, the properties of this transform will be exposed. This allows users to control where in the chain of operations the properties are applied.
To use dynamic properties
Section titled “To use dynamic properties”- Navigate to an appropriate editor in Designer, e.g a Video Clip editor.
- Select the desired colour space.
- The dynamic properties will be added to the editor in Designer when available. Adjust these fields to change the values of these properties in that particular instance of the colour space.
Layers
Section titled “Layers”Certain layers have fields which can be used to define the colour management settings in OCIO mode. Layers which don’t have any explicit colour management settings will generally render in sRGB space, and will automatically be transformed into working space.
The following layers apply colour management in OCIO mode:
- Video layer: Uses the Input colour space defined in the VideoClip to transform the video into working space
- Notch layer: Notch blocks authored in Notch version 1.0 or greater can be set up to render in one of several available colour space. Older blocks are always rendered in sRGB. The Notch layer communicates with the block to ensure that the correct colour space transforms are applied, with no user input required.
- RenderStream layer: Uses the Input colour space defined in the RenderStream Asset to transform the received streams into working space. This space should be set to match the colour space set up for the asset in the render engine.
- 2.5D layer: Videos and images applied to 2.5D plates are transformed from the Input colour space defined in the VideoClip to working space. The stage render of the 2.5D plates is then done in working space, to ensure no colour information is lost.
- LUT layer: See below
- CDL layer: See below
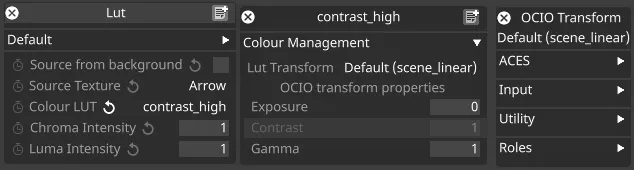
The LUTs in OCIO mode follows the conventional LUT workflow of d3 (LUT).
When OCIO is enabled, LUTs will include an OCIO transform field. This field indicates the color space where the LUT transform happens. The transformation process involving the LUT will follow these steps:
- Apply a color space transform from Working space defined in the OCIO config to the OCIO transform.
- Apply LUT transform.
- Apply a color space transform from the OCIO transform back to the Working space defined in the project settings.
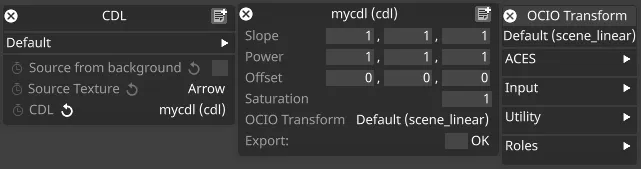
The handling of CDL in OCIO mode follows the conventional CDL workflow of d3 (CDL).
Note that there is a field named OCIO transform. If the OCIO transform is set to default, it will apply the CDL transform without any colour space transform; however, if the OCIO transform is set to a value other than the default, the colour transform process will follow these steps:
- Apply a colour space transform from the Working space defined in the OCIO config to the OCIO transform.
- Apply a CDL transform using the Slope, Power, Offset, and Saturation parameters.
- Apply a colour space transform from the OCIO transform back to the Working space.
Custom Gamut Output Transform
Section titled “Custom Gamut Output Transform”If a non-standard gamut is required for an output device such as a monitor or LED wall, this can be configured through the .ocio config file. The required colour space for the custom gamut can be added in the .ocio config file, which will be populated in the OCIO Output transform widget once the config file is selected from Designer project settings. Disguise provides an open-source utility tool, ocio-custom-gamut, that helps convert custom gamuts into OCIO config files.