Genlock Configuration
Genlock, from the phrase generator locking, is a common technique where a specific reference signal from a signal generator is used to synchronise other image or video sources together.
At Disguise, we use genlock as a mechanism to sync multiple Disguise Media server outputs. The Sync Card on each server receives a Genlock Signal from a central Clock Source (usually a dedicated piece of hardware) and individually locks the outputs of all of its heads to that incoming genlock signal. Genlock keeps multiple Disguise servers in sync and also allows external integration with cameras/LED devices.
Framelock is a mechanism within GPUs that keeps individual outputs of the same server in sync. Internal Sync is a mechanism within GPUs to individually lock to a locally generated genlock source.
Genlock synchronises the refresh intervals of all displays to an external signal. While framelock synchronises the frame rate of each display to a signal generated internally by the hardware.
Configuring Genlock
Section titled “Configuring Genlock”Genlock and framelock can be configured directly in the following ways:
- Using the Feed View in Designer (Recommended)
- Using the Graphics Card control panels directly
In general, genlock should always be configured within the Designer software. We recommend using this workflow because you can apply genlock across all your machines with one button press.
In rare circumstances, such as custom workflows, or if you encounter a bug, you may need to configure synchronisation using the AMD or NVIDIA Control Panel directly. We have outlined both workflows below.
The genlock status of Disguise servers can be monitored in the Network Status Widget and is generally configured from the Feed View.
There are 2 types of genlock signals that Disguise Media servers support:
- BlackBurst
- Tri-Level
Applying Genlock in Designer
Section titled “Applying Genlock in Designer”To lock to genlock in Designer you should first access the Feed View
To genlock a Disguise Media Server correctly the following conditions must be met:
- VFC slot resolutions across all output heads must be the same
- VFC slot refresh rates across all output heads must be the same
- VFC slot timing modes across all output heads must be the same
These are requirements imposed by AMD and NVIDIA Hardware and apply to all graphics cards.
To apply genlock using Designer:
Section titled “To apply genlock using Designer:”- Ensure that a genlock cable with a valid genlock signal is plugged into the BNC port marked “Genlock” on the back of the server.
- In the Dashboard, left-click on Feed to access the Feed View.
- Validate that the genlock signal is being received by the server by looking for a message underneath the Machine name in the Feed View. This should say “Genlock: Present (unused)”.
- Left-click Apply Genlock to configure all machines in the session. A machine does not need to be running Designer to have feed settings applied.

- Disguise will now begin configuring the GPU on all machines to accept the correct genlock signal. The screen will go black and there will be status text explaining the process.
- Wait for the process to finish. This may take a few minutes.
Once finished, you will see a coloured icon within each VFC card header indicating whether that VFC card is genlocked. If the indicator is green, this means that the machine has locked successfully.
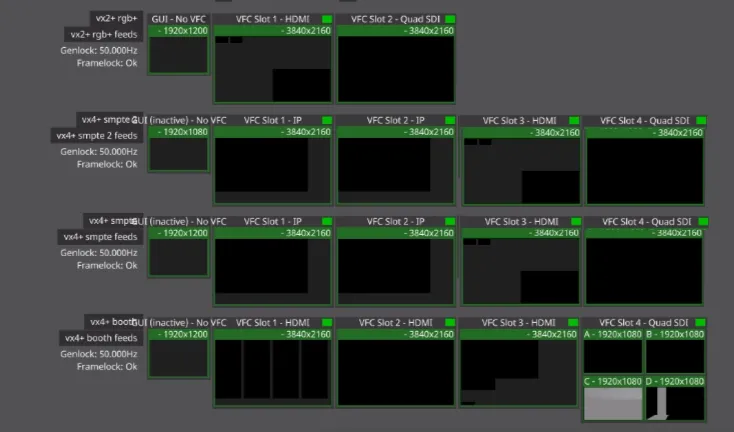
You can follow the same process to apply genlock to a single machine without affecting the others by right-clicking on the Machine name in the left of the output heads in the Feed View and selecting the Apply Genlock button.
When genlock is not present on a system the Apply Genlock button is replaced with an Apply Framelock button which only applies framelock. This is also true on systems that do not support genlock, like the Solo.
Applying Genlock outside of Designer
Section titled “Applying Genlock outside of Designer”We always recommend applying genlock in Designer because you can do it across multiple machines and it is less error-prone.
If you encounter issues with this workflow sometimes a good fallback is to use the NVIDIA or AMD-provided genlock configuration.
For AMD this will be via the AMD Software: Pro Edition Control panel.
For NVIDIA this will be via the NVIDIA driver Control Panel settings.
For assistance with configuring genlock please contact Support.
Configuring Sync using Graphics Card-Provided Control Panels:
Section titled “Configuring Sync using Graphics Card-Provided Control Panels:”Genlock
Section titled “Genlock”Configuring Genlock externally to Designer (NVIDIA)
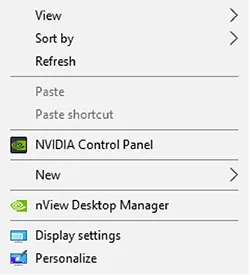
To apply genlock on NVIDIA Machines:- Right-click on the desktop and open the NVIDIA Control Panel.
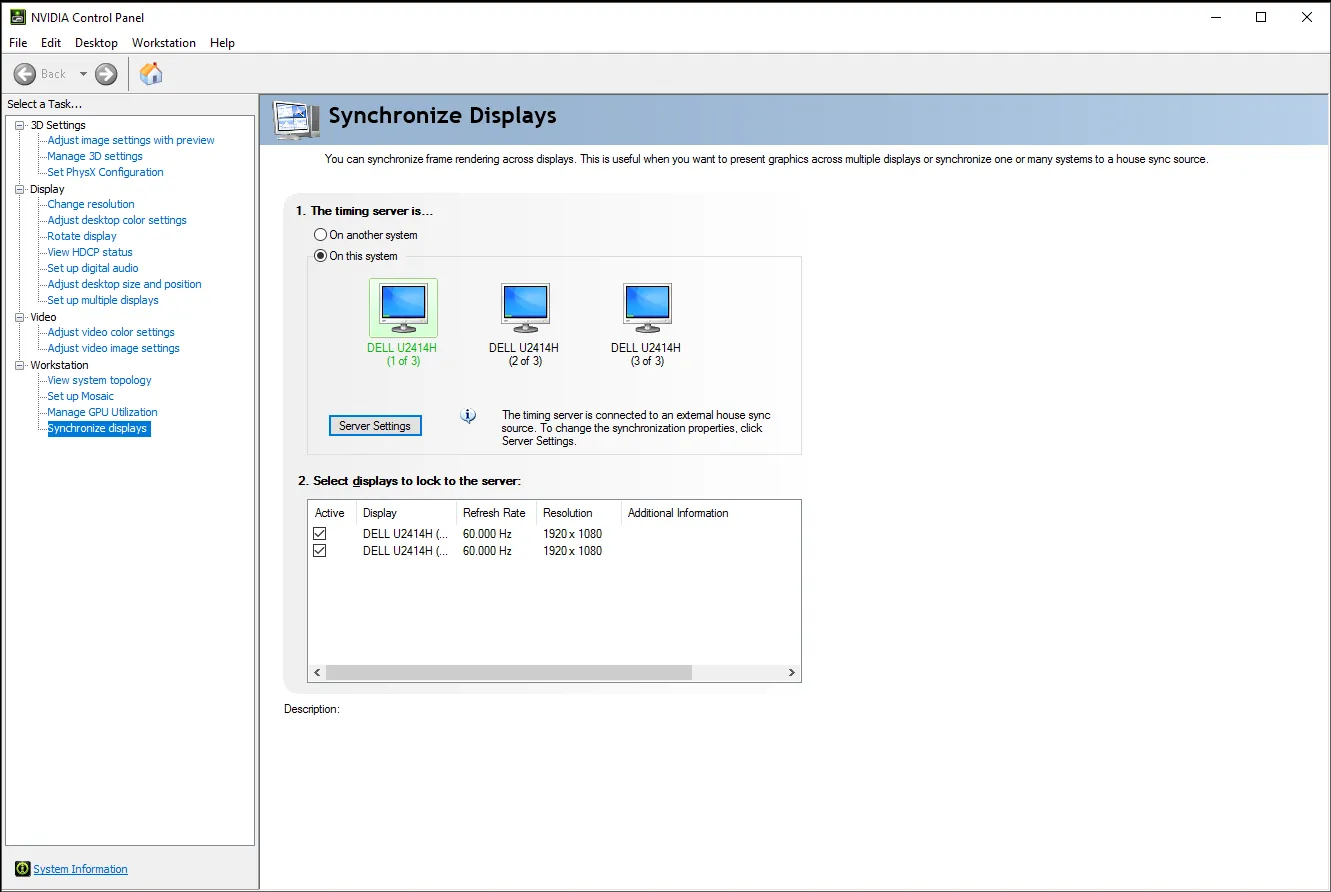
- Click Synchronize Displays under Workstation.
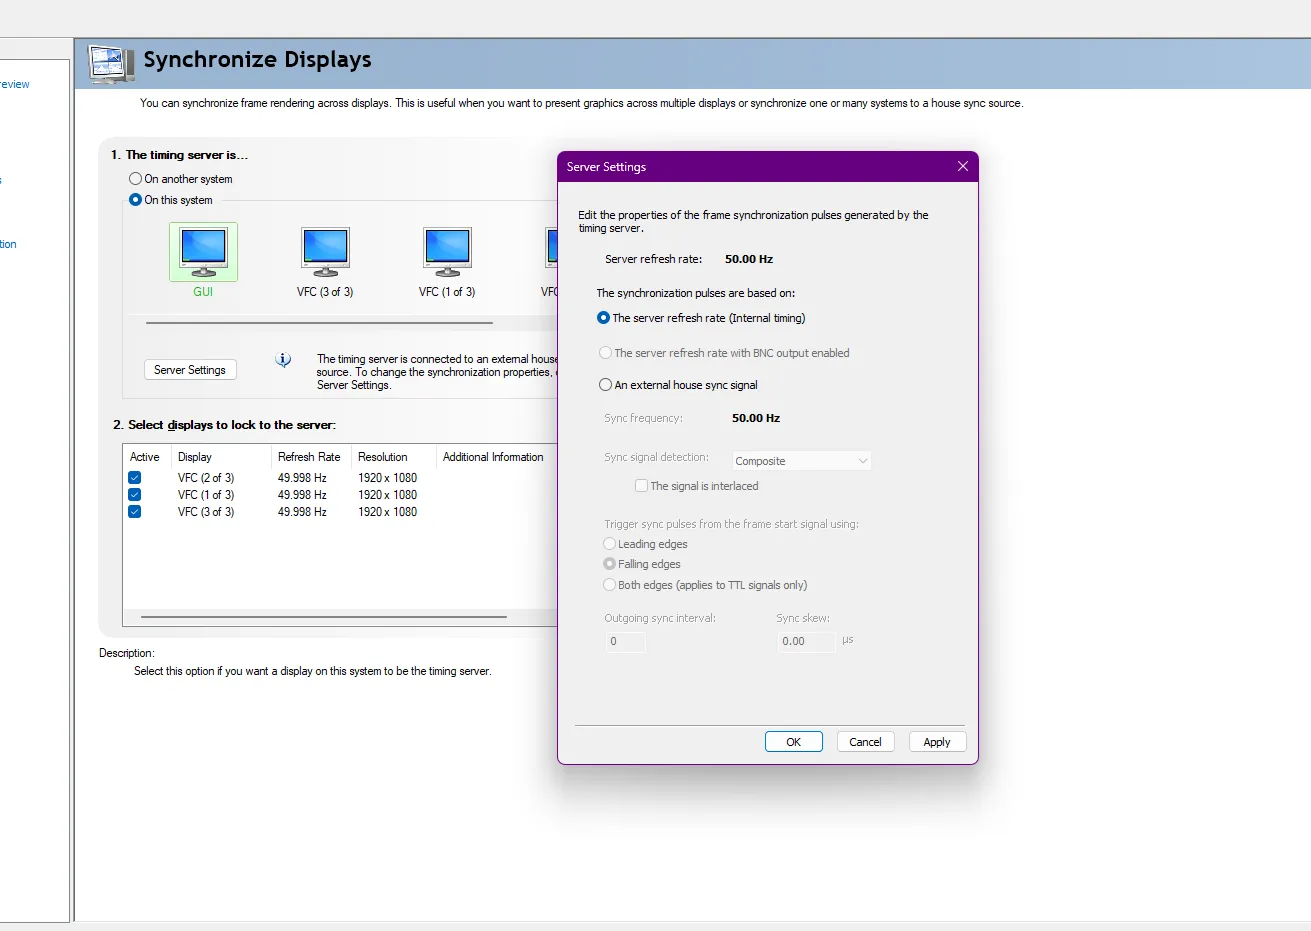
- In the open Synchronize Displays tab, under 1. The timing server is… select On this system.
- Select the displays to genlock to the server and ensure that the checkboxes are ticked below under Select displays to lock to the server:.
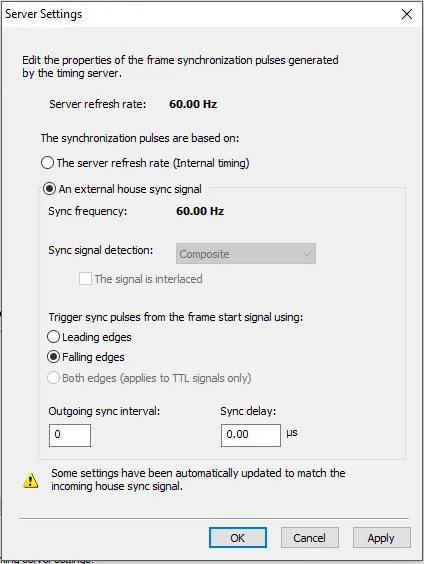
- With all displays selected, select your main display and click the Server Settings button.
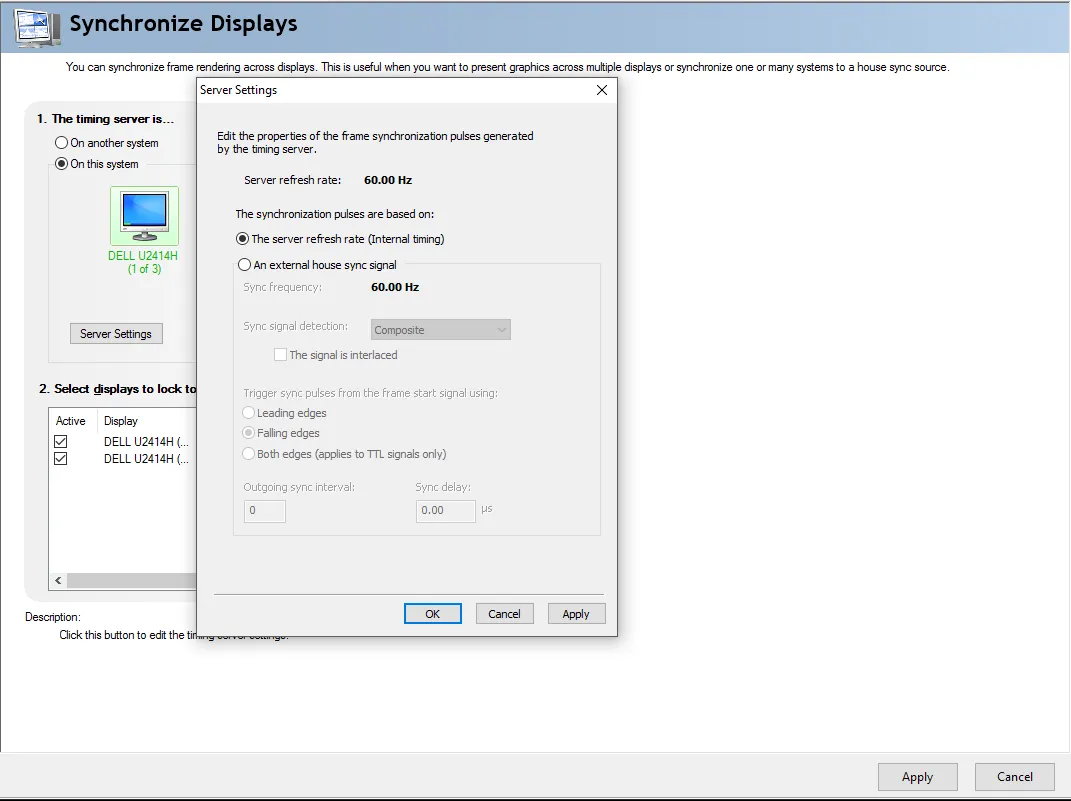
- The Server Settings pane shows the current synchronisation settings. Under The sychronization pulses are based on:, select An external house sync signal and click Apply to confirm the changes before clicking OK.
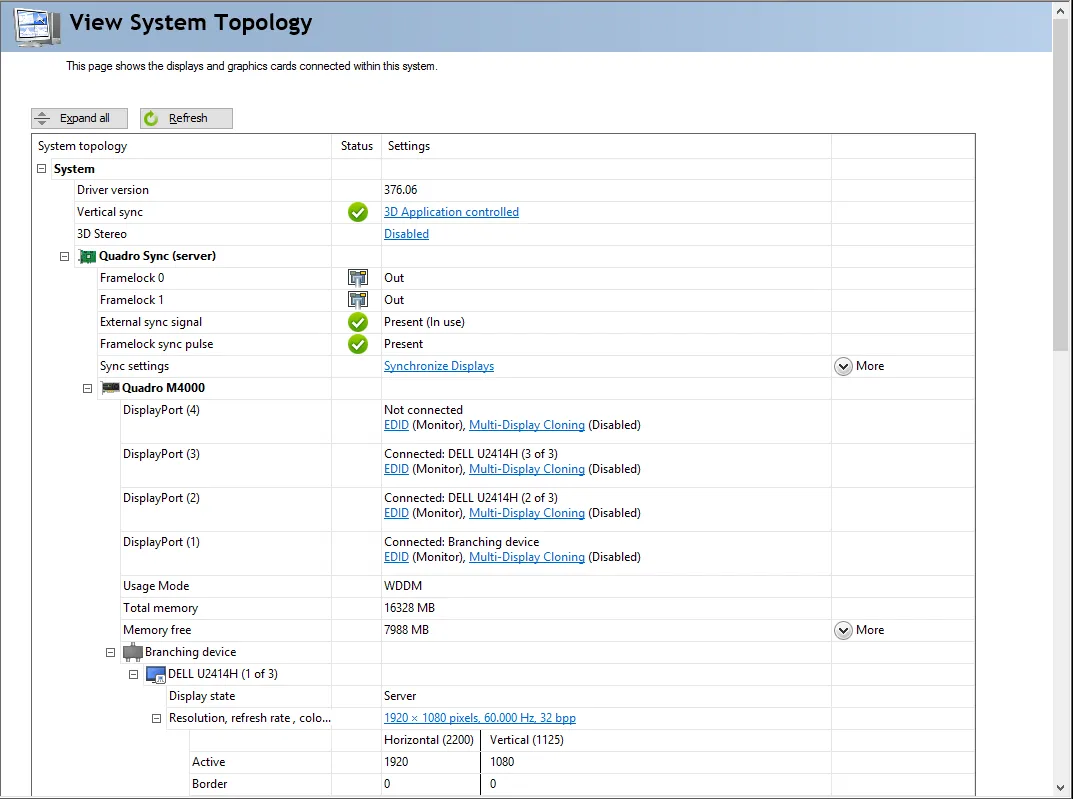
- Select View System Topology under Workstation. Genlock has been completed if the External sync signal has a green tick next to it and the settings are Present (In use).
- Click Refresh to update the configuration.
Configuring Genlock externally to Designer (AMD VX 4/VX 4+)
Accessing Genlock settings is different for the VX 4 and VX 4+:
Access the Radeon Pro Advanced Settings (VX 4)
Right-click on the desktop and select AMD Radeon Pro Advanced Settings.
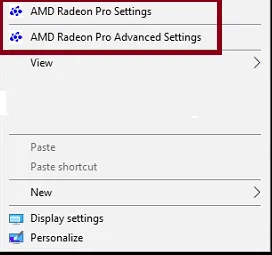
This will open up a reskinned version of the AMD Control Panel.
Access the Radeon Pro Advanced Settings (VX 4+)
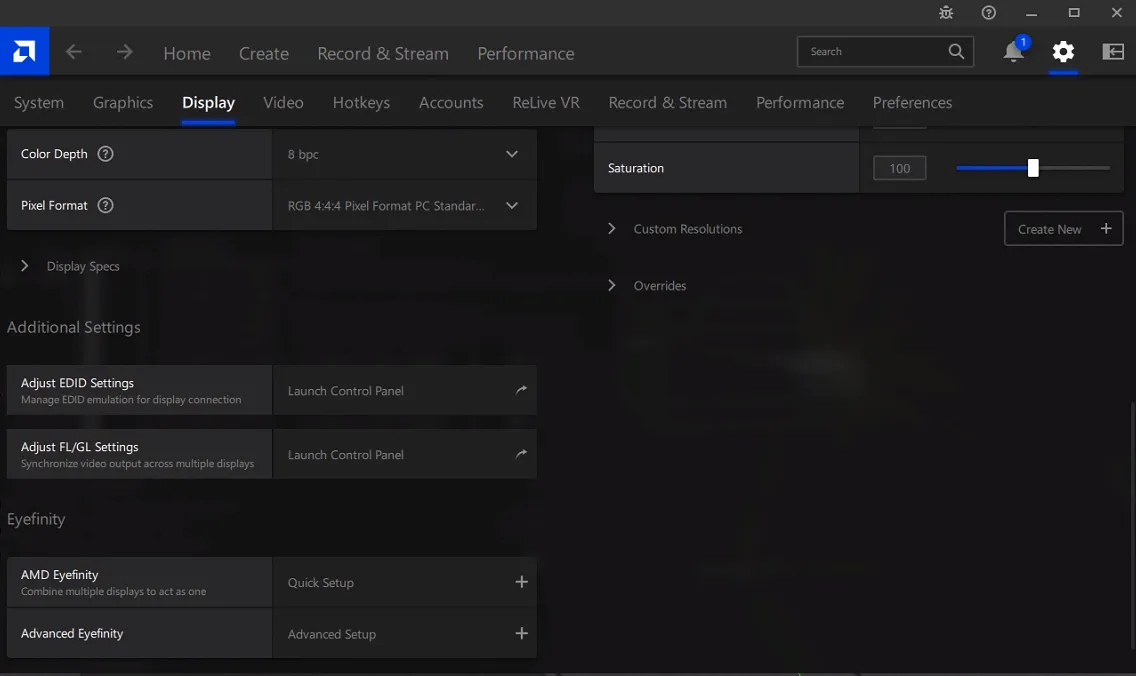
- Right-click on the desktop and open the VX 4+ AMD Driver.
- Select the Displays tab.
- Scroll down and select the Adjust FL/GL Launch Control Panel.
- This will open up a reskinned version of the AMD control panel in Blue workstation graphics branding.
Once you’ve got the correct GUI open follow these instructions:
Shared Advanced Pages and Syncronisation
Section titled “Shared Advanced Pages and Syncronisation”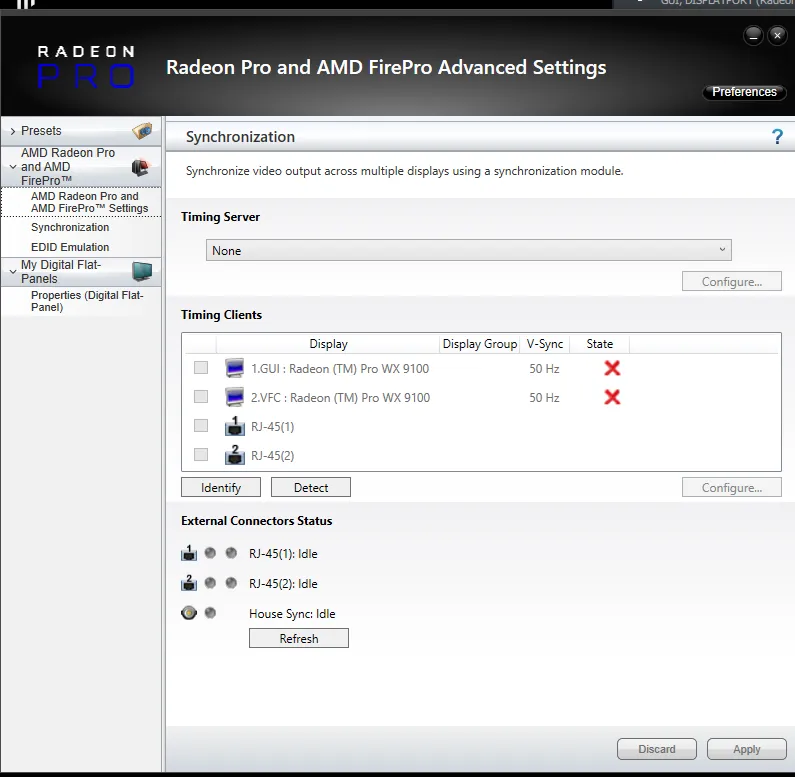
- Under the syncronisation tab, left-click Refresh under House Sync.
- Wait for the House Sync indicator to go green, indicating displays are receiving Genlock.
- Select each display under Timing Clients that you wish to lock to the Genlock source and click Apply.
- Your selected displays are now genlocked.
- Under the syncronisation tab, click refresh under House Sync.
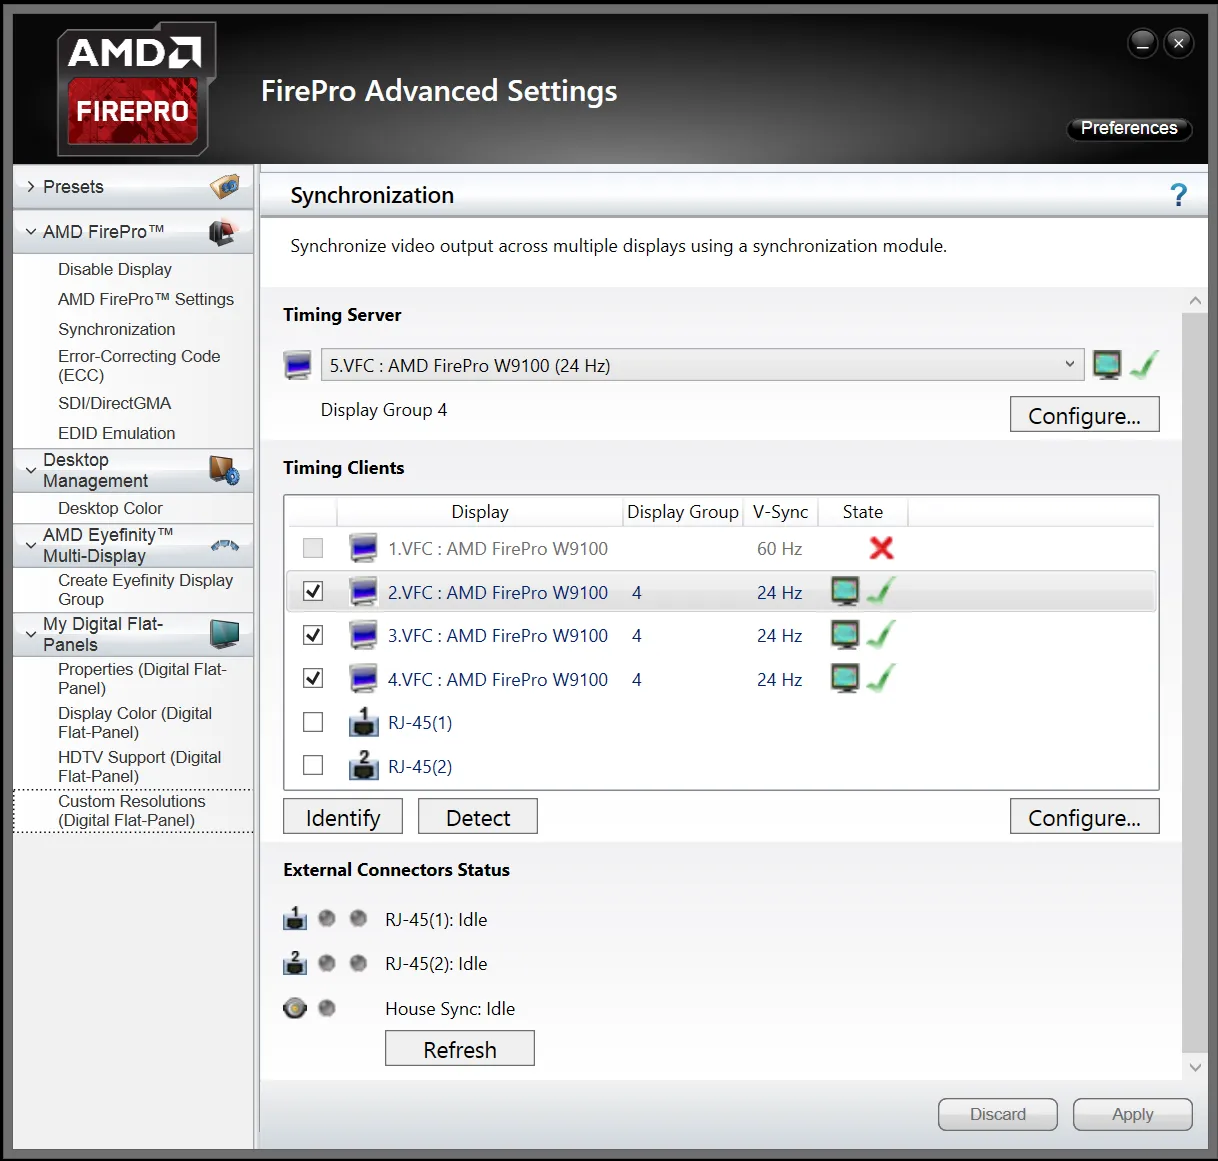
Configuring Genlock externally to the software (AMD Legacy)
For any AMD machines that were released before the VX 4 follow these steps:
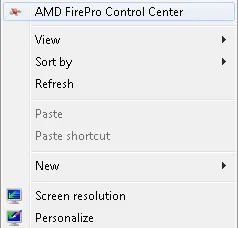
- Right-click on the desktop and select AMD Fire Pro Control Center.
- Open the AMD Fire Pro tab and click on Synchronization.
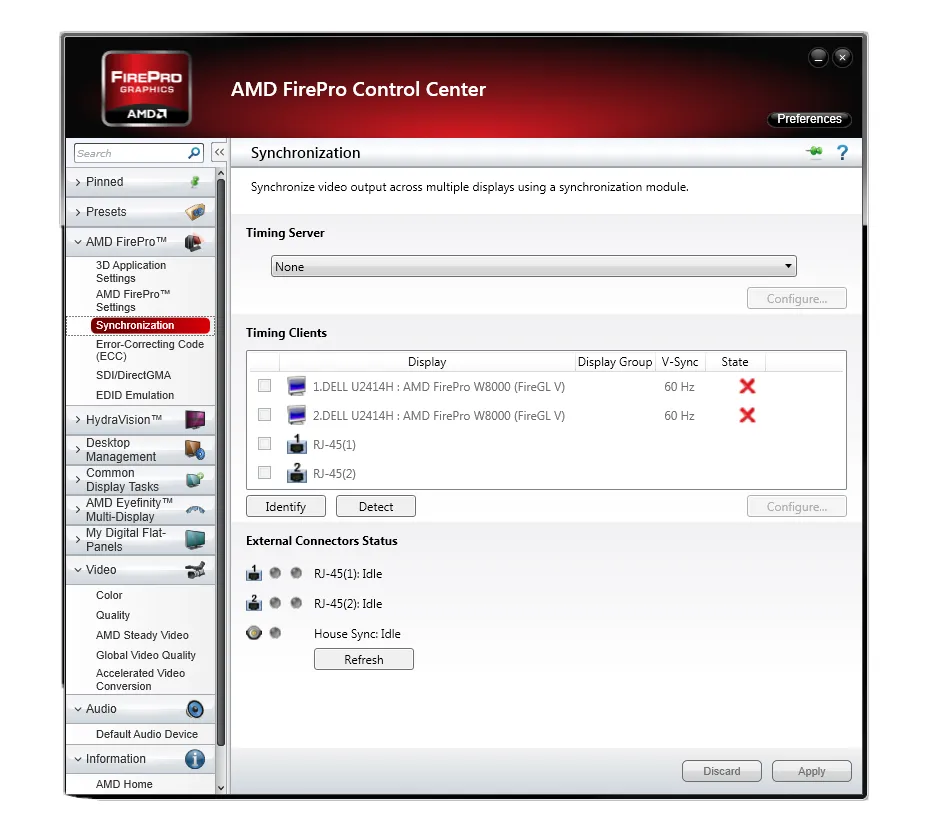
- Under the Syncronisation tab, left-click refresh under House Sync.
- Wait for the House Sync indicator to go green, indicating displays are receiving genlock.
- Select each display under Timing Clients that you wish to lock to the genlock source and click Apply.
- Your selected displays are now genlocked.
- Under the Syncronisation tab, click refresh under House Sync.
Framelock
Section titled “Framelock”You can also apply Framelock directly in the NVIDIA or AMD software.
Internal Timing Sync (NVIDIA)
To access the Nvidia Control Panel for Internal Timing:
Section titled “To access the Nvidia Control Panel for Internal Timing:”- Right-click on the desktop and select the NVIDIA Control Panel.
- The Synchronize displays tab should automatically open. Ensure that the boxes are ticked below.
After all displays are selected go back to highlighting your main display and select the Server Settings button.
- The Server Settings popup will show what the current Synchronization is. Change the selection from Internal timing
Internal Timing Sync (AMD)
To access the driver settings, please see the relevant machine types below:
Access the Radeon Pro Advanced Settings (VX4)
- Right-click on the desktop and select AMD Radeon Pro Advanced settings.
This will open up a reskinned version of the AMD control panel
Access the Radeon Pro Advanced Settings (VX4+)
- Right-click on the desktop and open the VX 4+ AMD Driver.
- Navigate to displays.
- Scrolling down, select the Adjust FL/GL Launch Control Panel.
- This will open up a reskinned version of the AMD control panel in Blue workstation graphics branding.
Once the driver has been accessed below, please see the following images and instructions:
- Click on Synchronization.
- Under the Timing Server tab, select the last listed display, (for example in the image shown it is number 5.)
- Tick all screens that you wish to sync in the list below.
- Your selected displays are now Internally Framelocked.
Use the reference image below to see how the correct setup will look.
System Configuration Recommendations
Section titled “System Configuration Recommendations”To ensure output and data synchronisation across your cluster of machines, Disguise Media servers should be genlocked where possible.
When to Genlock Machines?
Section titled “When to Genlock Machines?”We recommend genlocking your machines whenever possible. Here are some examples of instances where it is particularly critical to performance and synchronisation:
-
Multi-Machine Setups: When you are using multiple disguise media servers or machines in a synchronized environment, genlocking is essential to ensure that all machines output frames at the same time, preventing/reducing tearing. While it is not strictly required to also genlock a Dedicated Director in a multi-machine setup, it is still recommended.
-
Camera-Server Configurations: If you are working with a camera-server setup, genlocking is crucial to synchronize the camera’s output with the server’s frame output. This synchronization helps to ensure the camera and output are capturing the same frames consistently while also reducing camera latency.
-
External House Sync Requirements: If your production environment requires synchronization with an external House Sync signal, you should Genlock your machines to ensure they are in sync with the house signal.
When to Internally sync machines?
Section titled “When to Internally sync machines?”We recommend Genlocking your machines whenever possible. Here are some examples of instances where internal sync may also be sufficient:
-
Singular-Machine Setups When you are using one or two disguise servers or legacy machines such as the Solo / Machines without Genlock cards, you may find that framelock keeps the outputs of a server in sync. A good example of this would be a singular Director/Understudy, since only one machine is outputting, machines do not need to be frame accurate between each other.
-
No Camera Input Shows If no cameras are being utilised and timing with external systems is not needed you may find that Genlock is not required and framelock will keep outputs consistent.
Interlaced Genlock and VFC Behaviour
Section titled “Interlaced Genlock and VFC Behaviour”When using the SDI VFC cards with an interlaced video signal there is a chance that the output signal from the VFC card will not match the field of the incoming Genlock signal. To correct this state it is necessary to repeat the Apply Feed Settings process, this will re-sync the VFC card and reset which field is being output.
Due to GPU genlock limitations, this process may need to be repeated until the VFC card field sync matches that of the incoming genlock signal. In a session with multiple machines, this should be repeated across all machines at the same time to ensure they are locked to the same field together.
Glossary terms
Section titled “Glossary terms”- Genlock: A mechanism to synchronise multiple devices to a “clock source,” allowing them to coordinate with each other and external equipment. Genlock keeps multiple Disguise servers in sync allowing external integration with cameras/LED devices
- Framelock: A mechanism within GPUs that keeps individual outputs of the same server in sync.
- Internal Sync: A mechanism within GPUs to individually lock to a locally generated Genlock source.