Patch Assignments
Sockpuppet treats all of Disguise’s layer types as fixture personalities. The Patch Assignments window is where we patch or assign our layers on our Timeline to incoming DMX values or channels. For OSC and HTTP the process is slightly different.
Patching a layer to DMX control
Section titled “Patching a layer to DMX control”- Access the patch assignments window by right-click on the d3 icon in the top left corner of the interface.
- Navigate down to the Sockpuppet tab.
- Beneath this you will find two fields, the first will be Patch Assignments and the second Bank Editor.
- Left-click Patch Assignments to open the patch assignments window.
View types
Section titled “View types”Click the right triangle next to Patch Assignments, and click on the view type field to open the list of available view options.
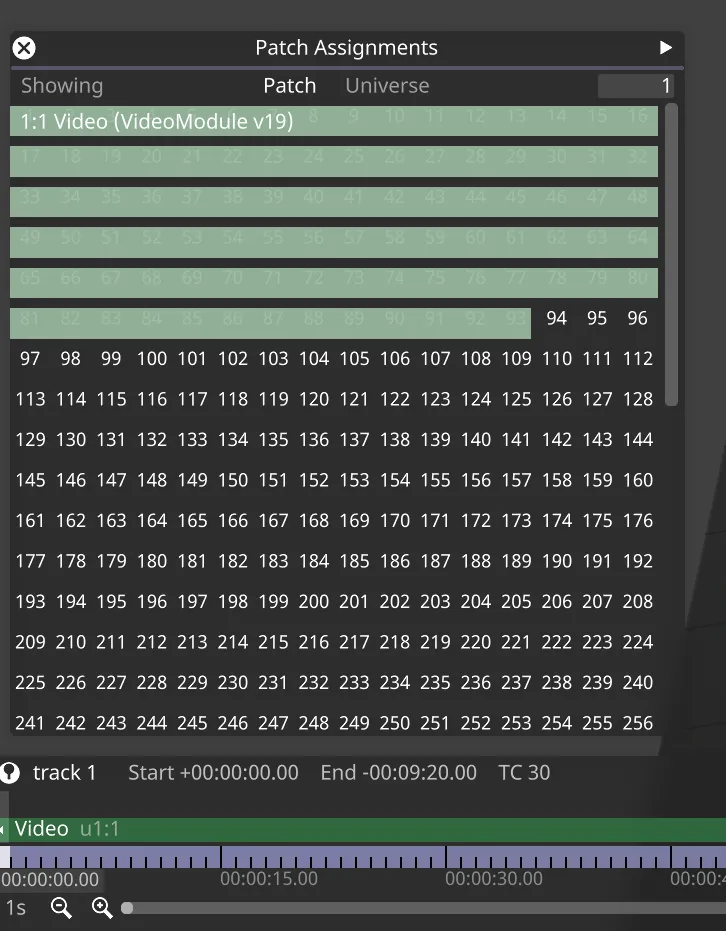
Patch grid
Section titled “Patch grid”Displays all 512 channels in a grid format. You are able to patch to any free channels here or view which channels you have already populated with a patch. Left-click on Patch Grid to view different options to change the layout of the patch window.
Please note: this is the view type you will need to be in to patch your layers.
Patch list
Section titled “Patch list”This shows us a list of all of the current layers patched and their start channels within any selected universe (selectable from the Viewing Universe field).
Global patch list
Section titled “Global patch list”This follows the same format as the Patch List, however this will show us a full list of all layers patched regardless of which universe they start on.
Universe occupancy
Section titled “Universe occupancy”This will show us in grid format which of our universes we currently have layers patched to.
Patching layers
Section titled “Patching layers”To patch layers within Designer ensure:
- The Patch Assignments window is open & in the patch grid view type.
- The layer you want to patch is added to the Timeline. Click here for more information on working with layers.
- Hover the cursor over the DMX channel you want to patch to in the Patch Assignments window.
- Select the DMX channel while holding down ALT to generate a white arrow, which should be dragged down to the layer on the Timeline that you want to patch to.
This will create a green block over the channels in our patch grid that the layer will take up, and also turn the layer on the timeline green to signify the layer is patched and only controllable through Sockpuppet DMX.
We will also be presented with some key information regarding our patch. This will include the start address, a user specified name (this will be “untitled” by default) the layer type, and the personality version.
Patch settings
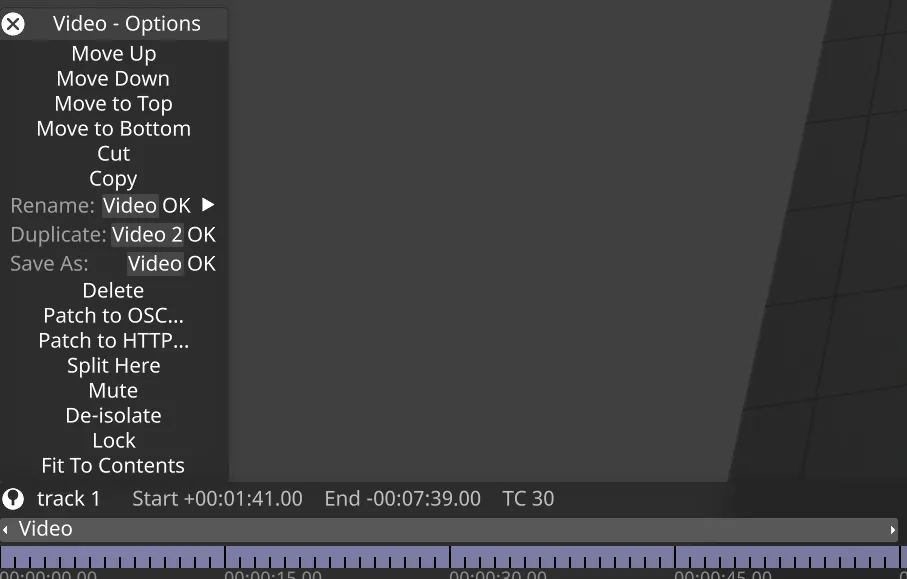
Section titled “Patch settings”To access this patch settings menu, right-click on the green patch block, this will open the patch settings.
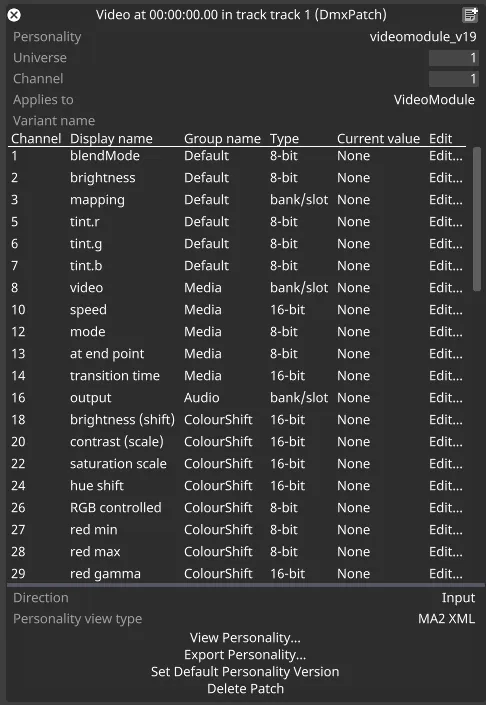
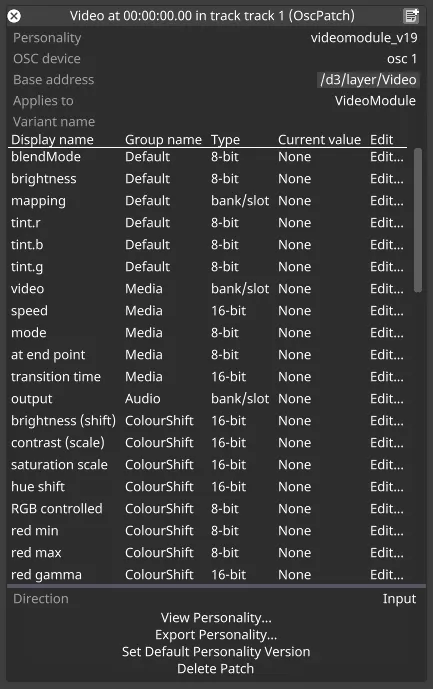
Personality
Section titled “Personality”Here we can select the version of the sockpuppet personality we would like to use. A personality profile may be updated / changed with a new release of Designer, this function will allow you to roll back to the personality version that you originally programmed your show with, meaning you will not have to update any of the programming on your console. The current selected personality is displayed as a table below the Variant name field.
Universe
Section titled “Universe”Here we can specify the universe we want to patch our layer to.
Channel
Section titled “Channel”Here we can specify the start channel we want to patch our layer to.
Applies to
Section titled “Applies to”This displays the layer type the sockpuppet personality applies to.
Variant name
Section titled “Variant name”This is not relevant for sockpuppet patches, and is only used for Event Transport patches.
Direction
Section titled “Direction”Here we can set whether we want input values to control the layer’s values, or output the current values of the layer.
Personality view type
Section titled “Personality view type”Here we can select whether to view and export the personality as a GDTF file, a text-formatted chart, or a (deprecated by MA) MA2 XML file.
View Personality
Section titled “View Personality”Opens a window displaying the personality with the chosen Personality view type.
Export Personality
Section titled “Export Personality”Exports the personality as a file with the chosen Personality view type.
Set Default Personality Version
Section titled “Set Default Personality Version”Sets the default version of sockpuppet personality for the current layer type.
Delete Patch
Section titled “Delete Patch”By left-clicking on delete patch we will remove the selected layer from our patch assignment. This will return it to its standard operating mode (controlled through the timeline & keyframable)
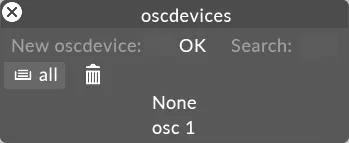
Patching a layer to OSC control
Section titled “Patching a layer to OSC control”- Right-click a layer on the timeline.
- Left-click Patch to OSC.
- Choose OSC device.

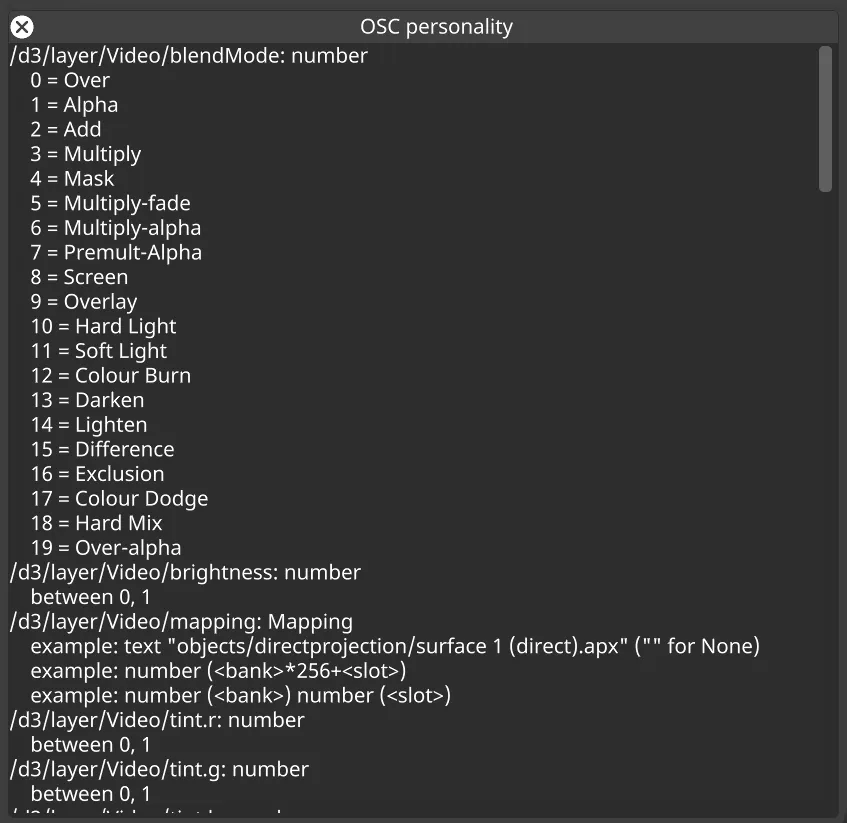
View the personality
Section titled “View the personality”-
To view the personality of the layer for OSC, right-click the layer and choose Edit OSC patch.

-
Left-click View personality
The default OSC personality opens.
Export the personality
Section titled “Export the personality”- Repeat the previous steps to view the OSC patch.
- Once the patch is open, left-click the Export Personality button at the bottom of the window to export the OSC personality as a txt file.