Waveform
The waveform is a histogram for each column of pixels in the image.
Opening the Waveform scope
Section titled “Opening the Waveform scope”A waveform scope can be used to verify the signal chain at these points:
- On a Video Input within the Video Input patch Editor.
- After capture into Disguise and any layer stack modifications.
- The feed output - after being transformed into the final 8- or 10-bit format going to the display.
- Open the Feed Output window by clicking on Feed in the dashboard.
- Right-click on the border of an output to open the Output Properties window.
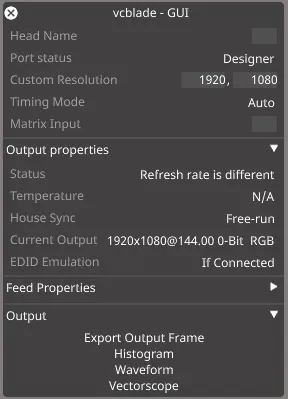
- Click on Waveform in the Output tab.
For more information on Histograms, please visit this link.
Understanding the Waveform
Section titled “Understanding the Waveform”Waveforms are typically used to ensure that the image is within safe limits i.e. above a minimum black level or below a maximum white level, and are also used to balance the red, green and blue channels.
- The horizontal axis is the same as the image’s horizontal axis i.e. left of the waveform is the left of the image, and right of the waveform is the right of the image. This means that panning the image will have the same pan effect on the waveform.
- The vertical axis is the value of the pixel. Down on the waveform vertical axis is the lowest value (e.g. black), and up is the highest value (e.g. white).
- The brightness at each point in the waveform is the amount of pixels at that value.
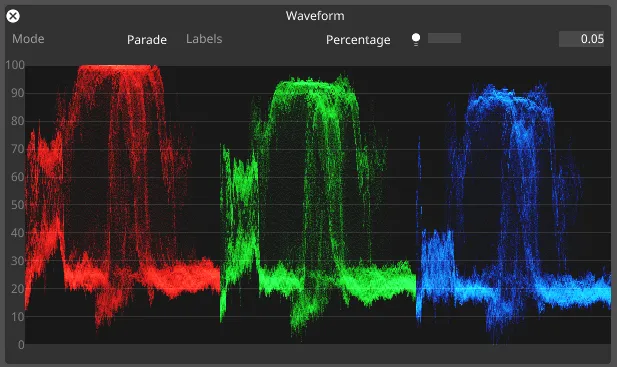
The waveform has three modes which can be accessed by clicking on the ‘Mode’’ button on the waveform:
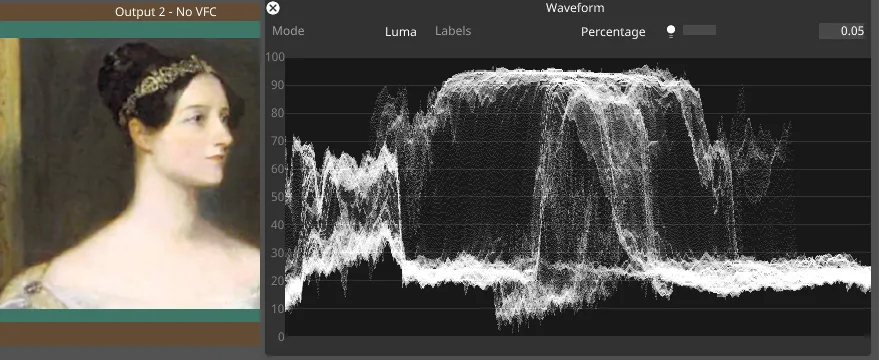
- Luma - (shown above) the same brightness value from the histogram
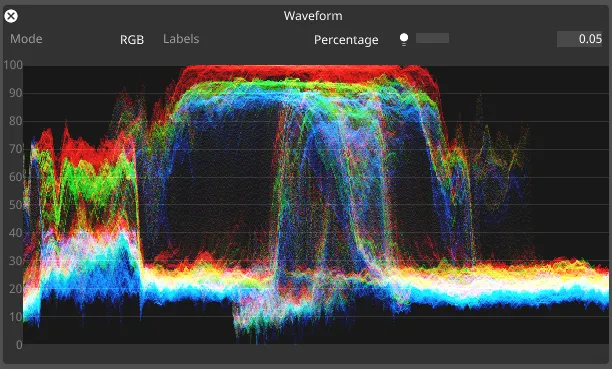
- RGB - red, green and blue values are overlaid on each other
- Parade - red, green and blue values side-by-side