Projector Studies
Projector studies allows you create technical documents from Designer that contains photometric heatmaps of the scene and projector properties.
The PDF document contains the heatmap from the visualiser cameras view and each projector.
Each page of a projector study will show the following:
- Software version
- Project name
- The photometric quantity used.
- The user specified revision and comment.
- The time stamp the study was created.
In addition, each page that contains a projector view will show the following properties:
- Name
- Resolution
- Brightness (lumens)
- Throw Ratio
- Lens Shift Horizontal
- Lens Shift Vertical
- Position (metres)
- Rotation (degrees)
The final page will show a table of all projector properties.
Projector Properties Table
Section titled “Projector Properties Table”This table is a .csv file that contains the properties of the projectors in the stage.
The properties are as follows:
- Name
- Resolution X
- Resolution Y
- Brightness (lumens)
- Lens Shift Horizontal
- Lens Shift Vertical
- Position X (metres)
- Position Y (metres)
- Position Z (metres)
- Rotation about X axis (degrees)
- Rotation about Y axis (degrees)
- Rotation about Z axis (degrees)
Considerations
Section titled “Considerations”The photometric analysis does not take into account the following
- Atmospheric absorption of light as it passes through space.
- Brightness decay due to projector lamp life.
- Effects of lens focus and distortion.
- Projector brightness uniformity.
- Physical properties of the surface material.
- It assumes a lambertian reflectance of all surfaces, that they are perfectly diffuse and reflect light equally in all directions so that the brightness is the same no matter the viewing angle.
Workflow
Section titled “Workflow”- Set your project up as normal, placing projectors, screens and other elements.
- View the scene lighting in the heatmap rendering mode to see how close the setup matches expectations.
- Open the Stage editor.
- Define the desired settings in the projector studies editor.
- Export the projector study.
Example
Section titled “Example”Enabling heatmap
Section titled “Enabling heatmap”- Open the stage editor by right-clicking Stage from the dashboard or by right-clicking the floor in the visualiser.
- Expand the Cameras tab, and right-click Visualiser camera to edit the visualiser camera settings. Alternatively, you can edit another camera and output that to the feeds.
- In the camera editor, expand the Renderer tab and set the render mode to Heatmap.
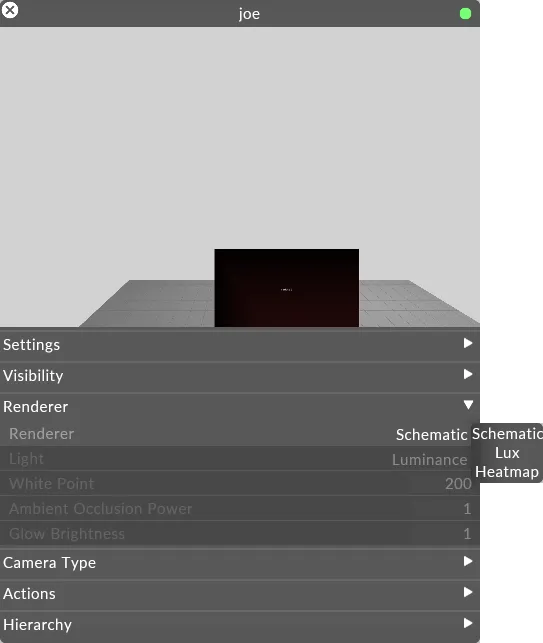
You are now viewing the heatmap visualisation of the photometric quantity specified by the Light field under the render tab within the camera editor.
The key shown in the heatmap editor shows the colour scheme and scale of the heatmap.
Editing heatmap properties
Section titled “Editing heatmap properties”- Open the heatmap editor.
- Set the target value to be the preferred surface illuminance or luminance that you want to achieve.
Creating a new projector study
Section titled “Creating a new projector study”- Open the stage editor by right-clicking Stage from the dashboard or by right-clicking the floor in the visualiser.
- Expand the Projectors tab of the stage editor.
- Left-click Projector studies… top open the Projector studies editor.
- Left-click Export projector study and the projector study will be written to the projectorstudies folder within your project folder.
Projector study properties
Section titled “Projector study properties”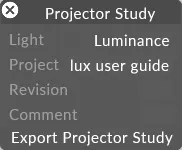
- Luminance - Luminance - The intensity of light emitting from an object or surface per metre in a given direction, measured in nits (cd/m²)
- Illuminance - The density of incident light in lumens hitting a surface per metre, measured in lux (lm/m²).
Project
Section titled “Project”The name of the project. This can be changed without affecting the main project name.
Revision
Section titled “Revision”User definable revision field.
Comment
Section titled “Comment”User definable comment field.
Export Projector Study
Section titled “Export Projector Study”Clicking Export Projector Study will write the projector study to the reports folder in Designer project folder.