Feed Mapping
The Feed mapping type allows you to sub-sample rectangular areas in a content area (referred to as the Mapping canvas) and copy that content onto rectangles inside one or multiple screens.
Feed mapping lets you specify any number of source rectangles within your content and map them individually to multiple surfaces. With Feed mapping, all your screens can easily be turned into one overall raster, and content applied to each surface with pixel-perfect accuracy. Individually move, scale, crop, chop or flip your source rectangles to compensate for differences in pixel density or to create interesting mapping effects..

Creating a Feed Mapping
Section titled “Creating a Feed Mapping”- In your track, add a new visual layer. This can be a content layer, generative layer, or effect layer.
- Left-click the new layer in the track to open the Layer Editor.
- Under the Default tab, left-click the Mapping parameter. This shows a list of all of the available mappings in the project. By default, screens are assigned a Direct Mapping with the same name. Cameras are assigned a Perspective Mapping with the same name.
- In the New Mapping text field, type a name for your new mapping. Select a mapping type from the list.
- In the Mapping Editor, assign the screens to be used for the mapping, and specify the resolution of the content.
- Adjust the mapping properties as needed.
- Finally, assign a piece of content to the layer in your track. The content will be displayed on the assigned screens in both the stage and feed output window.
Common Mapping Properties
Section titled “Common Mapping Properties”This section explains the properties that are shared by the different mapping types.
Filtering
Section titled “Filtering”-
Nearest: Nearest neighbour filtering. Use nearest-neighbour sampling, to disable blending between pixels when scaling. Can be used to create pixellated looks, or to ensure hard edges on certain types of content.
-
Bilinear: Bilinear filtering is a texture filtering method used to smooth textures when displayed larger or smaller than they actually are.
-
2x Multi-sample: Multi-Sample filtering can help fix issues with scaled content, but can introduce some blurriness.
Resolution
Section titled “Resolution”This controls the canvas size the layer renders into, in pixels. The Direct mapping type starts with a 256x256 pixel canvas and automatically sets the canvas size to that of the first screen you add.
Screens
Section titled “Screens”This is a list of screens that the selected mapping type can copy content to.
- Left-click + to open the Screens manager.
- Left-click + to add the Screens you want to map. This will copy the individual canvas content onto these three Screens simultaneously and will add the Screen names to the mapping object editor.
- Left-click and drag the Screens listed in the mapping object editor to -. This will remove the canvas content from the Screens and delete the Screen names from the mapping object editor.
This points to the Texture file that defines a Mask bitmap. You can use this property to apply a Mask bitmap to the mapping canvas. Selecting this property will open the Texture object library, which shows all of the still image files saved on your local hard-drive in the DxTexture folder.
To apply a mapping mask you will need to create and import a custom still image file.
-
The step-by-step instructions on how to create and import a custom Population mask can be used to create a custom mapping mask. The only difference is that the mapping masks resolution should be the same as the mapping canvas. For step-by-step instructions on how to create and import a Population mask into a d3 project visit to the section Population mask in the Editing screens sub-chapter.
-
Alternatively, set any layers blend mode to mask to channel the layer content into the mapping mask.
Find/Replace Usages
Section titled “Find/Replace Usages”Finds all usages of the current mapping in the project, and allows these to be replaced with an alternative mapping. Note that replacement only works for sequenced, non-sockpuppeted mappings.
Feed Mapping Properties
Section titled “Feed Mapping Properties”This section explains the properties that are shared by all the different mapping types.
Import from Table
Section titled “Import from Table”Allows feed settings to be imported and update feed mappings.
See the Import and Export feed maps section below.
Feed View
Section titled “Feed View”Feed View provides a visual representation of the feed mapping for screens and content.
Using the Feed Mapping type
Section titled “Using the Feed Mapping type”Feed Mapping guidelines
Section titled “Feed Mapping guidelines”In addition to the property explanations provided above, it is important to:
- Set the resolution of the Feed mapping to the same resolution as the content intended to be used for that Feed mapping. If the content is of a higher resolution than the resolution of the Feed mapping mapping canvas, Designer will by default crop away the sides of the content. If the content is of lower resolution, Designer will scale up the content inside the mapping canvas.
- Add the screens to the Feed mapping in the same order as they appear in the visualiser, from left to right. If the screens are not listed in that order yet, you can re-order the screens in the screens list by selecting and dragging a screen up or dow
Adding a Feed rectangle to the mapping canvas
Section titled “Adding a Feed rectangle to the mapping canvas”To add a Feed rectangle to the mapping canvas:
- Right-click the red screen canvas and select Add feed rectangle.
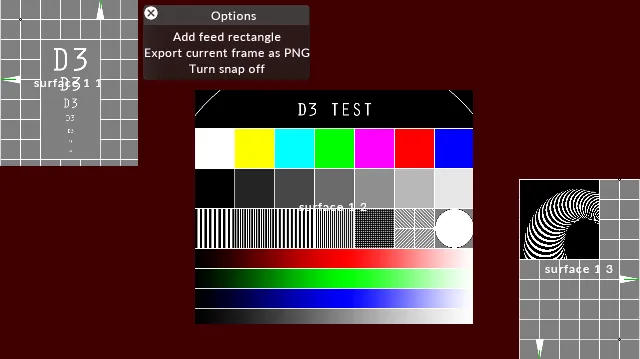
View of the Feed mapping editor when adding a new Feed rectangle
Note that the Feed rectangle is by default positioned in the top left corner of the mapping canvas. To change the position of the Feed rectangle, left-click it once, place the cursor in the middle and start moving it.
Editing a Feed rectangle
Section titled “Editing a Feed rectangle”The Feed rectangle has a number of options for scaling, flipping and chopping the rectangle. These options are very similar to those used when editing a Feed rectangle in the Output Feeds level. For more information please see the sub-chapter Quick editing controls.
This image explains the various options associated with a Feed rectangle in the Stage level.
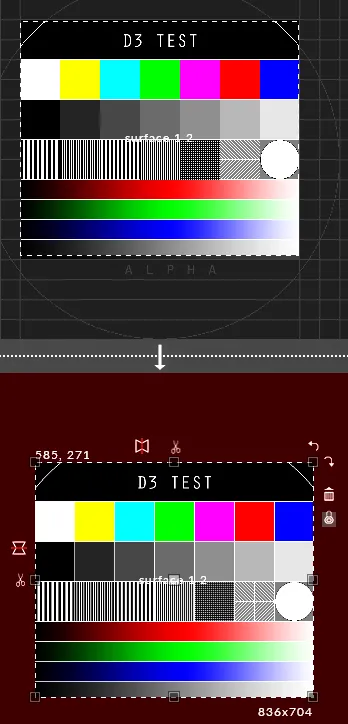
Feed rectangle quick editing controls
Section titled “Feed rectangle quick editing controls”| Item | Explanation |
|---|---|
| The position of the sample rectangle placed on the Mapping Canvas, in pixels. | |
| The Scissor tool on the sample rectangle for vertical cuts. Left-click and hold down the mouse button to move the cut horizontally.- | |
| The Scissor tool on the sample rectangle for horizontal cuts. Left-click and hold down the mouse button to move the cut vertically.- | |
| The Bin . Left-click the bin icon once to delete the sample rectangle (and the Feed rectangle).- | |
| The size of the sample rectangle in pixels. | |
| The Flipping tool to flip the sample rectangle horizontally. | |
| The Scissor tool on the Feed rectangle for vertical cuts. Left-click and hold down the mouse button to move the cut horizontally.- | |
| The Rotate tool on the Feed rectangle for rotating the Feed rectangle 90 degree clock/anti-clockwise.- | |
| The Scissor tool on the Feed rectangle for horizontal cuts. Left-click and hold down the mouse button to move the cut vertically.- | |
| The Flipping tool to flip the sample rectangle vertically. | |
| The Lock button locks the size of the sample rectangle to the size of the Feed rectangle and vice versa. Left-click the Lock button once to unlock the dependency. | |
| The name of the screen. | |
| The size of the Feed rectangle in pixels. |
Using these tools gives you a lot of freedom for configuring the Feed mapping on the screens in the Stage. Below, you can see an extreme example of this (for demonstration purposes only). Note that the red color in the background on the left hand side will only show up if the Feed mapping editor is open. When closed, the background will remain black.
Using Feed Rectangle properties
Section titled “Using Feed Rectangle properties”Right-clicking a feed rectangle offers the following properties.
Add feed rectangle
Section titled “Add feed rectangle”This option adds another feed rectangle to the canvas.
Export current frame as PNG
Section titled “Export current frame as PNG”A PNG of the feed rectangle is exported to the screenshots folder of your project folder. For more information see project structure.
Edit feed warping
Section titled “Edit feed warping”This option allows you to draw a 2D warp on an individual feed rectangle. Useful for warping within the mapping layer as oppose to the feed level.
Select mask
Section titled “Select mask”This option allows you to add a mask to the feed rectangle. Masks are read from the DxTexture folder of your Objects folder within your project folder. For more information see project structure.
Duplicate
Section titled “Duplicate”This allows you to create a duplicate of the feed rectangle.
Duplicate multiple
Section titled “Duplicate multiple”This allows you to duplicated multiple source and destination feed rectangles to create arrays of feed rectangles within the mapping.
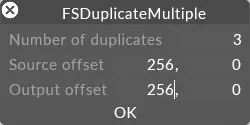
The duplicate multiple editor.
Turn snap off
Section titled “Turn snap off”This option toggles feed rectangle snapping on and off. When on, feed rectangle edges will snap to one another, and when off they do not do this (note the rulers still show with snapping off).
Import & Export feed maps
Section titled “Import & Export feed maps”The easiest way to import and export feed maps from projects is via a table. A feed map can be exported to a text file from Designer and then imported to another project.
Export
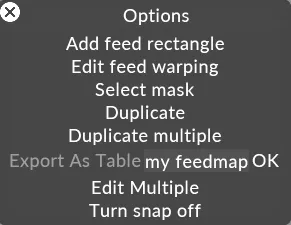
Section titled “Export”- In your Feedmap, right-click and choose Export to table.
- Enter a name.
- Click OK.
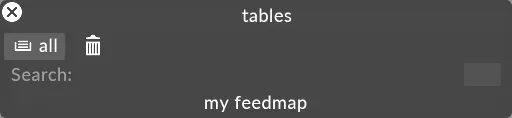
- The feed map is now exported to a newly created table folder in the objects folder.
The table that is exported will look similar to this example:
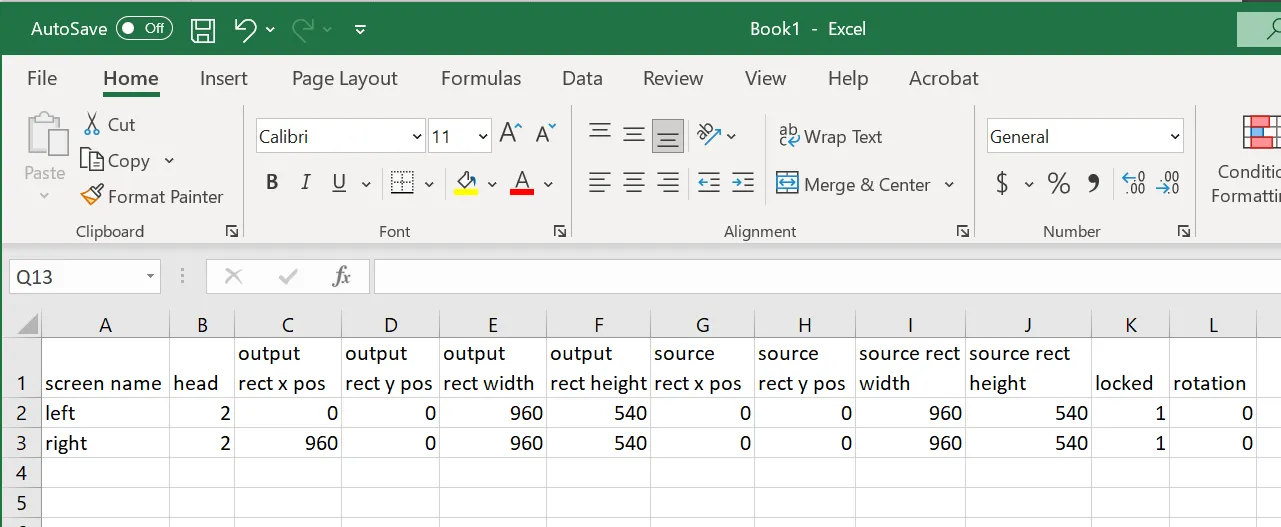
“Screen Name” refers to the name of the feed rectangle while “Head” refers to the number of the output slot.
Import from a table
Section titled “Import from a table”- In your new project, create a feed mapping. The mapping does not need to share the same name as the one you are importing.
- Left-click the Import from table option, this will only appear if there is a table folder present in the project folder.

- Left-click your table from the available list.
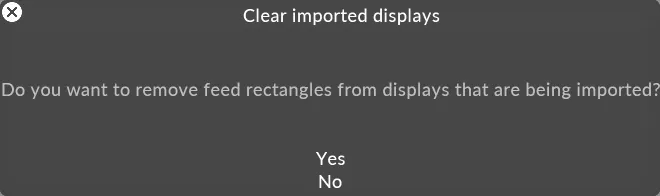
- Choose yes when prompted to overwrite existing feed rectangles.