Exposed Parameters in Unreal Engine
This topic explains how to expose parameters in an Unreal Engine scene and enable those parameters to be controlled using the RenderStream Layer in Designer.
The Unreal Engine RenderStream plugin allows you to expose variables within the UE scene that can be used to control the parameters of the actors in the virtual environment. These variables are presented as custom RenderStream Layer Editor parameters in Designer. Modifying the value of a parameter changes the value of the corresponding variable in the Unreal Engine level thus altering the parameter/s of the selected actor or setting within the scene.
Prerequisites
Section titled “Prerequisites”- Unreal Engine Scene
- RenderStream plugin enabled in the UE project
- Designer project
View the RenderStream Unreal Engine Integration Project Setup page here.
Exposing Parameters in an Unreal Engine Project Scene
Section titled “Exposing Parameters in an Unreal Engine Project Scene”There are two methods for exposing parameters in an Unreal Engine scene.
- Using an Event Tick.
- Using a Custom Event.
Both options can be added to a Level Blueprint to trigger an event and handle the change when this event is triggered.
Ticking is used to run a code or Blueprint script on an actor or component at regular intervals. If an Event Tick is used, an Event is called every frame. This is a particularly inefficient method of exposing parameters, but is the more widely known method for the workflow.
Custom Events in Unreal Engine are user-defined functions that allow you to trigger specific actions or logic within your Blueprints. These are reusable events that can be called whenever needed. This helps streamline complex interactions and maintain clean, manageable Blueprint scripts.
Creating and configuring a variable in the Level Blueprint
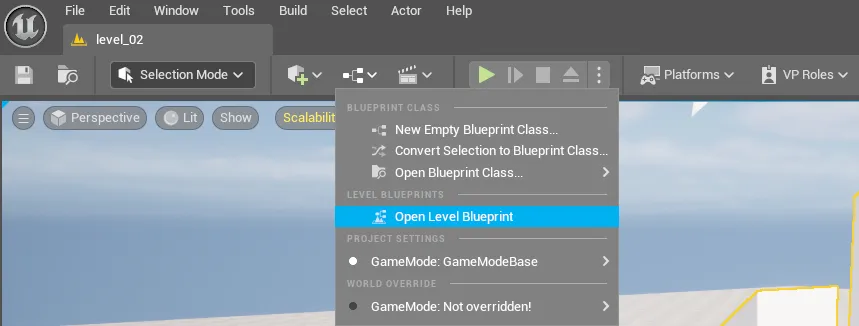
Section titled “Creating and configuring a variable in the Level Blueprint”- Click Blueprint in the Toolbar and select Open Level Blueprint.
- Click the Add button next to Variables within the My Blueprint panel.
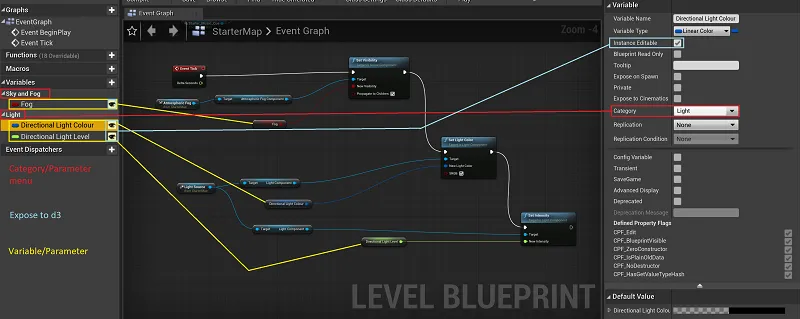
- Name the variable according to the desired property (e.g. Fog Visibility).
- Select the variable.
- Set the Variable Type in the Details panel to an appropriate property (e.g.
visibility == boolean). - Click on the check box to enable Instance Editable. (Alternatively click on the eye symbol.)
- Set the Category to represent the parameter in Designer. This will appear as a section in the RenderStream Layer Editor.
- When using a sliding range, configure the ranges for the value.
- Click Compile and then click Save.
- Next, set the Default Value for the variable in the Details panel.
1. Assigning an action to the variable in the Level Blueprint using an Event Tick
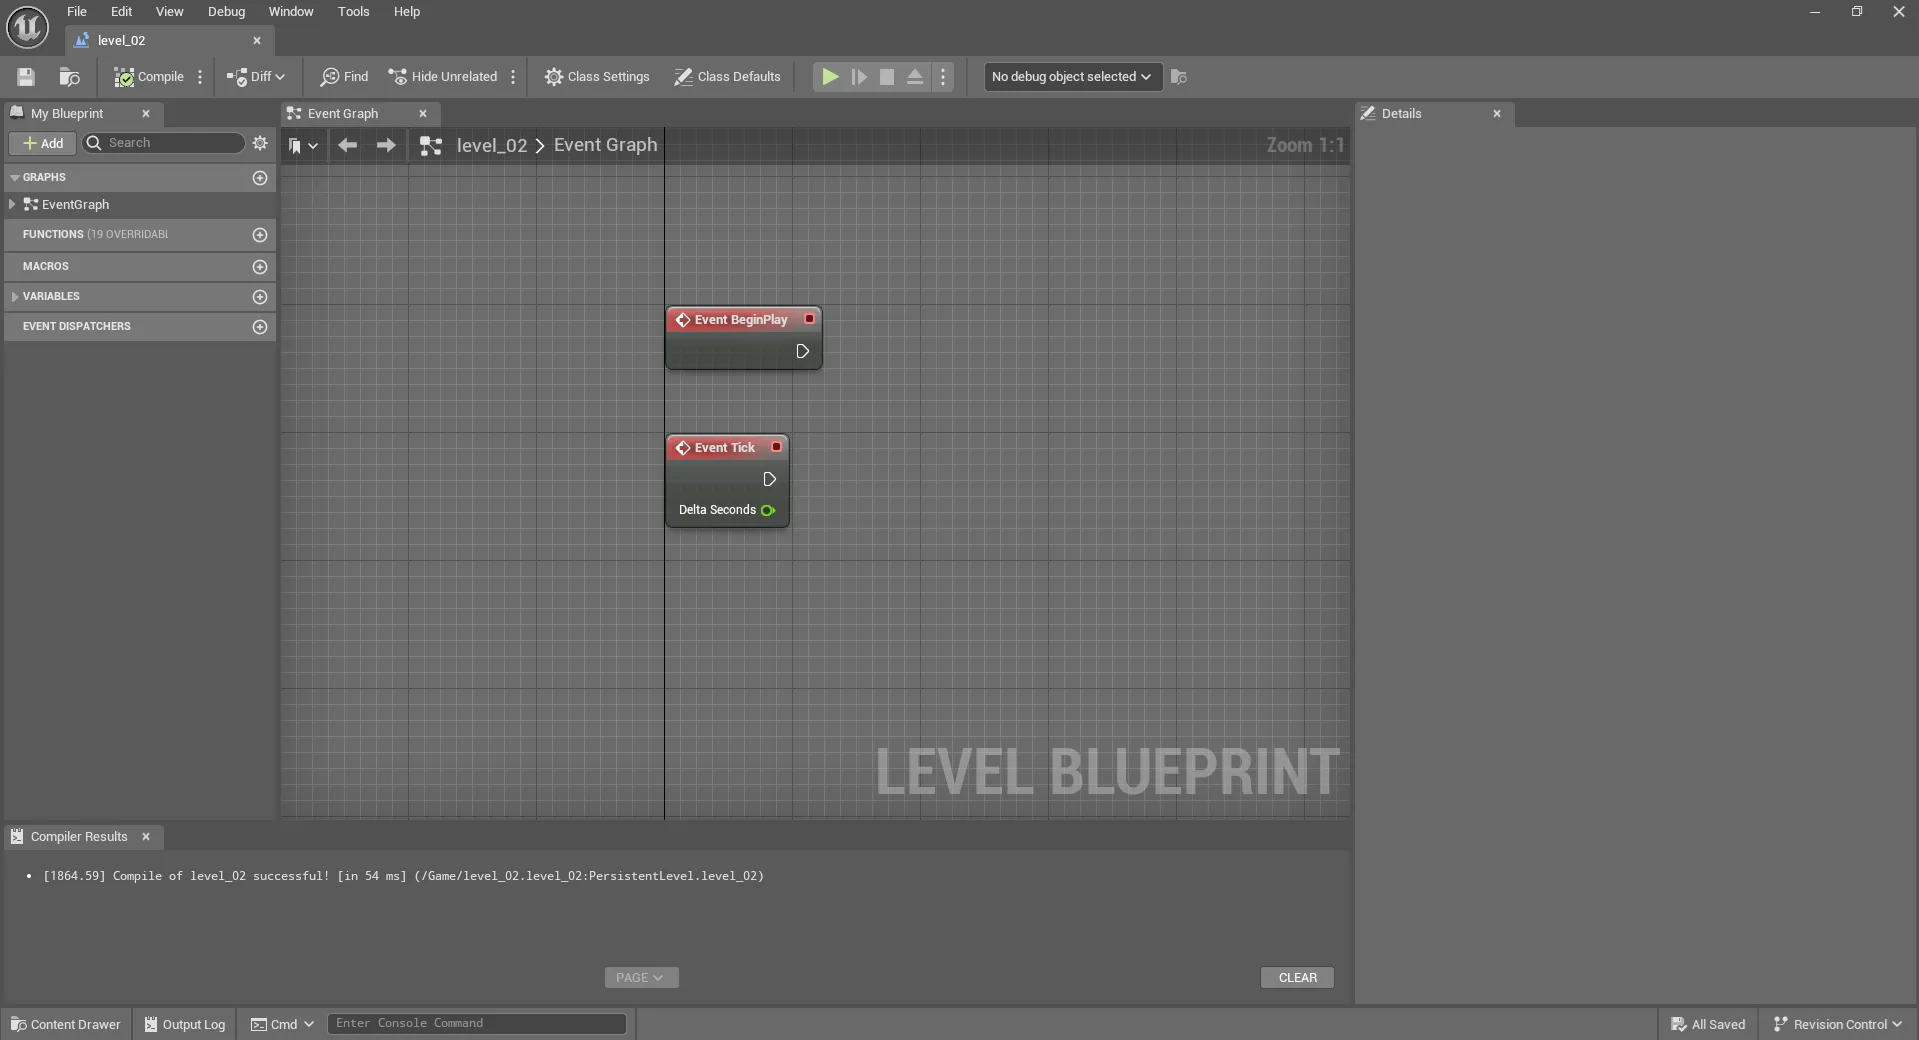
Section titled “1. Assigning an action to the variable in the Level Blueprint using an Event Tick”- In the Level Blueprint, right-click anywhere in the Event Graph and create an Event Tick action. Depending on the project you are using, one may already appear disabled and ready for use.
- Return to the scene.
- Select an Actor from the Outliner panel (e.g. Atmospheric Fog).
- Drag and drop the Actor into the Level Blueprint’s Event Graph.
- Drag out from the blue pin (Static Mesh Actor Object Reference) on the Actor component and create any new Rendering Component Action (e.g. Set Visibility or Set Intensity).
- Drag out from the white pin (Exec) on the Event Tick action and connect it to the white pin (Exec) on the left-side of the Rendering Component Action.
- Drag out from the New Component_Name pin (e.g. New Visibility) on the Rendering Component Action and create a Get Variable_Name action.
- Compile and Save.
Modifying the parameter in Designer
Section titled “Modifying the parameter in Designer”- Open the RenderStream Layer Editor in Designer and start the Workload.
- Modify new parameter value/s in the layer editor as part of your normal sequencing.
Alternatives to Event Ticks
Section titled “Alternatives to Event Ticks”Exposed Parameters attached to an Event Tick are expensive because they will be triggered every tick and re-apply the exposed parameter. To improve performance, Designer has 3 other options that will give you better performance:
- On Keyframe - Will trigger the event only when a keyframe is encountered in Designer.
- On Change - Will trigger the event only when the parameter changes.
- On Reset - Will trigger the event only when the parameter is set to
0.
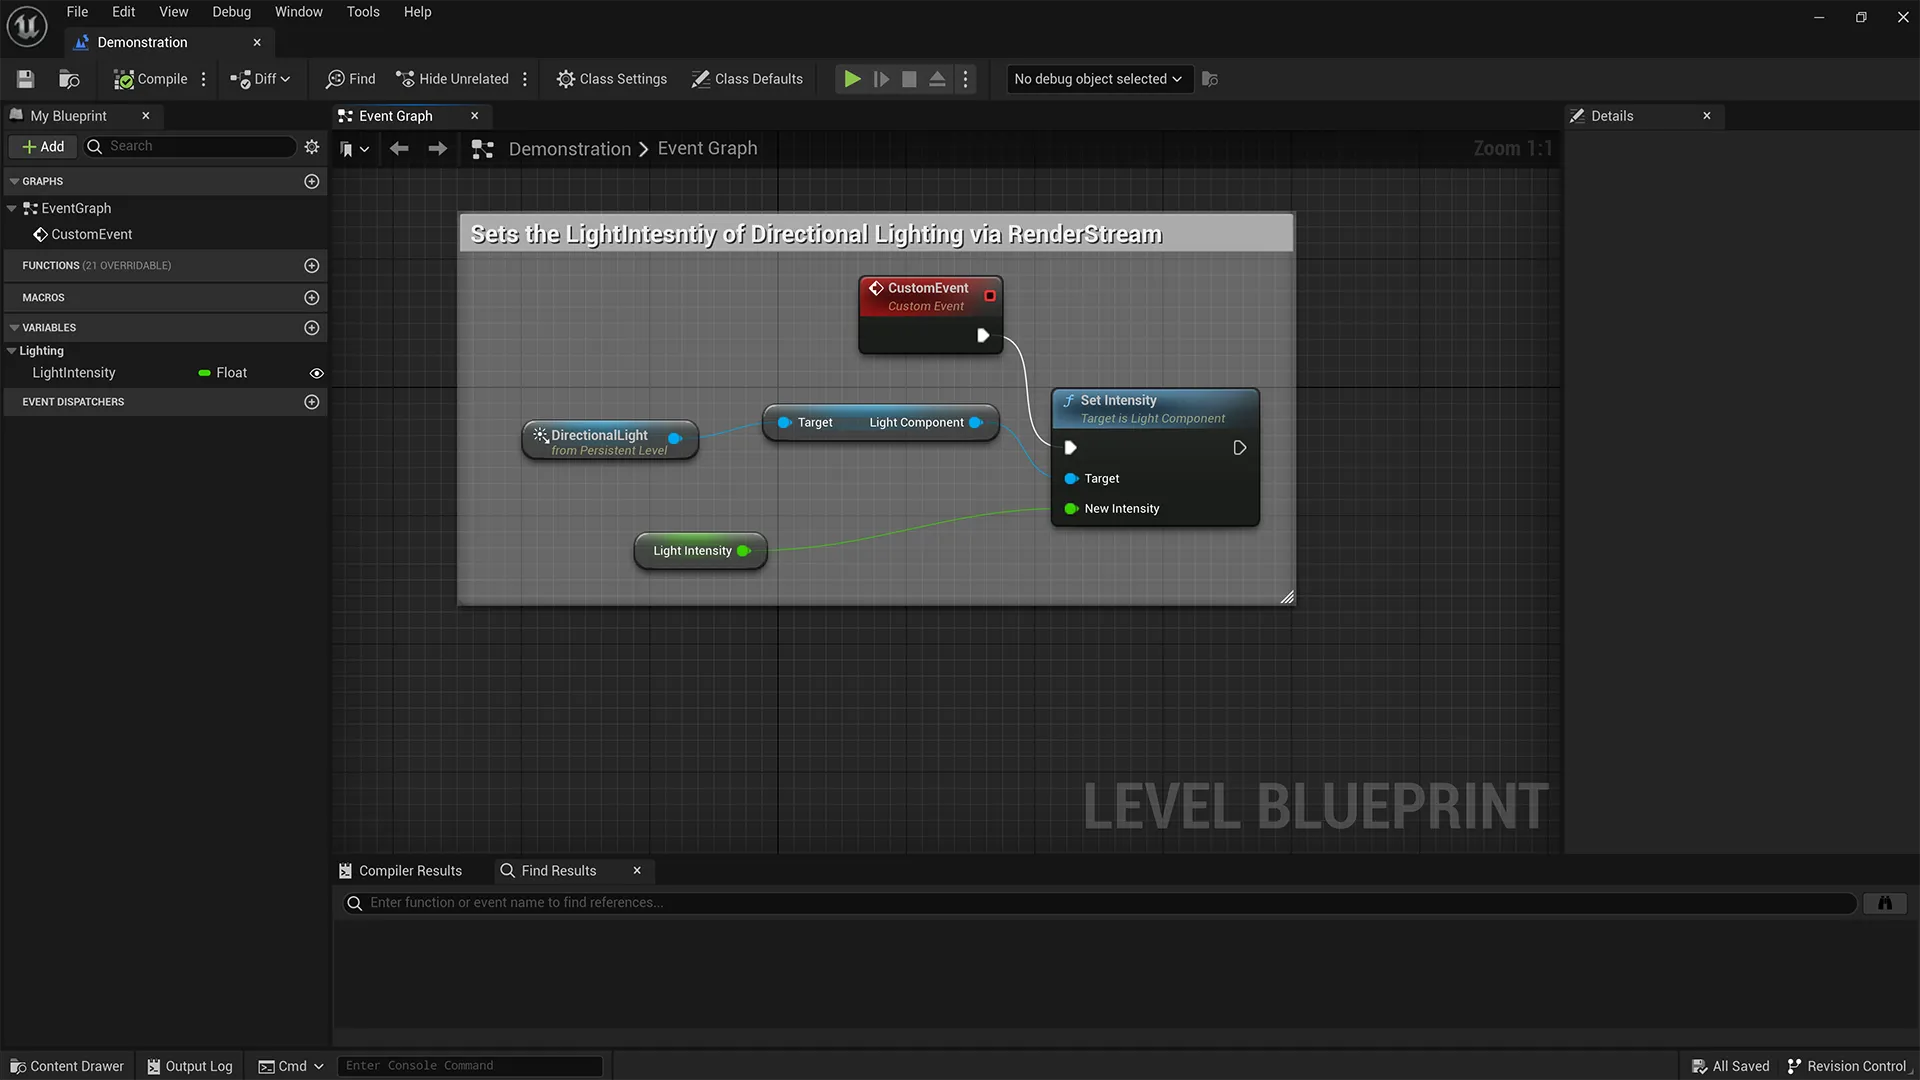
2. Assigning an action to the variable in the Level Blueprint using a Custom Event
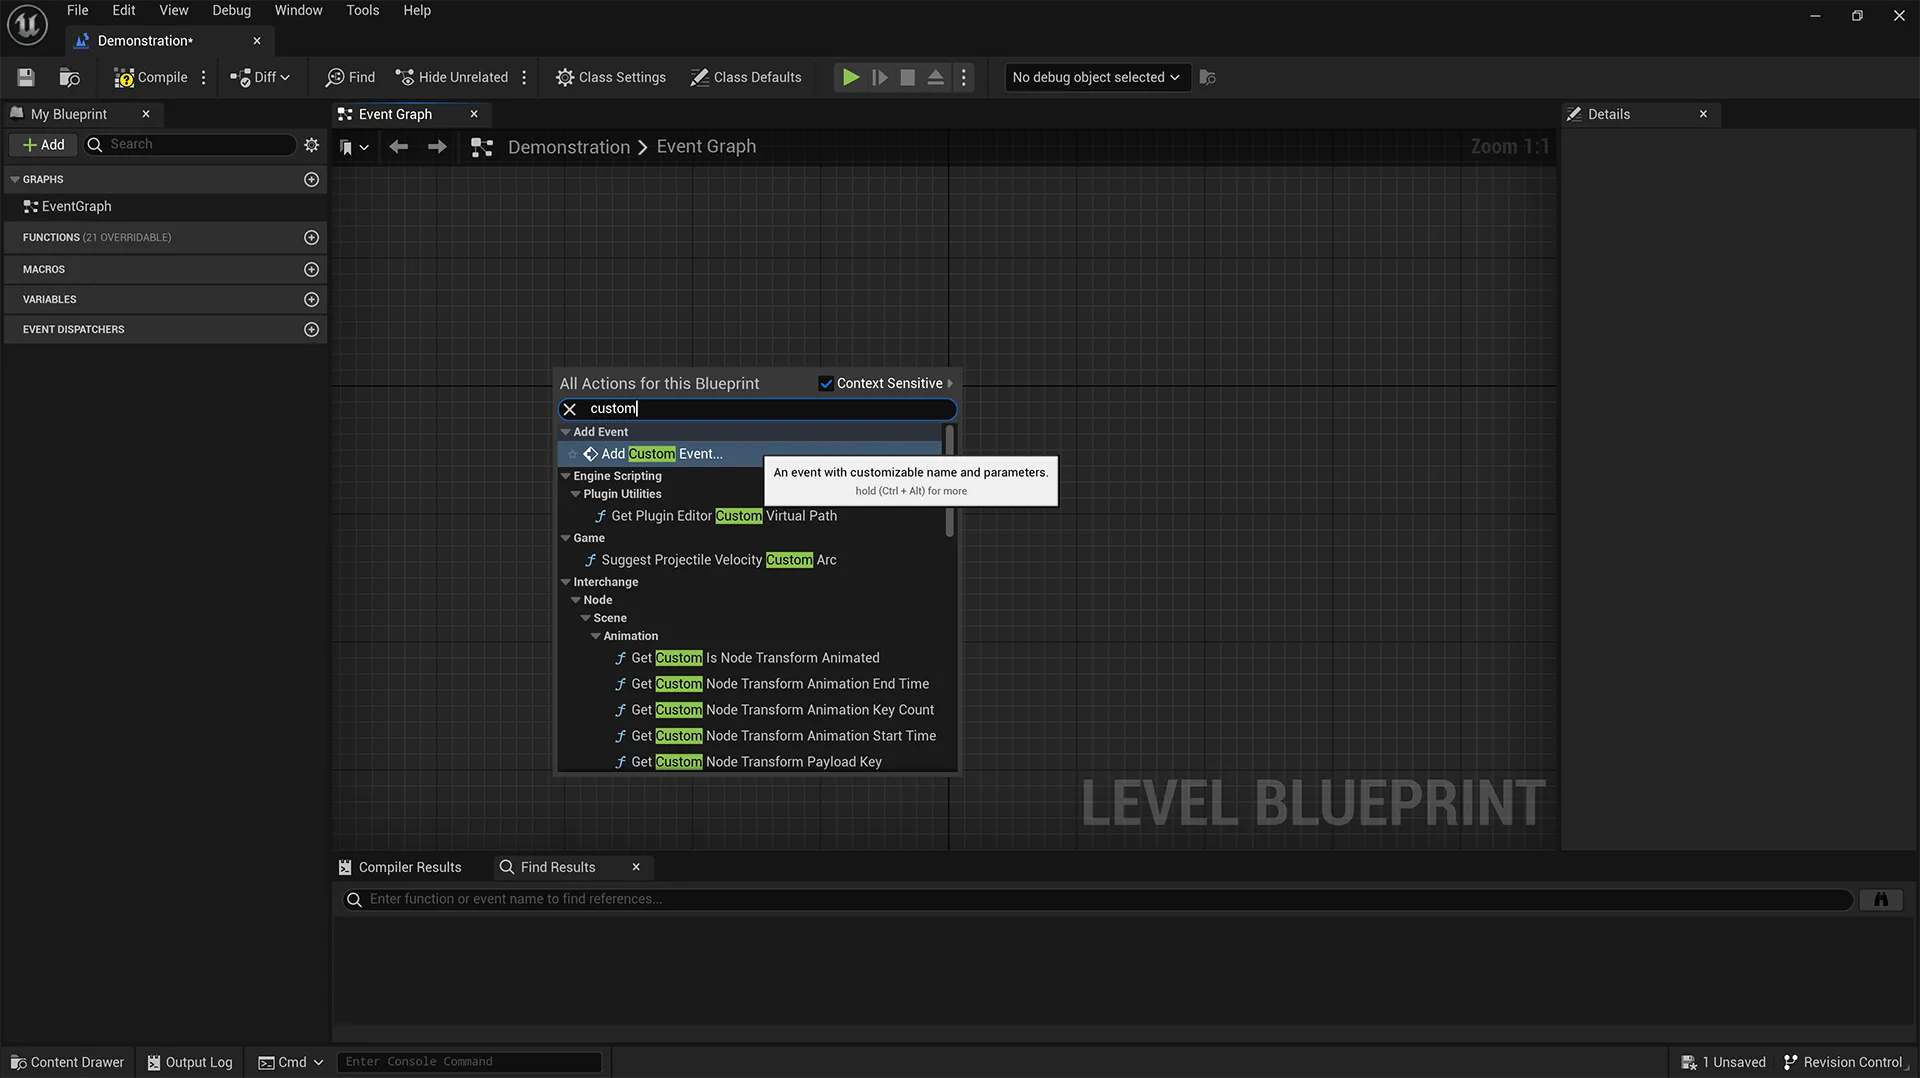
Section titled “2. Assigning an action to the variable in the Level Blueprint using a Custom Event”- In Unreal Engine, right-click in the Blueprint’s Event Graph, type Custom Event to search for the action, and click Add Custom Event. Then, name the event.Custom Event action. Where you have existing nodes such as EventPlay and Event Tick, these can be removed.
- Name the Custom Event to reflect the parameter that has been exposed.
- Return to the scene.
- Select an Actor from the Outliner panel (e.g. Atmospheric Fog or Directional Lighting).
- Drag and drop the Actor into the Level Blueprint’s Event Graph.
- Drag out from the blue pin (Static Mesh Actor Object Reference) on the Actor component and create any new Rendering Component Action (e.g. Set Visibility).
- Drag out from the white pin (Exec) on the Event Tick action and connect it to the white pin (Exec) on the left-side of the Rendering Component Action.
- Drag out from the New Component_Name pin (e.g. New Visibility) on the Rendering Component Action and create a Get Variable_Name action.
- Compile and Save.
Using Triggers generated by Custom Events in Designer
Section titled “Using Triggers generated by Custom Events in Designer”- Open the RenderStream Layer Editor.
- Under Custom Events you fill find a field called Trigger Mode.
- Select the appropriate Trigger Mode.
- Modify custom event value/s in Disguise as part of your normal sequencing to trigger the custom event when required.
Unreal engine also provides workflows for controlling parameters using the Remote Control API, or their MultiEditor plugins and features. These can be configured outside of Designer entirely if none of the above options are suitable. If you are using Porta, for instance, this is a standard workflow.
Examples
Section titled “Examples”The example Unreal Level Blueprint below demonstrates triggering Custom Events in Unreal from Designer.
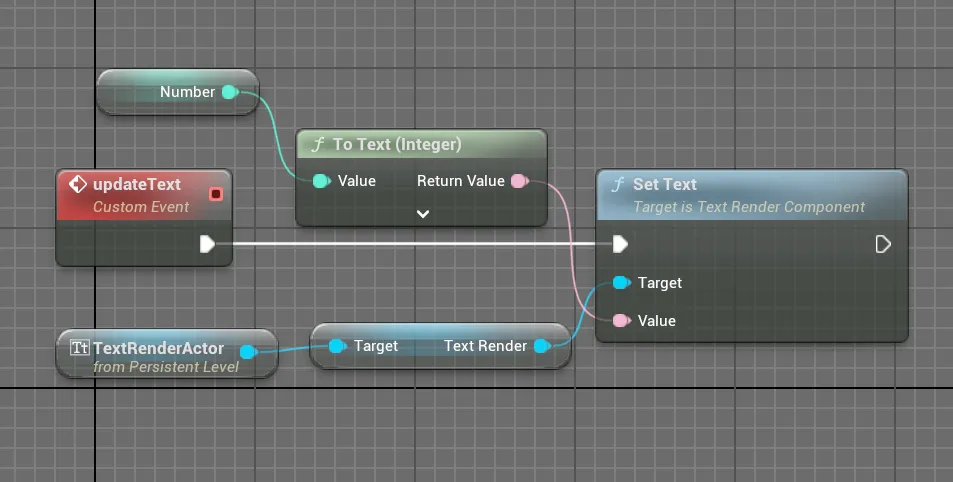 Level Blueprint: Creates a TextRenderActor with a number value that can be updated
On Keyframe
Section titled “On Keyframe”This will only trigger the Custom Event in Unreal when a keyframe is passed on the timeline in Designer.
Designer: On Keyframe, the exposed number value changes with each keyframeOn Change
Section titled “On Change”This will trigger the Custom Event in Unreal when the number value in the exposed Custom Event changes. The number has been keyframed to change over time to have it trigger constantly.
Designer: On Change, the exposed number changes with each change