Projection Examples - Perspective mapping
Perspective mapping is suitable for projection surfaces to display content rendered to a single point of view, for example building blocks animating into a building. However, perspective mapping is also suitable for 2D content, as explained below.
How the UV map is generated
Section titled “How the UV map is generated”A camera can perspective project UV coordinates from its point of view to the surface. The UV map can then be rendered to a content template to be placed as a background in Adobe After Effects. Here the content creator can render 2D content and in Designer the content will map perfectly to the screen. The 2D content will appear correct from any point of view.
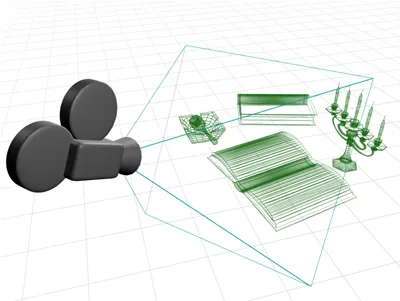
In a 3D application the content creator can also render 3D content by rendering 3D effects from a camera’s point of view. The render camera should match the position of the previous camera, and the 3D content should be rendered to a resolution that matches the 2D content. The mapped 3D content will only appear correct from the render camera’s point of view. Therefore, both cameras should be positioned to the point of view from which the audience will view the projection surface.
Step 1 - Generating the UV map (3ds Max)
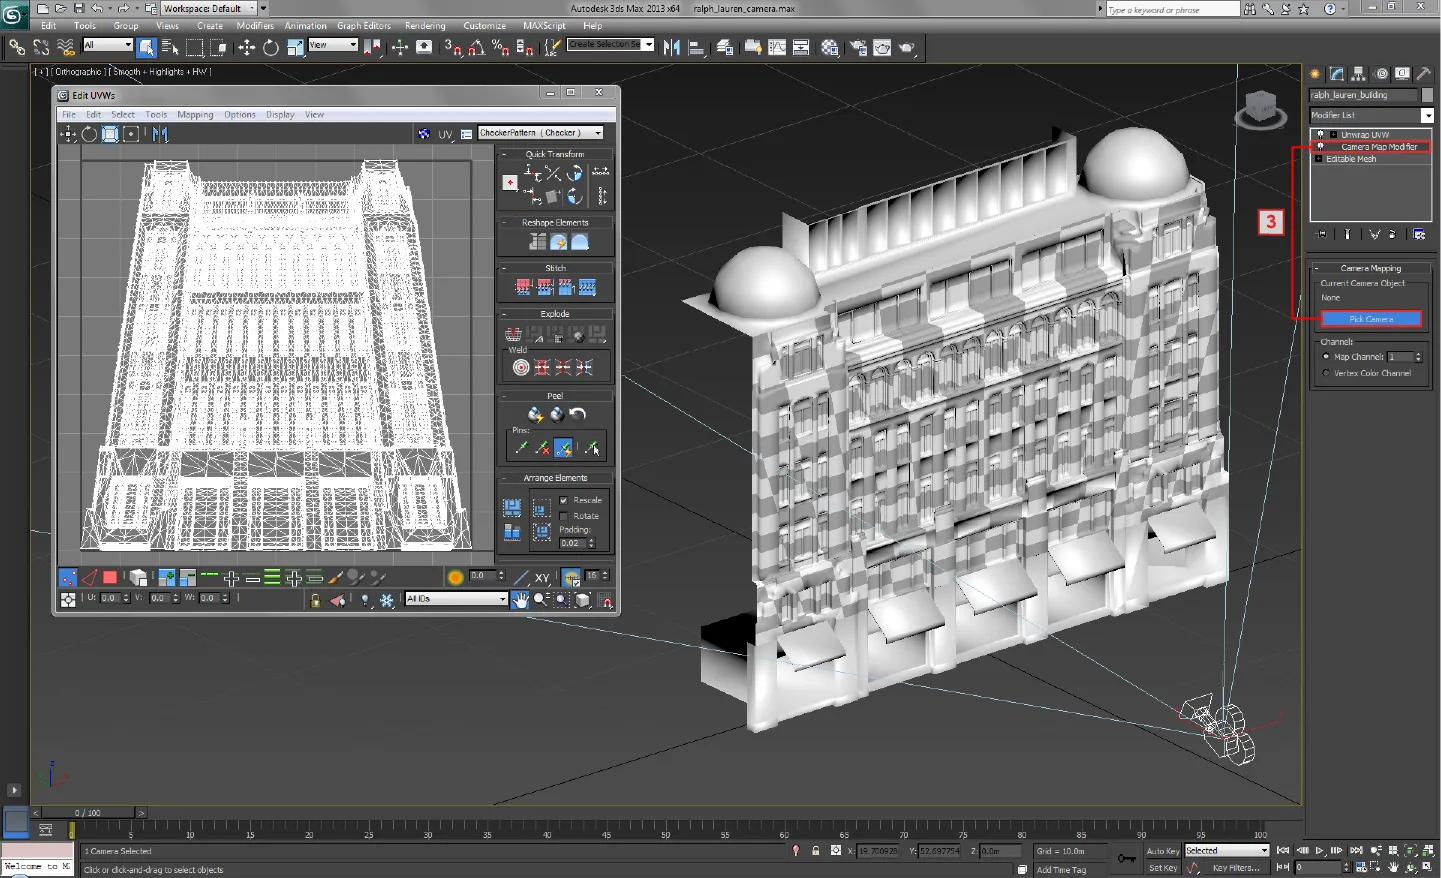
Section titled “Step 1 - Generating the UV map (3ds Max)”- Create a camera in your 3D scene.
- Adjust its position, field of view and zoom, to capture the surface’s outer edge. In the camera’s viewport safe frames can be enabled to show the captured area more clearly.
- Select the surface and apply a Camera Map modifier.
- From the Camera Map modifier pick camera. The camera will perspective project UV coordinates onto the surface.
- Select the Unwrap UVW modifier.
- Open the Edit UVWs window to view the UV map.
The image here shows a non-uniform checker pattern rendered to the surface. However, from the camera’s point of view the UV map will appear to have an even distribution of UV coordinates.
Step 2 - Rendering UV maps to content templates
Section titled “Step 2 - Rendering UV maps to content templates”-
The images below show the content template and how its resolution was calculated. The template’s resolution was calculated from the render settings set to generate 3D content, because when a projection surface is perspective mapped the UV map can be used to generate both 2D and 3D content. Therefore, the 2D and 3D content should match in resolution.
-
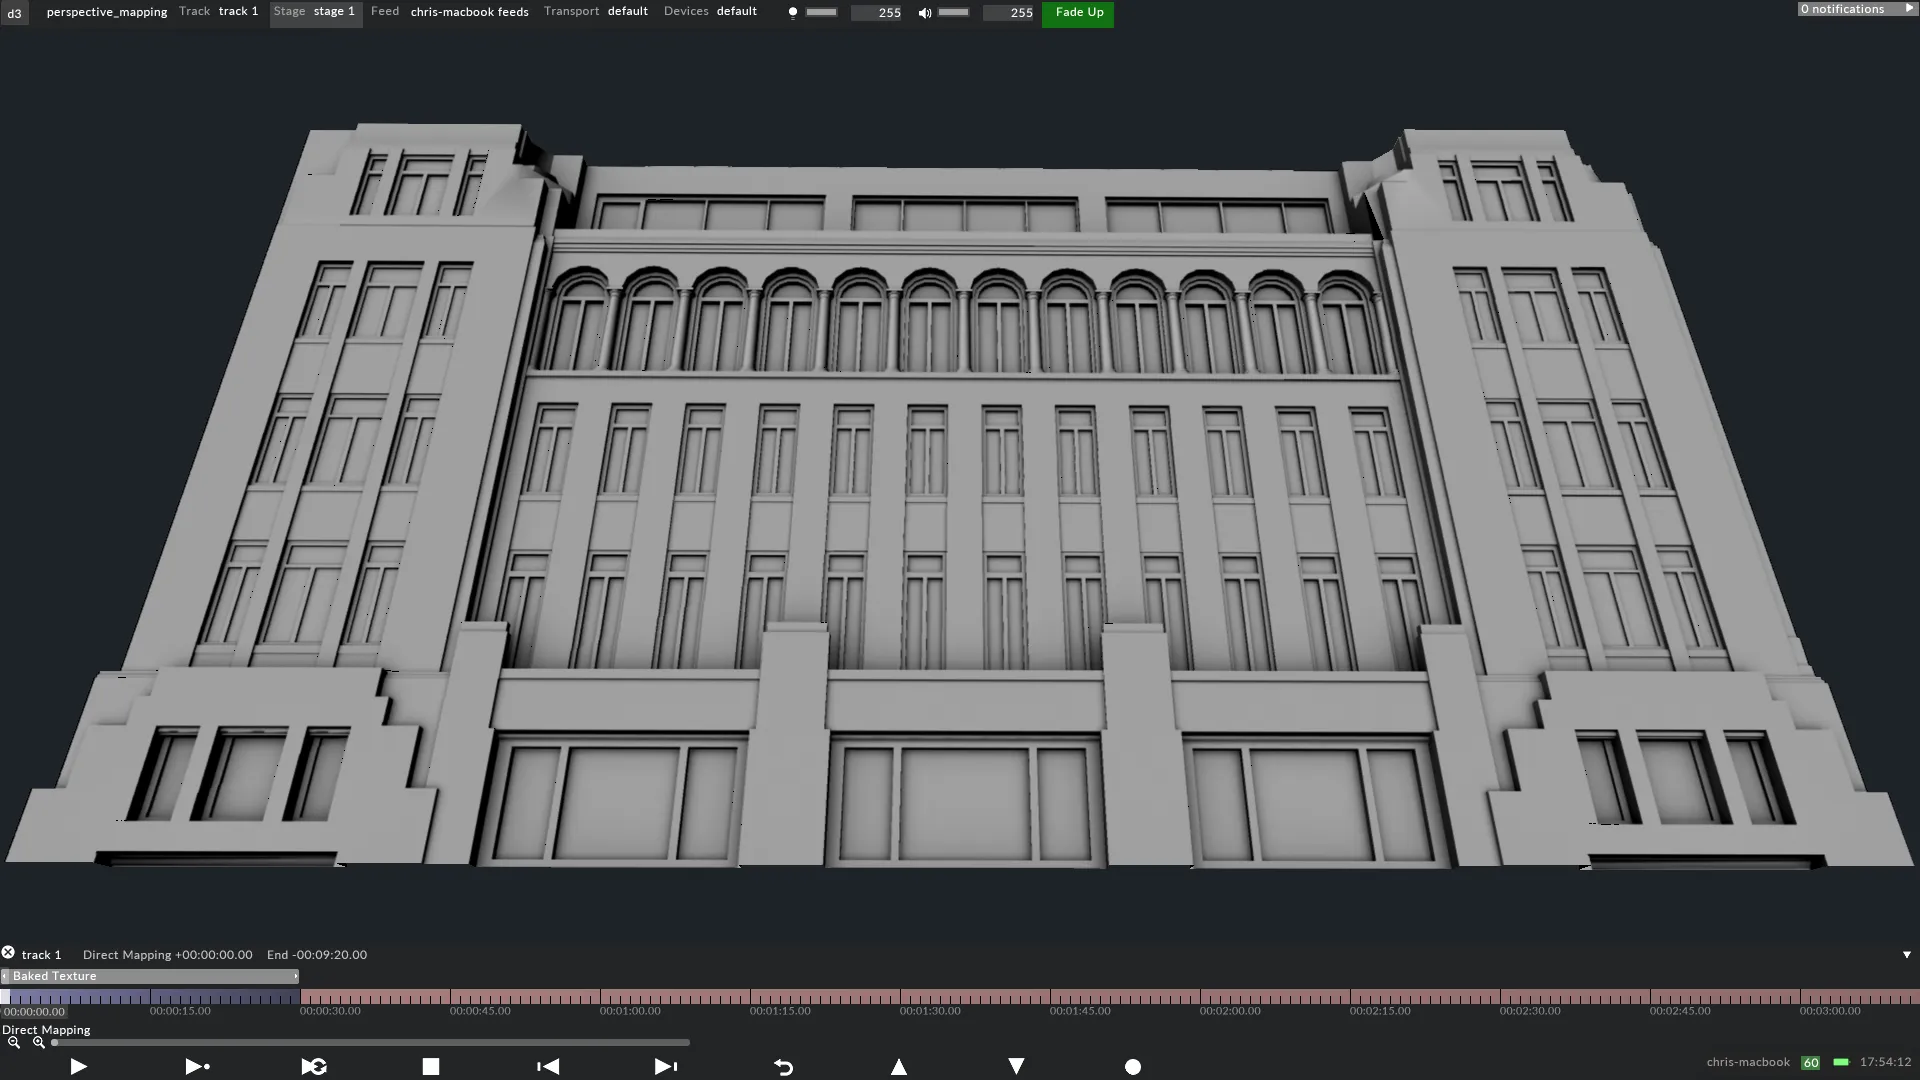
The UV map can be rendered to a template to be placed as a background in Adobe After Effects, to generate 2D content.
-
The UV map can have animated geometry baked into it in a 3D application, for example 3ds Max, to generate 3D content.
The template’s resolution is 4096x1576 pixels. This was calculated by:
- Knowing the aspect ratio of the camera’s output (this is automatically generated by the camera output’s width and height, shown in the render settings).
- Knowing precisely how many pixels produced by the projector will hit the projection surface, across either the horizontal or vertical axis..
- Multiplying or dividing this value by the aspect ratio, to calculate a resolution for the remaining axis.
Therefore, the following calculations apply:
- The camera’s output has an aspect ratio of 2.599.
- Approximately 4096 pixels will hit the projection surface horizontally.
- 4096 pixels / 2.599 = 1576 pixels (the vertical resolution).
Render settings from 3ds Max
Section titled “Render settings from 3ds Max”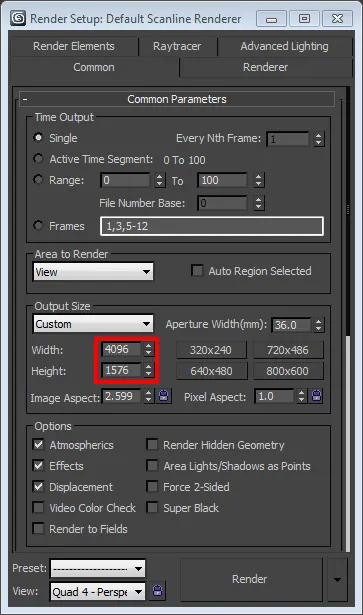
The images below show the content template and examples of 2D and 3D content rendered from the UV map.
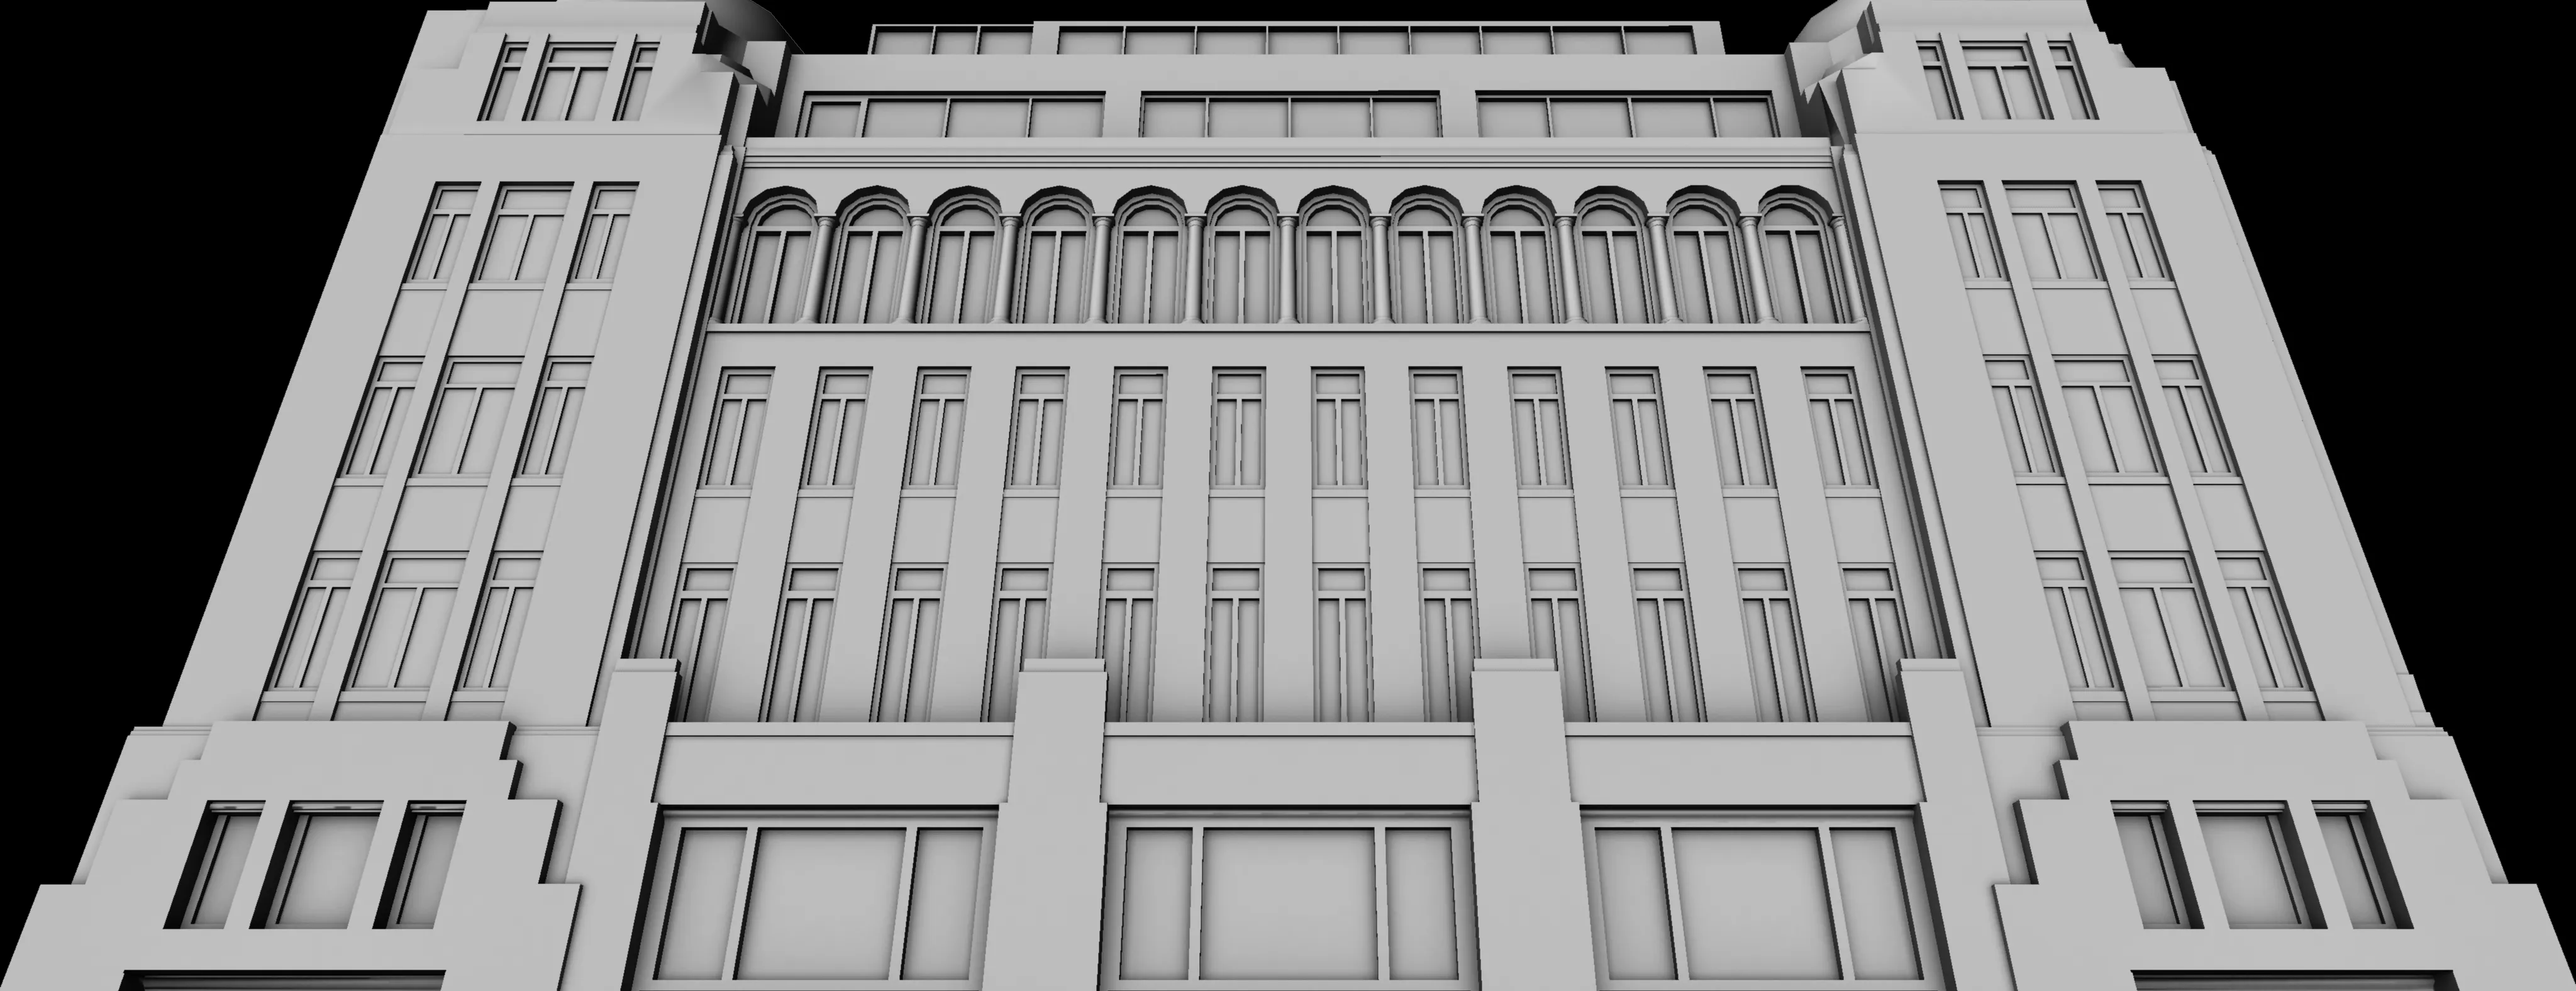
A 2D content template of the Ralph Lauren London Flagship Store renderedvfrom 3ds Max.