Viewport Brightness
Viewport Settings
Section titled “ Viewport Settings”This helps you customize the visual information in your Scene.
Go to Viewport Settings (in the top-right corner of your screen).
shaderlog
Section titled “shaderlog”Enable / disable shaderlog.
This replicates Luminance as perceived by the human eye. It gives more detail in lower intensity, and less detail in higher intensity
Show Object Edges
Section titled “Show Object Edges”Tick the box to enable / disable it.
Show Projector Infos
Section titled “Show Projector Infos”Tick the box to enable / disable it.
Show All Projector Beams
Section titled “Show All Projector Beams”Tick the box to enable / disable it.

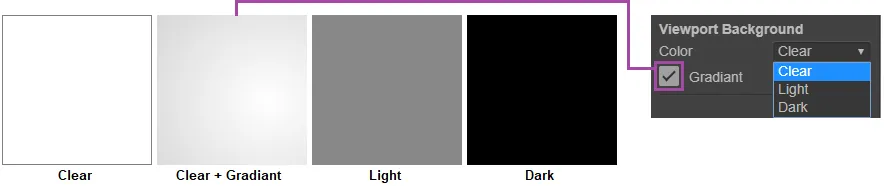
Viewport Background
Section titled “Viewport Background”You can change the Viewport Background for both ergonomic or aesthetic purposes.
Gradiant adds a soft esthetic glow to your Background.
Global Material Override
Section titled “Global Material Override”Some Objects may have a Material Override option enabled. This means you can “see through” them in the Viewport.
Learn about the Side Tool for Material Override here.
This is a global effect. When enabled (with Double Side box ticked), all Material Overrides are suspended.
Show Grid
Section titled “Show Grid”
Qte = Quantity of Squares both Horizontal and Vertical.
Size = Unit Size of 1 Square.
Sub = Subdivisions of each Square.
Projection Distance Helper
Section titled “Projection Distance Helper”This tool helps you visualizing the distance variations between a Projector’s Lens and the surfaces hit by its Beam. It will give you a better understanding of potential focus issues.
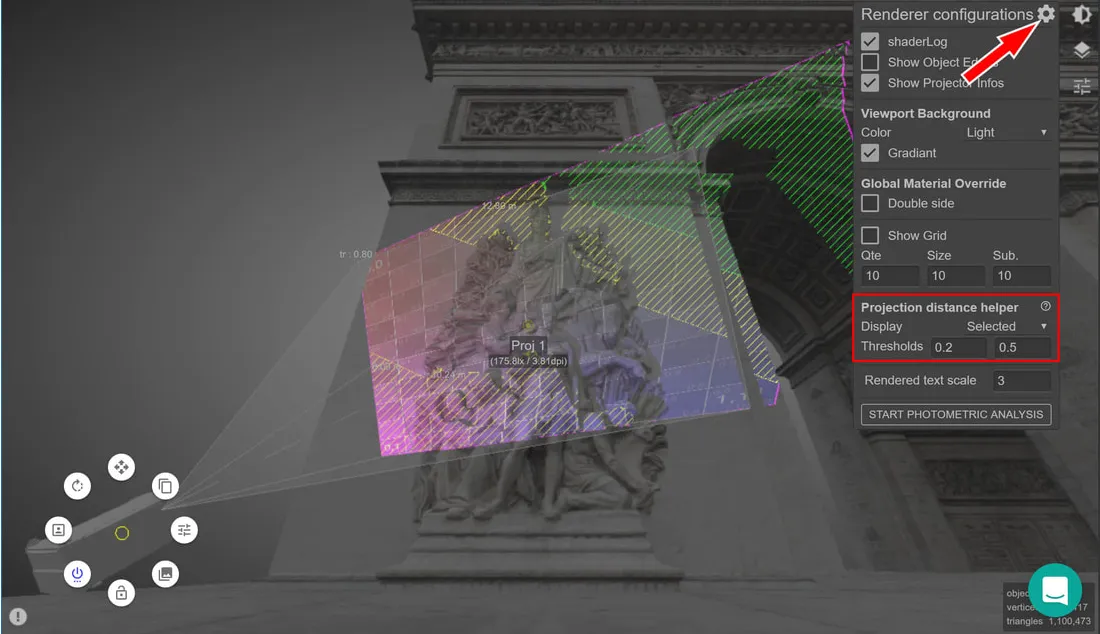
This is a global effect. When enabled, all Projectors apply it.
Go to Viewport Settings (in the top-right corner of your screen).
To disable it, go to the Display dropdown menu, and select None.
The two Thresholds parameters represent a fixed % value of the distance between any Projector and its Target Point.
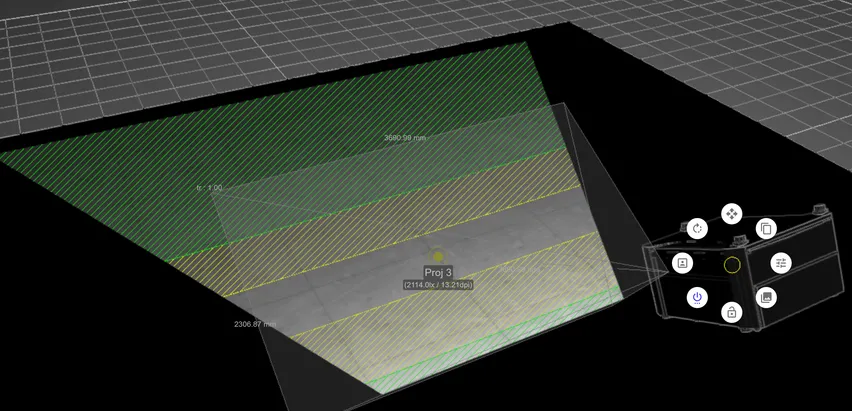
Example
Section titled “Example”We have a Beam with a 10m projection distance.
Both thresholds are set to 0.1 and 0.3.
Consequently, the areas between 1m and 3m away from the Target Point will be hatched in Yellow. And when 3m away or more, it will be all Green.
Photometric Analysis
Section titled “Photometric Analysis”
This tool allows you to evaluate both the Illuminance and Luminance on given surfaces in your Scene.
You can use this information to have an estimate of the Contrast Ratio on any surface. This will help you evaluate your needs in terms of Projection Light output.
Contrast Ratio = Projection Light / Ambient Light.
Start the Photometric Analysis mode either from the Viewport menu, or through the Viewport Settings panel.
Evaluate Illuminance and Luminance
Section titled “Evaluate Illuminance and Luminance”Illuminance = the amount of Light falling on a surface, per unit area.
The Object’s Material and surface angle have no incidence on it.
Luminance = the amount of Light reflected from a surface, per unit area. Aka the Light Falloff.
The Object’s Material (Gain / Color / Base Map) does have an incidence on it. The darker the surface, the lower the brightness.
The angle in which the Light Ray hits the surface also has an incidence. The wider the angle, the lower the brightness.
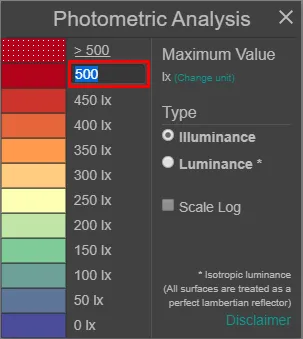
Scale Max is simply a reference value for all superior values in your Scene to show in a white-dotted Red.
You can also tick the Scale Log box to change the color distribution, as perceived by a human eye. It will give more details in the lower values, and less details in the higher ones.
Brightness Settings
Section titled “Brightness Settings”To adjust global Brightness parameters in your Scene:
Go to Brightness Settings (in the top-right corner of your screen).
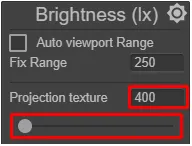
Auto Viewport Range
Section titled “Auto Viewport Range”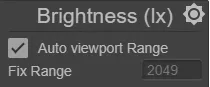
This will define a value range for both Projection Texture and Ambient / Directional Light.
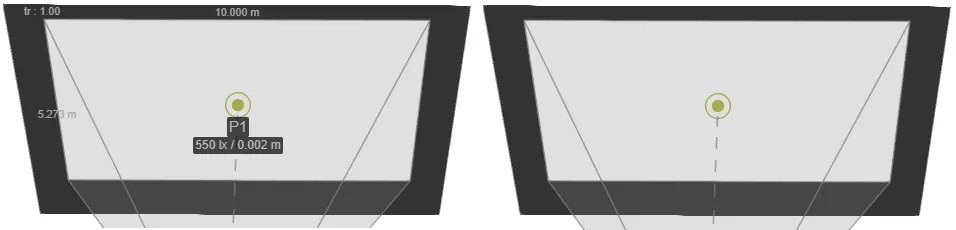
When enabled, the range is set automatically. The max brightness (100% white) will be adjusted in function of the selected Projector’s Illuminance value on its Target Point.
When disabled, the range has to be set manually.
Example
Section titled “Example”If we manually set 250 Lux, it will take 250 Lux to make any Object (which has a 1.0 Gain) 100% white. If it has a 0.5 Gain, 250 Lux will make it 50% white, etc. Same logic for Colors / Maps, the brighter the whiter.
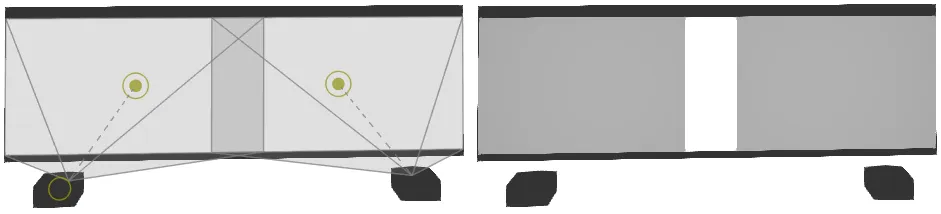
Projection Texture
Section titled “Projection Texture”The Projection Texture tool is global effect. It allows you to simultaneously reveal all projected Textures from the Scene. No need for any Projector Beam.
The projected Textures may be applied as a Material Projection Map, or emitted from a Camera Projector.
Adjust the value in lux.
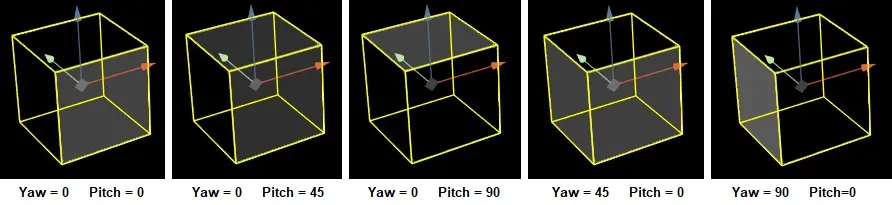
Ambient / Directional Light
Section titled “Ambient / Directional Light”Ambient & Directional Light are global effects. applying on all Objects of the Scene.
Ambient Light = the Light is equally emitted from all directions.
Directional Light = the Light is emitted from 1 source only.
Set a value (type-in or drag to adjust).
Yaw = the direction angle of the Light source, orbitting around the Blue Z axis. 180° shifts it to the opposite direction.
Pitch = the direction angle of the Light source, orbitting around the Red X (or Green Y) axis.