Designer User Interface
Overview of the Designer Graphical User Interface (GUI).
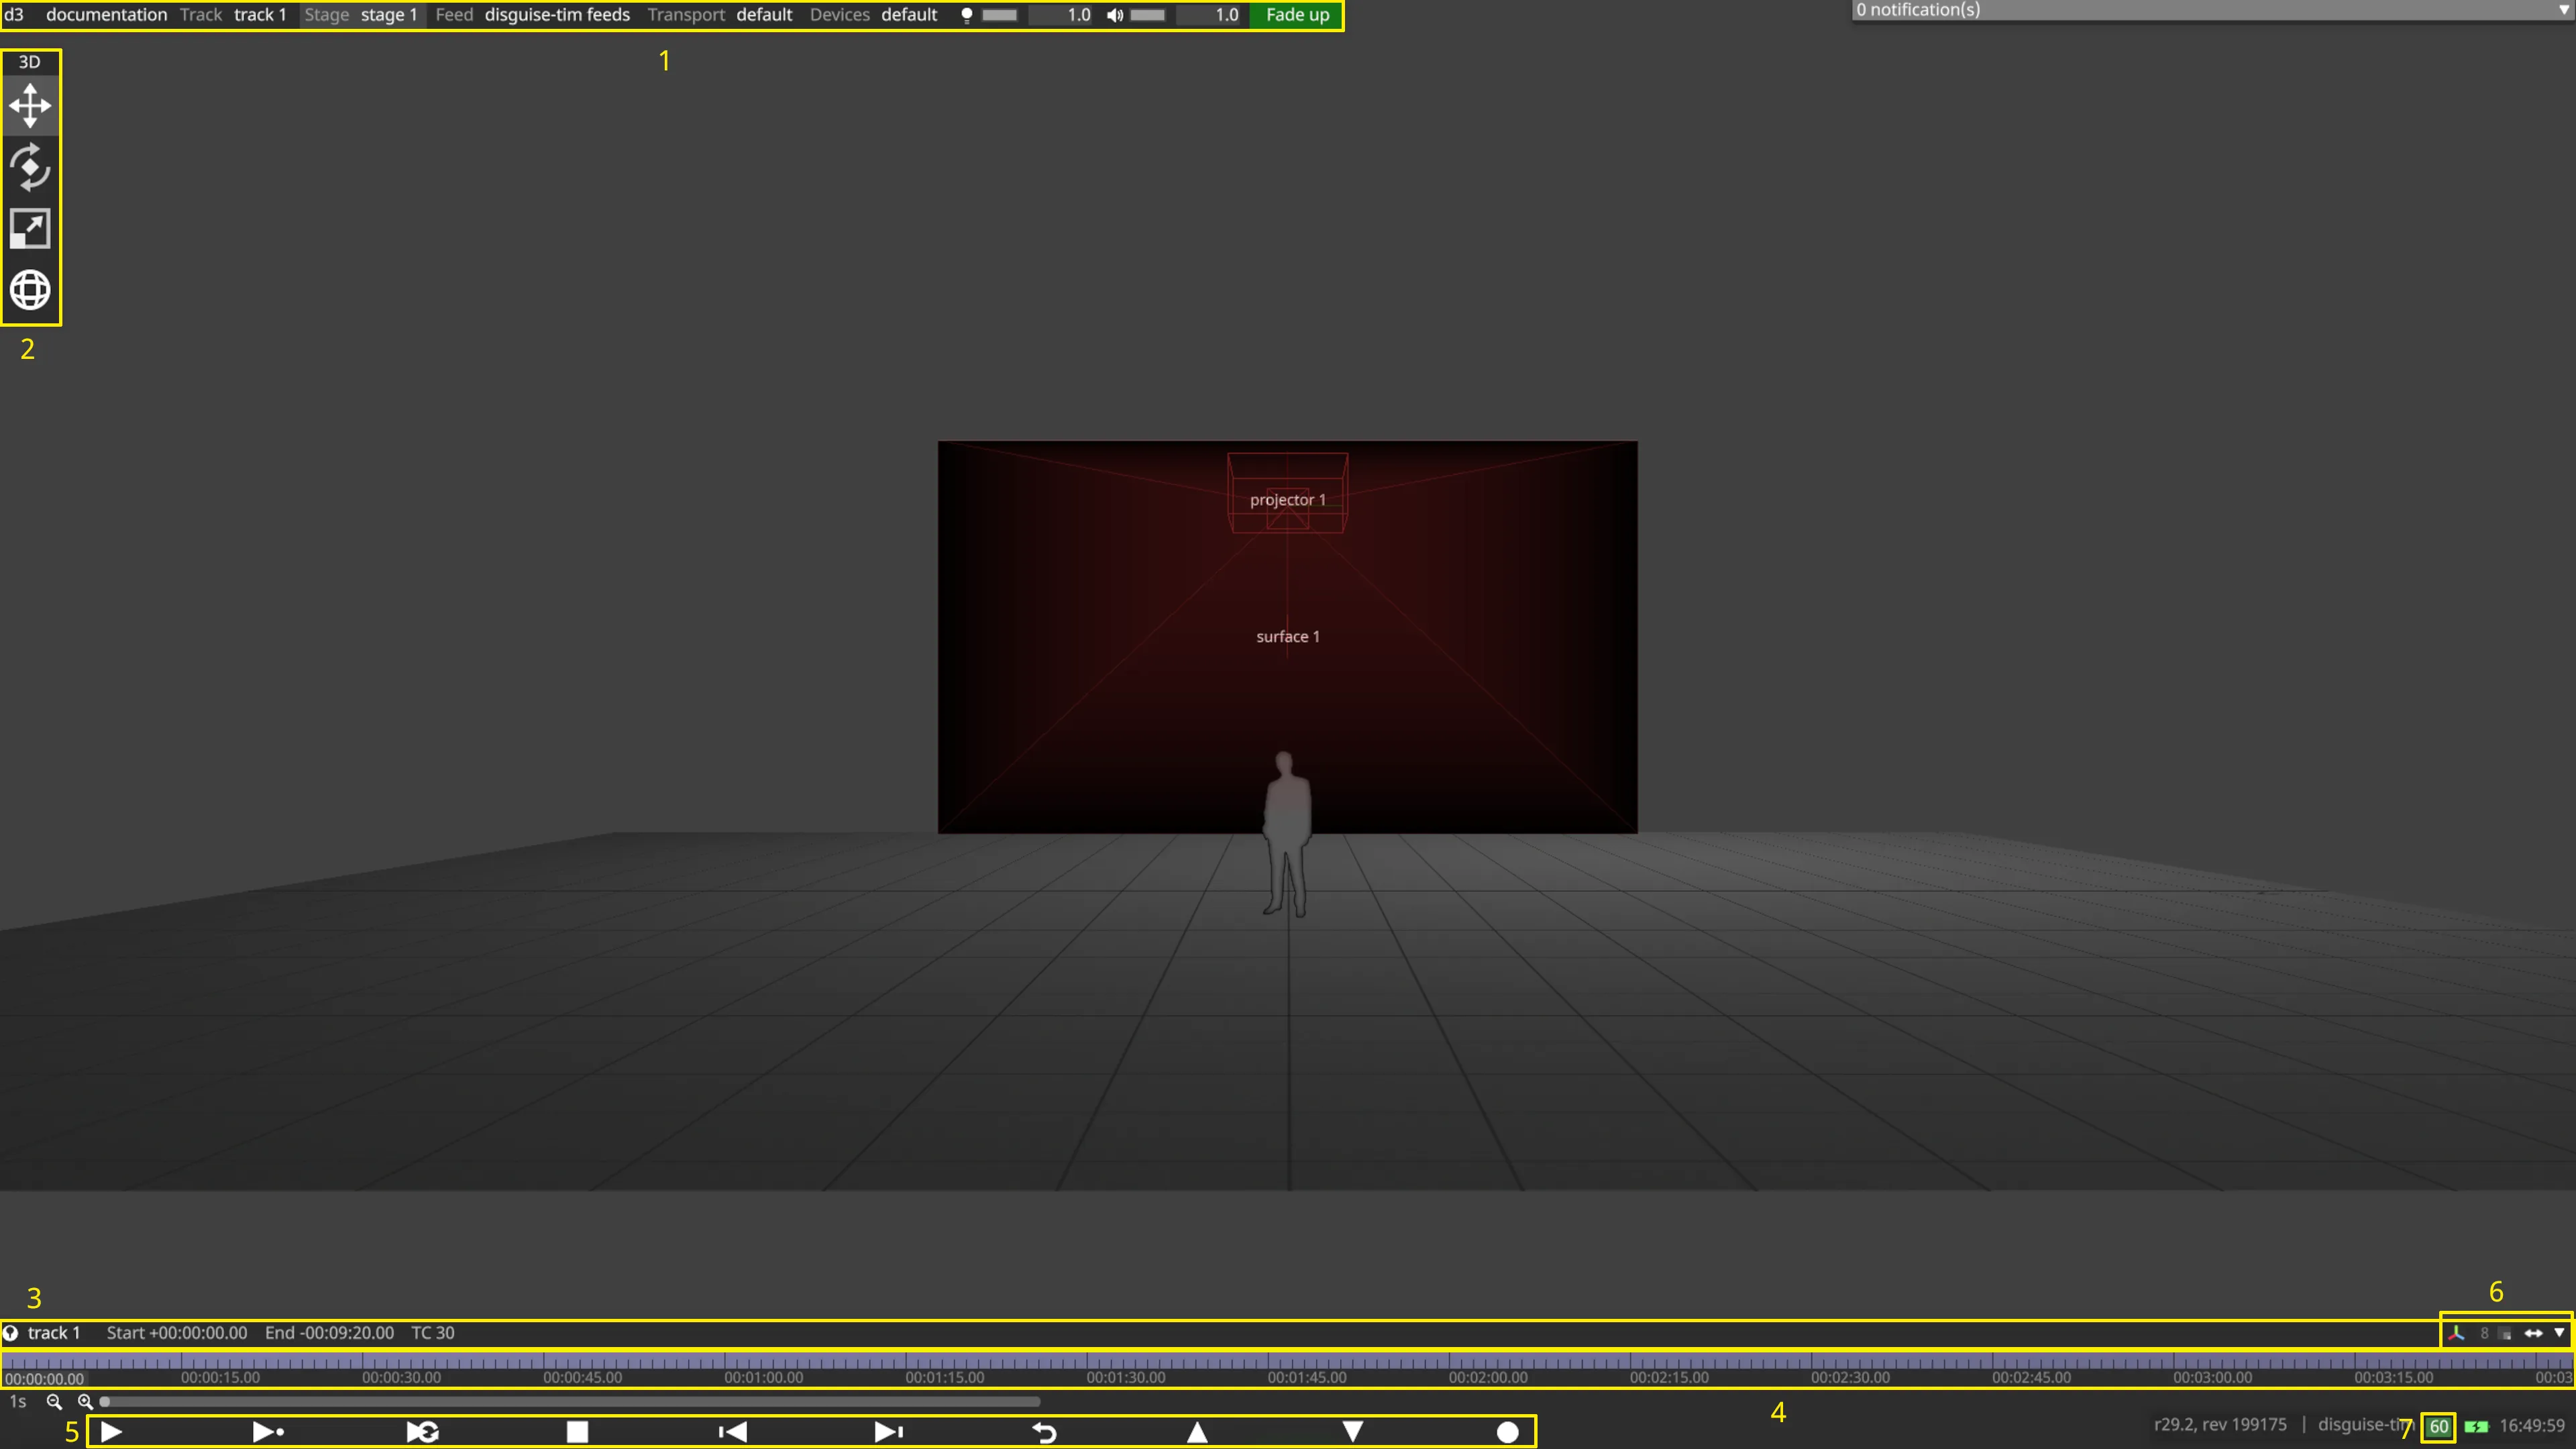
- Dashboard
- 3D Manipulators
- Track
- Timeline
- Transport controls
- 3D Manipulators toggle, Proxy Maker, Maximise and Minimise Timeline toggles. [L - R]
- FPS - click FPS box for Monitoring Manager
Dashboard
Section titled “Dashboard”This is the main menu of the system where you can access any system function. This is a standard object editor showing you the top level state of the system; hence the name. The menus, from left to right, are:
Options
Section titled “Options”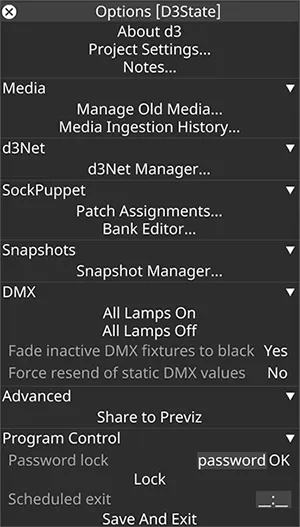
Right-click d3 in the dashboard to open the Options menu.
Project name
Section titled “Project name”The name of the project: this is the name of the .d3 file you are running, not the folder you are running it from.
Left-click track to open the Track manager. This shows a list of tracks which you can choose from and edit/play. All sequencing and timeline information is organised into tracks. The entire show may be placed into one track or can be divided into multiple tracks.
Left-click stage to open the Stage level. The Stage level uses the Stage Visualiser to view your current stage from any angle and play video from the Timeline onto the stage in real-time, avoiding the need for time consuming re-renders.
Right-click stage to open the Stage editor. This allows you to choose the venue, add or remove screens, change the floor dimensions, change the number of people, set labeling of objects on/off, set the rendering style of virtual projectors and change the camera point of view. You can then create a completely new stage and use the Stage editor to switch freely between your different stages.
Left-click Feed to open the Feed level. The Feed level uses the Feed Visualiser to view how content is mapped from your virtual screens in the Stage level to the physical output display heads.
Right-click feed to open the Feed editor. The Feed editor controls how the screen content is configured on the output heads. You can then create a completely new feed and use the Feed editor to switch freely between your different feeds. This is very useful as you can switch to a completely different set of output devices at the click of a button.
Transport
Section titled “Transport”Left-click transports to open the transport manager. This shows a list of control objects which manage all external show control.
Right-click transports to open the transport editor. This allows you to edit the properties of your show control objects, dictating how Designer responds to or generates external control signals. With this menu, you can set up MTC/ SMPTE clock chasing, DMX/Art-Net transport control, MIDI show control cueing, MIDI transport control, OSC, and a variety of other connection protocols.
Devices
Section titled “Devices”Left-click Devices to open the DeviceManager. For more information on this see the Devices chapter.
Right-click Devices to open the Devices menu. The Devices menu shows a list of active devices, from which you can open a Devices manager that lists which internal or external devices are installed. Examples of devices are MIDI control surfaces, DMX managers, video input cards, etc.
Video Input and Audio Output patching can be done here.
Brightness
Section titled “Brightness”Left-click the white brightness bar or text field to modify the master output brightness. You can fill in any number between 0 (zero) and 255 (full) in the text field. These are the minimum and maximum values. When brightness is at 0, the bar flashes red.
Right-click the Brightness control to open the Brightness editor. This allows you to edit the minimum and maximum brightness limits, the unit step of a numerical property, and the damping factor.
Volume/Mute Left-click the white volume bar or text field to modify the master audio volume. You can fill in any number between 0 (mute) and 255 (full) in the text field. These are the minimum and maximum values. When output volume is muted, the indicator flashes red.
Right-click the Volume control to open the Volume/Mute editor. This allows you to edit the minimum and maximum audio volume limits, the unit step of a numerical property, and the damping factor.
Output mode
Section titled “Output mode”Left-click Fade Up to open the Output Mode editor.
Fade down (flashing red button)
Section titled “Fade down (flashing red button)”Does a smooth fade to black from the current master level over the configured Fade up/down duration. When faded down, the indicator turns red to indicate that output is black.
Fade up (green)
Section titled “Fade up (green)”Enables full output levels, fading up over the configured Fade up/down duration.
Hold (flashing red button)
Section titled “Hold (flashing red button)”Stores the last active frame and holds that frame in the output device until further notice, enabling you to continue working on the show in the Stage visualiser while for example outputting lineup content to LED processors or projectors.
Notifications tab
Section titled “Notifications tab”The Notifications tab gives you a list of notifications and error messages, such as missing files or device errors.
Stage Visualiser
Section titled “Stage Visualiser”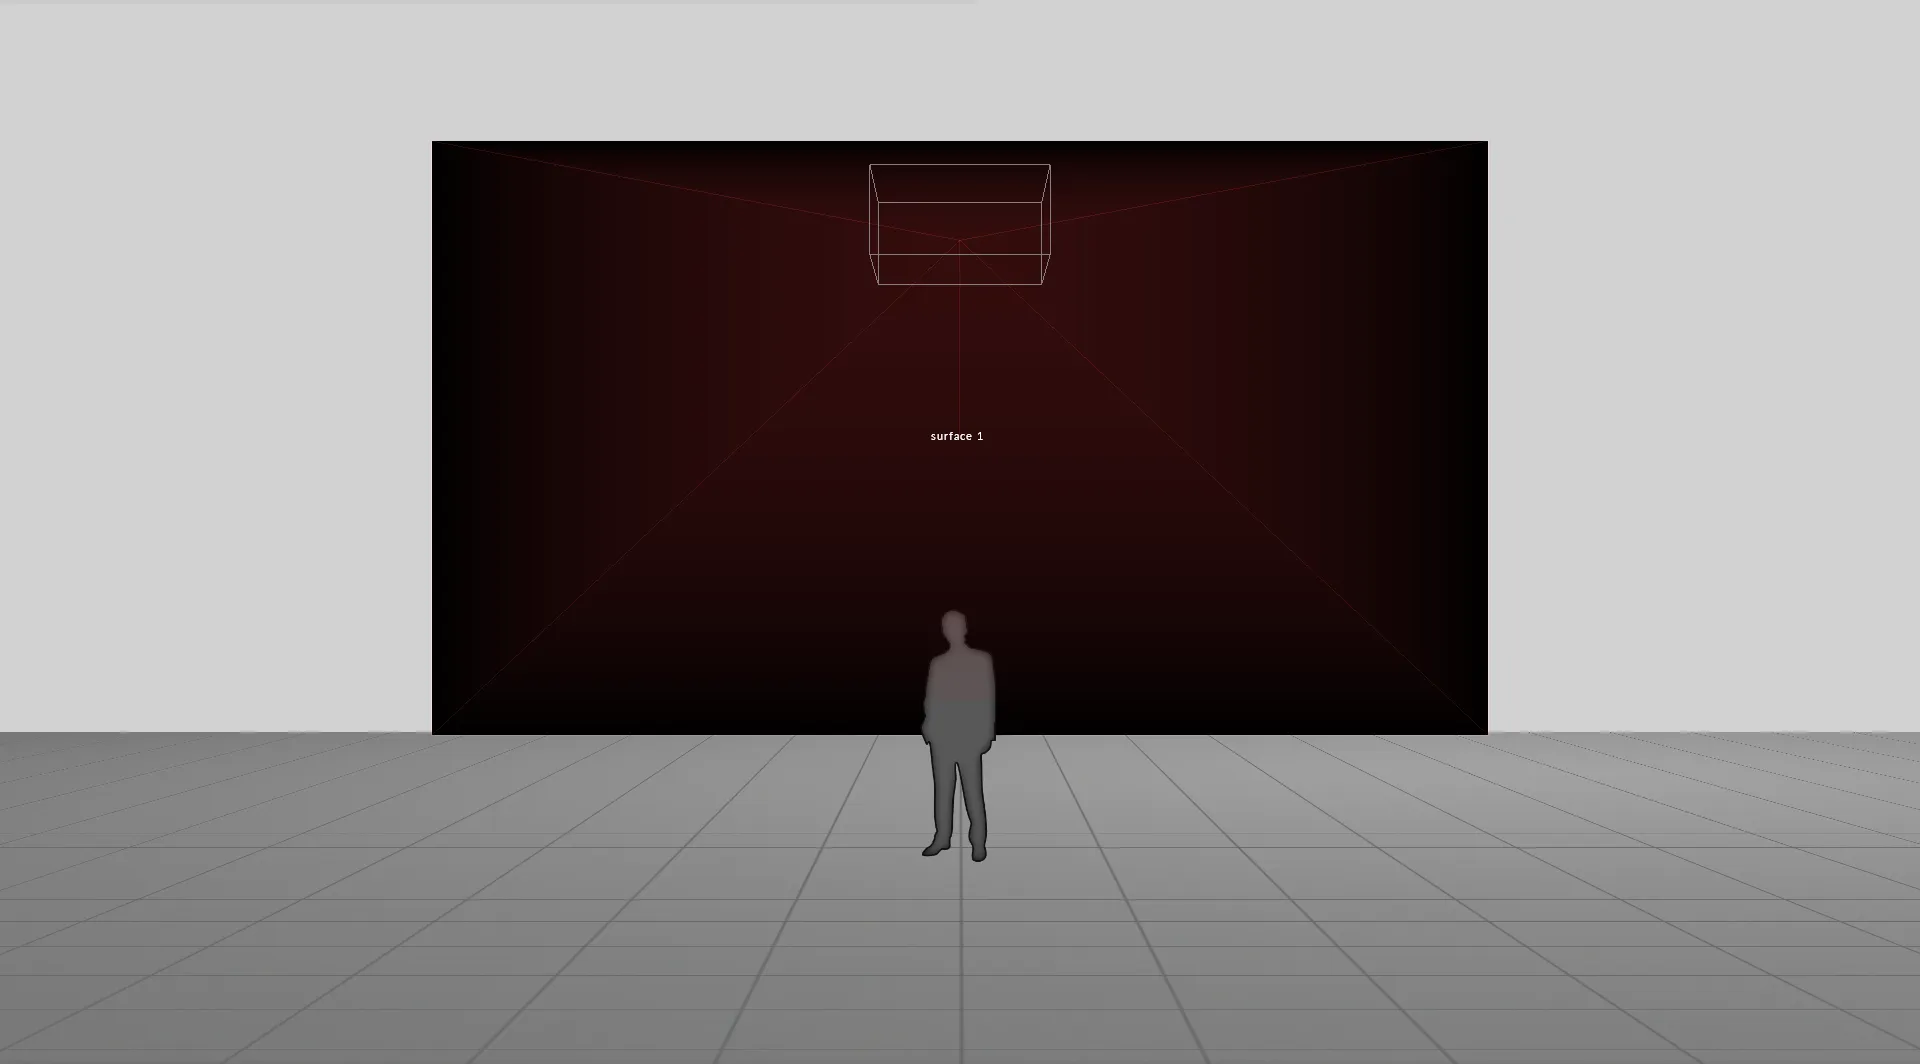
The Stage Visualiser occupies the central portion of the screen. It shows a 3D visualisation of the stage and screens, and allows you to move the virtual camera around the stage. The Stage Visualiser is replaced by the Feed Visualiser when you switch from the Stage level to the Feed level.
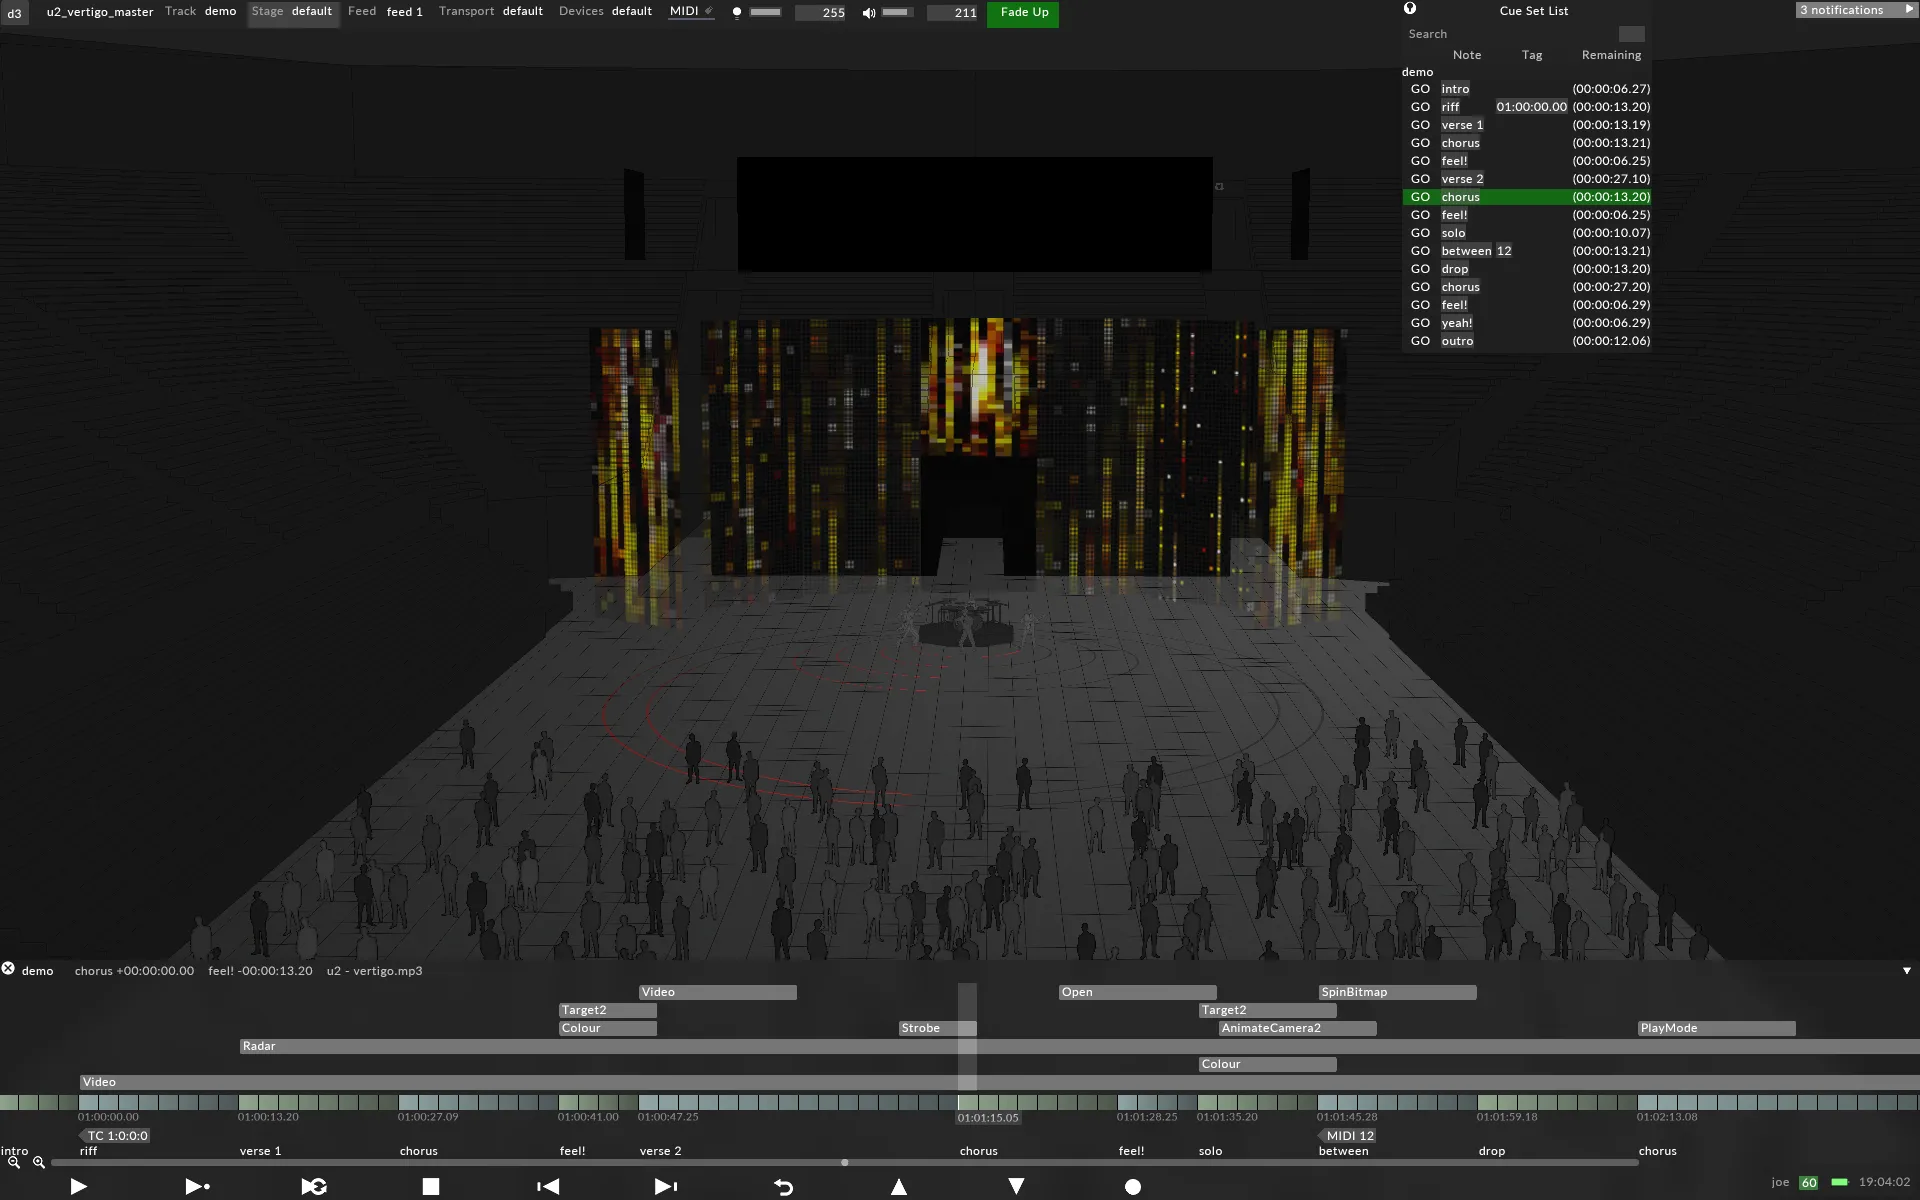
Timeline
Section titled “Timeline”The editor at the bottom of the screen is called the Track Player. The Track Player is used to control the Timeline.
The top bar is called the Title bar, which shows you the track name and gives you a readout of the current time, section and audio guide within the track.
The Layer editor is located just below the Title bar. It shows you which layers are active and where they are on the Timeline.
Next are the Track bars which can be identified by the coloured section blocks. Each section has a different colour and one block equals one bar (by default, one bar is equal to four seconds).
Below the section blocks, you can see the textual Timeline notes, followed by the Transport controls.
The Track widget can be resized by clicking and dragging its left or right edges. To move it horizontally, click and drag the title bar. At any time, you can maximise it back to screen width by clicking the ![]() icon. A more focused, minimised view is also available by clicking on the
icon. A more focused, minimised view is also available by clicking on the ![]() icon.
icon.
