Bank Editor
What is the Bank Editor?
Section titled “What is the Bank Editor?”The Bank Editor enables us to assign DMX values to the various resources required within a layer. Examples of resource parameters include video or bitmap files, mapping types, or HTML bookmarks. This process is managed on a bank-and-slot basis.
Banks & slots
Section titled “Banks & slots”Within the layer personality, Sockpuppet assigns two channels to each resource parameter. The first channel is for the resource bank, and the second is for the resource slot. For example, within the video layer personality, channel 8 is for the video bank and channel 9 is for the video slot.
Example: If we have a video asset assigned to video slot 5 in video bank 3, we would need to output the following from the lighting console to recall it:
channel 8 @ 3, channel 9 @ 5.
This means that we can have a maximum of 255 video banks and within each of those we can have 255 video slots, giving us a total of 65025 assignable video slots (255*255) for each resource type.
Main interface elements
Section titled “Main interface elements”To open the Bank editor right-click on the state menu (top left) and underneath the sockpuppet tab left-click Bank.
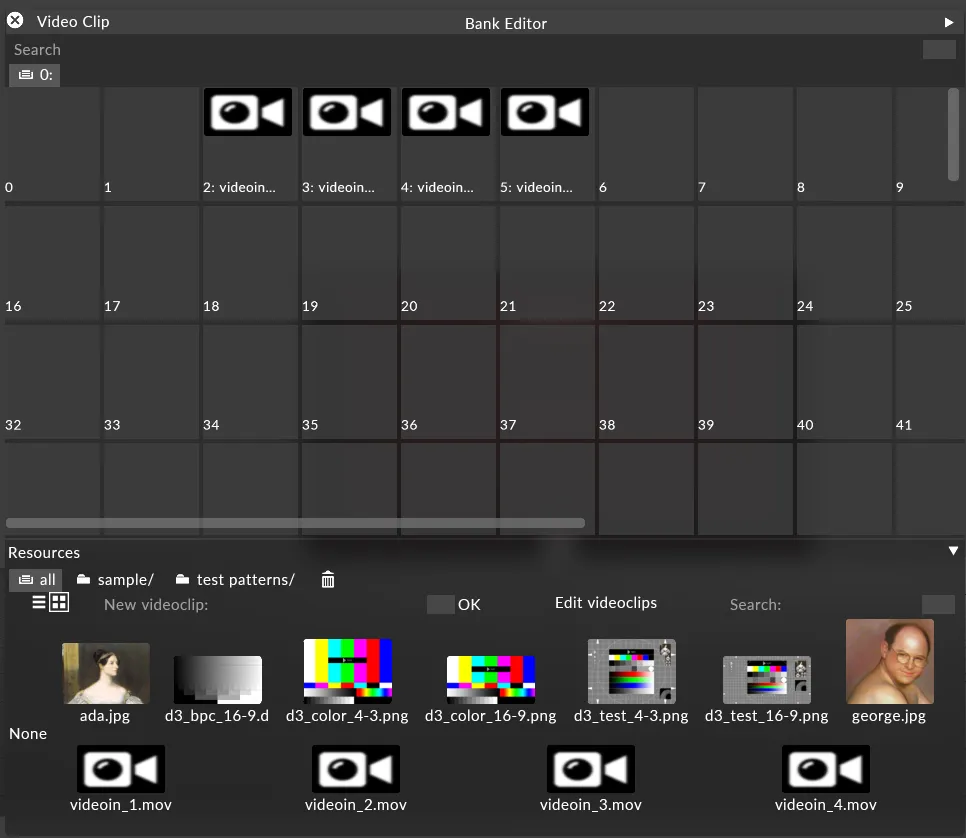
At the top of the window, the currently selected resource type is displayed (in this case, Video Clip). Left-click Video Clip to open a menu of other resource types, such as Audio Track, Cue, Logical Audio Out Device, Mapping, Notch File, and Texture.

You can populate the resource bank with resources by dragging them from the resources view in the bottom of the window to empty bank slots.
Preferences
Section titled “Preferences”The Bank Editor preferences can be opened by left-clicking the small white triangle in the top-right corner of the window.
View type
Section titled “View type”Select how you would like to view the Bank Editor. Grid displays the slot window in a grid format, and List displays the slot window as a list.
Columns
Section titled “Columns”Specifies the number of columns displayed by default.
Parameter tracking
Section titled “Parameter tracking”By left-clicking on this field and setting it to On, we will have a visual representation of which slot we currently have selected; so as the console programmer scrolls through the slots and banks on the encoders, a red square will be drawn over the slot we currently have selected.
Auto-populate
Section titled “Auto-populate”When disabled, it stops assets being added automatically based on their file name.
Search function
Section titled “Search function”Allows you to search through assets already assigned to slots. Matching results are highlighted with a light blue square.
Working with banks
Section titled “Working with banks”Banks are configured and managed using the tabs bar above the slot layout. By default, bank 0 is already created.
To open the bank options window, right-click on an existing bank (including bank 0).
Rename
Section titled “Rename”Specify a custom name for the bank, then click OK or press Return.
Duplicate
Section titled “Duplicate”Copy the contents of the selected bank into another bank. Specify the destination bank number, then click OK or press Return.
New bank
Section titled “New bank”Create a new bank by entering the desired bank number, then clicking OK or pressing Return.
Auto-populate banks from directory
Section titled “Auto-populate banks from directory”Please see Adding Assets to Slots below.
Reset bank
Section titled “Reset bank”Returns the bank to its default state and clears any populated slots.
Remove missing
Section titled “Remove missing”Removes missing media from the selected bank.
Delete bank
Section titled “Delete bank”Left-click to permanently delete the bank from the Bank Editor.
Adding assets to slots
Section titled “Adding assets to slots”Manually add assets to slots
Section titled “Manually add assets to slots”To manually add an asset to a slot:
- Select the resource type you wish to assign (for example, Textures).
- Left-click the thumbnail in the library.
- Drag and drop it onto the slot you wish to assign. Repeat this process for all required content.
If you have your content organised into files and boxes (read about organising your content here) then you can quickly populate your slots with whole boxes at a time. To do this simply hold down Alt on the keyboard and left-click over the box you wish to use, this will turn our cursor into a white arrow which we can drag from our box to the first slot we wish to use, release and it will populate the slots with the contents of that box.
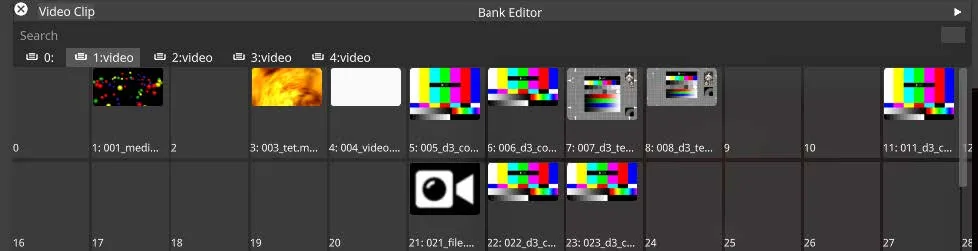
Using auto-populate to add assets to slots
Section titled “Using auto-populate to add assets to slots”Another widely used method of assigning DMX values to assets, is adding numerical values to folders and files within your assets library. Designer also supports this workflow and is managed via the auto-populate field in the bank options (see above for how to access).
Auto-populate file structure:
Each of the content folders located within the objects/videofile folder needs to be labelled numerically, for example: 001_Foldername
Files within this folder should follow this same numeric labelling scheme: 001_filename
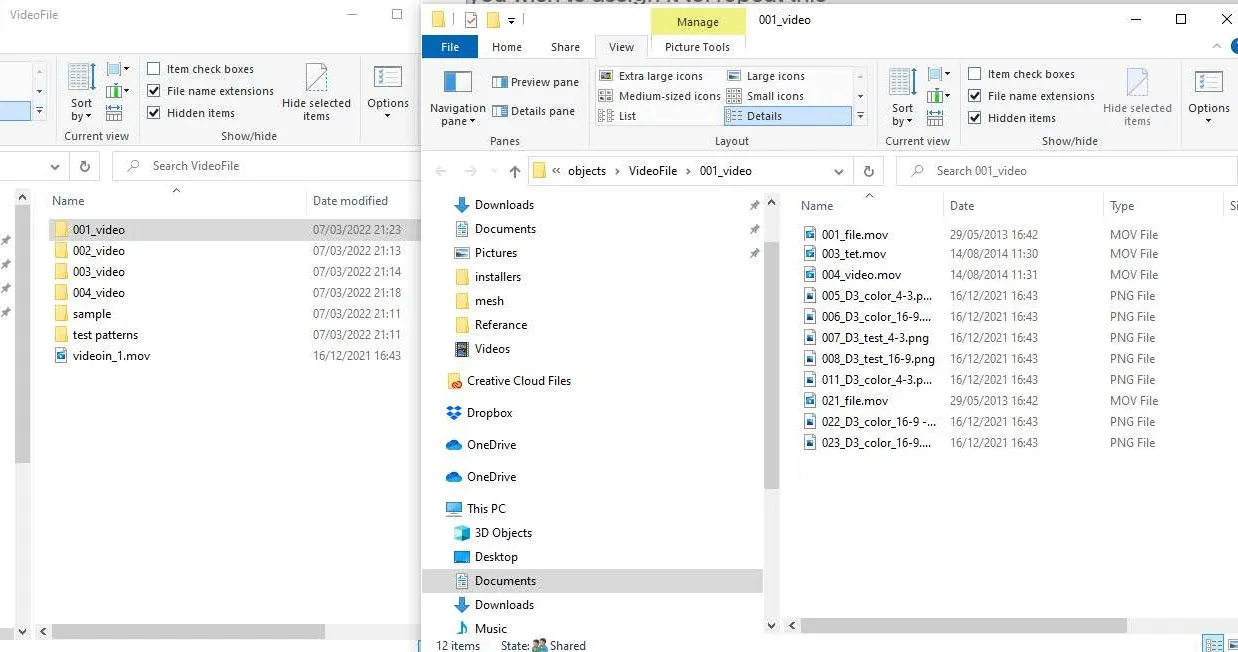
Creating a directory
Section titled “Creating a directory”When using this method to populate your banks and slots, you will need to start by numbering your folders and files within the project directory in Windows.
Navigate to the resource folder you wish to use (we will be using DxTexture as an example) and number your folders within the DxTexture folder, these will become your bank numbers. Within each of these folders you will need to number your asset files, these will become your slot numbers.
Clearing assets from slots
Section titled “Clearing assets from slots”To clear a slot, overwrite it with the None thumbnail from the resource library. Left-click the None thumbnail and drag it onto the populated slot.
Alternatively, use the Reset Bank option to clear the entire bank.n to clear out the entire bank.
Banks with OSC
Section titled “Banks with OSC”As of r17.3, banks can also be used with OSC sockpuppet.
- The path is always the same:
/d3/layer/Typeoflayer/Nameoflayer.
For example:/d3/layer/Video/video - It’s always one message (One address/path + one or two integers)
- Option one: One path and one integer with bank and slot encoded into one number.
For example:bank 1 slot 1is256+1=257. - The formula for a single integer is
bank*255+slot
For example:bank 0 slot 1is0*255+1. - Option two: One path and two integers with bank in the first integer and slot in the second integer.