Projection Examples - Shrink wrapping
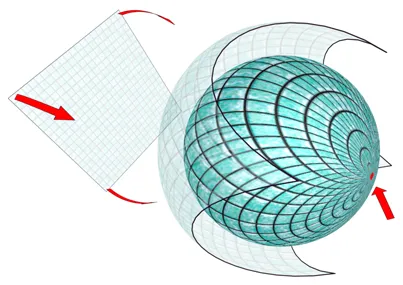
Shrink wrapping is suitable for projection surfaces curving across multiple axes, for example a sphere or a car. However, depending on the creative requirements, a Pelt map may be more suitable.
How the UV map is generated
Section titled “How the UV map is generated”The Shrink wrap will spherically project UV coordinates to the surface, by truncating the corners of the map and joining them at a
single pole. This will enable content to flow across the surface smoothly, because the UV map will only contain one singularity.
Step 1 - Generating the UV map (3ds Max)
Section titled “Step 1 - Generating the UV map (3ds Max)”- Select the UVW Map modifier.
- From the list of projection types select shrink wrap.
- The shrink wrap will project UV coordinates from its normals to the surface. Therefore, it is necessary to fit the shrink wrap’s position, orientation and scale to the surface.
- Select the Unwrap UVW modifier.
- Open the Edit UVWs window to view the UV map.
The image below shows a non-uniform checker pattern rendered to the surface, which indicates the UV map has an uneven distribution of UV coordinates. To fully unwrap the surface the UV map should be relaxed.
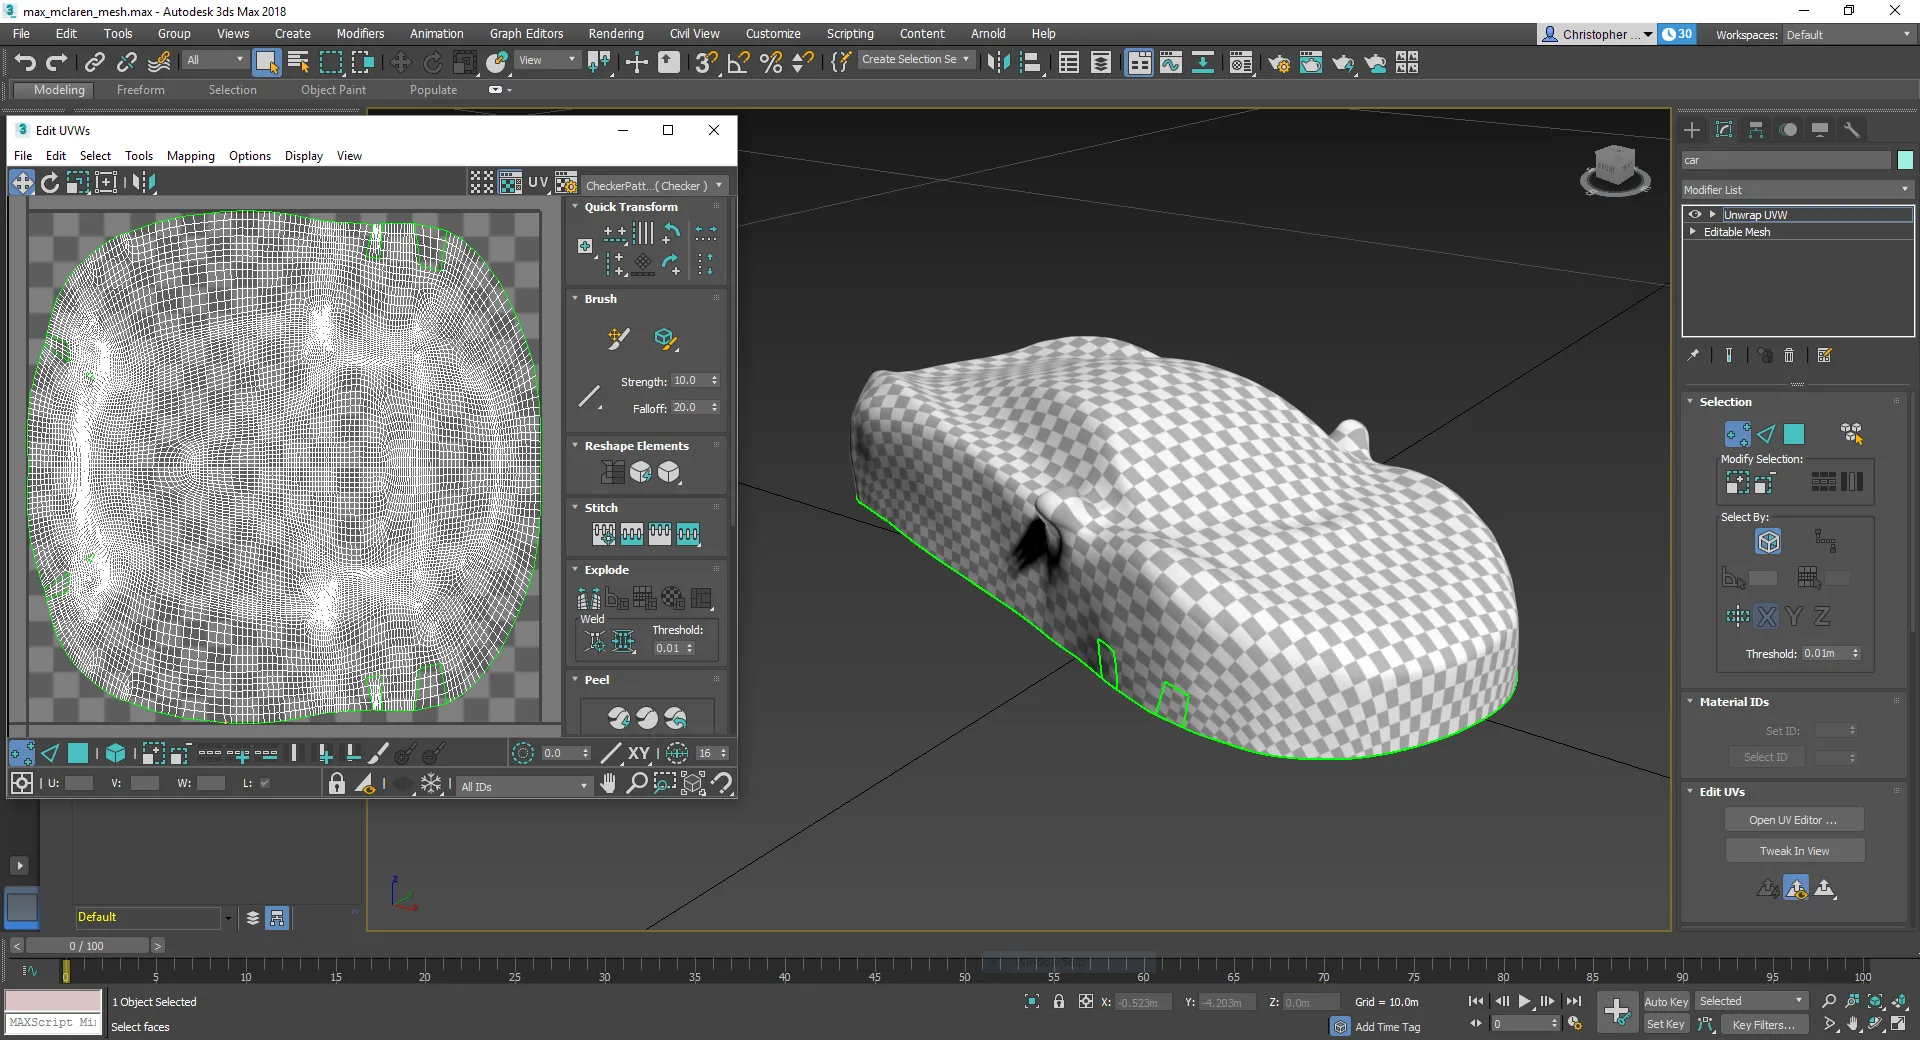
A 3D model of the Audi A7 mesh shrink wrapped in 3ds Max.
Step 2 - Rendering UV maps to content templates
Section titled “Step 2 - Rendering UV maps to content templates”The images below show the content template and how its resolution was calculated. When a projection surface is shrink wrapped, it is problematic to calculate the resolution mathematically. However, it is possible to calculate the resolution visually. The template’s resolution is 3448x1424 pixels.This was calculated following the steps below:
- Export the projection surface as an .obj from the 3D application to Designer. Remember to export the .obj’s texture coordinates, as explained in the Exporting UV maps page.
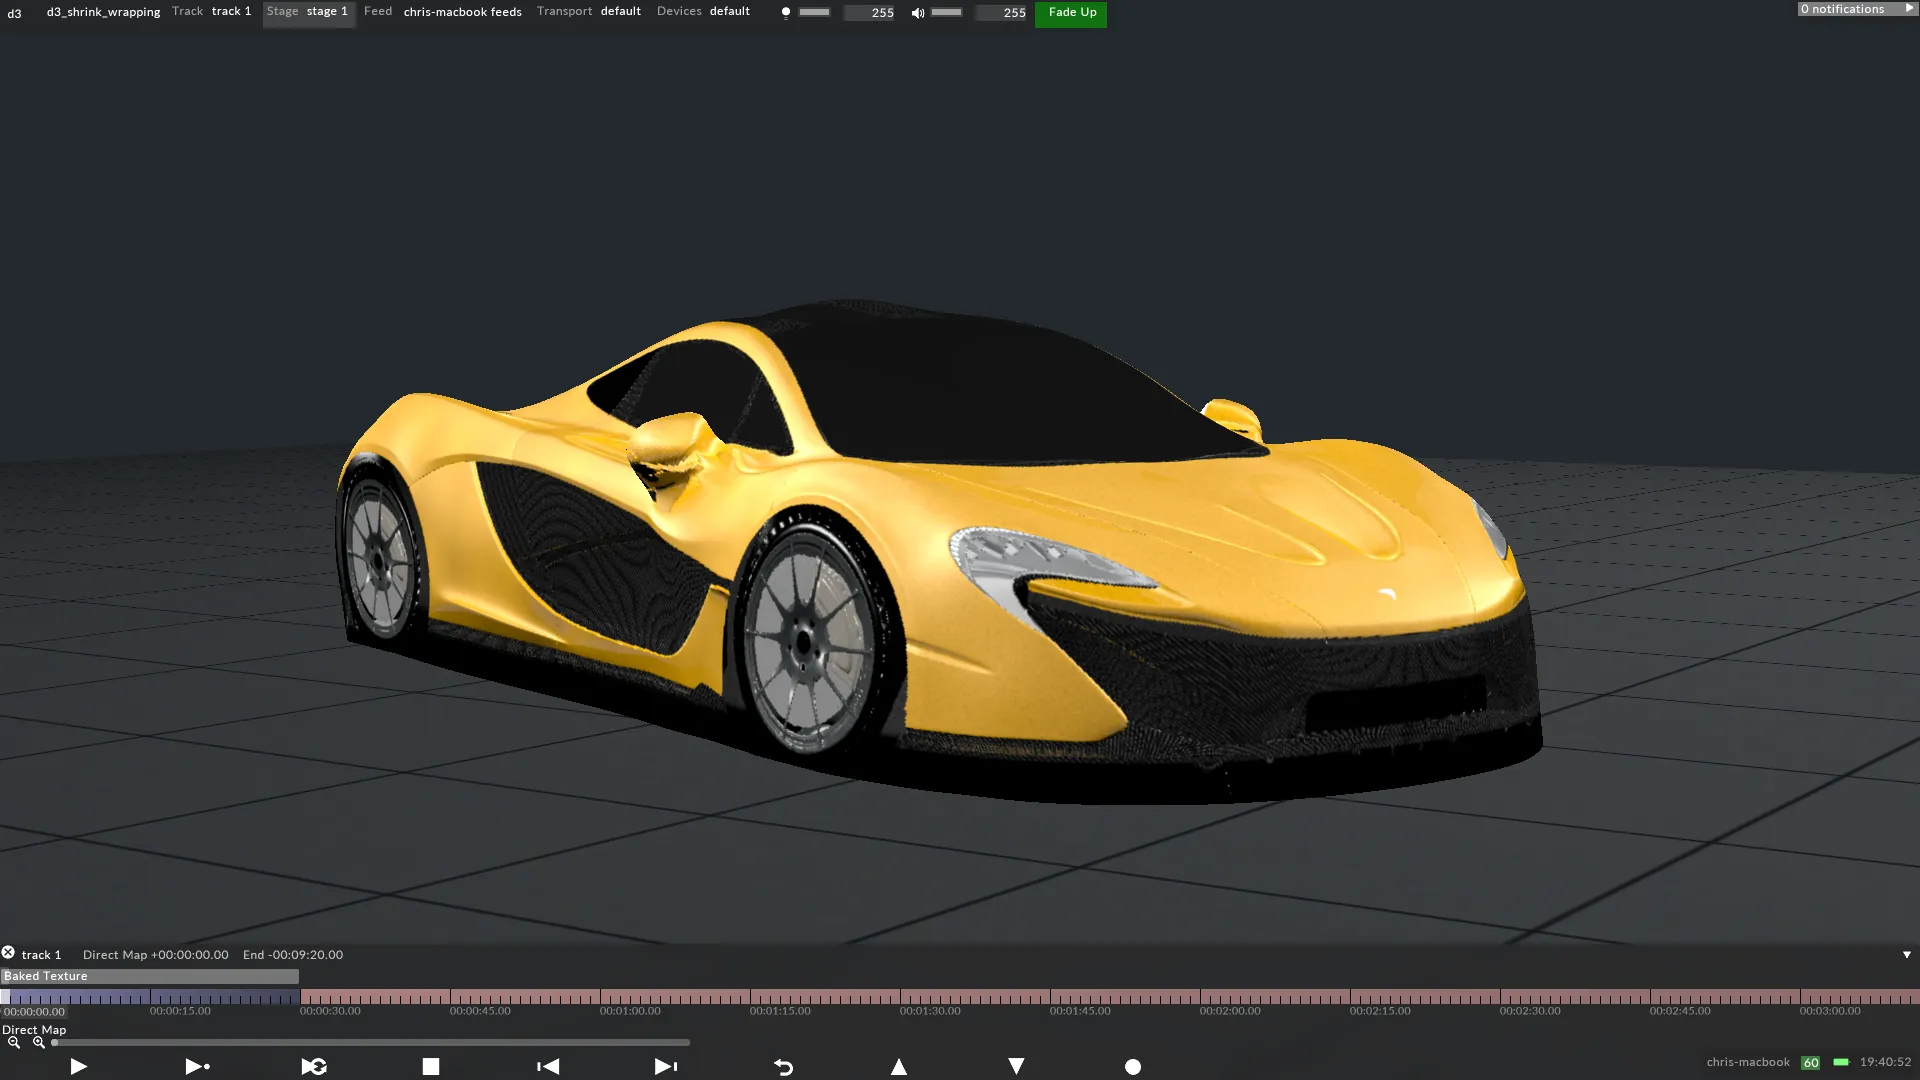
- In Disguise, add the .obj to the Stage as a Screen.
- Create a Bitmap layer on the Timeline.
- From the layer’s DxTexture library, select a texture with a square aspect.
- Direct map the texture to the screen.
- Set the layer’s scale mode to pixel-perfect.
- From the screen’s editor, set a resolution for the horizontal or vertical axis that matches or preferably exceeds, the projector’s pixel density. This requires knowing precisely how many pixels produced by the projector will hit the projection surface.
- Increase / decrease the screen’s resolution across the remaining axis until the texture appears square. This will ensure square pixels are enabled.
- Offset the texture using the pos x and y parameters, to check square pixels are visible across the entire surface.

A square Bitmap Direct mapped to the car screen in Disguise.
A content template rendered from the Audi A7 UV map with a paint texture baked into the shrink wrap.