Projection Examples - Spline mapping
Spline mapping is suitable for projection surfaces curving across multiple axes, for example a coiled snake or a winding road.
How the UV map is generated
Section titled “How the UV map is generated”The Spline map will extrude UV coordinates from a selected spline to be projected to the surface. This will enable content to flow across the surface smoothly, because the UV coordinates will match the surface’s curvature.
Step 1 - Generating the UV map
Section titled “Step 1 - Generating the UV map”The following steps are instructions for generating UVs in 3ds Max.
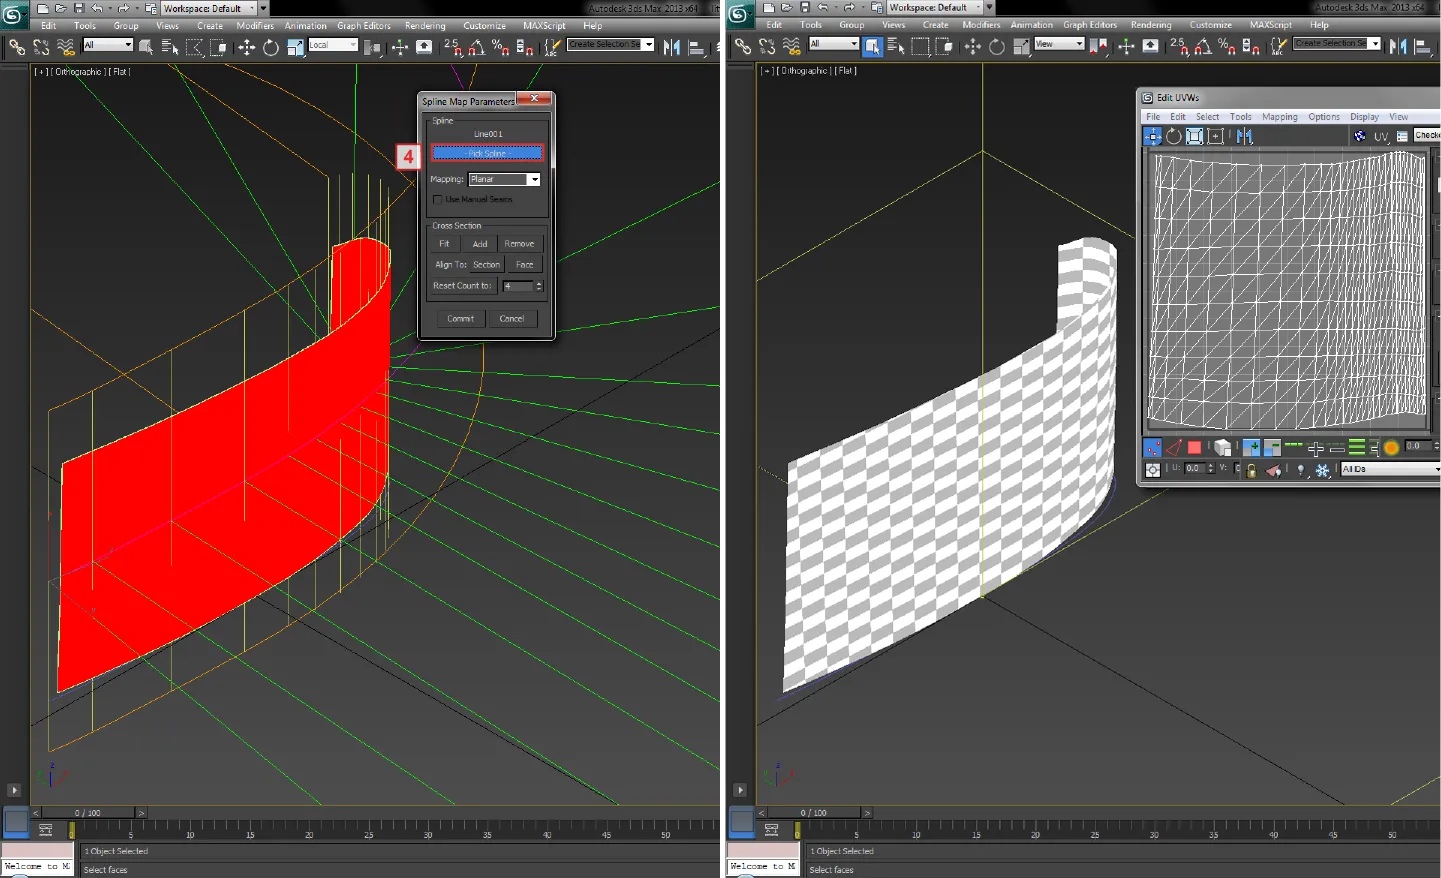
- Draw a spline that snaps to the surface’s bottom edge.
- Plot all the vertices in the same vertical position to ensure the UV projection is orientated correctly.
- Plot the spline across the surface’s widest points to ensure the UV projection is assigned to the entire surface.
- Select Unwrap UVW modifier.
- Select all of the surface’s faces.
- From the list of projection types select spline mapping.
- From the spline map’s parameters select pick spline.
- Open the Edit UVWs window to view the UV map.
- Rotate and normalise the UV map, if necessary.
The image here shows a uniform checker pattern rendered to the surface, which indicates the UV map has an even distribution of UV coordinates.
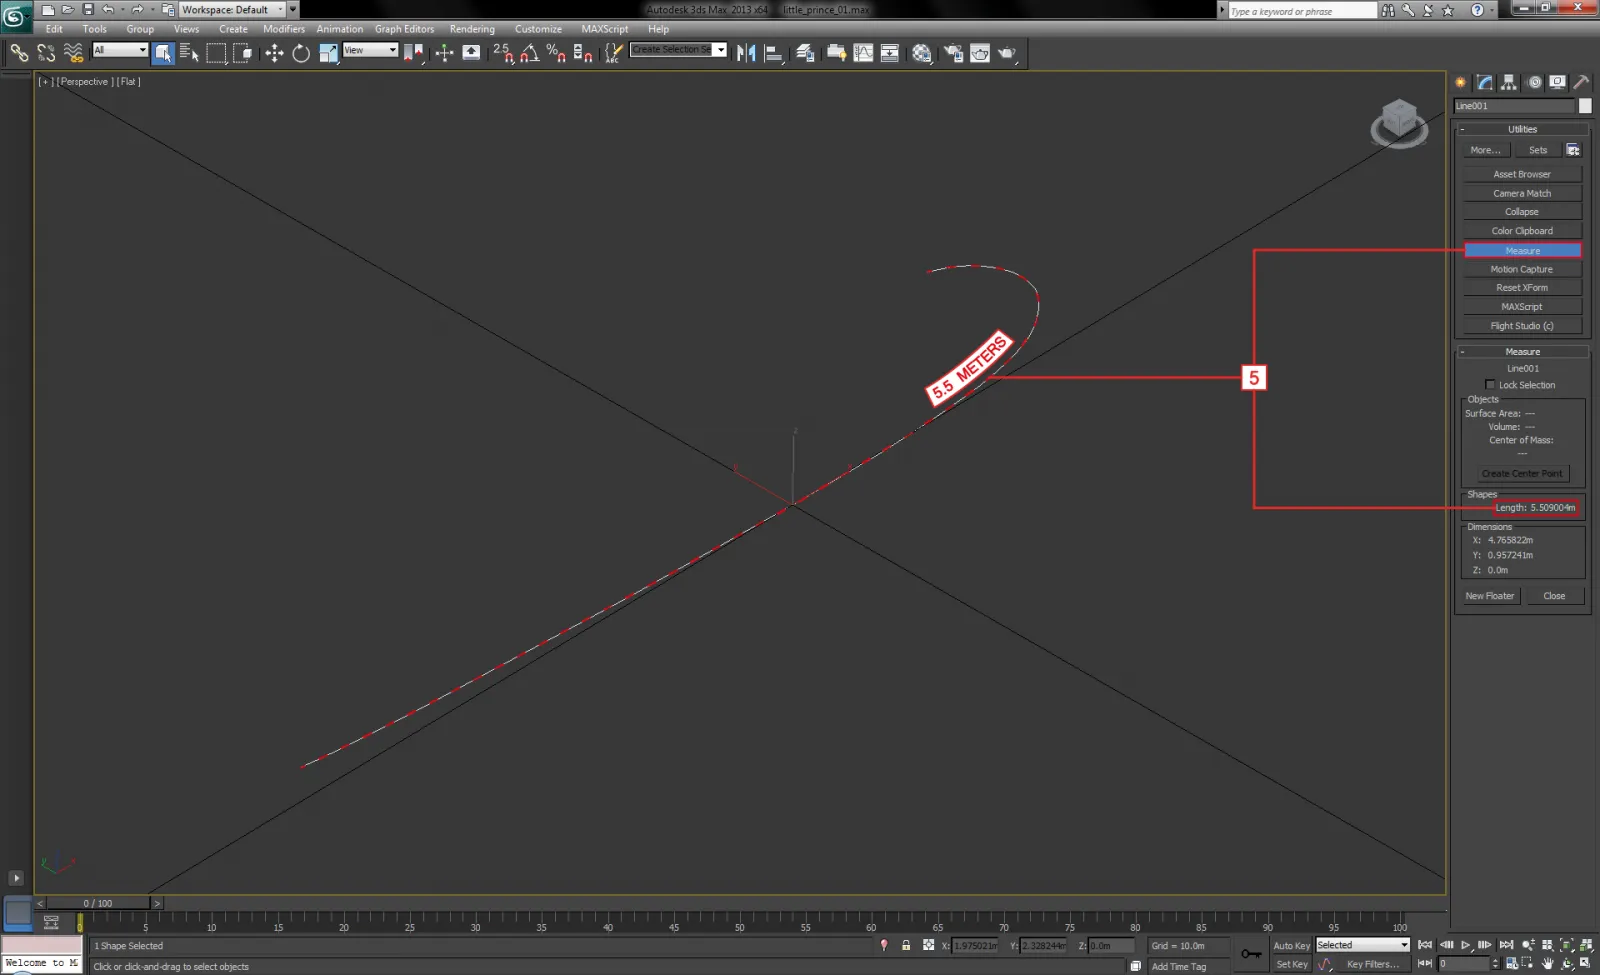
A 3D model of a screen from the Little Prince musical spline mapped in 3ds Max.
Step 2 - Rendering UV maps to content templates
Section titled “Step 2 - Rendering UV maps to content templates”The images below show the content template and how its resolution was calculated. The template’s resolution was calculated by following the same technique used for pixel-perfect projection surfaces. However, the key difference is this template was calculated by measuring the total length of the extruded spline, because in this case the extrusion automatically generated the UV map.
The 3D application should calculate the total length of the spline automatically. In 3ds Max select the spline, Command Panel > Utilities > Measure.
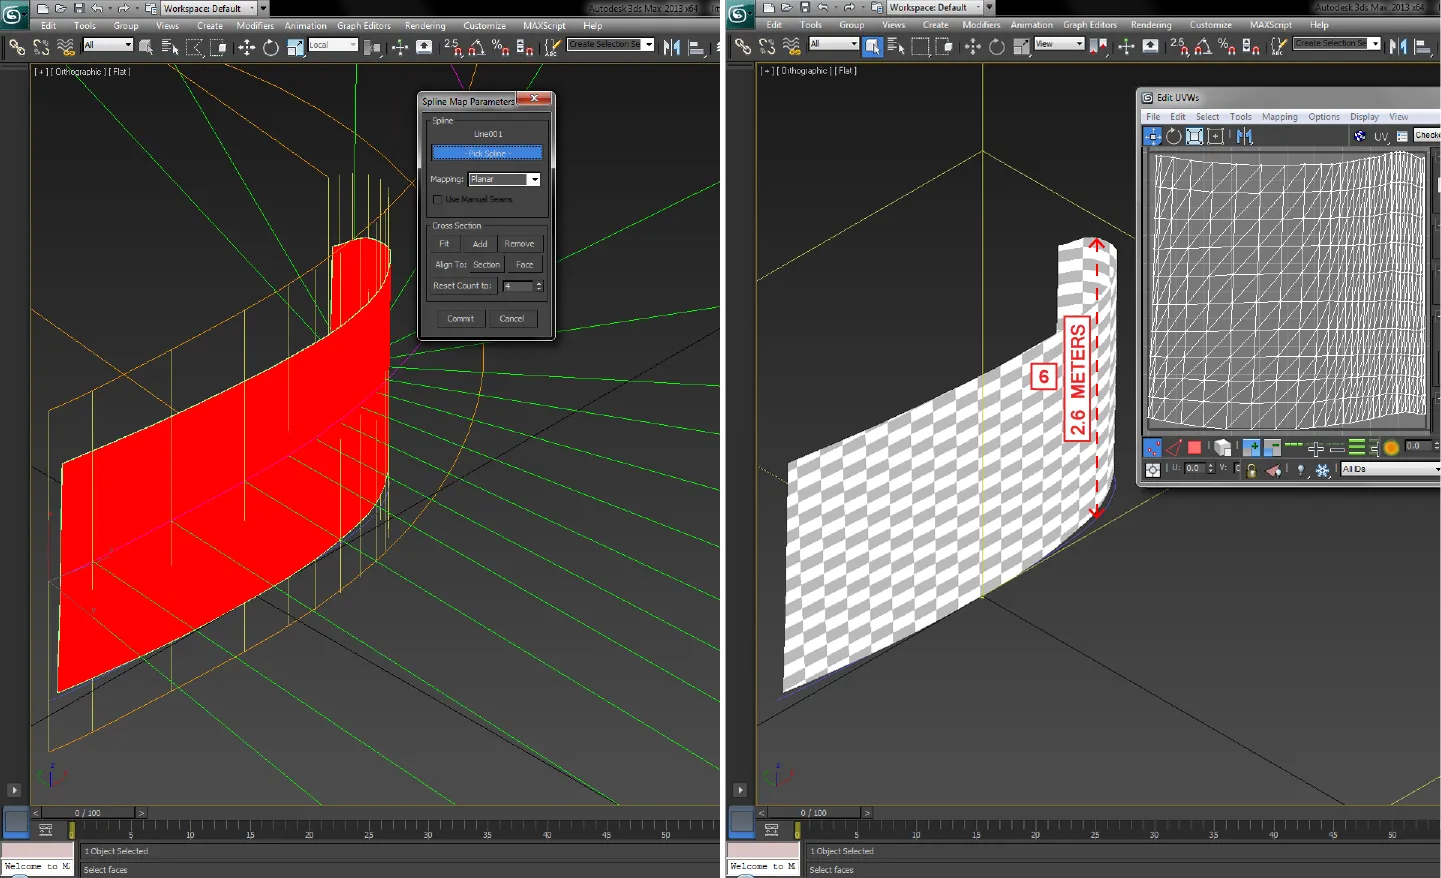
The length of the spline can be measured by selecting it and then selecting Utilities > Measure.
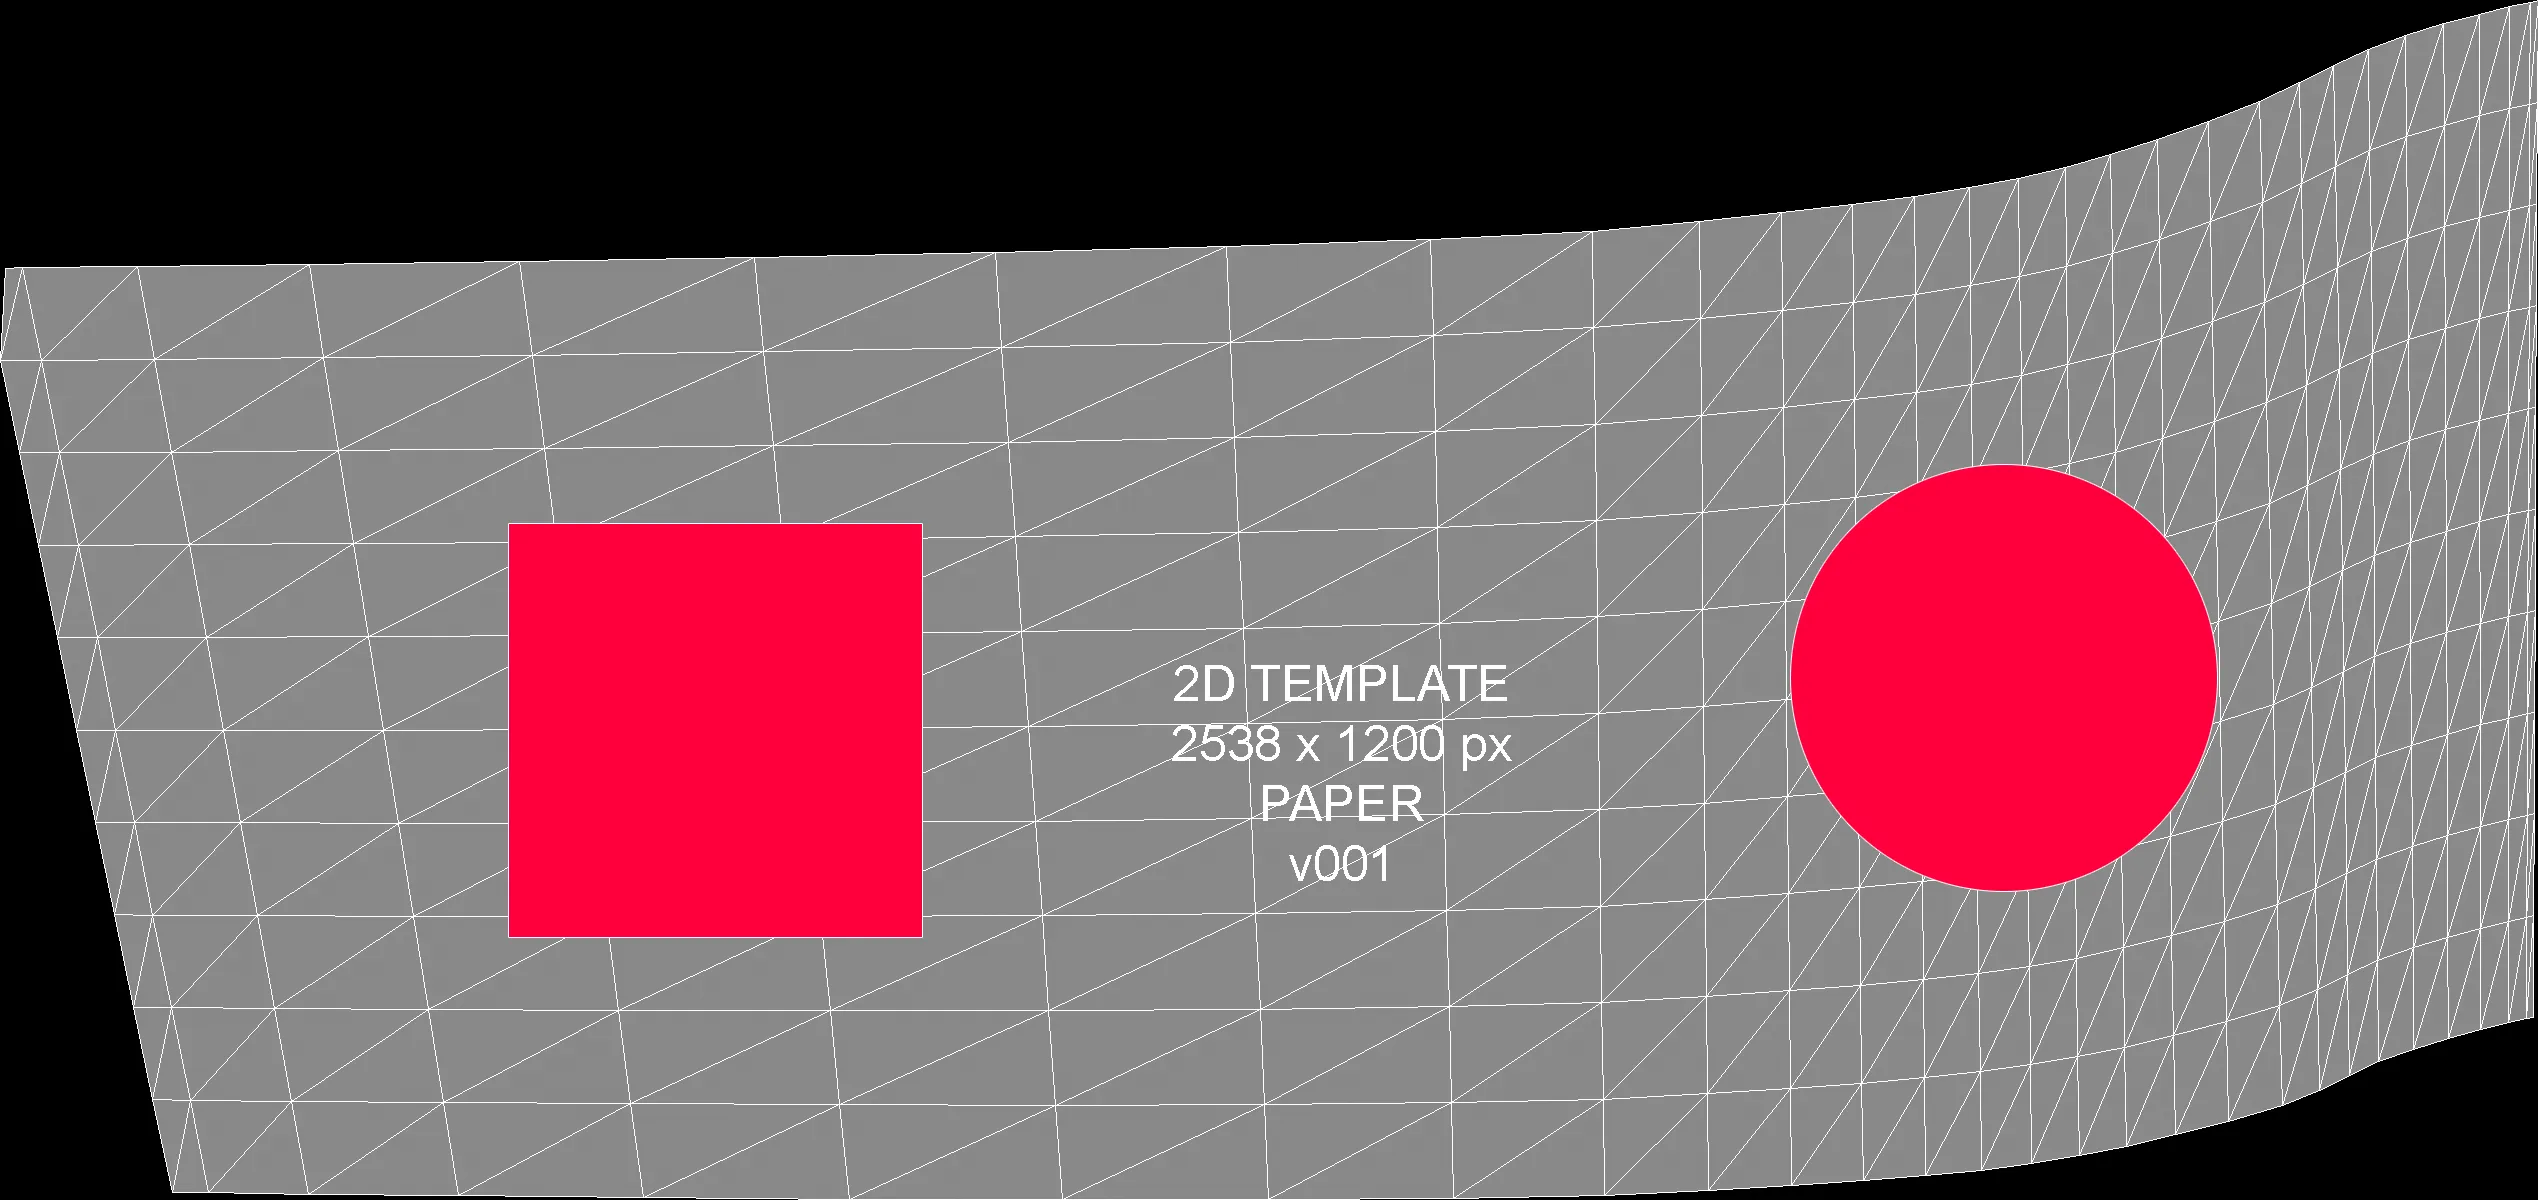
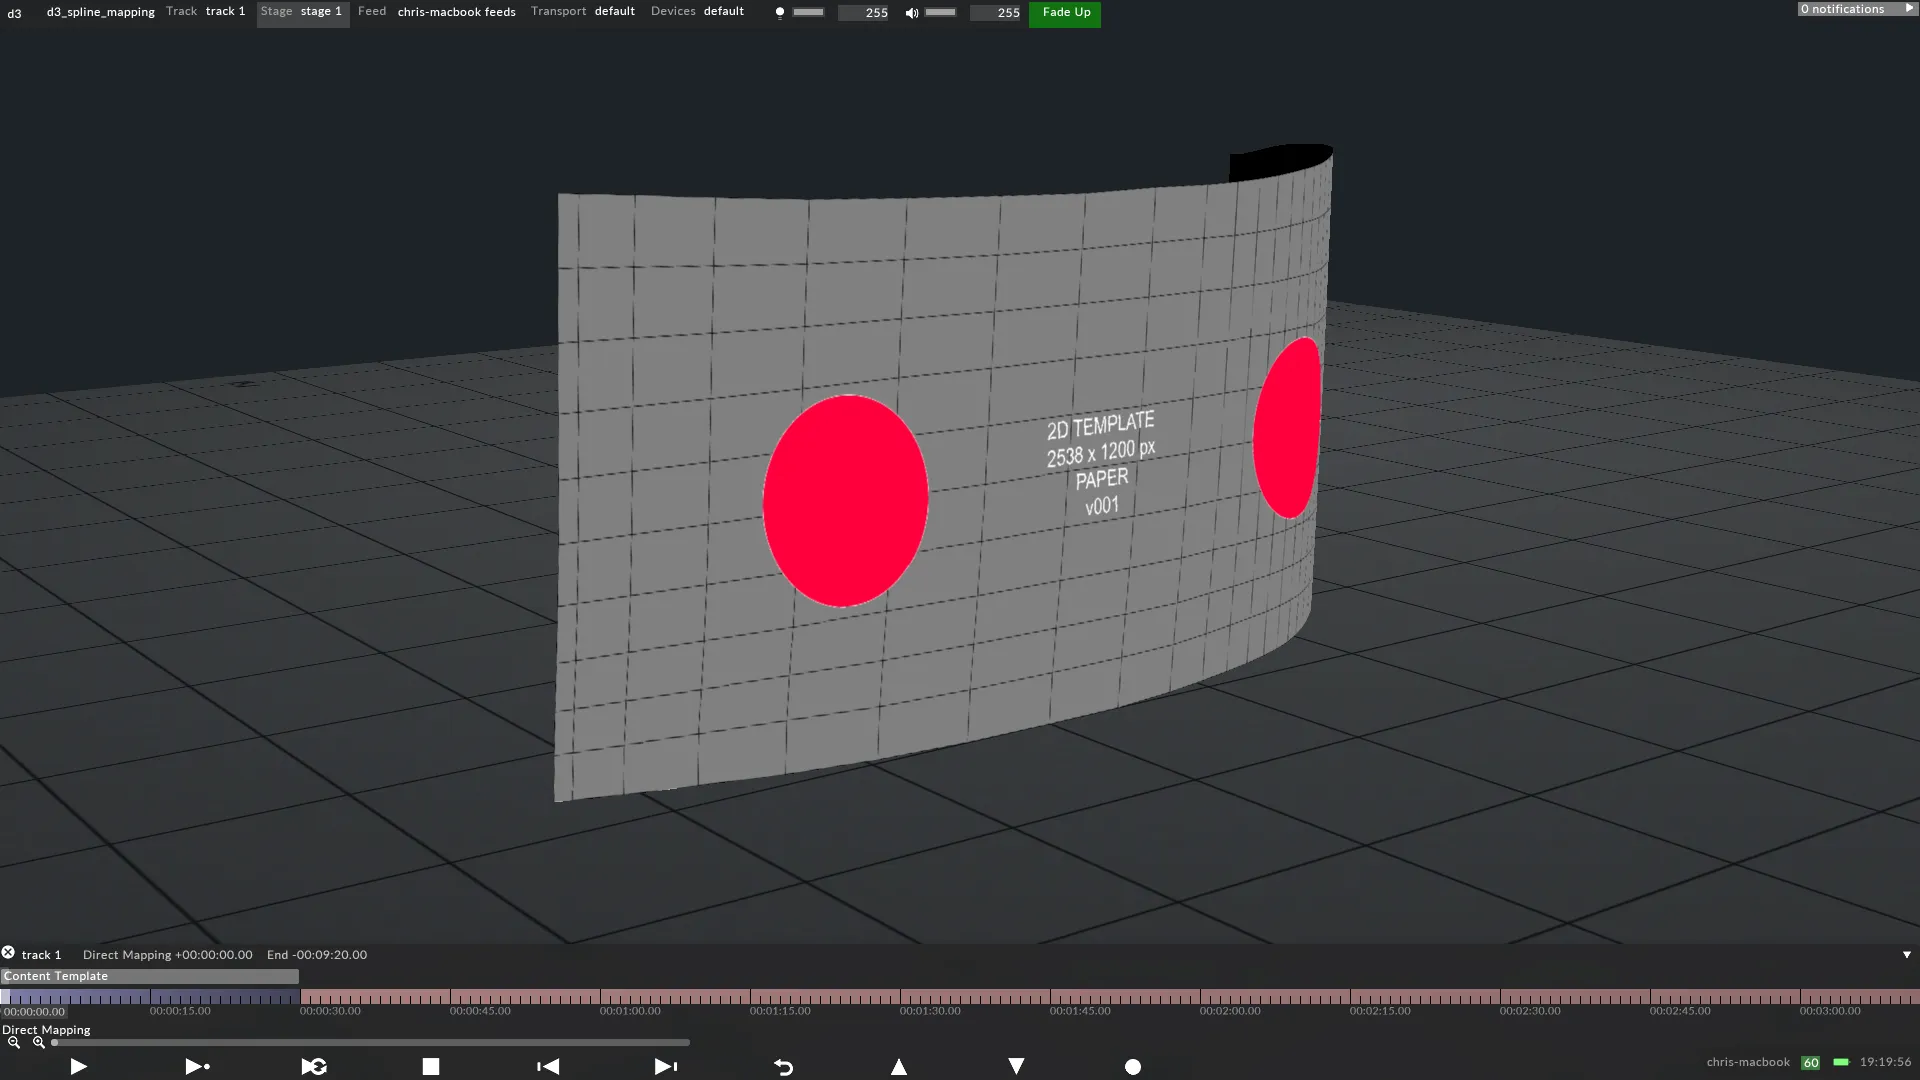
A 2D content template of a screen from the Little Prince musical rendered from 3ds Max.