Lux
Lux is an enhanced rendering mode designed to simulate a more realistic impression of how a show would look.
Lux is most useful for showing clients a more realistic impression of how a project would look. This includes ambient lighting, shadowing of objects being hit by projectors based on physical lighting and scene settings. This allows you to make more technical & creative decisions in advance before going onsite.
Features of this rendering mode
Section titled “Features of this rendering mode”-
Physical lighting values
-
Ambient light
-
Ambient occlusion
-
Projector shadows
-
Bloom effect
-
Diffuse maps
Limitations of the rendering mode
Section titled “Limitations of the rendering mode”- Lux does not support transparent objects, that includes transparent pixel and population masks.
- Lux does not support blend modes other than ‘Over’, i.e. any non-opaque modes.
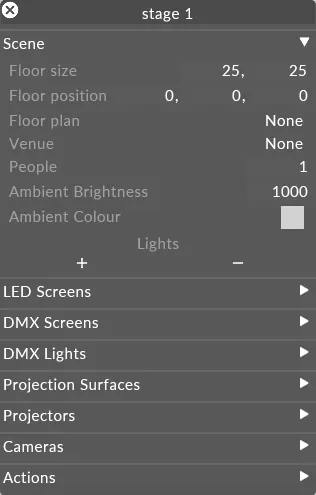
Scene Lighting
Section titled “Scene Lighting”Lux aims to simulate light in an accurate way, as such the Scene is absent of light by default and only Projectors and Scene Lights can be used to introduce lights.
All objects will be affected by the Ambient Brightness in lux of the scene where ever they are. This must be accounted for when setting Exposure and is required to allow props to be seen.
The Ambient Colour effects the colour of this light. So a high Ambient Brightness and a red Ambient Colour will give everything a red tint.
Directional Lights can be used to add a sun-like light source to the scene, it has no source point but casts lights at a constant angle into the scene in parallel rays. This improves the appearance of a 3D object by providing shading to surfaces depending on their exposure to the Directional Light, much like an object in the real world. Directional Lights are visualised in the Scene at the specified Offset but this value has no effect on the lighting and visual results as the Directional Light has no source point.
The Reflectivity of an object can be set to adjust the amount of light reflected by the surface. This number is based on a perfect lambertian surface and represents the fraction of light that will be reflected. It does not indicate screen gain or simulate colour response.
Screens
Section titled “Screens”All objects will be affected by any projectors that hit them. The brightness is determined by the projectors lumen value. Projectors will cast shadows.
LEDScreens, DMXScreens have physical luminance values based on NITS but do not cast light on other objects in the scene..
Ambient Occlusion
Section titled “Ambient Occlusion”Ambient Occlusion is an effect that emulates the occlusion seen in dark corners of objects in the real-world but is not related to any real lighting. It is only affected by the ambient light in the scene.
Ambient Occlusion Power can be changed via the Camera Editor and turned off to improve performance.
Enhanced Projector Footprints
Section titled “Enhanced Projector Footprints”Projector brightness is specified in Lux which is used for simulating the brightness of an image in Lux and also the resulting Lux readings in Heat Map mode.
In Lux mode, all objects will cast shadows when in the projector frustum for the use of previsualisation and checking of sight-lines. These shadows are not shown in the feed outputs.
Diffuse Maps
Section titled “Diffuse Maps”A Diffuse Map can be added to Projection Surfaces or Props to simulate how the projected light will interact with the surface. This is useful when projecting on surfaces that are not ideal for projection such as buildings with a stone surface or painted set pieces where the light that is reflected may be different than imagined due to the interference of the surface.
Workflow
Section titled “Workflow”- Setup your project as normal by adding projectors, screens, venues & props.
- Define Ambient Brightness & Colour.
- Change your visualiser camera to Lux mode, or make a new Camera to assign to a feed output.
Example
Section titled “Example”Enabling lux
Section titled “Enabling lux”- Open the stage editor by right-clicking Stage from the dashboard or by right-clicking the floor in the visualiser.
- Expand the Cameras tab, and right-click Visualiser camera to edit the visualiser camera settings. Alternatively, you can edit another camera and output that to the feeds.
- In the camera editor, expand the Renderer tab and set the render mode to Lux.
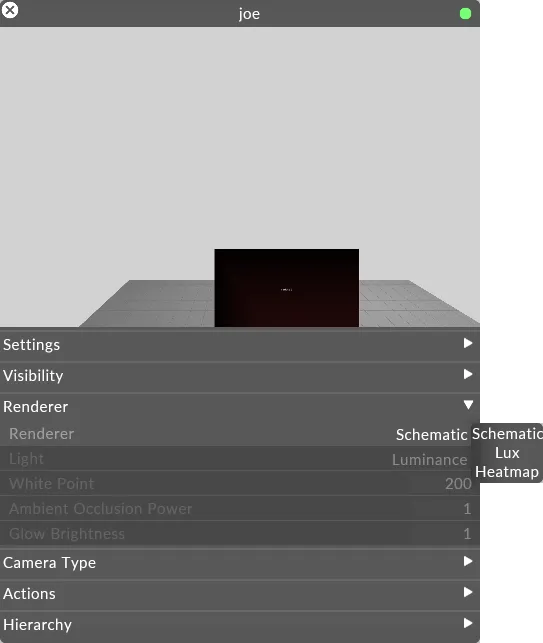
You are now viewing a Lux rendering of the scene based on the values defined in the visualiser camera.
For more information, see the Cameras topic.
Setting scene lighting
Section titled “Setting scene lighting”- Open the stage editor by right-clicking Stage from the dashboard or by right-clicking the floor in the visualiser.
- Expand the Scene tab.
- Adjust the ambient light and colour values to suit.
Viewing Lux through cameras
Section titled “Viewing Lux through cameras”- Position the camera in the visualiser.
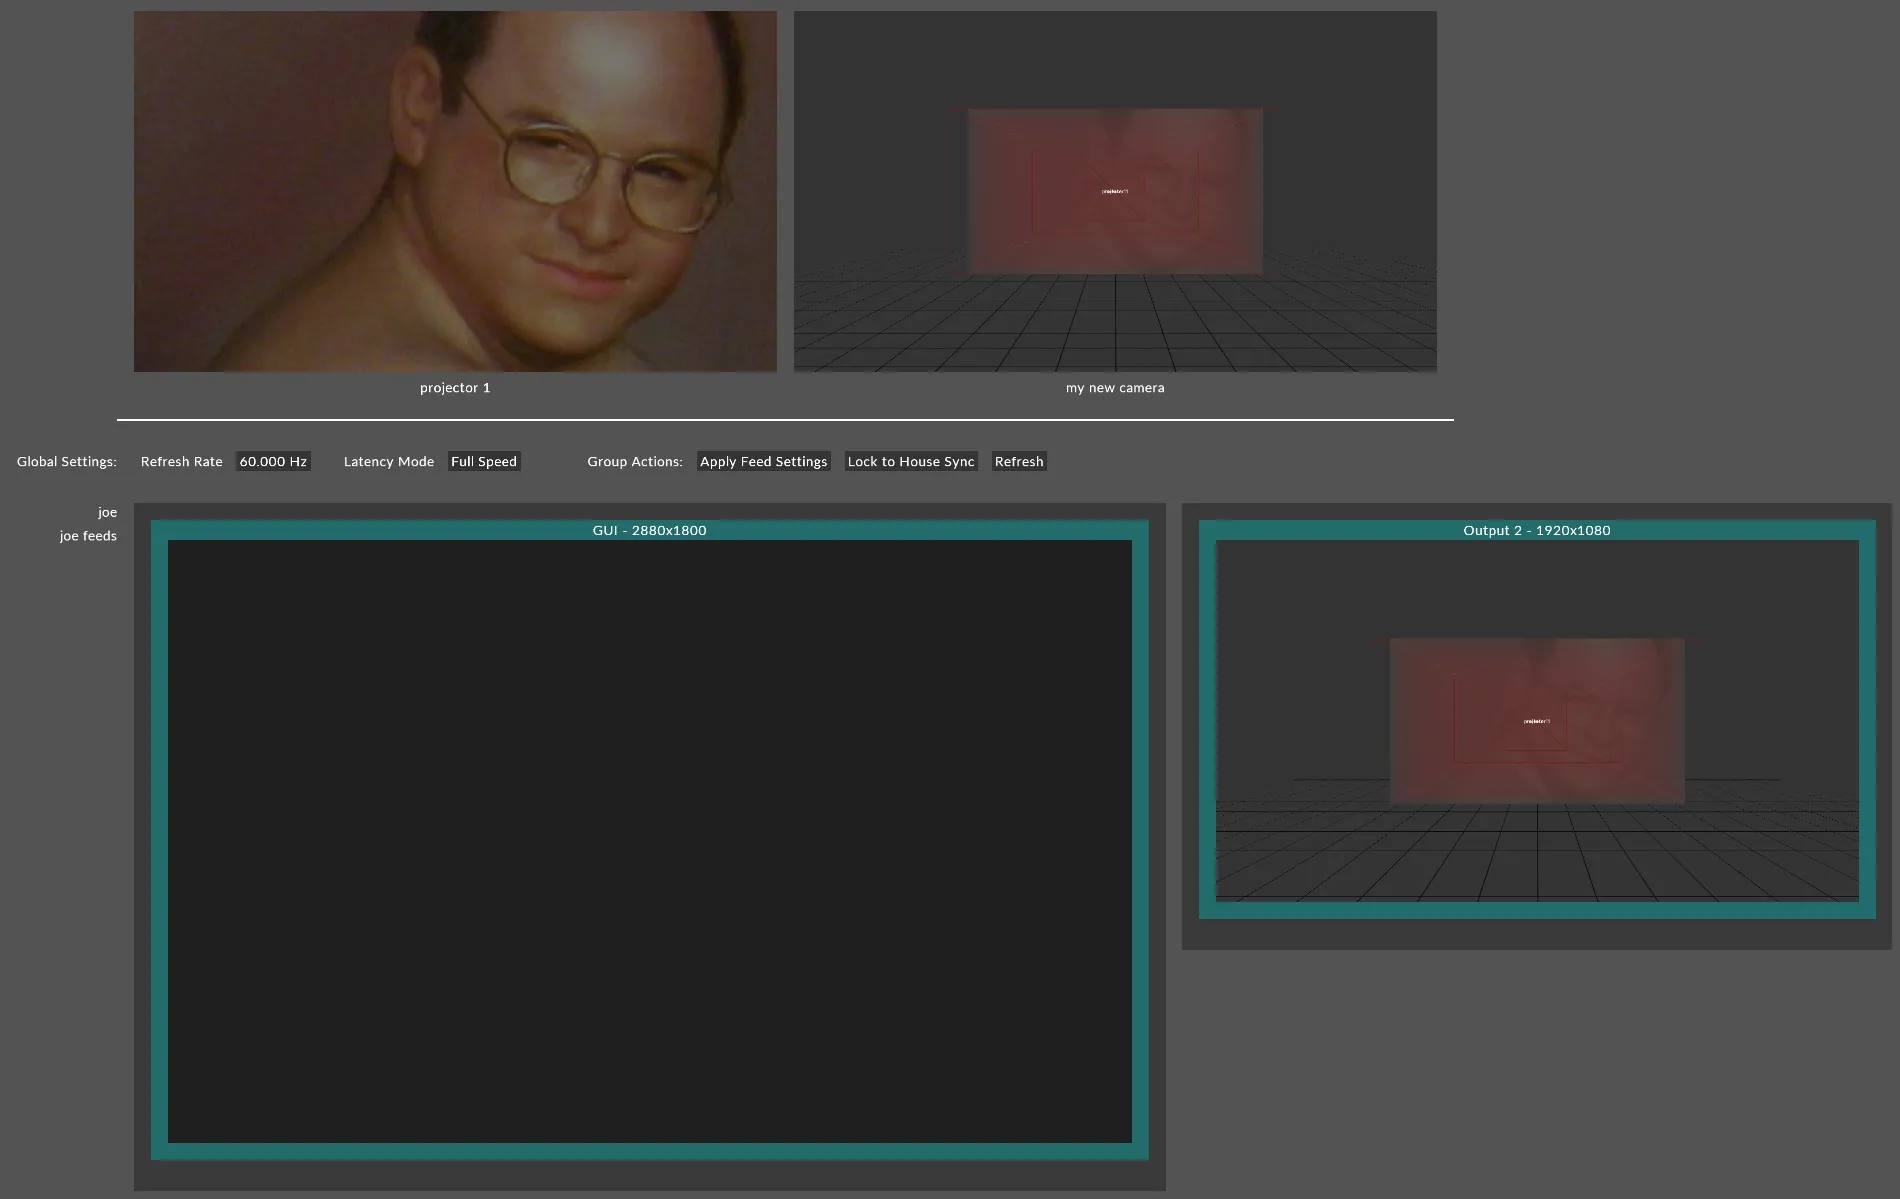
- Left-click Feed from the dashboard.
- Right-click on the camera feed at the top of the feed scene and left-click Add feed rectangle or alternatively hold ALT, left-click and drag an arrow from the camera feed to an available output head.