Porta Unreal Plugin
Introduction
Section titled “Introduction”The Porta Unreal Engine integration allows you to control pre-built visual effects, scenes, and animations authored in Unreal Engine from Porta.
Designers expose parameters and functions on Unreal assets so that Porta can remotely switch items on and off, change levels or environments, adjust lighting, reposition assets, switch camera views, or trigger animations. Augmented Reality (AR) assets — such as sports players, F1 cars, or weather elements — can also be added to levels and driven from Porta.
Prerequisites
Section titled “Prerequisites”Supported Unreal Engine versions
Section titled “Supported Unreal Engine versions”Download the Porta Unreal Engine plugin build that matches your Unreal Engine version.
| Unreal Engine version | Latest plugin release |
|---|---|
| 5.7 | Plugins_UE5.7.4_24.0.5.zip |
| 5.6 | Plugins_UE5.6.1_24.0.5.zip |
| 5.5 | Plugins_UE5.5.4_24.0.5.zip |
| 5.4 | Plugins_UE5.5.4_24.0.5.zip |
| 5.3 | Plugins_UE5.3.2_24.0.5.zip |
Review the recommended hardware and software specifications for Unreal Engine on the Epic Games documentation site. For general Unreal Engine documentation and learning resources, see the Unreal Engine website.
Required plugins
Section titled “Required plugins”You need the following plugins enabled in your Unreal project:
- Remote Control API — ships with Unreal Engine.
- Pixel Streaming — ships with Unreal Engine. Required for Porta Preview.
- Porta Unreal Engine plugin — downloaded from Porta.
Install the Porta Unreal Engine plugin
Section titled “Install the Porta Unreal Engine plugin”-
In the Porta web interface, go to Help → Plugins and download the Porta Unreal Engine plugin that matches your Unreal Engine version.
-
Unzip the archive and copy all folders (except
DefaultPorta.ini) into thePluginsfolder of your Unreal project. If thePluginsfolder does not exist, create it at the project root.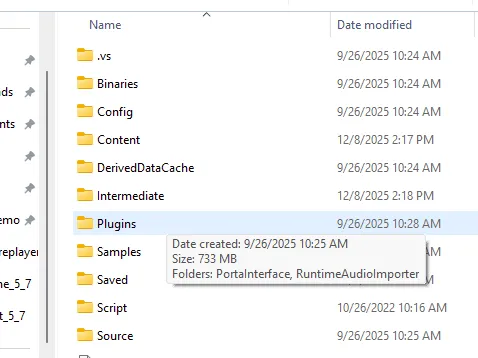
-
In the Unreal Editor, go to Edit → Plugins, search for Remote Control API and Pixel Streaming, and enable both.
-
Relaunch the project when Unreal prompts you, so the loaded plugins are activated.
Configure the plugin
Section titled “Configure the plugin”The recommended way to configure the plugin is through the Unreal Editor UI. For headless or automated setups, see Advanced: DefaultPorta.ini.
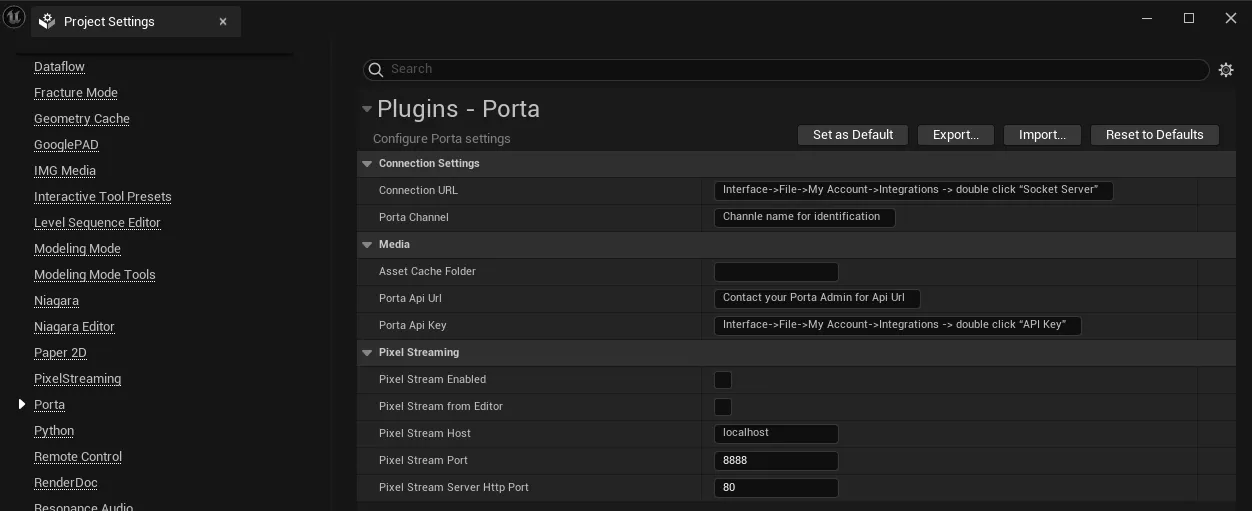
In the Unreal Editor, go to Edit → Project Settings → Porta and fill in each section:
Connection
- Connection URL — In Porta, go to File → My Account → Integrations and double-click Socket Server to reveal the URL.
- Porta Channel — A unique name used to identify this Unreal Engine connection in Porta.
- Namespace — Leave at the default value.
Media
- Asset Cache Folder —
C:\PortaCache(or any writable path where Porta can stage media assets). - Porta Api Url — Contact your Porta administrator for the API URL.
- Porta Api Key — In Porta, go to File → My Account → Integrations and double-click API Key to reveal the key.
Pixel Streaming
Enable this section if you want to use Porta Preview. The host and port values you set here are used by Porta to establish the preview connection. See Porta Preview for details.
Advanced: DefaultPorta.ini
Section titled “Advanced: DefaultPorta.ini”If you need to configure the plugin without opening the editor — for example in CI, headless builds, or as part of a project template — edit DefaultPorta.ini directly.
Copy the DefaultPorta.ini file that shipped in the plugin archive into your project’s config folder at <Project_Folder>/Config/DefaultPorta.ini. Open it in a text editor and set the following keys. String values containing URLs must be wrapped in double quotes.
| Key | Value |
|---|---|
ConnectionURL | Socket server URL. For Porta On-prem: "http://<host-ip>:6001". |
PortaChannel | Unique name for this Unreal connection. |
Namespace | Leave as the default unreal. |
AssetCacheFolder | C:\PortaCache or another writable path. |
PortaApiUrl | Porta API URL. For Porta On-prem: "http://<host-ip>:3000". |
PortaApiKey | API key from File → My Account → Integrations in Porta. |
Example:
[/Script/PortaInterface.PortaSettings]ConnectionURL="http://192.168.1.10:6001"PortaChannel=NYCUnrealEngineNamespace=unrealAssetCacheFolder=C:\PortaCachePortaApiUrl="http://192.168.1.10:3000"PortaApiKey=YOUR_API_KEY_HEREThe Project Settings UI and DefaultPorta.ini write the same values — use whichever is more convenient.
Test the connection
Section titled “Test the connection”-
Open your Unreal project and click Play.
-
In the Output Log, look for:
LogPorta: Connected -
In Porta, go to Window → Settings → Channels and click the refresh button at the top. Your new channel should appear in the list.
If the connection fails, see Troubleshooting.
Create a Remote Control Preset
Section titled “Create a Remote Control Preset”Porta controls Unreal through an Unreal asset called a Remote Control Preset, which exposes variables and functions inside your project to external tools.
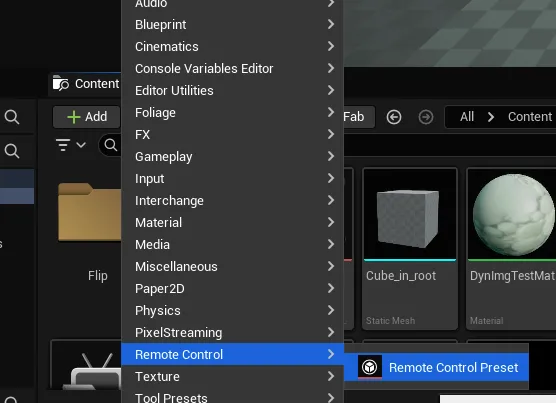
-
In the Content Browser, click Add → Remote Control → Remote Control Preset.
-
Open the preset. With it open, you can expose properties and functions on actors in your scene. Anything you expose becomes available for control from Porta.

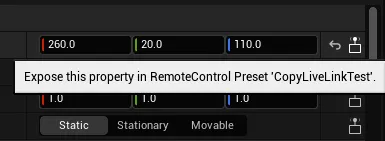
Expose properties
Section titled “Expose properties”Select an actor in the scene, find the property you want in the Details panel, and click the Expose this property button next to it. Exposed properties appear in the Properties area of the Remote Control Preset.
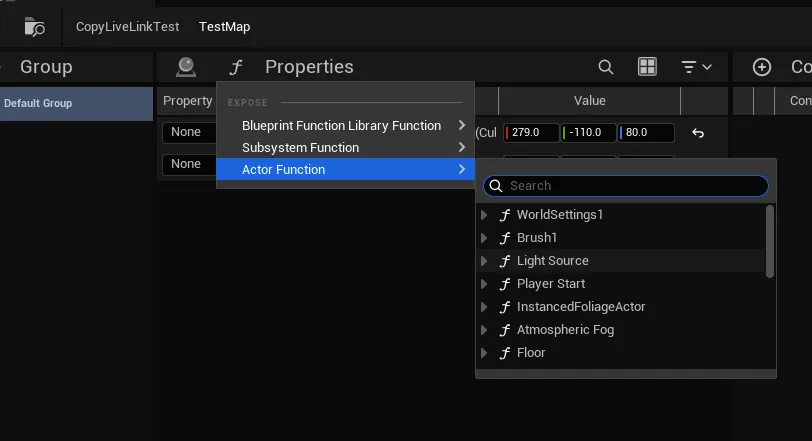
Expose functions
Section titled “Expose functions”In the Remote Control Preset window, click the F button near the Properties header to expose a function.
Expose images
Section titled “Expose images”There are three ways to expose an image to Porta, depending on how you want to use it.
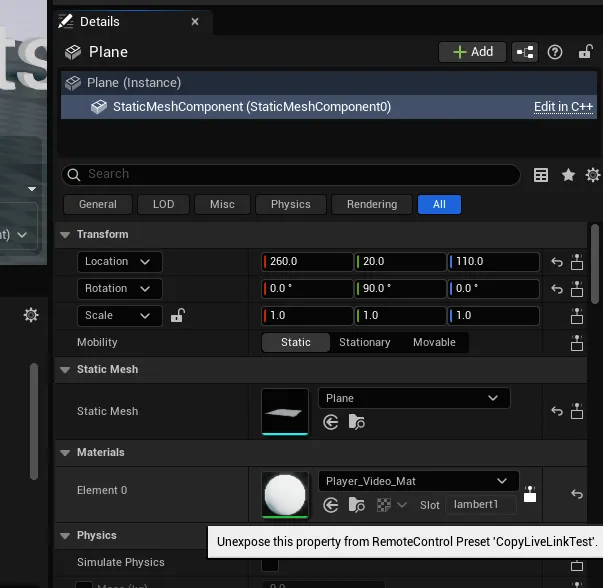
Override a material directly on an actor
Select the actor, click its Mesh Component in the Details panel, find the Materials property, and expose Element 0.
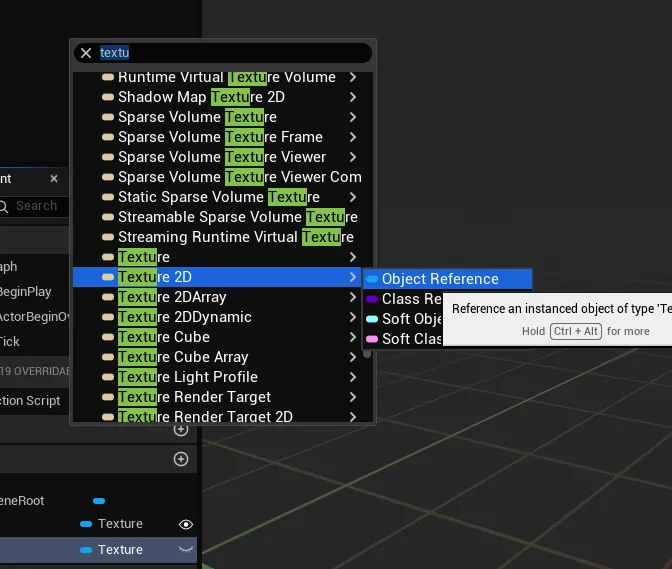
As a Blueprint variable
Create a Blueprint variable of type Texture or Texture 2D and flag it public by clicking the eye icon next to the variable.
As a function parameter
Create a function that takes a Texture or Texture 2D parameter and expose the function the same way as any other.
Build a Porta template from the preset
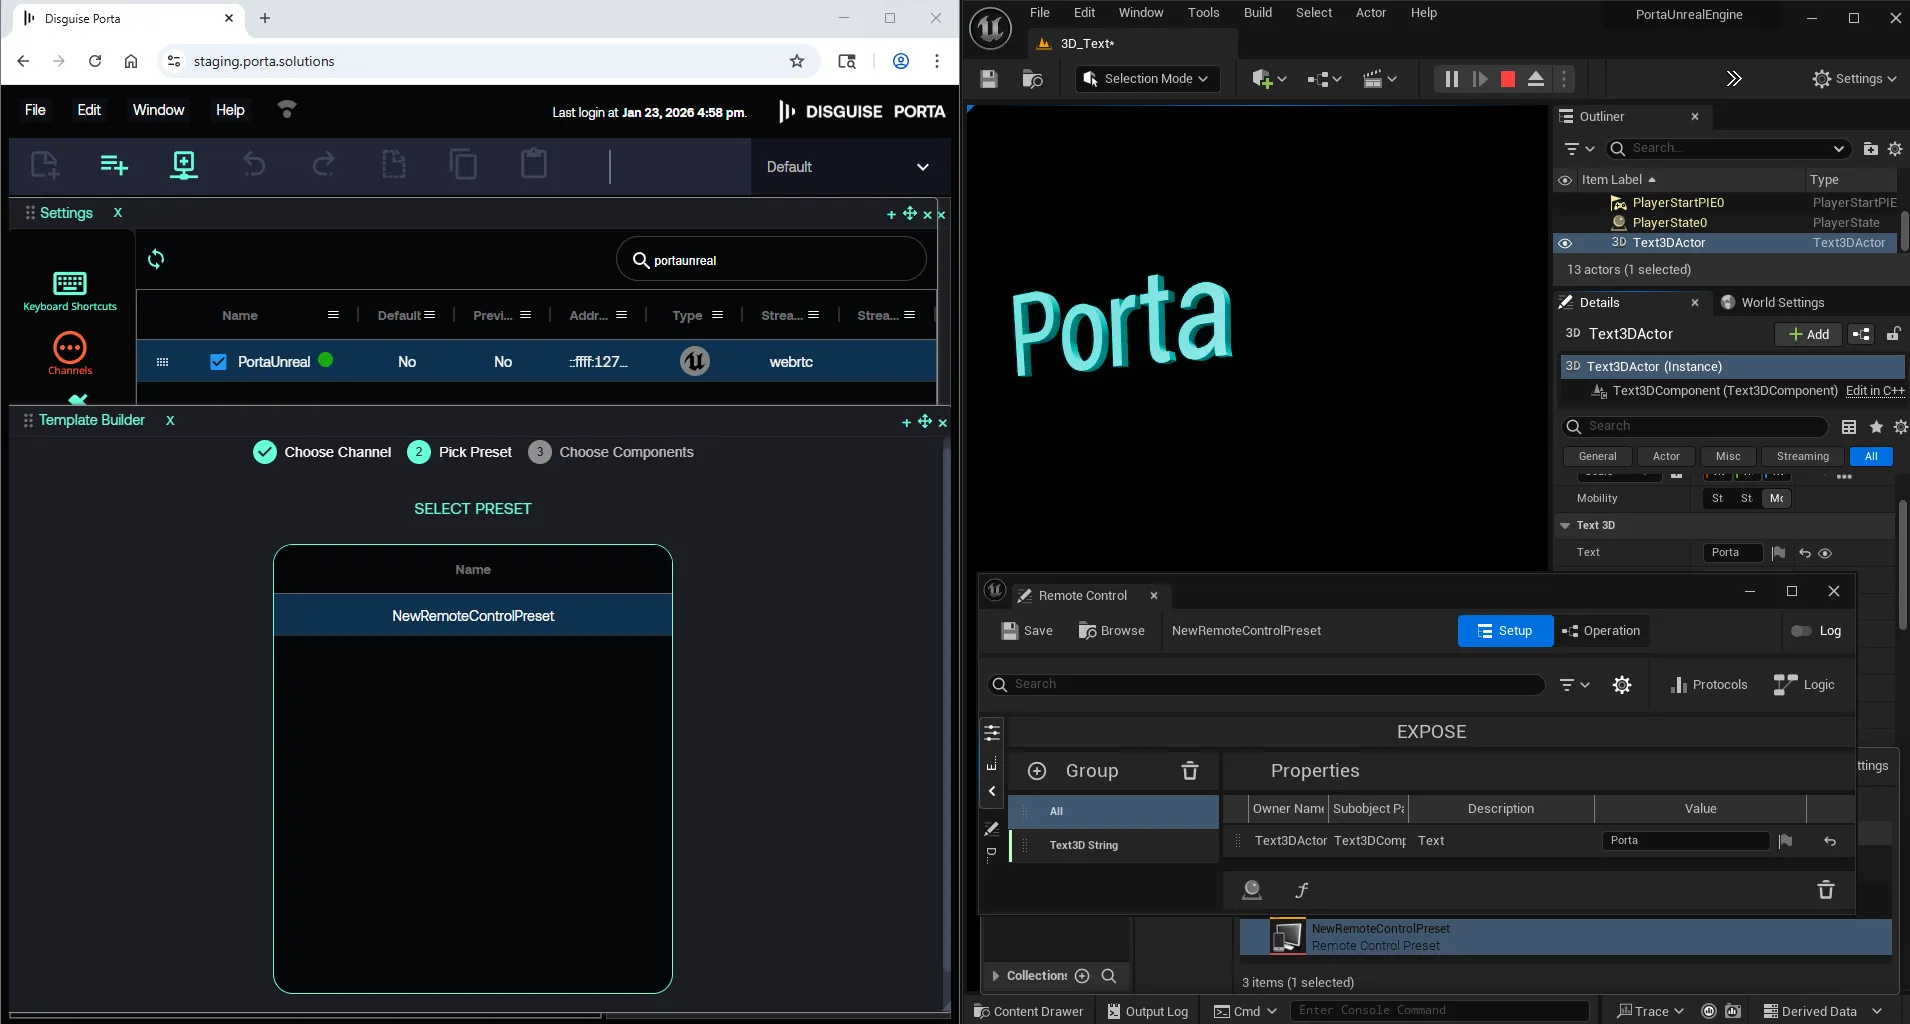
Section titled “Build a Porta template from the preset”With Unreal running and in the Play state, you can turn a Remote Control Preset into a Porta template.
-
In Porta, open the Settings panel from the Window menu.
-
Select the Channels tab and click the sync button to add the new channel.
-
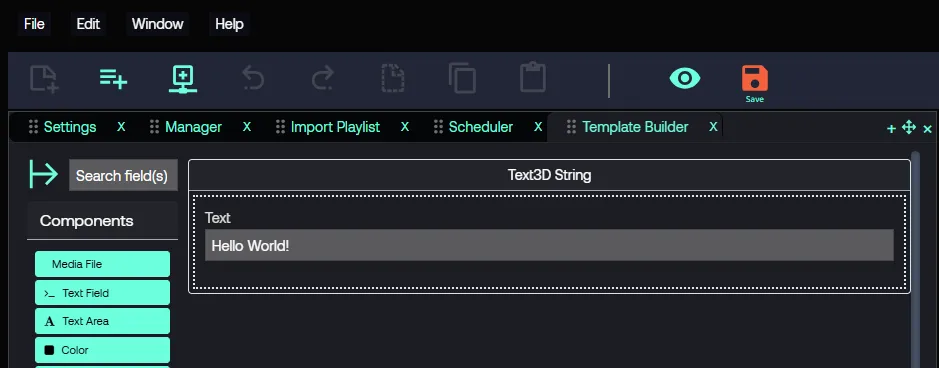
From the File menu, select New → Template to open the template builder.
-
Select Unreal Template.
-
Choose your channel’s address and click Next.
-
In the Select Preset box, choose the exposed preset from Unreal Engine and click Next.
-
Select the preset properties you want to control and click Next.
-
The selected properties are added as components to the template.
-
Set a default value for each component.
-
Click Save in the action menu ribbon.
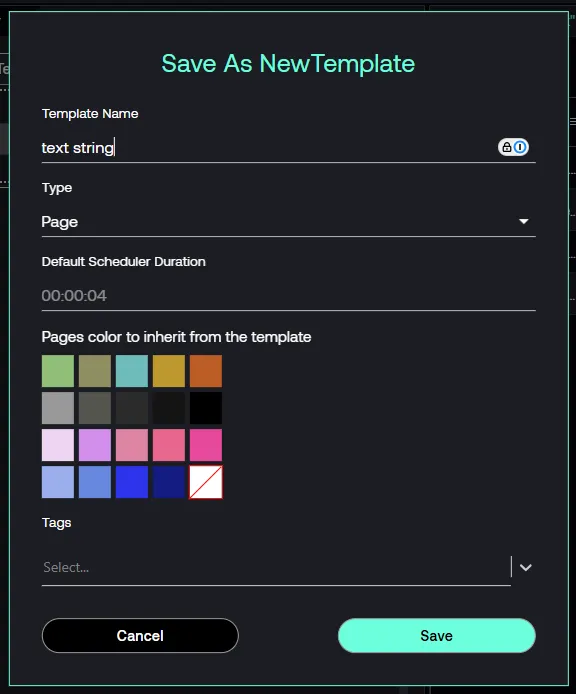
-
In the pop-up, enter a unique name for the template and click Save.
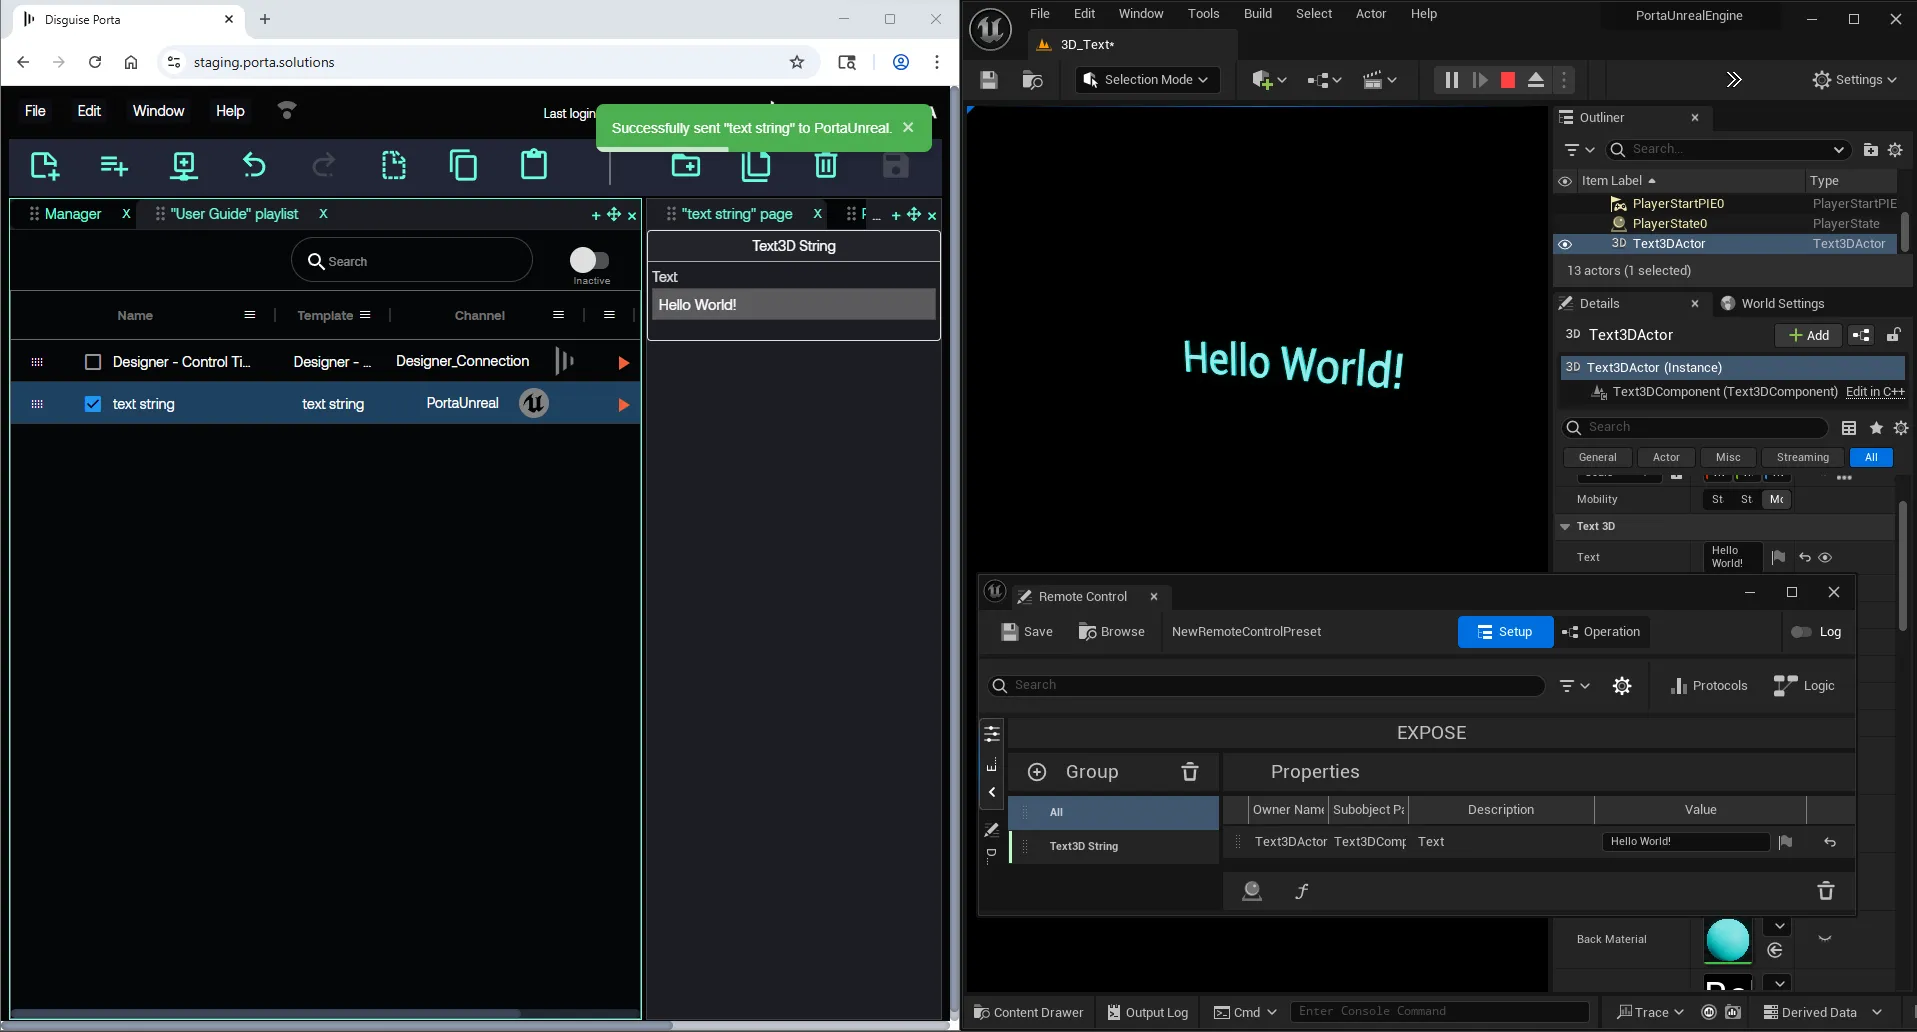
-
Return to your playlist and create a page from the template using New Page in the action menu ribbon. Double-click the template in the pop-up to add it as a page.
-
Click Send now (play icon) on the page row to push the value to Unreal Engine.
Level Sequences
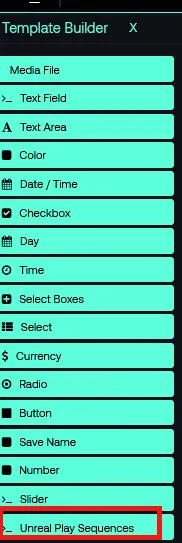
Section titled “Level Sequences”Level Sequences animate actors in an Unreal scene. To play a Level Sequence from Porta:
- In the Template Builder, drag the Unreal play sequences item into your template.
- When you preview the template or create a page from it, a list of available level sequences will be shown. The selected sequence plays when you press Play page.
Use Unreal Out Sequences for sequences that should play on Take Out or Stop instead.
Porta Preview
Section titled “Porta Preview”Porta Preview uses the Unreal Pixel Streaming plugin to stream the Unreal viewport into Porta so you can preview your changes. If you don’t need this feature, leave the Pixel Streaming section disabled in Project Settings.
Local setup
Section titled “Local setup”For a simple local setup, enable Pixel Streaming in Edit → Project Settings → Porta → Pixel Streaming (or in DefaultPorta.ini) with the following values:
PixelStreamEnabled=TruePixelStreamFromEditor=TruePixelStreamHost=localhostPixelStreamPort=8888PixelStreamServerHttpPort=80PixelStreamEnabledturns the feature on.PixelStreamFromEditorlets you stream directly from the editor (usually what you want).- The remaining values generally only need to change if port 80 or 8888 conflicts with something else on the host.
On the Porta side, mark your channel as a Preview channel:
![]()
Then set the IP address of your Unreal machine:
![]()
The channel will then appear in the Preview window dropdown:
![]()
Setting up Pixel Streaming across multiple on-prem machines or to cloud hosts is more involved and is beyond the scope of this guide.
Troubleshooting
Section titled “Troubleshooting”LogPorta: Warning: Socket IO connection failed
The socket server is unreachable. Check that:
- The
Connection URLin Project Settings (orConnectionURLinDefaultPorta.ini) matches the URL shown in Porta under File → My Account → Integrations → Socket Server. - The Porta socket server is running.
- No firewall is blocking the configured port (default 6001 for Porta On-prem).
LogPorta: Error: Invalid Porta config options
One or more required configuration values are missing or malformed. Re-check each field under Edit → Project Settings → Porta, paying attention to quoting in DefaultPorta.ini if you use it.
Channel not showing up in Porta
In Porta, go to Window → Settings → Channels and click the refresh button at the top while Unreal is running in Play mode.
Pixel Streaming preview not appearing
- Confirm Pixel Streaming is enabled in Project Settings and that the channel is marked as a Preview channel in Porta.
- Verify the IP address set in Porta matches the Unreal host machine.
- Check that the configured ports (default 8888 and 80) are not blocked by a firewall or used by another service.