Fixtures Grid Setup
To set up a fixture please see the previous sub-chapter Creating a fixture.
Now that you have set up the fixture, you can begin playing with it in the Stage Visualiser. Initially, the DmxLights screen holds only one fixture; if you send content to the Dmx Lights (for example, by targeting a Colour layer), you will see a single beam of colour coming from the centre of the screen surface (assuming you have set a nonzero beam length).
You can now increase the number of fixtures by editing the properties contained in the fixture section of the DmxLights screen editor.
DmxLights properties
Section titled “DmxLights properties”Number Across, Number Down
Section titled “Number Across, Number Down”This controls the number of fixtures in the grid attached to the screen surface.
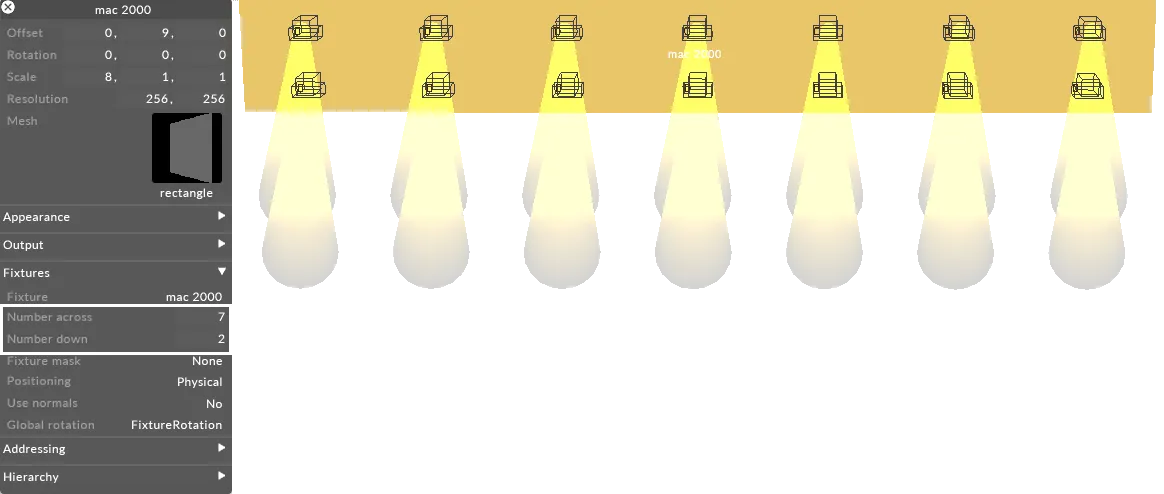
Number Across and Number Down properties control the number of fixtures in the grid attached to a screens surface
As you increase these values, you should see the number of fixture beams increase (assuming there is content going to the screen). Number Across increases the number of fixture beams horizontally, and Number Down increases the number of fixture beams vertically.
Fixture Mask
Section titled “Fixture Mask”This controls the mask used when rendering the fixture.
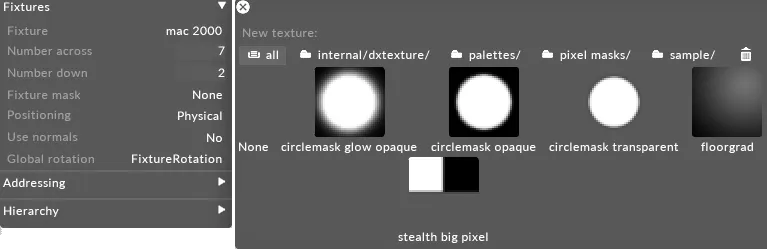
Fixture Mask property is used to select a still image file that defines the mask used when rendering the fixture
Please scroll down to the explanation of the mask property in the previous sub-chapter Creating a fixture for information on how to use the fixtureMask property.
Positioning
Section titled “Positioning”This controls how the positions of the individual fixtures are generated.
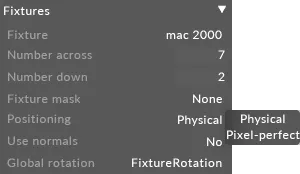
Positioning property controls how the positions of the individual fixtures are generated
There are two options: physical spaces the fixtures out at equal physical separations and samples the underlying content accordingly, pixelperfect spaces the fixtures out so that they sample the underlying content at regular intervals and positions them at the appropriate physical locations.
Use normals
Section titled “Use normals”This controls how the orientation of each fixture instance depends on the screens surface.
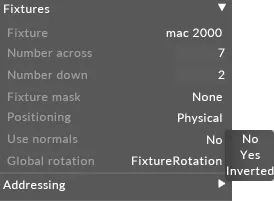
Use Normals property controls how the orientation of each fixture instance depends on the screens surface, in this example the fixtures are inverted.
There are three options. If set to no, then the orientation of each fixture does not depend on the screen surface. If set to yes, each fixture is oriented so that it is parallel to the screen surface. If set to inverted, a negative version of the surface normal is used, flipping the fixture upside down relative to the surface.
Global rotation
Section titled “Global rotation”This allows you to rotate the fixtures relative to their standard orientation.
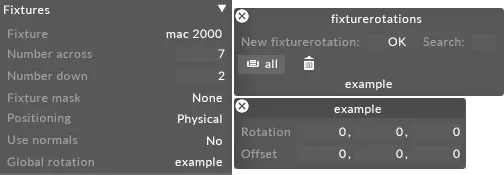
Global Rotation property being used to, in this example, rotate the ixtures by minus 20 degrees in the x direction
- Right-click global rotation to open a local (untitled) FixtureRotation editor. rotation controls the rotation of the fixtures, in degrees. The x component controls the rotation around the x axis; the y component around the y axis; and the z component around the z axis. offset controls the screen position in the 3D space, in metres. There are three numbers laid out horizontally: respectively the x (left/right), y (up/down) and z (into/out of the screen) coordinates.
Once you see the fixture beams it is possible to just visualise the lights.
- Switch off the underlying screen content and just visualise the lights by setting the alpha property to 0. This property is contained in the appearance section of the DmxLights editor.

Alpha property set to 0 to switch off the underlying screen content