Project Settings
Designer provides some standard project settings which can be accessed through the state menu.
This page provides an explanation for each setting in the menu, as well as how to access it.
Accessing the Project Settings
Section titled “Accessing the Project Settings”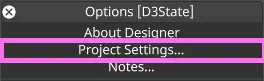
- Right-click on “d3” in the top left corner of the interface on the dashboard; this will open the d3State Options window.
- Left-click Project Settings from the menu to open the Project Settings menu.
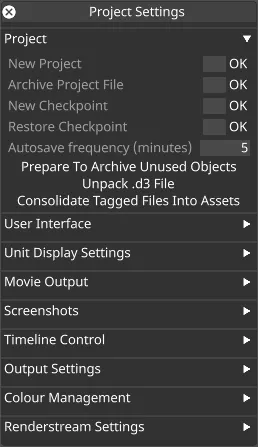
Project tab
Section titled “Project tab”New Project
Section titled “New Project”Creates a new Project
Archive project file
Section titled “Archive project file”Essentially a “save as”. Type in a name and it creates a project file in the history folder with the name you defined..
New Checkpoint
Section titled “New Checkpoint”Creates a Checkpointed project. Checkpointed projects are frozen in time and locked to a specific Disguise version.
Restore Checkpoint
Section titled “Restore Checkpoint”Restores a previously made Checkpoint.
Autosave Frequency
Section titled “Autosave Frequency”Defines the autosave frequency expressed in minutes. This defaults to 5 minutes.
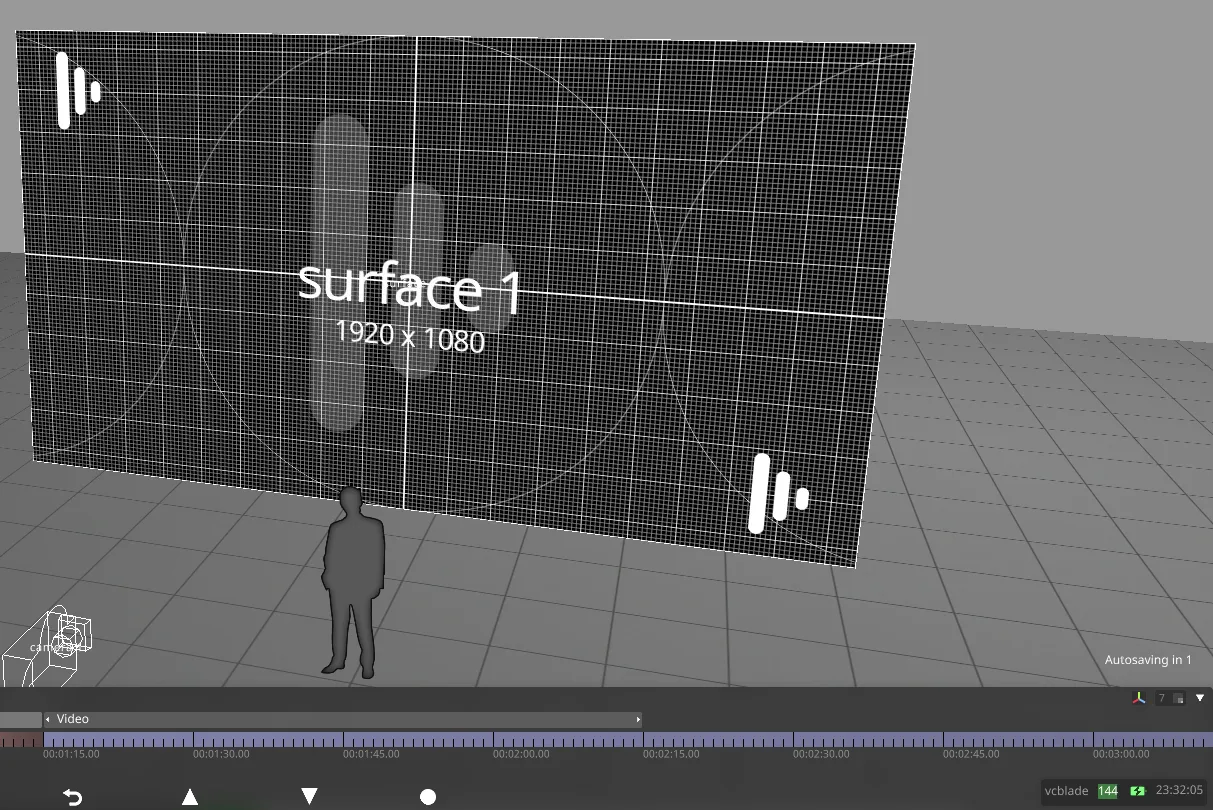
A new ‘Autosaving’ indicator with a 5 second countdown has been added in the bottom right hand corner above the timeline.
Prepare to archive unused objects
Section titled “Prepare to archive unused objects”Generates a batch file for you to then define an archive directory outside of the project file, thus releasing the files from Designer. See Archive old media topic for more information.
Unpack d3 file
Section titled “Unpack d3 file”Unpack the contents of the .d3 project file into a new ‘unpack’ folder, for advanced use cases. For further information, see importing and exporting objects.
Consolidate tagged files into assets
Section titled “Consolidate tagged files into assets”This is used to upgrade old projects to use versioning.
User Interface tab
Section titled “User Interface tab”Framerate fraction
Section titled “Framerate fraction”The fraction of the framerate that the GUI renders at. This option is used to sacrifice responsiveness for performance. This option is not suitable for lower latency modes.
Options for this setting are:
- 1 represents full framerate
- 1/2 represents half framerate
- 1/3 represents one third framerate
DPI Scale
Section titled “DPI Scale”The DPI scale determines the font and icon size in Designer. The Default option follows the Windows DPI scale, while other options apply the selected scale directly.
Options for this setting are:
Default100%125%150%175%200%225%250%
Maximum visualiser proxy
Section titled “Maximum visualiser proxy”Designer uses a proxy system to render content at the level of detail (LOD) required on each machine. For displays which are not mapped to the current machine’s feed outputs, navigating the visualiser camera or zooming in and out will change the LOD the display is rendered at. This can increase the load on the machine resulting in reduced framerate, particularly for high-resolution displays.
The maximum visualiser proxy setting limits the LOD of displays viewed in the GUI only, i.e. visualiser, feed previews, editors etc. Displays which are mapped to feed outputs are not affected, and are always rendered at full resolution. This setting is applied across all machines in the session.
Options for this setting are:
- 1:1: Display LOD can match its full resolution
- 1:2: Display LOD is capped at half resolution
- 1:4: Display LOD is capped at quarter resolution
- 1:8: Display LOD is capped at one eighth resolution
- 1:16: Display LOD is capped at one sixteenth resolution
The maximum visualiser proxy can also be edited from the 3D manipulators toolbar
Tooltips
Section titled “Tooltips”Controls when tooltips appear in.
Options for this setting are:
- Only when F1 is pressed
- After 1 second (default)
- After 2 seconds
- After 3 seconds
Persistent Key Widgets
Section titled “Persistent Key Widgets”When enabled, key widgets will remain open on creation or on selection of a new layer with the same property.
Disable UI Transparency
Section titled “Disable UI Transparency”Untick this setting to turn off transparency for UI windows to save performance.
Disable key frame editor film strip
Section titled “Disable key frame editor film strip”Untick this setting to turn off rendering intermediate frames of videos inside keyframe editors which can increase performance when viewing video clips.
Global layer colour rules
Section titled “Global layer colour rules”Select the default rules that will determine the colours of layers on any tracks that do not have their own Layer colour ruleset. For more information about layer colour rules see the Layer Colour Rules page.
Unit Display Settings tab
Section titled “Unit Display Settings tab”Display value as
Section titled “Display value as”Defines the way the numerical values are displayed for Brightness, Volume, and Colour.
The options are:
- Normalised (0-1)
- Percentage (0-100%)
- 8-bit (0-255)

Measurement unit
Section titled “Measurement unit”Determine the units that measurements are displayed in.
The options are:
- Metric
- Imperial
Movie Output tab
Section titled “Movie Output tab”Output movie format
Section titled “Output movie format”Defines the output format for Stage & Feed movies. For more information about outputting Stage & Feed movies see our Stage and Feed Movies page.
Options for this setting are:
- Photo-JPEG (no audio)
- Animation (no audio)
- MPEG-4 (with audio) (default)
- Photo-JPEG mov (OLD QuickTime players)
- HAP (no audio)
- DPX image sequence (no audio)
- WEBM vp9 (audio as Vorbis output)
Output movie FPS
Section titled “Output movie FPS”Sets the FPS the output movies should be rendered at.
Stage movie size
Section titled “Stage movie size”Sets the resolution Stage movies should be rendered at.
Below, the actual output movie size is displayed after licensing restrictions are applied.
Add head to output movie
Section titled “Add head to output movie”Adds additional seconds to the start of the output movie.
Add tail to output movie
Section titled “Add tail to output movie”Adds additional seconds to the end of an output movie.
Animation movie format
Section titled “Animation movie format”Select the 3D format to use when writing an Animation movie.
Encoding Options
Section titled “Encoding Options”Bitrate (Kb)
Section titled “Bitrate (Kb)”Sets the target bitrate of your output movies. Setting this to 0 will allow Designer to use it’s best-guess per codec.
Screenshots tab
Section titled “Screenshots tab”Output format
Section titled “Output format”Defines the output format for Screenshots.
Options for this setting are:
- JPEG
- BMP
- PNG (default)
- TIF
- DPX
- EXR
Timeline Control tab
Section titled “Timeline Control tab”Global latency mode
Section titled “Global latency mode”Defines the levels of buffering and the rendering interval of the video output system.
Options for this setting are:
- Full speed ultra low latency (no buffering)
- Full speed low latency (one frame buffer)
- Full speed (default) (two frame buffers)
- Half speed low latency (halves the frame rate, one frame buffer)
- Half speed (halves the frame rate, two buffers)
Frame buffers are on the video output system, other system processing will add further latency.
Sometimes it is very useful to use half speed mode to swap between 2 framerates quickly without needing to re-apply genlock. In this case, always make sure you are genlocked to the full framerate. If you genlock to the half-framerate you may get tearing between machines when in half speed mode.
Global refresh rate
Section titled “Global refresh rate”Sets the project refresh rate. For more information see the Setting Project Refresh Rate topic.
Project bit depth
Section titled “Project bit depth”Sets the bit depth the project will output at. This setting will not take effect until Feed Settings have been applied. For more information about applying feed settings visit our Configuring Output Settings page.
Timeline audio device
Section titled “Timeline audio device”Sets the default timeline audio device.
Deferred jump
Section titled “Deferred jump”With this feature activated, you can now hit the left or right Arrow keys (while playing) to jump Track bars without losing sight of the original bar you jumped from (this bar will also continue to flash).
Global crossfade
Section titled “Global crossfade”Sets the Universal crossfade mode for all tracks and sections by default. This can be overridden on a per track and per section basis.
Reset on stop
Section titled “Reset on stop”This defines the behaviour of the Stop button. You can either reset to the start of the bar, or stay where you are.
Options for this setting are:
- Always
- When Quantised (default)
- Never
Output Settings tab
Section titled “Output Settings tab”Video information overlay
Section titled “Video information overlay”Overlays debug information on the content of video layers.
Options for this setting are:
- None (default)
- Resolution
- Smoothness - A white line that moves across the image to assess playback smoothness.
- Frame/Time - A readout of what frame is currently displayed.
- Regions/Tiles - Each mapping region in SLC.
Fade up/down duration (seconds)
Section titled “Fade up/down duration (seconds)”Sets how long, in seconds, the Fade up and Fade down controls take to complete.
Colour Management tab
Section titled “Colour Management tab”Colour Management
Section titled “Colour Management”This defines what model for colour management disguise uses.
Options for this setting are:
- Disabled
- Gamma Space (default)
- ACES
- OCIO
More information about colour management can be found on our Colour Management page.
Default ingest profile
Section titled “Default ingest profile”This defines the default colour profile that will be applied to all media when it is ingested. This does not apply retroactively to media that has already been ingested or had another colour profile set.
Default display profile
Section titled “Default display profile”This defines the default colour profile that will be applied to all displays when they are created. This does not apply retroactively to displays that have already been created or had another colour profile set.
RenderStream Settings tab
Section titled “RenderStream Settings tab”RenderStream latency override (ms)
Section titled “RenderStream latency override (ms)”This can be set to define a fixed latency for all RenderStream workloads in the project. Frames received more than this latency after the previous frame will always be dropped. Leaving this setting at 0 will allow Designer to automatically measure and set an optimal RenderStream latency for your specific network configuration.