Projection Examples - Planar mapping
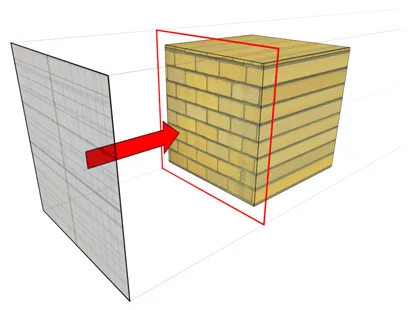
Planar mapping is suitable for projection surfaces that have:
-
flat surfaces requiring one side to be UV mapped
-
shallow surfaces requiring multiple oblique sides to be UV mapped
-
for example a plane or a facade
How the UV map is generated
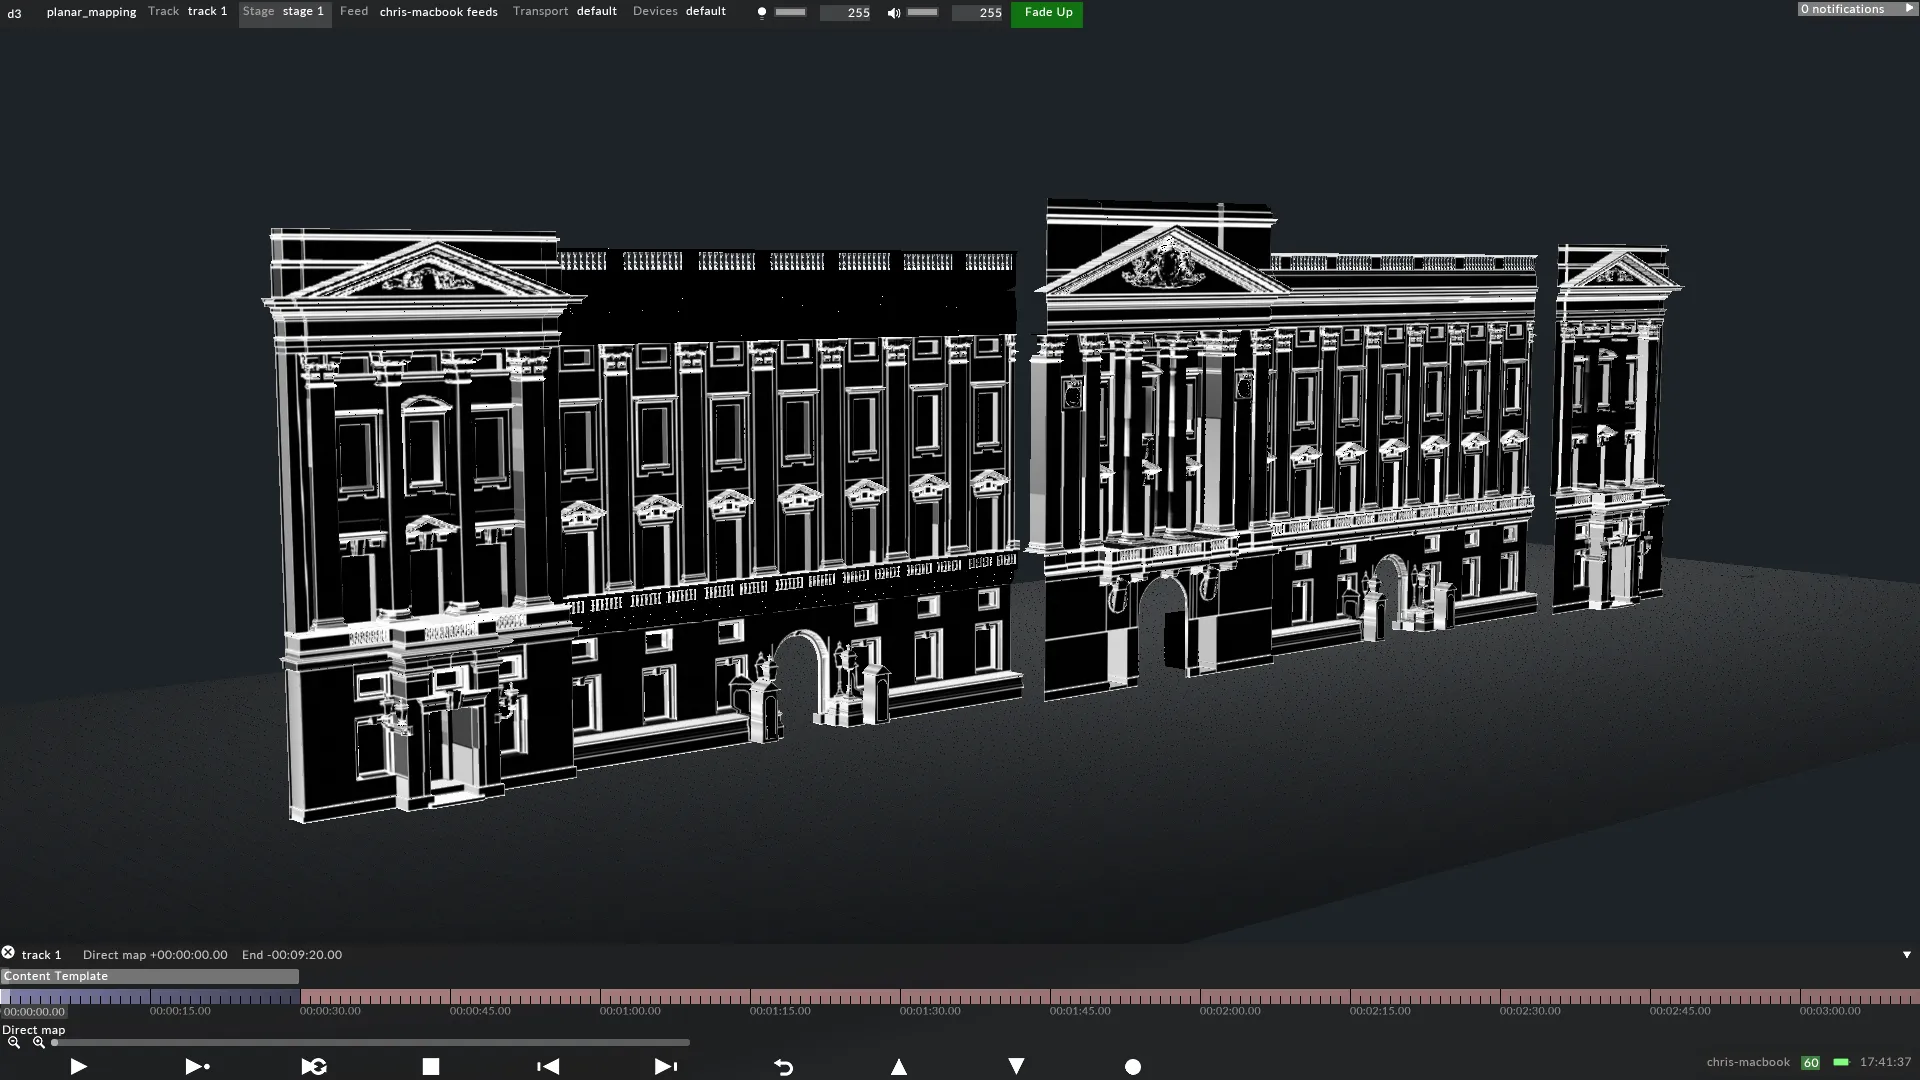
Section titled “How the UV map is generated”The Planar map will parallel project UV coordinates to the surface. Therefore, it is important to align the Planar map’s position, orientation and scale to the surface.
Step 1 - Generating the UV map (3ds Max)
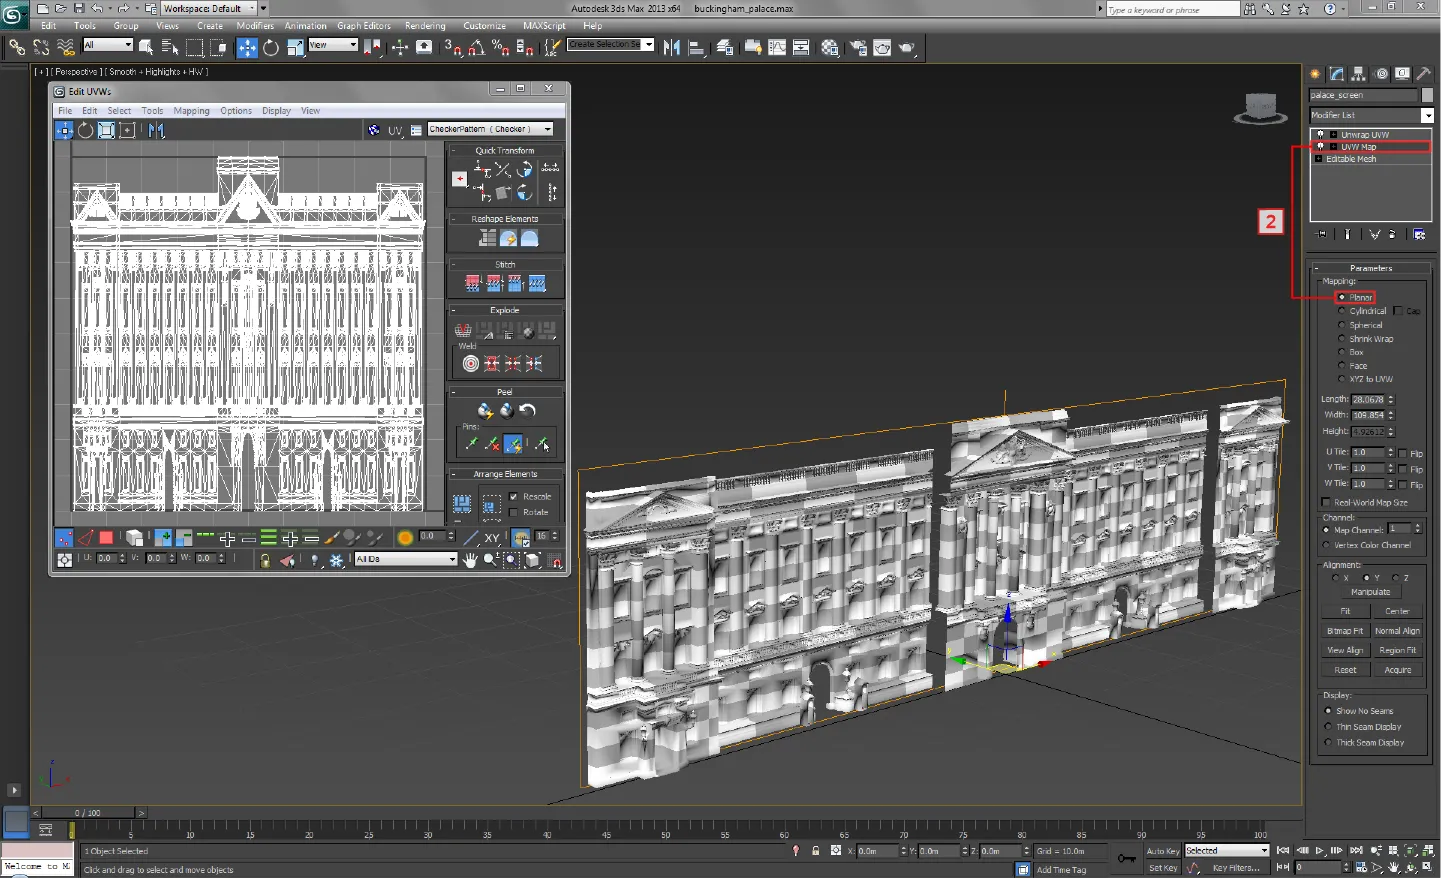
Section titled “Step 1 - Generating the UV map (3ds Max)”- Select the UVW Map modifier.
- From the list of projection types select planar.
- The Planar map will project UV coordinates from its normals to the surface. Therefore, it is necessary to fit the planar map’s position, orientation and scale to the surface.
- Select the Unwrap UVW modifier.
- Open the Edit UVWs window to view the UV map.
The image here shows a uniform checker pattern rendered to the surface, which indicates the UV map has an even distribution of UV coordinates, for all areas facing towards the Planar map. As a result, those areas have a higher UV density than the areas facingaway from the Planar map. For example, the windows’ side faces have a lower UV density, which will result in content appearing stretched. To avoid this the UV map should be relaxed.
Step 2 - Rendering UV maps to content templates
Section titled “Step 2 - Rendering UV maps to content templates”The image below shows the content template, which was rendered from the UV map. The template’s resolution was calculated by following the same technique used for pixel-perfect projection surfaces. However, the key difference is this template was calculated by measuring the dimensions of the Planar map object, because in this case the Planar map automatically generated the normalised UV map.
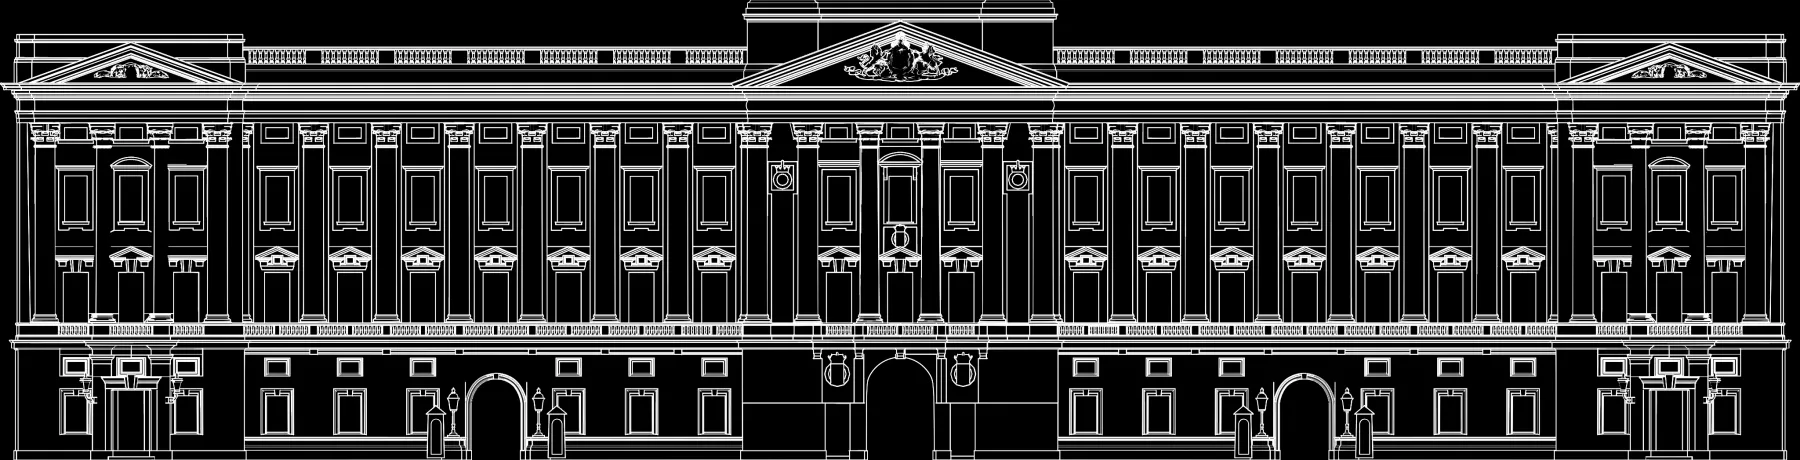
A 2D content template of the Buckingham Palace rendered from 3ds Max.