Using stage editor
To edit the Stage you need to open the Stage editor.
To open the stage editor, right-click stage from the dashboard (bar at the top of the screen).
Select the scene tab to display the following properties:
Floor size
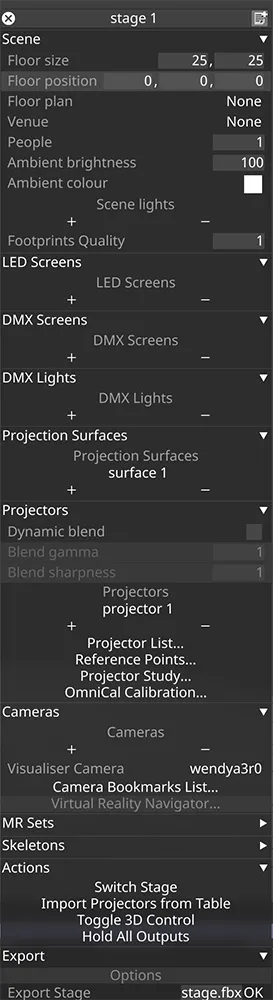
Section titled “Floor size”This property controls a stage’s floor size. There are two numbers laid out horizontally: respectively the x (width) and z (depth) coordinates. The units used for floor size are meters.
Floor position
Section titled “Floor position”This property controls a stage’s floor position in 3D space. There are three numbers laid out horizontally: respectively the x (left/right), y (up/down) and z (forward/backward) coordinates.
Floor plan
Section titled “Floor plan”This points to the still image file that defines the floor plan of the currently active stage. Selecting this property will open the Texture object library, which shows all of the still image files saved on your local hard-drive in the DxTexture folder.
To add the floor plan to the stage floor:
- Left-click floor plan to open the Texture object library.
- Left-click the image you want to use for the stage floor.
If you want to use a floor plan other than the standard still images provided in the software, you will need to use a custom still image file.
See the Placing media files for a project sub-chapter to understand where to place a custom still image file and how to access it. Also, save the file to a supported file format.
This property enables you to swap a venue with the currently active venue. This switching of venues will be updated in the Stage Visualiser. This is very useful for quickly switching between different prop configurations.
- Left-click venue to open the Venue manager. This will display a list of all of the venues you have created.
- Left-click the venue you want to switch with the currently active venue.
For more detailed information on using this feature please see the Creating/switching venues, Editing venues, Creating/removing props and Editing props sub-chapters. For general information about venues and props please see the Venues/props overview.
People
Section titled “People”This property controls the number of human figures displayed in the Stage Visualiser. The maximum number of human figures in a stage is 320.
Ambient Brightness
Section titled “Ambient Brightness”This property controls the ambient brightness level of the stage while in Lux renderer mode.
Ambient Colour
Section titled “Ambient Colour”This property controls ambient colour of the stage while in Lux renderer mode.
Use the Colour Dropper tool to select an ambient colour for the stage.
Footprints level
Section titled “Footprints level”This property is a resolution multipler for projector shadow buffers. 0 disables footprints.
LED Screens
Section titled “LED Screens”Click the + icon to open the LED screens manager and create new LED screens to add to the stage.
Left-click and drag LED screens in the list into the - icon to remove them from the stage.
For more information see screen types overview and creating screens.
DMX Screens
Section titled “DMX Screens”Click the + icon to open the DMX screens manager and create new DMX screens to add to the stage.
Left-click and drag DMX screens in the list into the - icon to remove them from the stage.
For more information see screen types overview and creating screens.
DMX Lights
Section titled “DMX Lights”Click the + icon to open the DMX lights manager and create new DMX lights to add to the stage.
Left-click and drag DMX lights in the list into the - icon to remove them from the stage.
For more information see screen types overview and creating screens.
Projection Surfaces
Section titled “Projection Surfaces”Click the + icon to open the Projection Surfaces manager and create new Projection Surfaces to add to the stage.
Left-click and drag Projection Surfaces in the list into the - icon to remove them from the stage.
For more information see screen types overview and creating screens.
Projectors
Section titled “Projectors”Dynamic Blend
Section titled “Dynamic Blend”Toggles dynamic blend on and off for projectors, globally.
Blend gamma
Section titled “Blend gamma”Controls the blend gamma for Dynamic Blend.
Blend sharpness
Section titled “Blend sharpness”Controls the blend sharpness for Dynamic Blend.
Click the + icon to open the Projector manager and create new Projector to add to the stage.
Left-click and drag Projectors in the list into the - icon to remove them from the stage.
For more information see screen types overview and creating screens.
Projector List
Section titled “Projector List”Clicking this button opens a list of all projectors in the project, with the ability to edit their properties in one editor. This can also be accessed with the shortcut, CTRL P.
Reference points
Section titled “Reference points”Clicking this button opens a list of all projector calibration points in the project, with the ability to view the name, parent object as well as toggle the mute, lock & delete functions.
Projector Studies
Section titled “Projector Studies”Clicking this button opens the Projector Studies editor.
OmniCal Calibration
Section titled “OmniCal Calibration”Clicking this button opens the OmniCal Calibration editor.
Cameras
Section titled “Cameras”The cameras tab allows you to add fixed cameras to the stage that all have their own rendering settings. All cameras can be assigned to feed outputs.
Visualiser camera
Section titled “Visualiser camera”The visualiser camera is the camera you are looking through on the local machine. It has its own set of settings, and can be changed by left-clicking the porperty and selecting a different camera. See visualiser renderer for more information.
Camera bookmarks list
Section titled “Camera bookmarks list”Opens the camera bookmarks list.
See storing & recalling camera positions for more information.
Virtual reality navigator
Section titled “Virtual reality navigator”Opens the VR viewfinder.
Actions
Section titled “Actions”This property allows you to change the stage displayed in the Stage Visualiser. The currently active stage name will be displayed in the Stage tab of the dashboard as highlighted in the image below.
Switch Stage property is used to open the Stage manager and select a stage
To create a new stage:
- Left-click Switch stage to open the Stage manager. This will display a list of all of the stages you have created.
- Type the name of a stage into the new stage text field and hit Enter. This will create a new stage which will be added to the Stage manager.
You can then use the Stage editor to select the stage you want to switch with the currently active stage.
Export stage
Section titled “Export stage”As of r17.3, the stage can be exported as either FBX, OBJ or 3DS.
- Enter a name for the export.
- Append the file extension, such as .fbx .obj or .3ds
- Click OK.
The exported file will be written to the output folder of the project folder.
Import Projectors from table
Section titled “Import Projectors from table”This button is used to import projectors via CSV. See Projector Import for more information.
Toggle 3D control
Section titled “Toggle 3D control”This button is used to toggle the Manipulators function on and off. It can also be toggled through the axis icon on the track header and with the CTRL M keyboard shortcut.
Hold/Unhold all outputs
Section titled “Hold/Unhold all outputs”Hold all outputs is a toggle between hold/unhold. Similar to the existing Hold functionality available in the dashboard, this function allows you to quickly set all screens in the stage to Hold mode which freeze the frame displayed on them, allowing you to continue sequencing without changing their output. This can also be done on a per screen basis as detailed in output properties.