Editing Objects
Types of object properties
Section titled “Types of object properties”An objects properties can be categorised into four types. Examples of these four types are described below using the example of a Screen object and its editor.
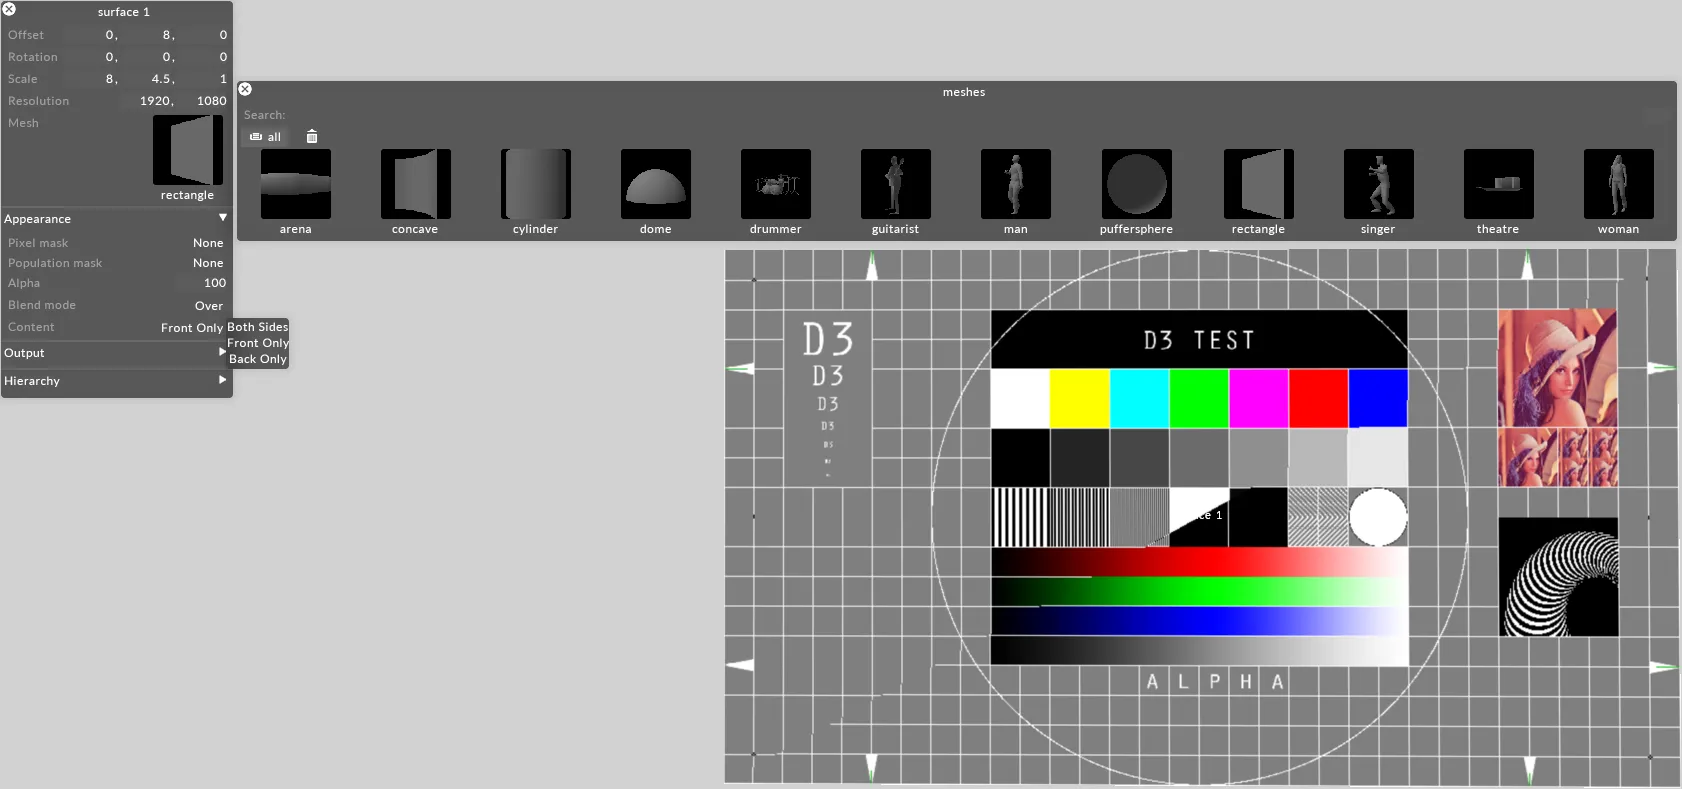 Properties of an object can be categorised into four types: Numeric, Options, Object, Array.
Numeric
Section titled “Numeric”With a numeric property, you are asked to fill in a numeric value.
Options
Section titled “Options”An option property gives you a fixed option list to choose from.
Object
Section titled “Object”An object property refers to another object.
The example above highlights mesh as an object property. In this instance the mesh property is set to a Rectangle mesh.
An array property is used when an object property points to a list of other objects when you wish to edit it.
In the example above I have left-clicked the mesh property to open the Mesh object library. Notice the object library contains further mesh objects such as Concave and Cylinder objects which can be swapped for the Rectangle mesh object. This is an example of an array property because the Rectangle object points to a list of other objects.
The information below provides a detailed overview on how to edit the four types of object properties.
Editing numerical properties
Section titled “Editing numerical properties”There are several ways to edit a numerical property:
Adjust using the scroll wheel
Section titled “Adjust using the scroll wheel”Left-click the property name or text field and use the mouse scroll wheel for adjusting the numerical property. Each step of the wheel will add or subtract a step value. Holding down the left Shift key will step ten times faster; holding down the left Ctrl key will step ten times slower.
Adjust using the Arrow keys
Section titled “Adjust using the Arrow keys”Left-click the property name or text field and use the Arrow keys to adjust the values. Each click of the Arrow key will adjust the value by the step value.
Type in the number directly
Section titled “Type in the number directly”Left-click the property name or text field and type in a new value to replace the old one.
Type in a numerical formula
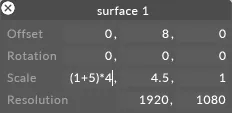
Section titled “Type in a numerical formula”Left-click the property name or text field and type in a formula, for example, (1 + 5)*4 . Press Enter to replace the formula with the result.
Change the minimum and maximum limits of a numerical property
Section titled “Change the minimum and maximum limits of a numerical property”Right-click the object property name; this will open up a small editor with four values: min , max , step, and damping. By default, when min > max, there are no limits. If min < max, then the numerical property is automatically restricted to the min/max range. This will apply to all the objects of that type across the whole project.
 Minimum and maximum limits of a Screen objects Scale property
Change the Step of a numerical property
Section titled “Change the Step of a numerical property”The step value controls the increment at which a numerical property changes. This will apply to all the objects of that type across the whole project.
 Step value of a Screen objects Scale property
Damping
Section titled “Damping”If a numerical parameter is linked to a MIDI surface control, the damping value smoothens the incoming MIDI value to a 0-255 range (MIDI only ranges between 0-127). The higher you set the damping value, the smoother the conversion will be. This will apply to all the objects of that type across the whole project.
 Damping value of a Screen objects Scale property
To see how to link a MIDI control surface to a numerical parameter in Designer, see the Expressions section.
Editing an option property
Section titled “Editing an option property”Left-click the option property name or value; this will open up a small menu with available options. Left-click the option you want.
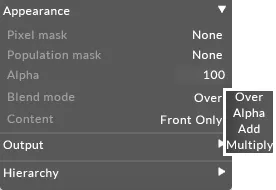 Option properties to decide how content should appear on a Screen object
Editing an object property
Section titled “Editing an object property”To examine or edit the object that the property refers to, right-click the object property name or thumbnail.
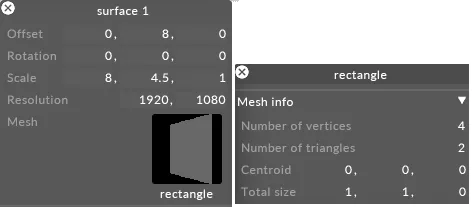 Right-clicking Mesh to access an objects properties, in this example a Rectangle
Editing an array property
Section titled “Editing an array property”To swap the object for a different object, left-click the object property name or thumbnail. This will open up an object library. Left-click an object thumbnail to select that object.
 Left-clicking Mesh to access the Mesh object Library where you can swap an object for a different object
Object property explanations
Section titled “Object property explanations”The software is able to provide useful explanations on different object properties. To enable to display explanations of object properties:
- Hit F1.
- Hover your mouse cursor over an object. A text box should appear that provides an explanation of that particular object property.
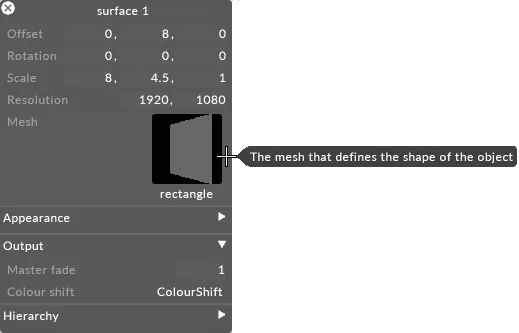
Object properties explained in a useful text box when you hit F1 and hover your mouse cursor over the particular property
- Hit F1 to exit this mode.
Hitting F1 will also open a Shortcuts menu.
Separator tabs
Section titled “Separator tabs”Object editors may contain elements called separator tabs , which appear as lighter grey bars with a sideways facing triangular arrow (when closed) or downward facing triangular arrow (when open). Separator tabs hide additional editor text fields or command actions, collecting them into sensible groups. Left-click separator tab to open or close it.
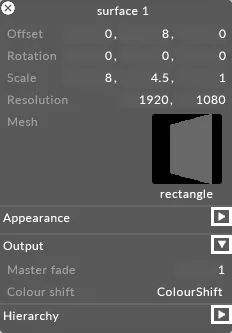 Separator tabs dividing the Screen Object editor into Appearance, Output and Hierarchy