Keyframing Overview
Keyframing is used to animate a layer’s property over time.
What is the Keyframe editor?
Section titled “What is the Keyframe editor?”Keyframing enables you to animate a layer’s property over time. A layer’s property can be accessed from its layer editor.
If you are unfamiliar with the Layer editor, we recommend reading Editing layers.
Opening a Keyframe editor
Section titled “Opening a Keyframe editor”To open a Keyframe editor
Section titled “To open a Keyframe editor”- Left-click a Layer property to open the Keyframe editor. Opening a Keyframe editor will close any other open Keyframe editors.
Keyframe toggles
Section titled “Keyframe toggles”- Beginning with r20, Keyframe toggles have been added, allowing you to reset all keyframes for an attribute within a layer. Enable and disable keyframes easily by clicking on the keyframe toggle icon. For more information on Keyframe Toggles, please visit this link.
Opening multiple Keyframe editors
Section titled “Opening multiple Keyframe editors”- Hold Ctrl whilst left-clicking the properties of a layer editor to open multiple Keyframe editors.
Keyframe editor types
Section titled “Keyframe editor types”There are three different types of Keyframe editors. Examples of these three types are described below using the example of a Bitmap layer and its editor, and in the three following sub-chapters. Please read the Editing objects sub-chapter for more information on object property types.
Numeric
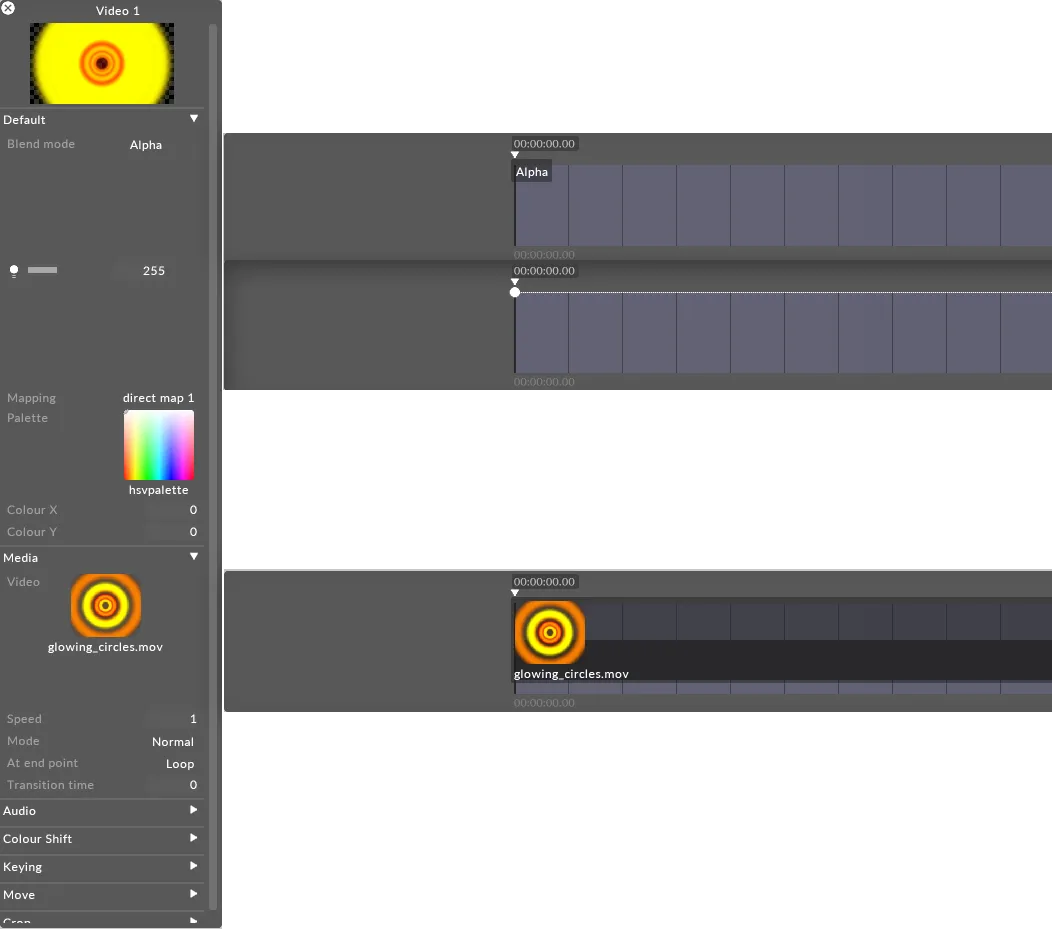
Section titled “Numeric”A numeric Keyframe editor allows you to animate a numeric value when editing a numeric property, in this example, brightness.
Option
Section titled “Option”When animating an option-based property, the Keyframe editor restricts you to a fixed option list of valid values. For example, when animating blendMode, you can only choose from the supported blend modes.
Object
Section titled “Object”An object Keyframe editor refers to another object when animating an object property.
Navigating Keyframe editors
Section titled “Navigating Keyframe editors”-
Left-click a Track bar in the Timeline to play forwards or backwards in the currently selected Track. Notice that as you navigate the Timeline, the currently open Keyframe editor will adjust accordingly. The Keyframe editor shows a bar of time just before the current Timeline position and a certain number of bars after it. The number of bars depends on the screen width and the current zoom factor.
-
Left-click the Keyframe editor and hold Alt whilst moving the mouse scroll wheel to zoom in or out (you can also use the - and = keys while the Keyframe editor is selected). The mouse must remain focused on the Keyframe editor to successfully zoom.
Snapping
Section titled “Snapping”The snapping behaviour in the Keyframe editor is relative to the zoom level of the editor. By default, this zoom level will be in sync with the Timeline zoom level unless you have manually adjusted it as explained above. Snapping behaves in 3 different ways based on your zoom level:
| Zoom Level | Snapping Behaviour | Example |
|---|---|---|
1s, 2s, 5s, 15s, Max, and quantised tracks regardless of zoom level | Quarter Second Keyframes will snap to the nearest* quarter second interval in frames. | With a 30fps Timeline keyframes will snap to the 0th, 7th, 15th and 22nd frame of a each second. |
15f, 10f, and 5f | Half Timestep Keyframes will snap to the nearest* interval determined by the half of the zoom level. So if the zoom level is 10f the snapping will be every 5 frames. | With a 30fps Timeline and a zoom level of 5f keyframes will snap to the 0th, 2nd, 5th, 7th, 10th, 12th, etc… frame of a each second. |
1f | One Frame Keyframes will snap to every individual frame defined by the Timeline’s frame rate. | N/A |
* Snapping of all types is relative to the frame rate of the Timeline and will always round down when the interval lands in the middle of two frames.
Common Keyframe properties
Section titled “Common Keyframe properties”All three Keyframe editor types have the following things in common:
-
They consist of a sequence of Keyframe or key values, which can be either option choices, numeric values or objects. In the case of numeric properties, the value between the keyframes is generated according to a line or curve that passes through the keyframes.
-
A beat of time appears as a single vertical line. Each group of four lines represents a single Track bar and is marked with a bar number just below it. The background colour of the Keyframe editor matches the colour of the corresponding Track bar in the Timeline.
-
Just above the Keyframe editor is a small triangle with a timecode just above it. This is the ‘Now’ pointer; it indicates the Timeline position that is currently being rendered to the stage. Editing a Keyframe moves the now pointer to the time of that Keyframe, thus allowing you to instantly see the effect of changing the value.
Keyframe Options
Section titled “Keyframe Options”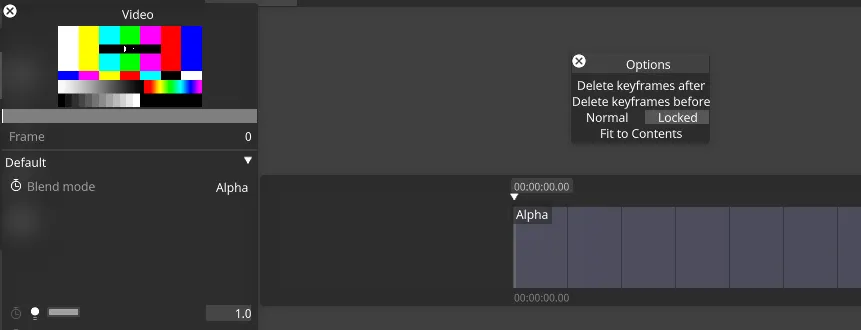
Right-click on the border of a keyframe timeline, and the Options window will appear with the following options:
-
Delete keyframes after
-
Delete keyframes before
-
Normal: When there are looping keyframes after a section break and the playhead hits that section break, it will play the keyframes after the section break anyway.
-
Locked: When there are keyframes after a section break and the playhead hits that section break, it respects the section break and will not play the keyframes.
-
Fit to Contents: Shortens the layer length to the same length of time as the last keyframe of that layer.
Keyframes in the Track Widget
Section titled “Keyframes in the Track Widget”From r30.8, all keyframes on layers will appear in the timeline as small ticks at the bottom of each layer.
