Virtual Cameras
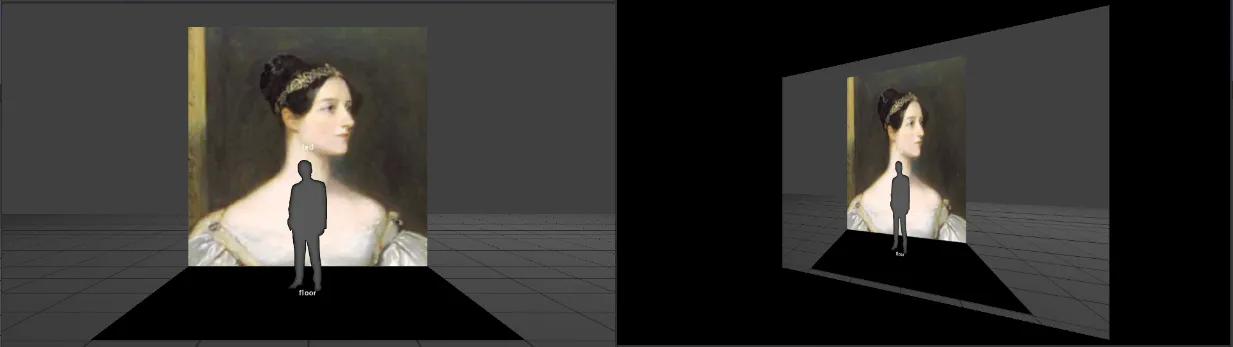
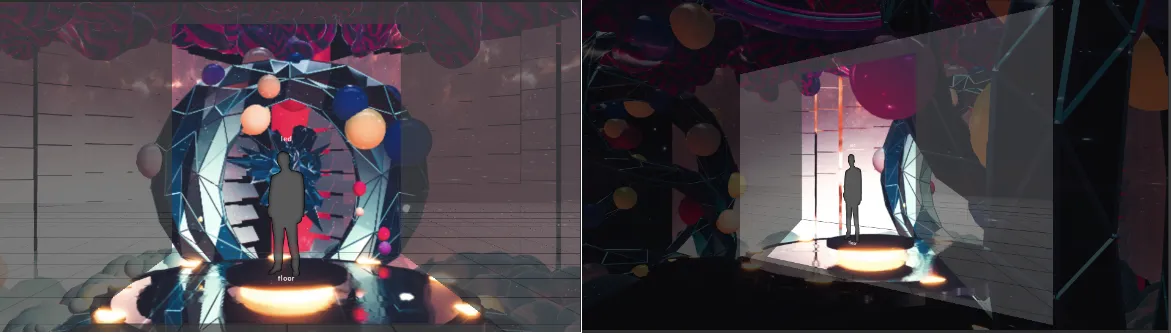
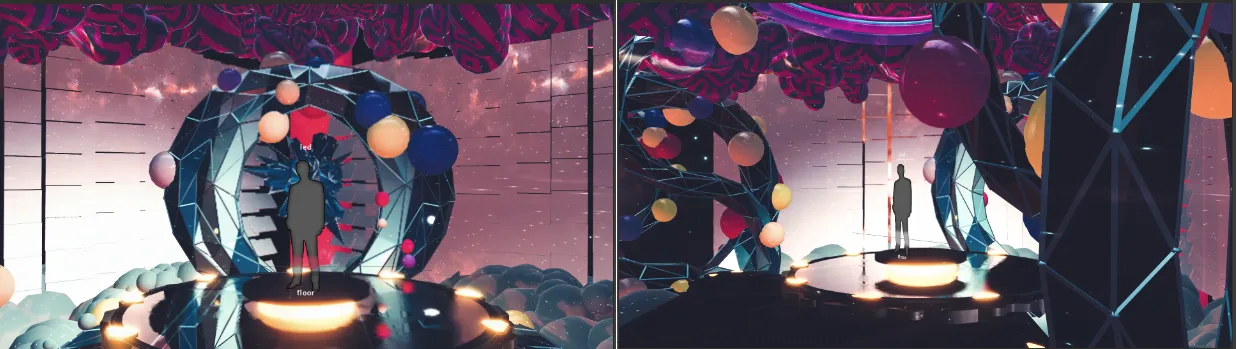
Virtual cameras can be used as part of MR or green screen workflows to allow shots to be captured from positions outside of the range of the physical cameras. By reprojecting the filmed action and virtual content to a new viewpoint, wide shots can be captured for small stages with limited space.
A virtual camera can also be used to traverse a large virtual scene, such as a cityscape. It is possible to start by moving through the streets rendering the virtual scene, and end by transitioning into the view of the real camera on an xR stage, capturing the people on the stage within your virtual scene.
Background
Section titled “Background”Virtual cameras are designed to be interchangeable with real cameras within a MR or green screen setup. They should be interacted with in similar ways to a real camera. Virtual cameras work by reprojecting the filmed content from a parent camera to the virtual camera’s viewpoint:
We render the virtual scene from the virtual camera’s viewpoint, add set extension to the outsides of the reprojected plane, and account for the reprojection in the content we send to the screens. This gives us the virtual camera viewpoint:
Workflow
Section titled “Workflow”To set up a virtual camera
Section titled “To set up a virtual camera”- Create a new virtual camera in the Cameras list in the stage.
- Set the Parent camera property to the desired real camera.
- Add a Live action position marker located at the average position of live content on the stage (e.g. people). This will ensure that the live content appears with the correct perspective relative to the virtual content when the virtual camera moves.
- Set the virtual camera as the target camera of the MR set.
- Map content to the MR set front and backplates as normal.
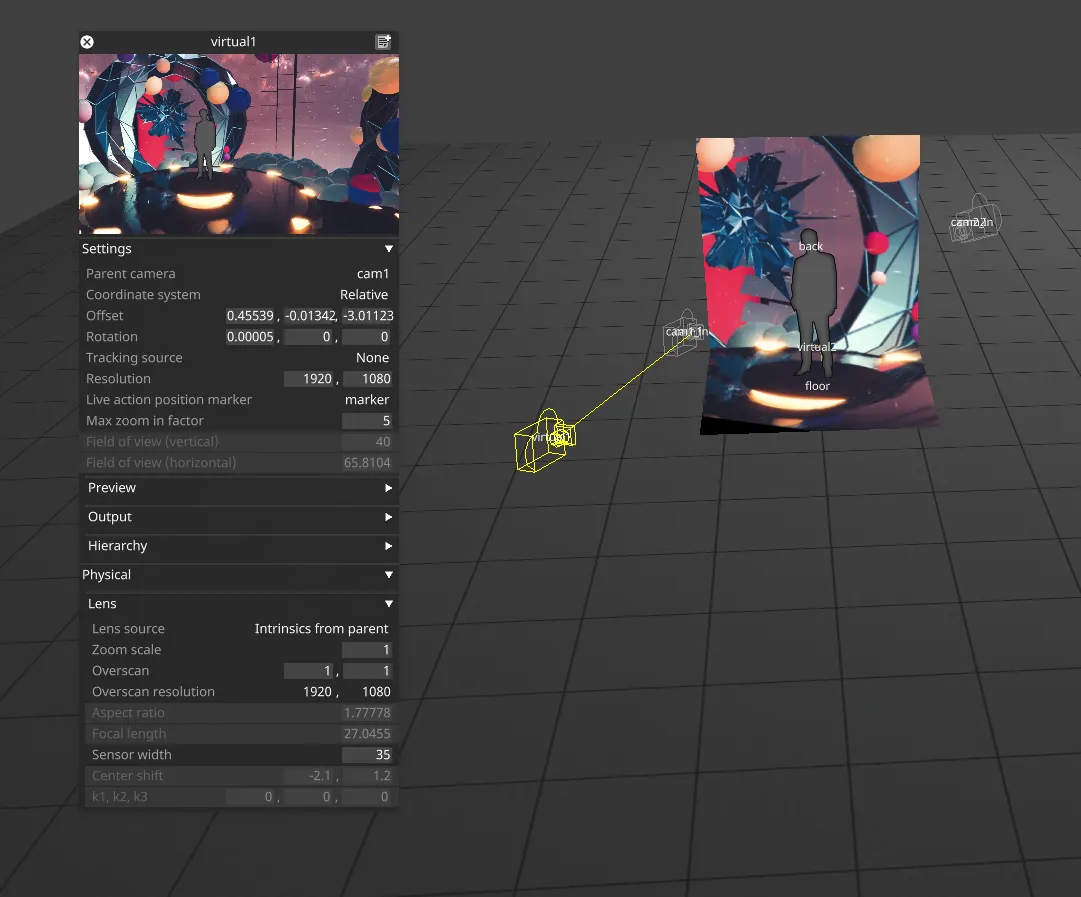
Virtual camera properties
Section titled “Virtual camera properties”There are several properties than can be set on virtual cameras to control their behaviour. Many of these are the same as regular cameras. Other notable properties to be aware of for virtual cameras specifically include:
- Max zoom in factor can be set to restrict how much the filmed content can be zoomed into before purely virtual content is displayed. This prevents excessive pixelation when moving the virtual camera towards the live action.
- Lens settings can be set under Physical→Lens. These can be defined locally in the virtual camera, set to follow the zoom of the parent camera (with an optional scaling applied), or set to follow all the intrinsics of the parent camera (with an optional zoom scale).
- Output type under Output can be set to Spherical to output spherical content for viewing in VR. See xR for VR for more details about this workflow.
To control a virtual camera
Section titled “To control a virtual camera”There are various ways for controlling the position of the virtual camera. You can either:
- Use the 3D object manipulators to move the virtual camera object around in the stage.
- Edit the values in the virtual camera editor. Note that values can be defined in a Global coordinate system, or Relative to the parent camera.
- Use a tracking source: A tracking source can be used to control the pose and lens intrinsics for a virtual camera in the same way as a real camera.
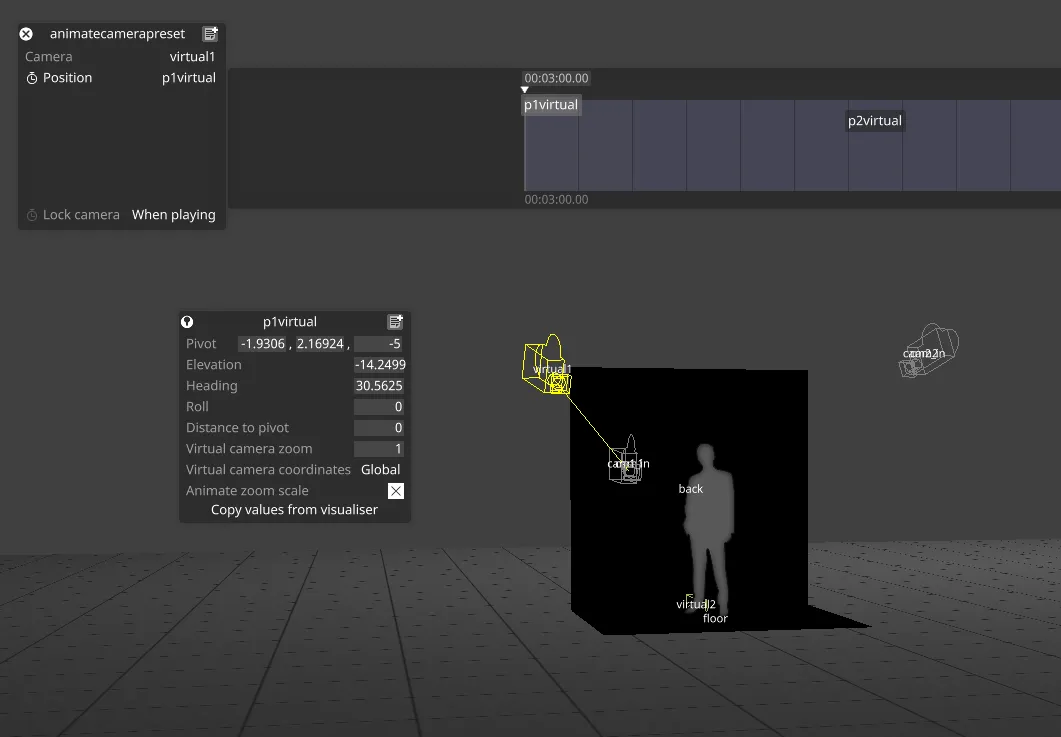
- Keyframe camera animations using AnimateCameraPreset or AnimateCameraControl.
To keyframe virtual camera animations
Section titled “To keyframe virtual camera animations”Virtual camera animations can be keyframed similarly to standard cameras using the AnimateCameraControl or AnimateCameraPreset layers.
AnimateCameraControl:
Section titled “AnimateCameraControl:”- Add an AnimateCameraControl layer.
- Set the camera to the virtual camera you wish to animate.
- Set the coordinate system to Global or Relative as desired.
- Keyframe virtual camera properties. In addition to the standard properties for a normal camera, zoom scale can also be keyframed.
AnimateCameraPreset:
Section titled “AnimateCameraPreset:”- Add an AnimateCameraPreset layer.
- Set the camera to the virtual camera you wish to animate.
- Add new virtual camera positions to the Position property.
- Set the coordinate system to Global or Relative as desired.
- In addition to the standard properties for a normal camera, the virtual camera’s zoom can be set. Toggle the Animate zoom scale option to choose whether to animate zoom scale or global field of view.
- Keyframe several virtual camera positions to animate the camera between these positions. Positions in Global and Relative coordinates can be mixed, and the camera will move between the coordinate systems.
Limitations
Section titled “Limitations”- If the virtual camera is significantly off-axis from the real camera, the live objects (e.g. people) will become skewed. The projection can be thought of as looking at a 2D cardboard cutout from a different angle.
- All live action must be completely within the frame captured by the real camera. If not, it will be cut off during the reprojection.
- If the lens is heavily distorted, there maybe be distortion artifacts. A radial mask can be set in the editor to remove these effects, which are most pronounced at the edges of the image.
- If you attempt to move the virtual camera forwards towards the live action, the picture will become progressively more pixellated. This is because you are zooming in on the captured image at fixed resolution. This can be mitigated by setting the Max zoom in factor.
- If the virtual camera moves behind the live action, it will render virtual content only.
- If the parent camera moves quickly, there may be some noticeable discontinuity between filmed content and the set extension. This may be more noticeable if the virtual camera is near to the parent camera. For fast camera moves it is recommended to use a real camera rather than a virtual camera.
Legacy Workflow
Section titled “Legacy Workflow”Virtual camera animations could previously be keyframed using additional options in the AnimateCameraControl or AnimateCameraPreset layers. The new workflow supersedes this method, however for backwards compatibility the old workflow can be enabled by setting the option switch enableLegacyVirtualCameraWorkflow.