MR Set
An MR set contains all the components of your virtual set and the camera(s) you will be using to capture that virtual set for transmission.
Workflow
Section titled “Workflow”To create an MR set
Section titled “To create an MR set”- Open the Stage properties widget and navigate to the MR Set tab. It can be useful to pin this widget open.
- Add LED screens to the MR set.
- Add an Indirection Controller (if needed).
Properties
Section titled “Properties”Settings
Section titled “Settings”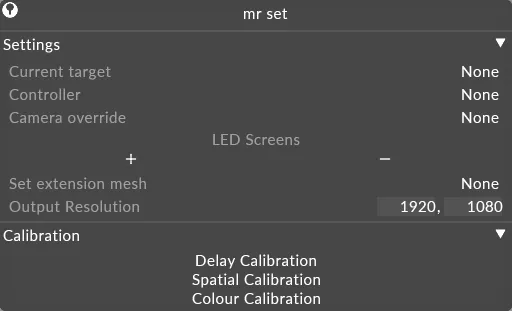
Current target- Defines the camera that the content is being rendered from.Controller- Defines the indirection controller that controls the camera switching.Camera override- Allows you to set a camera override for whatever the current controller is set to.LED Screens- Defines which LED screens are included in the MR Set.Set extension mesh- Defines the mesh used for the set extension. This property reads from the mesh folder of your project folder.Output resolution- Defines the final output resolution of the MR Set.
Calibration
Section titled “Calibration”Delay calibration
Section titled “Delay calibration”Left-click this button to open the calibrate displays editor.
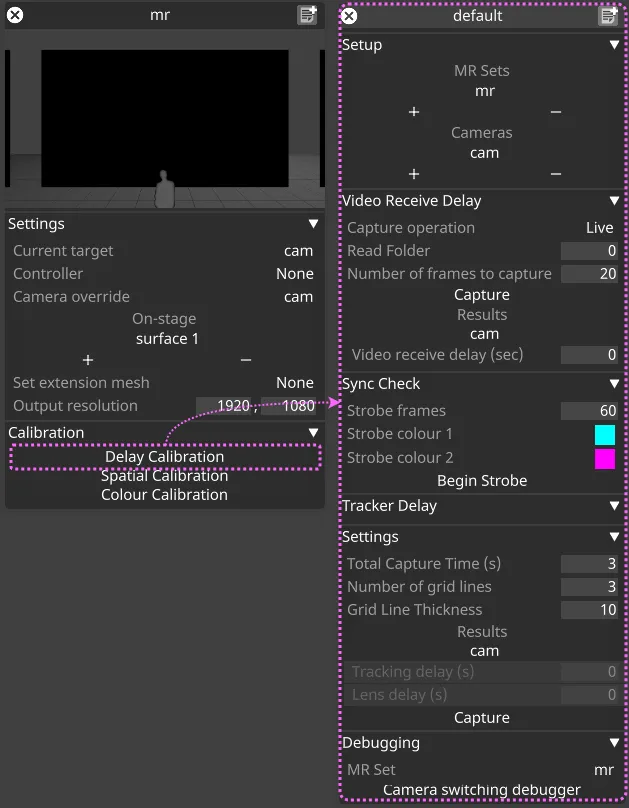
MR Set- defines which MR Sets are used.Cameras- defines which cameras are included.
Video Receive Delay
Section titled “Video Receive Delay”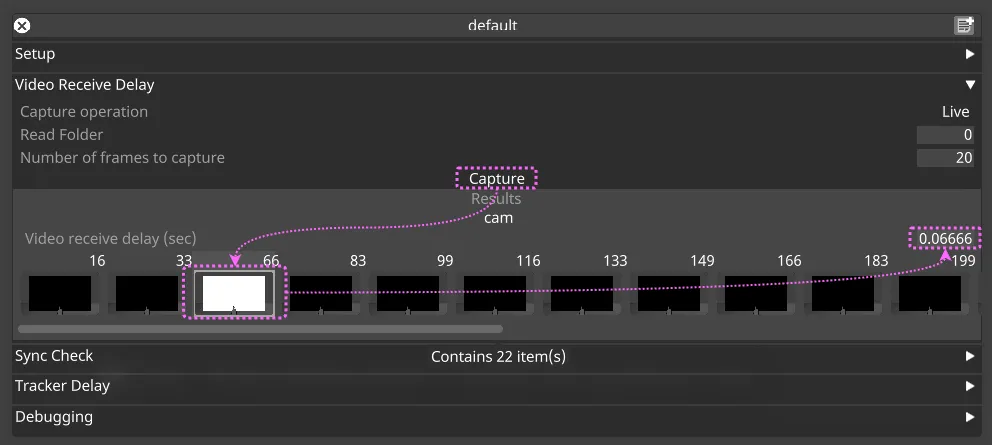
Workflow
Section titled “Workflow”- Click Capture.
- The LED wall displays one white frame among black frames.
- The captured frames appear below the Video receive delay (sec) field.
- Click the white frame.
- The Video receive delay (sec) value updates accordingly.
- This is the capture delay of the camera.
It is absolutely crucial that only a single frame of white is visible in order for xR to work correctly. If there is more than one white frame in the capture, then a combination of shutter angle and/or genlock phase offset on the camera and LED processor will likely need to be adjusted.
Capture operation. There are three options
Section titled “Capture operation. There are three options”Live- The live setting will use the live captured images to do the calibration.Write- The write setting will write the images captured to disk so they can be used for debugging later.Read- The read setting will read back the images you previously wrote to disc, this is useful for debugging.
Sync check
Section titled “Sync check”Strobe frames- defines the FPS for the sync test.Strobe colour 1- Defines the colour for part one of the strobe alternation.Strobe colour 2- Defines the colour for part two of the strobe alternation.
Tracker Delay
Section titled “Tracker Delay”Settings
Section titled “Settings”Total capture time- Defined in seconds. This is the total capture time of the calibration.Number of grid lines- Defines the number of grid lines.Grid line thickness- Defines the thickness of the grid lines. Increase or decrease thickness based on specific stage setup.Results- Left-click Results to open the results dialog.Capture- Left-click capture to run a calibration.
Debugging
Section titled “Debugging”MR set- Defines the MR Set to debug.Camera switching debugger- Left-click to open the camera switching debugger.
Spatial calibration
Section titled “Spatial calibration”Left-click this button to start a spatial calibration.