Establish a Designer Connection with Porta Bridge
Porta Bridge acts as the communication gateway between Porta and external systems, such as Designer (d3 software), MOS, RossTalk/GPI. For this page, we will focus on establishing the communication between Porta and Designer (d3 software).
Porta Bridge: Set up connections
Section titled “Porta Bridge: Set up connections”Step 1: Connect to Porta
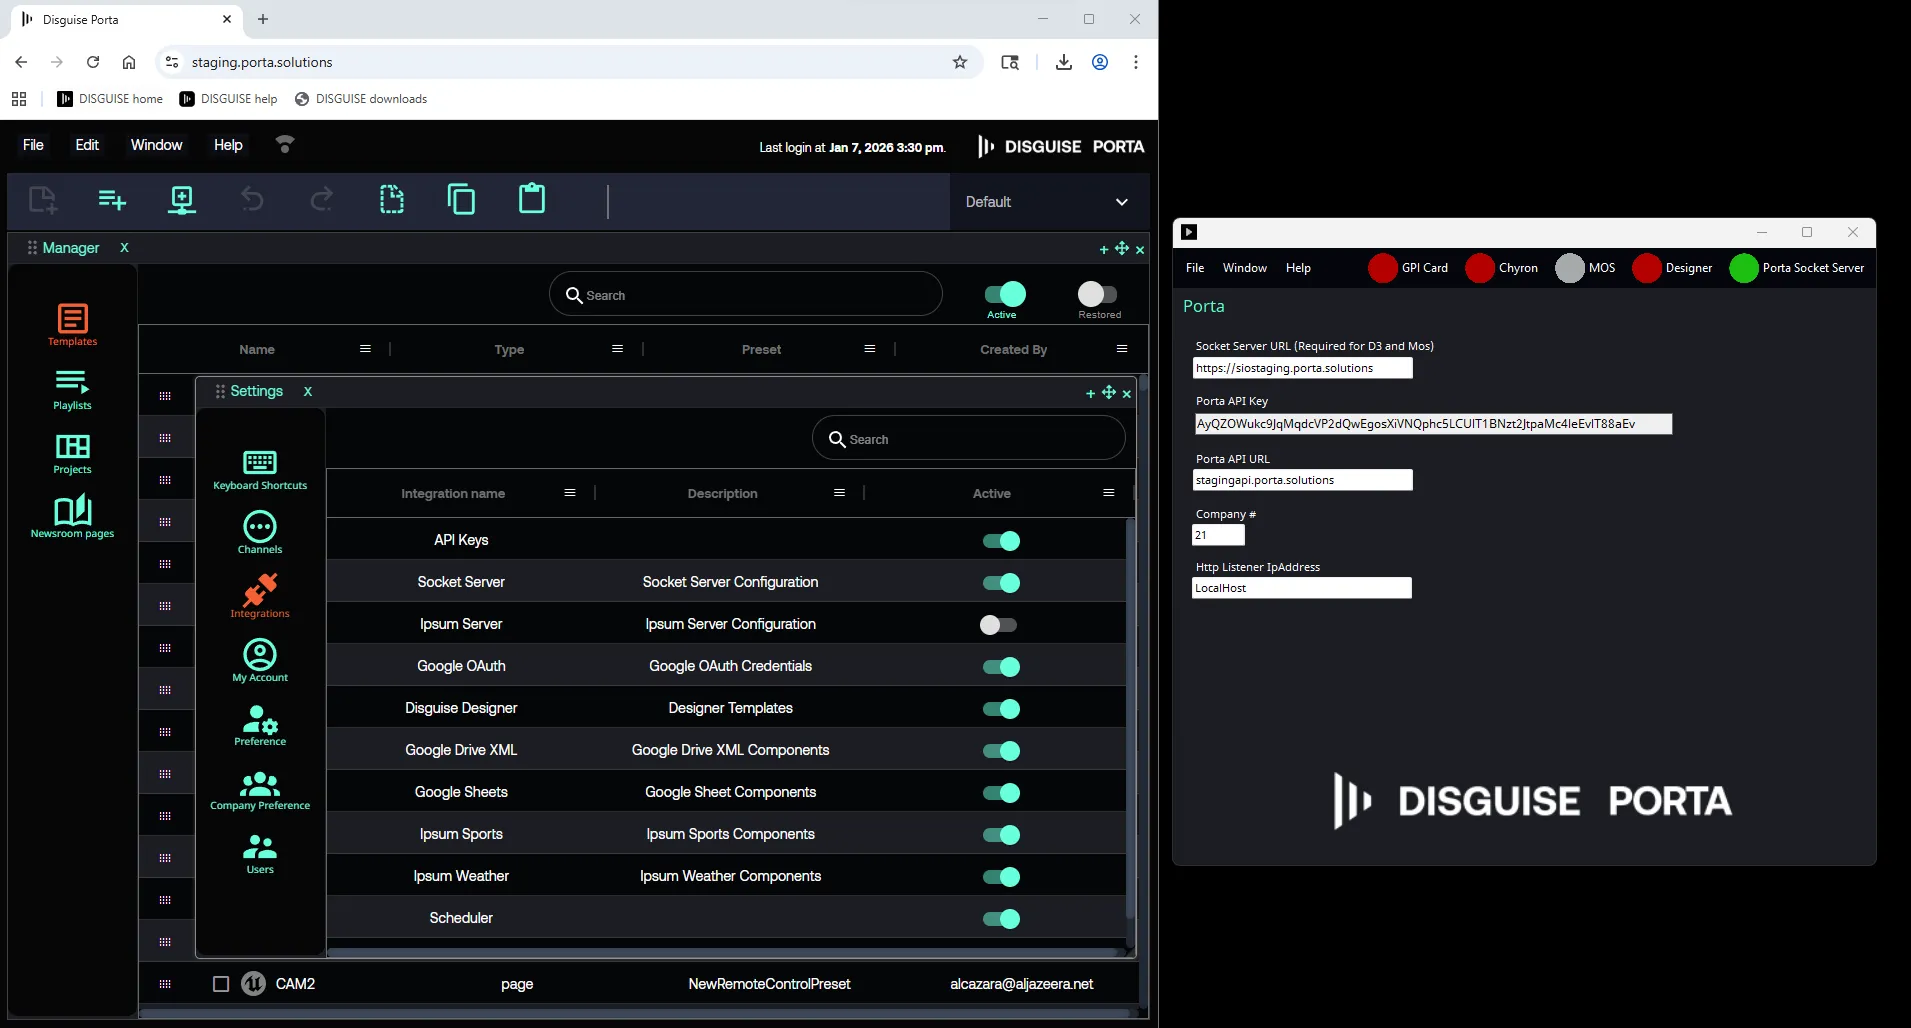
Section titled “Step 1: Connect to Porta”- Specify Porta configuration: Navigate to Window -> Porta
- Socket Server URL : Location of the Socket Server. In Porta, go to File -> My Account -> Integrations and double click Socket Server to reveal the URL.
- Porta API Key: In Porta, go to File -> My Account -> Integrations and double click API Key to reveal the key.
Upon successful connection to Porta, top right indicator for Porta Socket Server will turn green.
Step 2: Connect to Designer
Section titled “Step 2: Connect to Designer”Review the following settings:
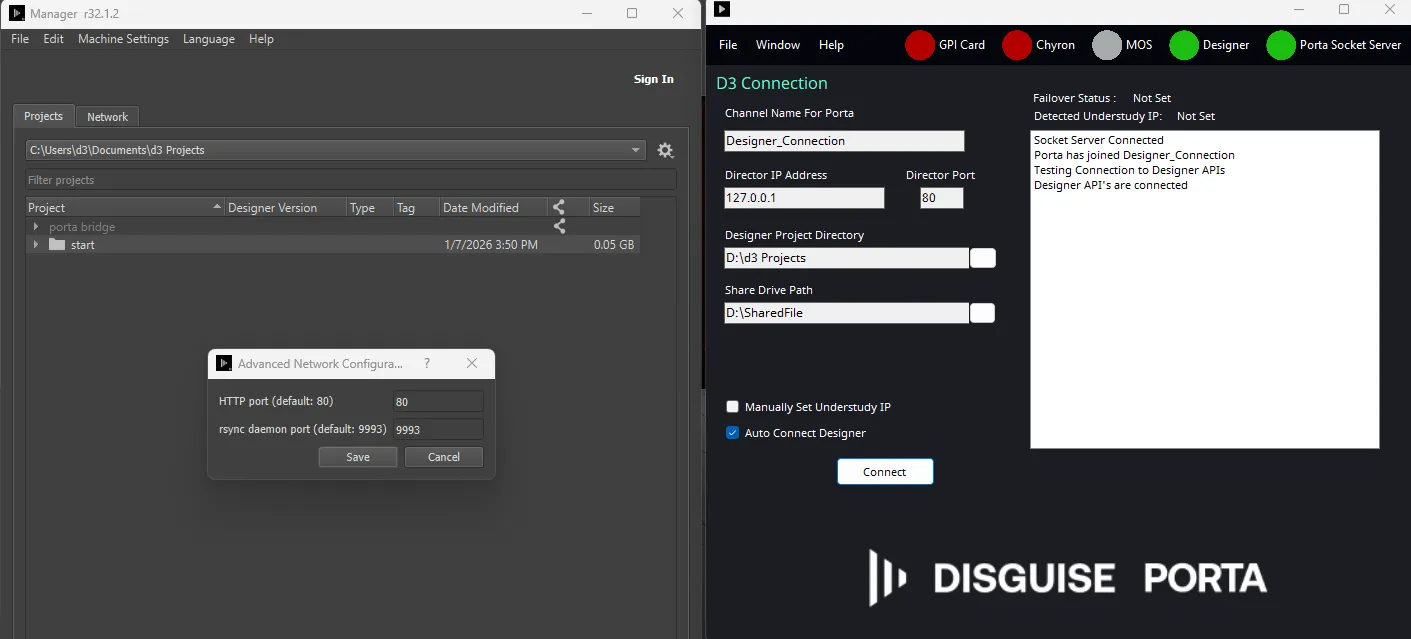
- Specify the Designer configuration: In Porta Bridge, navigate to Window -> Designer.
- Channel Name for Porta: This is the d3 channel name is shown in Porta.
- d3 IP Address: This is the location of the d3 instance that is running.
- Port(Not Required): Port location if needed 80 if not used.
- Backup d3 IP Address: This is the location of the d3 Understudy instance if needed by the project.
- d3 Project Path: The location of the d3 Project Path not the projects itself.
- It ends with
\d3 Projects. - The Default location is
Documents\d3 Projects
- It ends with
- Share Drive Location: The location of a share drive that stores images that can be added to d3 via Porta Pages.
Upon successful connection to Designer, the top right Designer indicator will turn green.
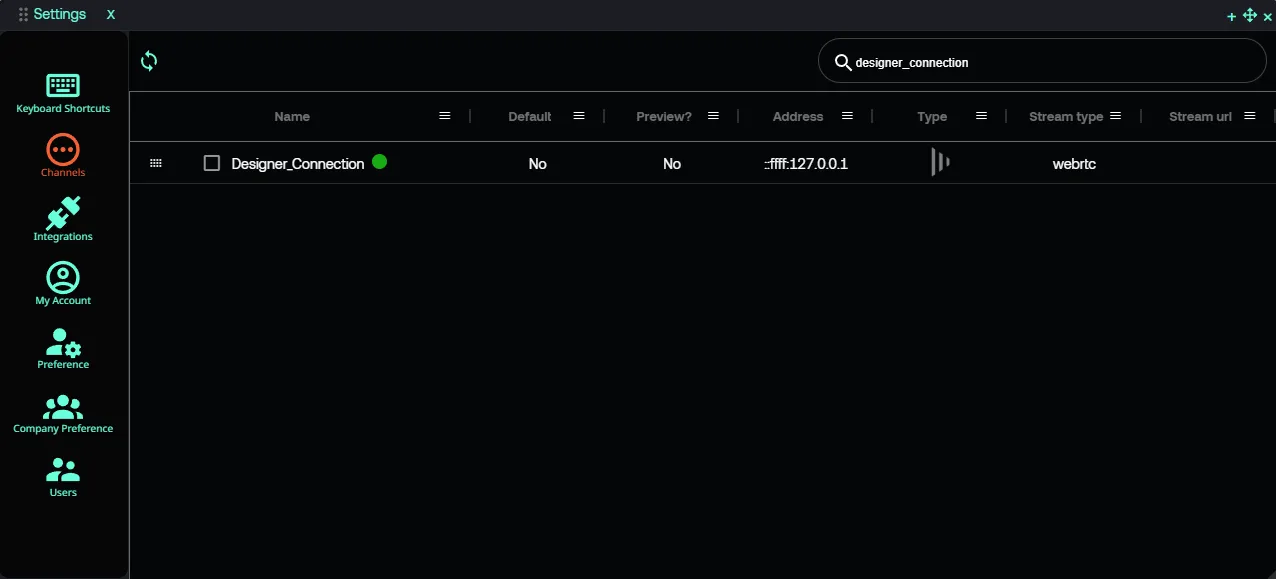
Testing the connection in Porta
Section titled “Testing the connection in Porta”Go to Windows > Settings -> Channels and click the refresh button. Here you will see the new Channels that you have created in the d3 Connection Configuration.
Troubleshooting
Section titled “Troubleshooting”- Indicators should be GREEN, if they are RED, it indicates an issue with the connection.
- Ensure the Disguise project is running BEFORE starting the d3 connector.
- The Designer active project is the expected project for Porta’s selected page/template/channel.
- Check that the Designer API homescreen can be reached by IP address in Chrome.
- In the Porta menu, under Window -> Settings -> Channels, ensure the correct channels are listed. If not, use the sync button in the channel panel, or refresh the Porta interface.
- In the Porta menu, under Window -> Settings -> Preference, ensure Enable Play Groups and Enable play group sequence are enabled.
Summary
Section titled “Summary”Porta Bridge is the application that connects Porta to other systems, such as Designer.
Upon establishing the connection, user will be able to control Designer features such as Transport/Timeline Controls, HTTP Sockpuppet. It also enables alignment with general Designer features such as Failover and Content Ingestion/Deletion.