Using Sony’s Moiré Alert with Designer
Sony’s Camera and Display Plugin for Unreal Engine has a Moiré Alert feature that can warn a user if moiré is likely to be captured by a camera pointing at an LED display wall.
The Sony Camera and Display plugin can be requested and downloaded for free from the Sony website: Sony Virtual Production Toolset Downloads.
As the Sony plugin is for Unreal Engine (UE), not Disguise’s Designer application, the Moiré Alert feature cannot currently be used directly inside Designer. However, by running the Unreal Editor alongside Disguise Designer the Moiré Alert can be used effectively for either On-Set or in Pre-Viz.
To do this, we need to export the mesh used as the LED wall layout from Designer and import it into Unreal Engine. This document describes the steps necessary to do this.
Export from Designer
Section titled “Export from Designer”- In Designer, right-click on the LED surface mesh, then right-click again on the Mesh thumbnail to show the menus as in the screenshot below.
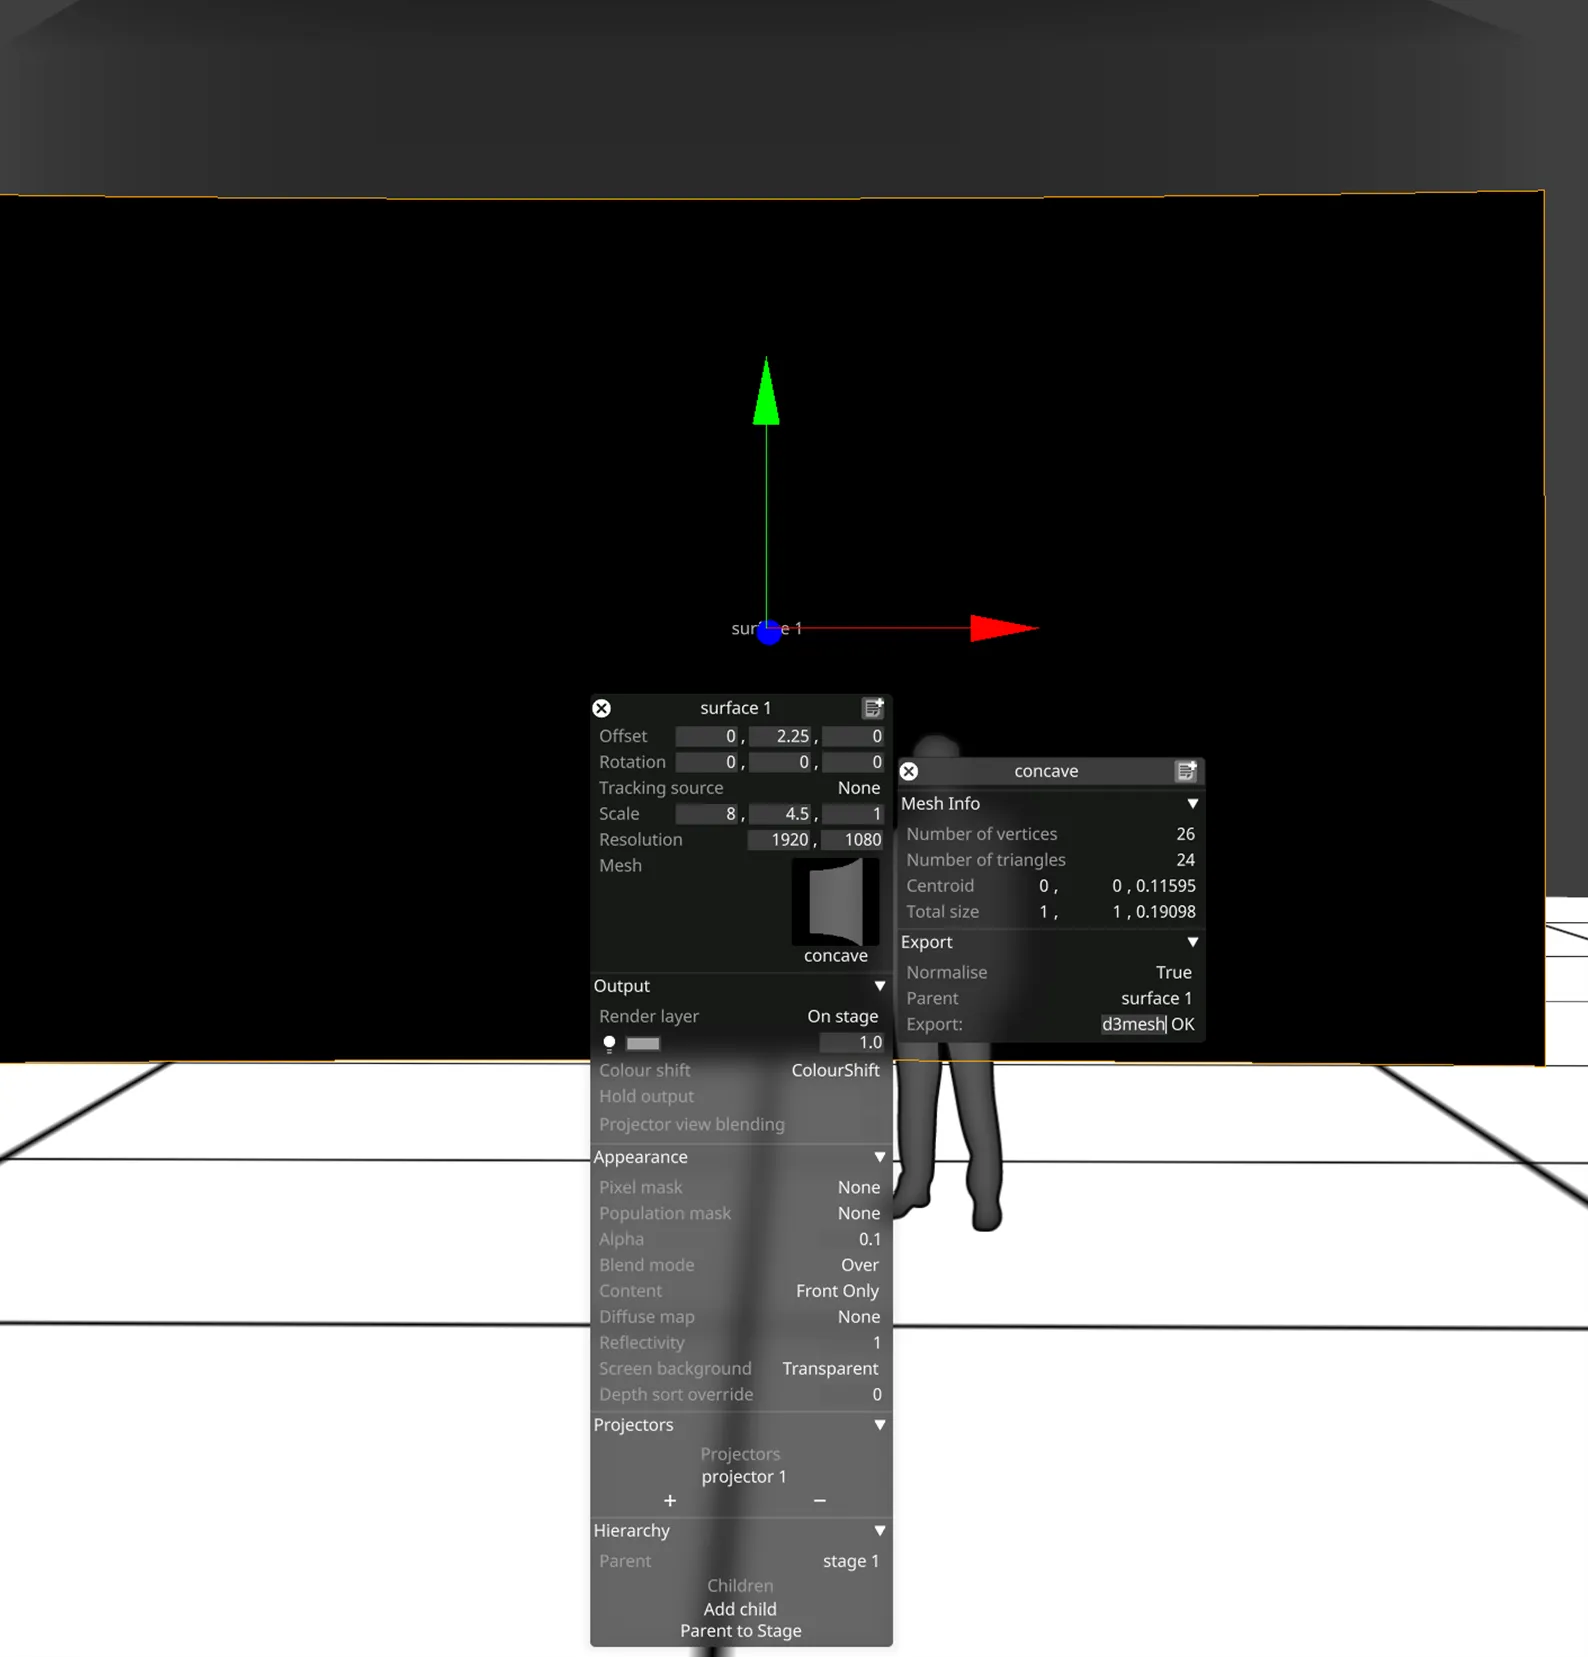
- Under Export select True for Normalise (this actually seems to do the reverse of the tooltip: setting to True maintains the current translation, rotation and scale).
- Enter a filename in the Export line at the bottom, and press Return, or click OK.
- This will save an .obj file (a text file containing the vertices etc) and a .mtl file for the material (note that changing the Screen Background and/or Alpha for the surface in Designer does not seem to affect the exported Material).
Import into Unreal Engine
Section titled “Import into Unreal Engine”- Open the relevant project in Unreal Engine 5.7 – this could contain the 3D scene that will be rendered via Disguise’s RenderStream, or it could be an empty level to reduce rendering requirements, if only the Moiré Alert is of interest.
- Add a CineCameraActor to the level, with Sony’s On-Set Camera Component attached.
- In the Content Browser, right-click and select Import to Current Folder, or click on Import, and select the .obj file exported from Designer. The Import Content dialogue should appear, as shown below.
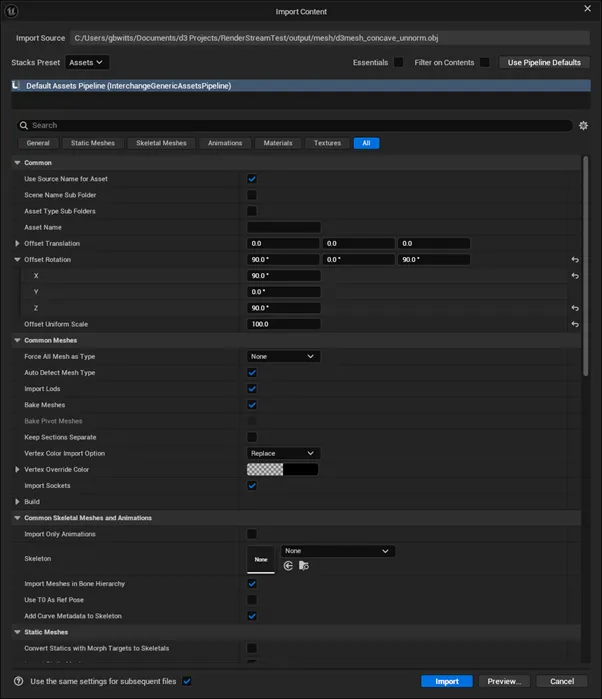
- As Designer has units in metres, but Unreal Engine uses cm, we recommended to set an Offset Uniform Scale to 100.0 so that the scale is maintained.
- Similarly, the XYZ axes are different between Designer and Unreal Engine, so it is recommended to set an Offset Rotation of (90, 0, 90) degrees.
- All other Import Settings can be left as default.
- Click the blue Import button at the bottom of the dialogue.
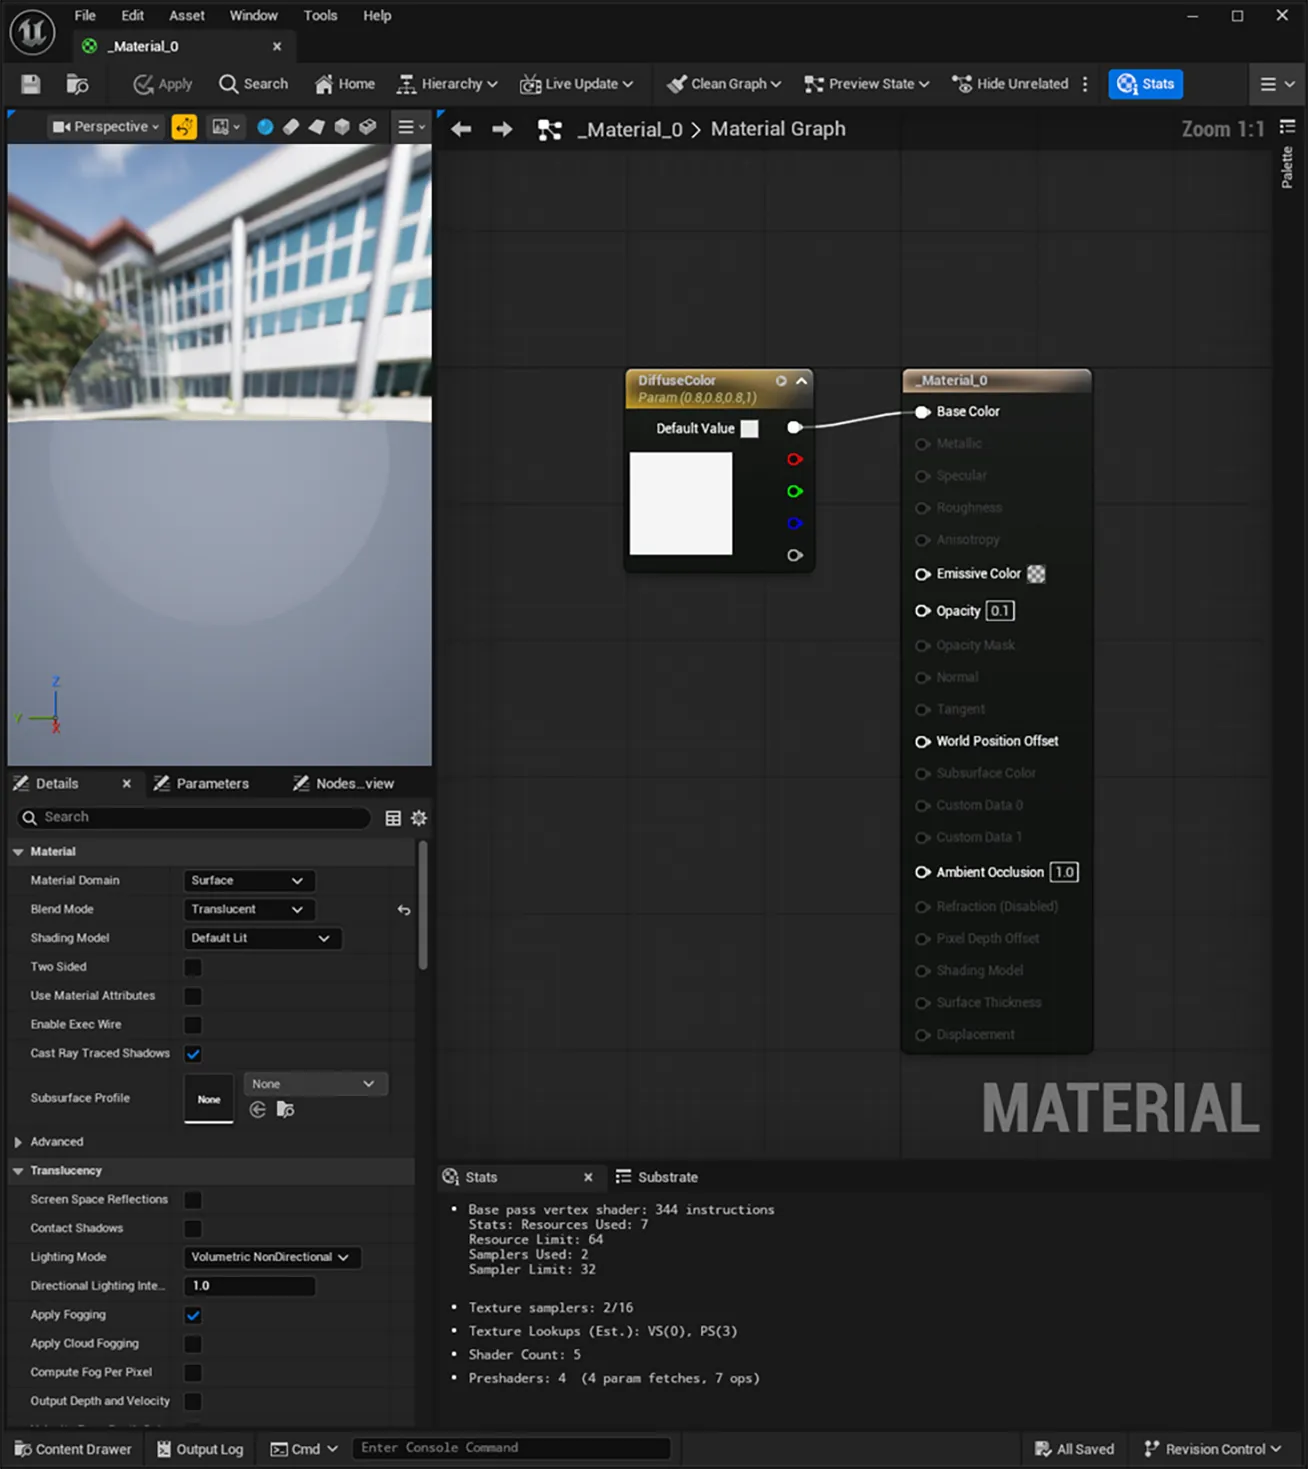
- A Static Mesh and Material should now be visible in the Content Browser. Both need to be opened and saved.
- If the LED screen mesh is being added to a level that has the original 3D scene in it, then it is probably preferable for this mesh to be mostly transparent when added to the level. To do this you will need to open the imported Material. Change the Blend Mode to Translucent and set the Opacity to something less than 1.0 (e.g. 0.1).
- Drag and drop the mesh into the level, and place at the origin (location (0, 0, 0), rotation (0, 0, 0), scale (1, 1, 1)) so that its position matches that in Designer.
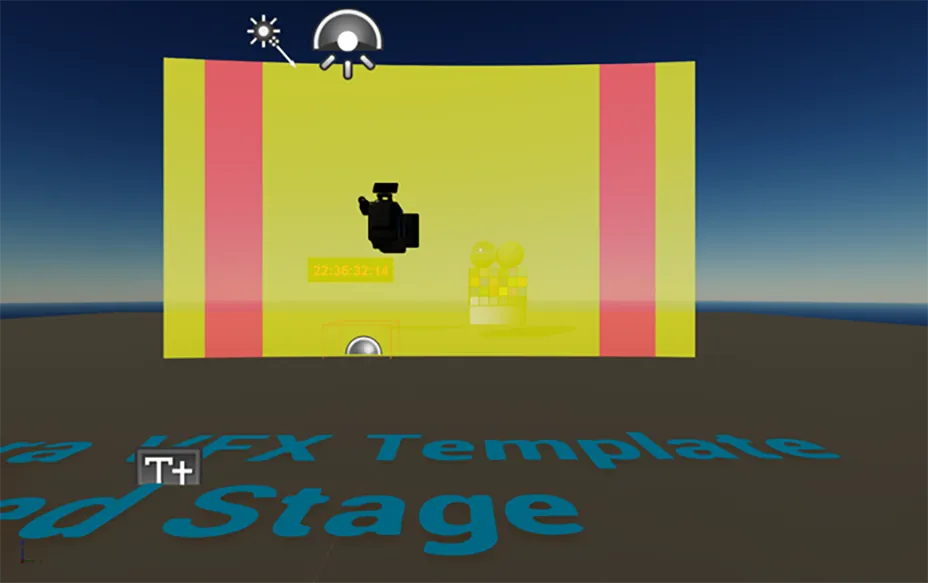
- In the CineCameraActor’s On-Set Camera Component, under Moiré Alert, click Add Display to setup the mesh up as the LED display for Moiré as shown in the screenshot below. Select the appropriate Sony LED display type.
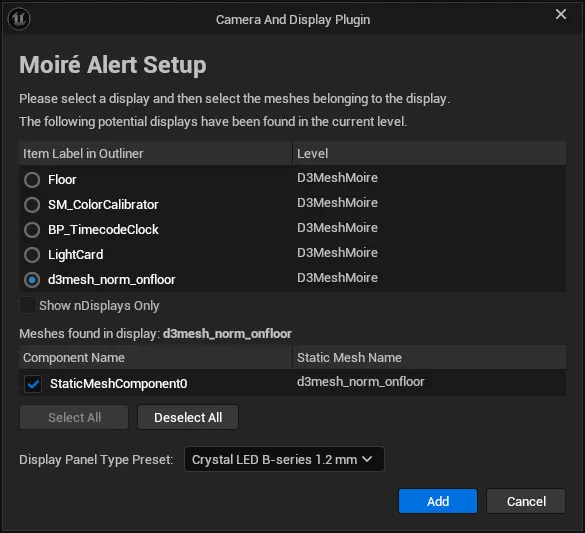
- Enable Moiré Alert in the On-Set Camera Component – you should see the Moiré colours appear in front of the mesh.
Camera Tracking
Section titled “Camera Tracking”To ensure that the Moiré Alert is correct in a live situation, the CineCameraActor needs to be configured correctly (Camera Mode/Type, Imager Mode, etc), but also needs the correct camera position and rotation, and lens information (focal length, focus distance and aperture) from the real camera. Different Camera Tracking systems are set up in different ways, so are not detailed here, but it is recommended that the tracking data are sent to both Disguise and Unreal Engine at the same time as both systems need to know the values at the same time.