Observations
An observation is a set of images of the stage captured by the camera of white dots on a black background (called structured light.) The number of dots and their size/spacing is determined by the user.
Observations are used as data points within the spatial calibrator, which is the predefined algorithm Disguise will use to align the tracked camera with the stage and set up the lens characteristics.
Observations are split between primary and secondary. Primary observations let Disguise determine the position of the camera and the position of the screens which make up the MR Set. We also determine the lens characteristics in that primary configuration.
Secondary observations contribute to Disguise’s understanding of variable zoom and focus settings on the camera lens.
Adding observations is a cumulative process, and each “primary” observation will equally affect the overall calibration results. This can mean that one bad observation will spoil the lot, but that is something we want to hear about to fix it. It is critical to review each observation after it has been taken to determine if it will improve or worsen the overall primary calibration.
Workflow
Section titled “Workflow”- Check camera tracking data.
- Set your first camera position.
- Select the target camera you wish to calibrate.
- Select spatial calibration.
- Use live blob preview.
- Set your first zoom position.
- Focus the camera.
- Lock zoom & focus values (optional).
- Set adjust screen position to on or off in the calibration widget.
- Add your first observation.
- Troubleshoot any issues with the observation.
- Delete observations (if necessary).
- Reset observations (if necessary).
- Add more observations from new positions.
- Repeat process for secondary observations.
- Test zoom interpolations.
Example
Section titled “Example”Check camera tracking data
Section titled “Check camera tracking data”- Check that the camera tracking system can see its location dots, and that it is outputting good data.
- Check that zoom and focus encoder information is reaching Disguise. Wiggle the encoders on the camera and see the change in the automation monitor.
- Check that you are receiving the correct movement in each axis: move the camera along the x y and z axes and pan, tilt and roll (where possible) making sure that the movement of the virtual camera in Designer matches the real world movement.
Set your first camera position
Section titled “Set your first camera position”- Choose where you want to take your first observation from on the floor. Pick a position and lock the camera off.
Try to remove as much negative space from the frame and fill the monitor with as much of the LED as possible.
- Select The Target Camera You Want To Calibrate.
- Select Spatial Calibration in the MR set.
- Use the Live Blob Preview tool to visually ensure the blobs are on the stage.
- Set your first zoom position by zooming the camera out to the first level of zoom you need.
- Focus the camera.
- Set whether the calibration should set both the camera and LED screen positions (on by default), or just camera position (off by default). This can be done in the calibration editor.
For stages that comprise of multiple screens, the screen at the top of the list in the mr set will be the main screen, and will remain unchanged while the other screens and cameras move around it. If you monitor the MR Set on your monitor, you should see the virtual line up layer pop into place and align with the test pattern the LED is outputting.
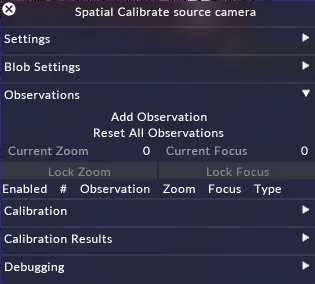
- Click Add Observation.
Designer will display a blob pattern on stage and capture the blobs as they appear. When the observation is finished, it will appear in the observation list.
Add more observations from the first position
Section titled “Add more observations from the first position”As you add more observations they will appear in the observation list; Disguise automatically calibrates all the observation in a list.
- For A/B testing the effect an observation has on a calibration you can mute or delete observations from the observation list.
- After taking your first observation then take additional observation from that same location pointing the camera at different places on the set.
- Try panning left, right and tracking up, down to cover all the pixels you will use in your show.
Add more observations from new positions
Section titled “Add more observations from new positions”- Now move your camera to other positions and start at 0 level of zoom and 0 focus, try to cover all the pixels from other angles.
- Monitor your MR Set Output notice when the virtual line up layer appears out of place, take observations at these points.
Secondary observations
Section titled “Secondary observations”- With our primary observation calibrated, we now want to repeat the above steps at the next zoom and focus level you require for your show.
- Disguise will calculate the interpolation between zoom and focus levels automatically.
- Repeat these step for as many zoom and focus level you require.
- Check after each observation that the zoom and focus values match those of other observations taken at the same zoom / focus level. If they do not, edit the zoom / focus value to match.
Testing zoom interpolations
Section titled “Testing zoom interpolations”To test if Designer is interpolating between different zoom positions, zoom in and out on the camera and watch the MR Set. If Designer is interpolating correctly, the virtual line up layer should zoom in with the camera and stick to the test pattern on the stage.
Troubleshooting an observation
Section titled “Troubleshooting an observation”Understanding why an observation is bad can be achieved with the observation debugger.
The Current Observation parameter allows you to cycle through the captured observations. Different colour squares are overlaid on the blobs which help Designer differentiate which screen the blob was seen on.
You can rectify what blobs Designer is able to see by increasing or decreasing the dot size and grid spacing parameters in your spatial calibration settings.
Users can change the Tracker Distortion Compensation to Matrix. This will attempt to resolve the calibration using another method.
Deleting an observation
Section titled “Deleting an observation”Deleting an observation will remove it from the observation list.
To delete an observation
Section titled “To delete an observation”- Left-click the trash icon next to the observation to delete it.
Resetting all observations
Section titled “Resetting all observations”It is possible to reset all observations, rather than deleting them one by one. Reset all Observations will completely reset the spatial calibration of the camera. Confirmation is required when clicking this button.
Properties
Section titled “Properties”