Setup Video Input
This topic covers how to set up video inputs in Designer, including SDI and NDI® sources.
Sources
Section titled “Sources”Disguise offers the ability to capture video from a number of sources.
- 3G/HD/SD-SDI capture sources on hardware. See hardware manual for capabilities.
- DirectShow devices (intended for testing only, limited support, not for use on shows)
- NDI® sources, when an NDI® source is present on the network.
Concepts
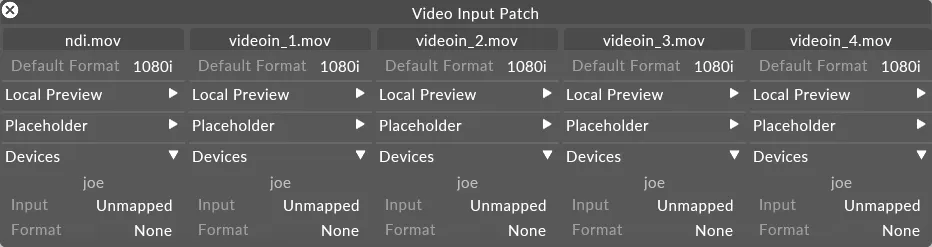
Section titled “Concepts”Video capture is managed by the Video Input Patch manager, accessible via the Devices menu item.

Video Input Clips are essentially ‘virtual slots’ into which you can patch physical capture inputs for each machine in your Designer setup. You can have as many Video Input Clips as you wish, they are labelled videoin_1.mov and upwards by default.

Local inputs: shows only the local incoming signals on the selected machine.
Preview all: shows all incoming signals on the selected machine.
Switch to quick edit: changes the format of the editor to a list view, for quick group editing of properties.
Add/Remove video in devices: opens the logicalVideoIn editor, allowing you to create new inputs and duplicate existing ones.

A Video Input Clip can be selected by left-clicking its thumbnail in the editor, this will display the following properties:
Placeholder image: If no capture device is mapped locally for this video input clip, the placeholder image will be shown instead. This is useful for pre-site sequencing.
Input: The physical input that the source is coming through on the machine.
Format: The desired format that you wish to capture for this Video Input Clip. If the desired capture format is not supported on the mapped capture device, Disguise will attempt to find the closest match.
Deinterlace method: Deinterlacing method to use on incoming video, details of available methods can be found here.
Process HDMI RGB Limited as Full: Only shown on servers with HDMI capture. Sometimes a video source sending RGB Full doesn’t state this correctly and will be detected as RGB Limited. Selecting this option will process it as the RGB Full data it really is, so no colour depth is lost.
Layer stack: The layer stack to apply to the incoming video, to apply time-independent visual effects. More information on layer stacks can be found here.
Crop size: The crop rectangle size in pixels to apply to the incoming video. The applied crop will be centered on the frame e.g. a horizontal crop of 1600px on a 1920px original frame will remove 160px on the left hand side and 160px on the right hand side.
Crop offset: The offset in pixels to apply to the crop rectangle. Offsetting the crop rectangle more than half the crop size in an axis will cause the crop rectangle to shrink in order to stay within the original frame.
Local Preview: A preview of the input selected on the local machine. You can start and stop the preview using the button below the thumbnail.
Start/Stop preview: this button below the thumbnail will toggle from showing nothing, to showing the current input. When you select stop preview, the thumbnail will return to black, but the video input is still being received.
Configuration
Section titled “Configuration”To configure a Video Input Clip execute the following steps
Section titled “To configure a Video Input Clip execute the following steps”- Ensure your video source is connected correctly (via SDI etc).
- Right-click devices in the dashboard.
- Left-click Video Input Patch. By default, four Video Input Clips will be presented to you. Or if you are on a piece of Disguise hardware, whatever number of physical inputs the hardware has, will be displayed. In the Devices section, you will find your local machine as the first item. Select the input source connection for your local machine (e.g. Bluefish 1A or Phoenix 1A).
- For 4U v2.5 and older systems, you will need to select the Format of the source signal. On Pro and GX range machines, the signal will be auto-detected.
The live picture from this capture source will now show in the Local Preview section (only once you have clicked start preview).
You can now use the videoin_1.mov clip as a live source in the Video Content Layer on the timeline (see below).
Duplicating video input sources
Section titled “Duplicating video input sources”Sometimes it may be necessary to duplicate the video input sources, to gain additional virtual capture ‘slots’. This can be useful for looping back internal cameras or for use with NDI®.
- Open the video clip editor by right-clicking a video clip from the media picker.
- Select duplicate and give the new input a name.
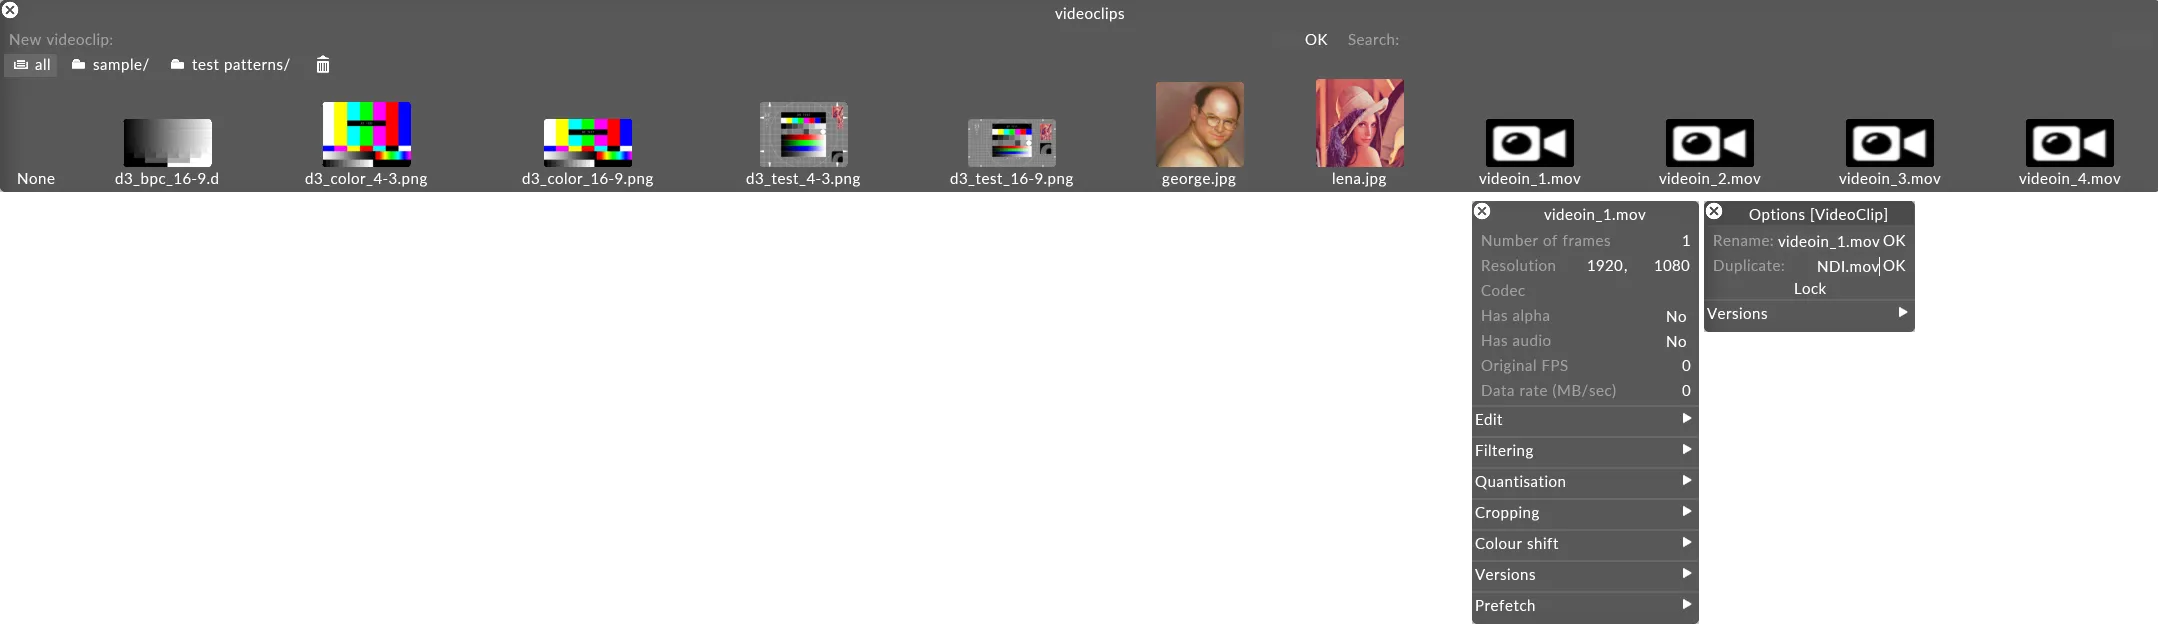
- The new video input will now be available in the video input patch editor.
Working with live video on the timeline
Section titled “Working with live video on the timeline”Live video is applied to the video keyframe editor using the special Video Input Clips: videoin_1, videoin_2, videoin_3 and videoin_4 respectively. As soon as the video inputs are configured, they are treated just like normal video clips.
-
For example, drop videoin1 onto the keyframe editor to route video from the first sampler in the device manager, and so on.
-
Use the appropriate Mapping type to map the camera input to the screens.
-
Right-clicking the videoin thumbnail lets you edit colour correction and other clip properties, just like normal clips.
Input latency
Section titled “Input latency”By default, Designer delays incoming video by one frame in order to ensure smooth playback across inputs.
This figure can be adjusted using the smoothVideoInputFramesDelay options switch.