Creating a Fixture
When you first create a DmxLights screen, it is just an ordinary screen. You can drive content to it and see the content in the Stage Visualiser, but you cannot see the screen in the Feed level.
The first step is to set up the fixture the DmxLights screen will use to cover its surface. For information on how to create a DmxLights screen please read the previous sub-chapter DmxLights.
To create a fixture:
- Left-click fixture from the DmxLights editor. This will open the Fixtures manager.
- Type in the name of the fixture in the new fixture text field, in this example mac 2000.
- Hit Enter to open a list of fixture types.
- Left-click the type Fixture.
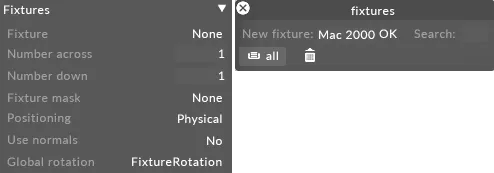
- Hit Enter to create the new fixture. For information on how to create a grid of fixtures please see the following sub-chapter.
Setting up a grid of fixtures.
- Hitting Enter will also open the Fixture editor.
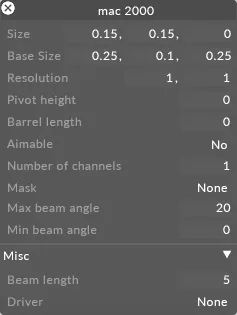
Fixture properties
Section titled “Fixture properties”This specifies the physical size of the fixture, in meters. The first number is the x component (width), the second is the y component (height) and the third is the z component (depth). These numbers refer to the size of the actual fixture emitter, not to the total size of the fixture base.
Resolution
Section titled “Resolution”Each fixture is considered to be a mini screen containing one or more pixels. The default resolution is 1 by 1 pixel (i.e. a single pixel) but it is possible to have multiple pixels in the same fixture. For example, a Traxon tile has a grid of 8 by 8 pixels; a Robe Redwash has a grid of 4 by 1 pixels.
Aimable
Section titled “Aimable”Set this to yes if the fixture has a moving head, otherwise select no .
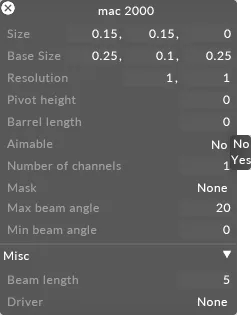
Aimable property should be set to yes if the fixture has a moving head
Number of Channels
Section titled “Number of Channels”Specifies the number of DMX channels in the fixtures personality.
This points to the still image file that defines the mask used when rendering the fixture. Selecting this property will open the Texture object library, which shows all of the Texture still image files saved on your local hard-drive in the DxTexture folder. By default d3 comes with a number of still image files. For example, fixtures with circular emitter profiles should use the circlemask bitmap.

Mask property is used to select a still image file that defines the mask used when rendering the fixture
The instructions on how to create a custom Pixel mask can be used to create a mask for rendering a fixture. For step-by-step instructions on how to create a Pixel mask, where to place a still image file, and how to access it in d3, scroll down to the section Pixel mask in the Editing screens topic.
Beam Angle
Section titled “Beam Angle”These control the max (zoomed out) and min (zoomed in) beam angles of the light, in degrees.
Beam Length
Section titled “Beam Length”This sets the beam length, in meters. This property is for visualisation purposes only; it does not send a signal to the light.
Drivers
Section titled “Drivers”This specifies how colour and orientation information are sent to the actual physical fixture. For detailed information on how to use this property please see the Fixture drivers topic.