Flashing an Active Silicon Card
It is sometimes necessary to program the Flash memory on all Phoenix boards with updated information to match that in the current driver set.
To flash an active silicon card
Section titled “To flash an active silicon card”- First, check the current firmware version. Open the Phoenix Capture application and click Phoenix > Control Center and navigate to the status tab. You can see the firmware version next to the Software Library box.
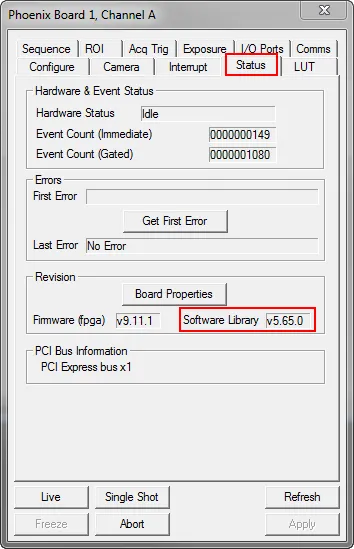
- Check the current firmware version of your boards, in this example a Phoenix board, using the cards control window before flashing an Active Silicon card.
- Shut down the host computer and remove all Phoenix boards from the machine.
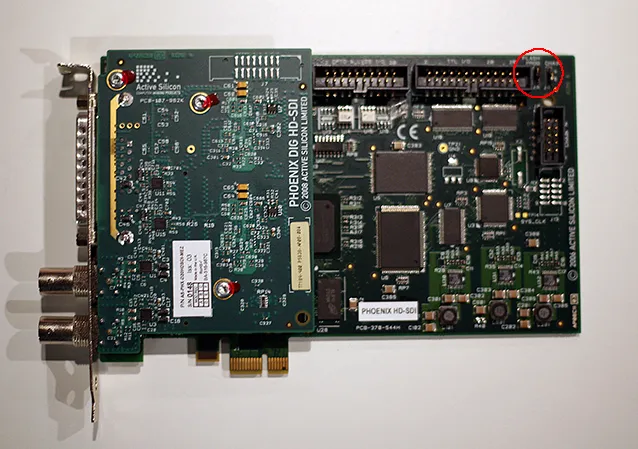
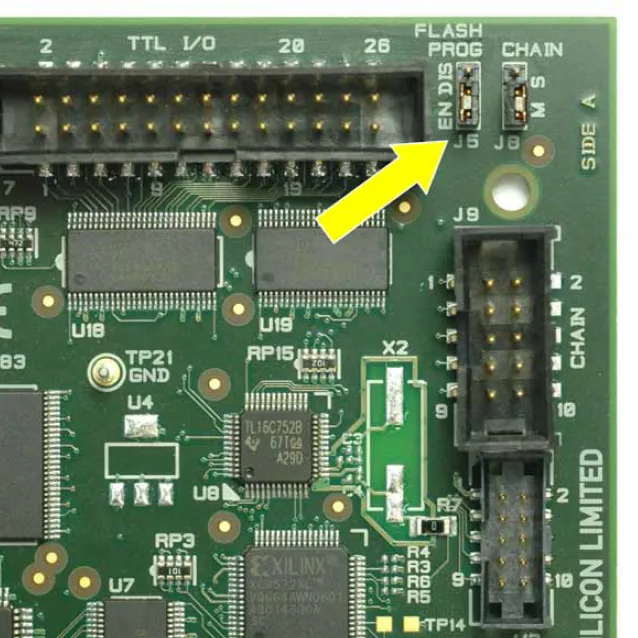
- Ensure that the jumper marked FLASH PROG is in the enabled ( EN ) position on each board.
Look at the pictures below to find the position of this jumper on the Active Silicon card. They all show the jumper in the enabled position.
- Replace the Phoenix boards in to the host computer and reboot.
- When the operating system has loaded, run the PfwProg (Phoenix Firmware Updater) application, and press the Program button.
- When the application has completed, shut down the computer.
- The FLASH PROG jumper may now be set back to the DIS position.
- Reboot the computer and continue to use the Phoenix boards.