Cylindrical Mapping
The Cylindrical mapping type wraps content around a cylinder and fires it outwards (or inwards) onto the selected screens. Similar to the Parallel mapping and the Perspective mapping types, the content is being virtually projected from the surfaces of the cylinder, both inwards and outwards.
Cylindrical mapping wraps content around a cylinder and emits it inward or outward towards the screens assigned to it. It does not matter if the screen is moving or expanding, the Cylindrical mapping re-maps the content in real-time to accommodate for the movement, similar to parallel mapping.
Creating a Cylindrical mapping
Section titled “Creating a Cylindrical mapping”- In your track, add a new visual layer. This can be a content layer, generative layer, or effect layer.
- Left-click the new layer in the track to open the Layer Editor.
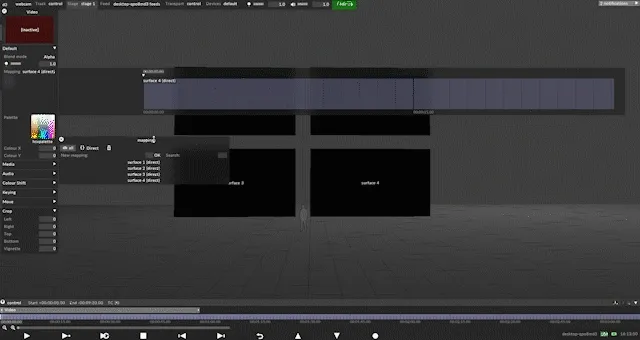
- Under the Default tab, left-click the Mapping parameter to display the Mappings manager which list all of the mappings in the project. By default, all screens are assigned a Direct mapping with the same name. All cameras are assigned a Perspective Mapping with the same name.
- In the New Mapping text field, add a name for your new mapping. A list will appear prompting to you select a mapping type.
- Select Cylindrical from the list. The Cylindrical Mapping editor will appear.
- In the Mapping editor, assign the screens to be used for the mapping, and specify the resolution of the content.
- Adjust the mapping properties as needed.
- Finally, assign a piece of content to the layer in your track. The content will be displayed on the assigned screens in both the stage and feed output window.
Common Mapping Properties
Section titled “Common Mapping Properties”This section explains the properties that are shared by the different mapping types.
Filtering
Section titled “Filtering”-
Nearest: Nearest neighbour filtering. Use nearest-neighbour sampling, to disable blending between pixels when scaling. Can be used to create pixellated looks, or to ensure hard edges on certain types of content.
-
Bilinear: Bilinear filtering is a texture filtering method used to smooth textures when displayed larger or smaller than they actually are.
-
2x Multi-sample: Multi-Sample filtering can help fix issues with scaled content, but can introduce some blurriness.
Resolution
Section titled “Resolution”This controls the canvas size the layer renders into, in pixels. The Direct mapping type starts with a 256x256 pixel canvas and automatically sets the canvas size to that of the first screen you add.
Screens
Section titled “Screens”This is a list of screens that the selected mapping type can copy content to.
- Left-click + to open the Screens manager.
- Left-click + to add the Screens you want to map. This will copy the individual canvas content onto these three Screens simultaneously and will add the Screen names to the mapping object editor.
- Left-click and drag the Screens listed in the mapping object editor to -. This will remove the canvas content from the Screens and delete the Screen names from the mapping object editor.
This points to the Texture file that defines a Mask bitmap. You can use this property to apply a Mask bitmap to the mapping canvas. Selecting this property will open the Texture object library, which shows all of the still image files saved on your local hard-drive in the DxTexture folder.
To apply a mapping mask you will need to create and import a custom still image file.
-
The step-by-step instructions on how to create and import a custom Population mask can be used to create a custom mapping mask. The only difference is that the mapping masks resolution should be the same as the mapping canvas. For step-by-step instructions on how to create and import a Population mask into a d3 project visit to the section Population mask in the Editing screens sub-chapter.
-
Alternatively, set any layers blend mode to mask to channel the layer content into the mapping mask.
Clip outside region
Section titled “Clip outside region”Clips pixels outside of rendered region, preserving existing colour. If not set, pixels outside the rendered region are set to the border colour.
Border Expansion
Section titled “Border Expansion”UV islands on screens are expanded by this many pixels to cover edge sampling artifacts such as black fringing. Note that there must be an equivalent amount of empty space in the screen UV map to take advantage of this.
Find/Replace Usages
Section titled “Find/Replace Usages”Finds all usages of the current mapping in the project, and allows these to be replaced with an alternative mapping. Note that replacement only works for sequenced, non-sockpuppeted mappings.
Hierarchy
Section titled “Hierarchy”The hierarchy section allows the mapping to be set as a parent or child of another object, like any other object. See Object Overview for details.
Cylindrical mapping properties
Section titled “Cylindrical mapping properties”Output
Section titled “Output”By default, this is set to colour. This implies that red, green and blue content channels are sent to the red/green/blue colour output channels of the screen (or converted to cyan, magenta and yellow if the output fixtures are CMY ). However, content can also be channelled to other channels in the case of DMX-based fixtures. Currently, this is a beta functionality, so for the moment you are advised to leave this set to colour.
Anchor
Section titled “Anchor”As with the Parallel mapping type, you can anchor the cylinder around the centre, or the top or bottom points. Resize and rotation operations will keep the anchor point in the same place. With the anchor, the cyclinder can be moved/rotated around the top, middle, or bottom.
Select from the following:
- Centre
- Top
- Bottom
Projection mode
Section titled “Projection mode”In cylindrical mapping, the projection mode determines the direction from which the texture is projected onto your 3D object.
Options are:
- Outside: Used for texturing the exterior of objects like pillars, bottles, cans, tree trunks, and character arms.
- Inside: Used for texturing the interior of hollow objects, such as the inside of a pipe, a tunnel, a cup, or a panoramic sky dome that surrounds your scene.
Position
Section titled “Position”This property is the position in X, Y, Z space.
Rotation
Section titled “Rotation”This rotates the cylinder around the anchor point; specified in degrees of rotation around the x, y and z axes respectively.
This controls the size of the cylinder in metres, on the x, y and z axes respectively. The y property (the second value) controls the height; the two other properties control the radii in the x and z axes. Setting x and z to the same value keeps the cylinders cross section circular; setting them to different values makes it elliptical.
Using the cylindrical mapping type
Section titled “Using the cylindrical mapping type”In addition to the property explanations provided above, it is important to:
- Base the resolution of the Cylindrical mapping on the aspect between the circumference of the cylinder and the height of the screen. The circumference can be calculated by taking the diameter * pi, = size* 3.14 . Set the size x and z to the same value to establish as perfect circular shape.