Virtual Reality
Virtual Reality visualiser is an OpenVR / Steam compatible visualiser mode allowing the user to enter and navigate through the scene.
VR was designed to primarily work with Designer machines, utilising GPU’s such as GTX 1060 & higher (or other manufacturer equivalent).
Supported headsets
Section titled “Supported headsets”We have tested HTC and Meta headsets on Designer, which are known to work. We have also used Apple Vision Pro with Designer, through the ALVR system.
HTC Vive
Section titled “HTC Vive”- The machine needs to be restarted after the first installation, otherwise, the headset will not be detected
- All EDID’s need to be de-emulated otherwise the headset will not work
- The box needs to be plugged into a USB 3 port.
You need to have the SteamVR system running; you should be able to get to the point where the headset and one controller are reporting green and working, and the headset should show the Steam basic scene. Once that’s working, if steam is installed, and the VR equipment is connected - when starting a Disguise project, you will automatically be placed into VR mode.
-
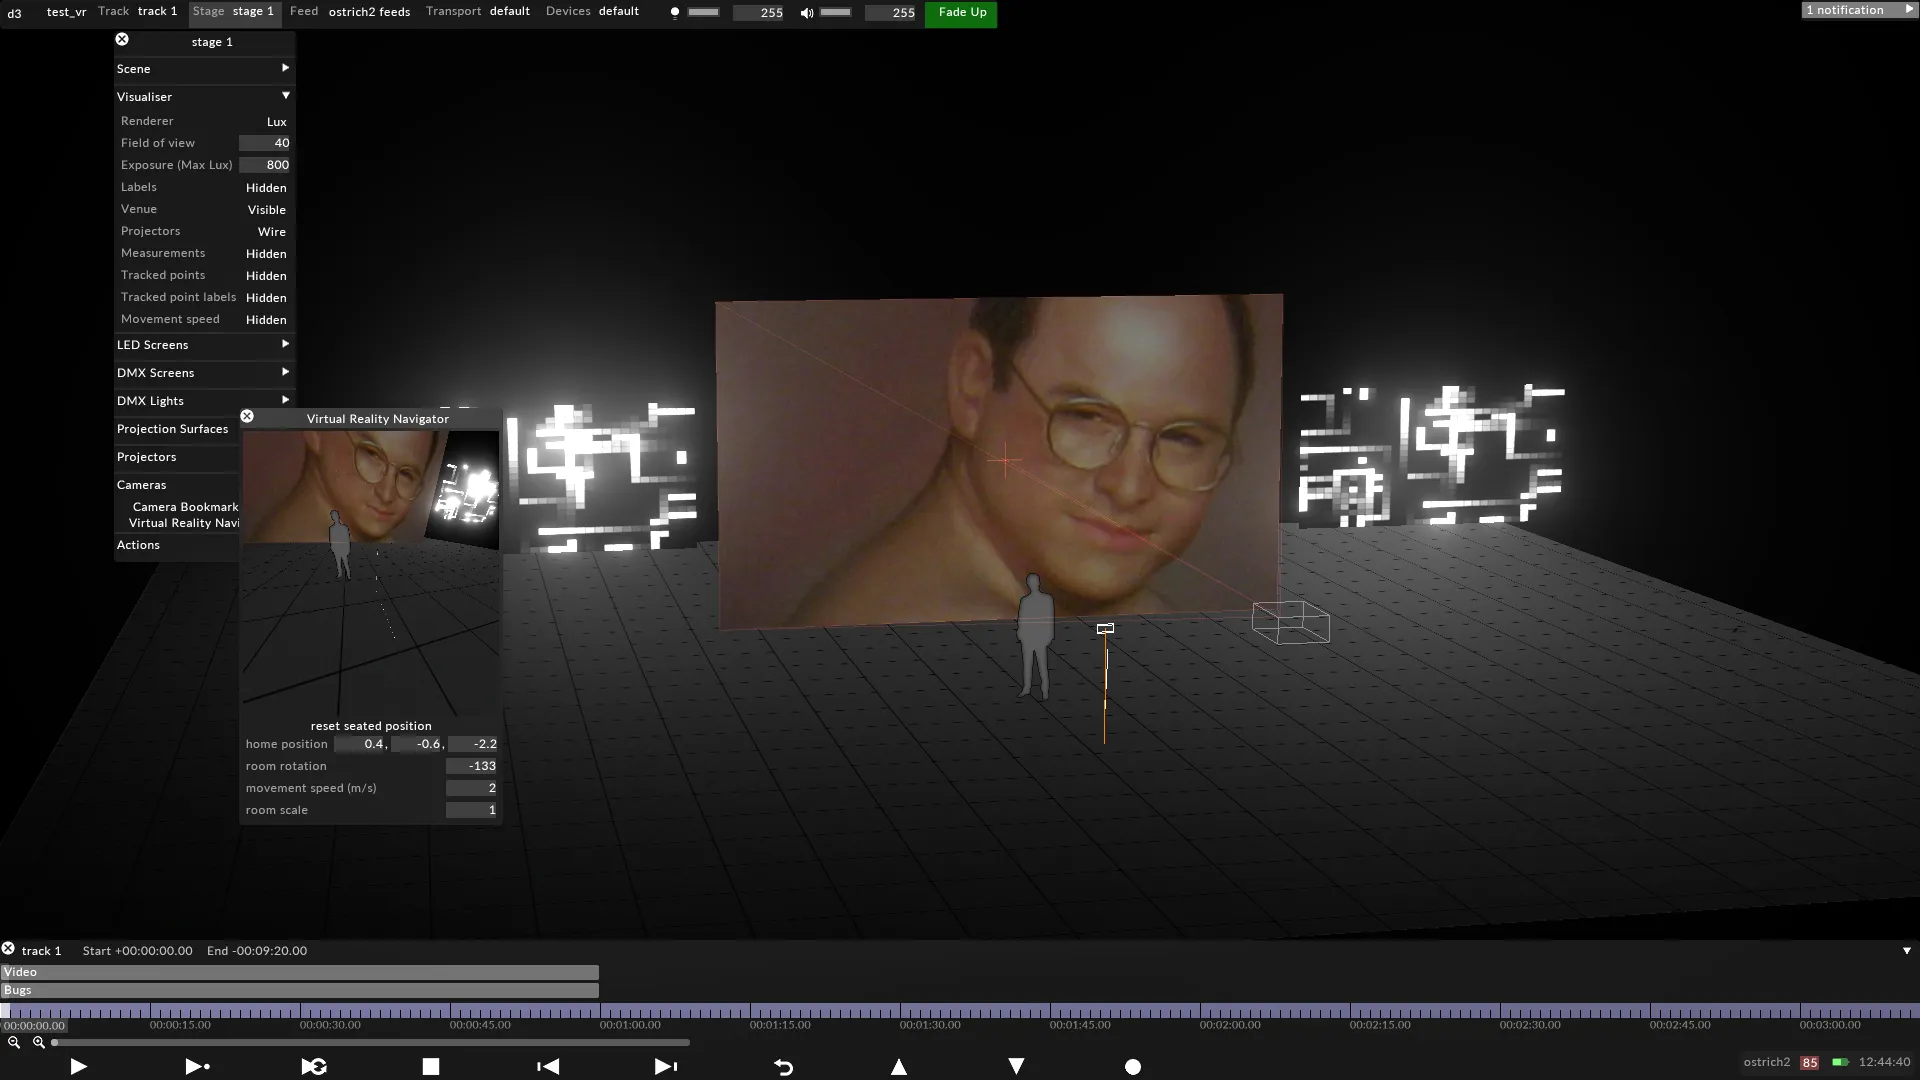
The visualiser shows you the position and orientation of the headset in stage space (small white cuboid about the same size as a headset, with an orange line down to the floor). It also shows you where the controller is pointing (white line when it hits the floor level, blue line otherwise).
-
Navigation - the VR user navigates by pointing the controller at the floor location they want to go to; it goes white; they click the button and they jump there. The property movement speed in the VR Navigator window can be set to zero (jump immediately) or some non-zero number, which moves the VR world in a straight line on a linear path. This gives you a little ‘jerk’ at start and end but doesn’t seem to result in nausea. It’s less confusing for new users, but may be annoying for experienced users.
The Virtual reality navigator also lets you set up the position and orientation of the scene relative to the physical world. The VR experience keeps this orientation constant to avoid users getting lost. They still get lost of course, and when they do you can hit the reset button to bring them back to the center.
Opening the virtual reality navigator
Section titled “Opening the virtual reality navigator”- Open the stage editor by right-clicking Stage from the dashboard or by right-clicking the floor in the visualiser.
- Select the Cameras tab.
- Left-click Virtual reality navigator and then you can see what the VR user sees.
Using a VR device for camera tracking
Section titled “Using a VR device for camera tracking”Cameras and other stage objects can be tracked by the headset or controller of a compatible VR headset
To assign a VR device as a tracking source for a camera
Section titled “To assign a VR device as a tracking source for a camera”- Connect your VR headset to your machine and ensure the device is working in SteamVR.
- Launch your Disguise project (version r17.2 or later).
- Create a new virtual camera in your project file by right-clicking on the Stage menu.
- Hit the + icon under the Cameras tab and input the name and specifications of your camera.
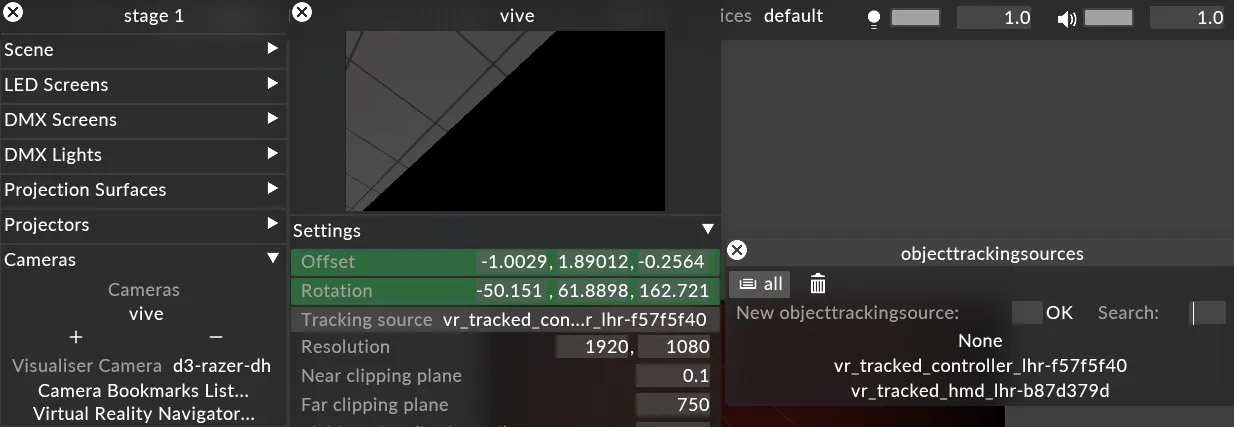
- Open the camera’s menu by right-clicking on its name from the Stage menu, or on the icon of the object in the visualiser.
- Under the first tab called Settings, right-click on the Tracking source field.
- The VR’s headset and any active controllers will be listed here; left-clicking on one will assign the position of the camera to it.
- The Offset and Rotation fields of the virtual camera’s menu will turn green when receiving a working signal.
To use an animated object as a moving VR platform
Section titled “To use an animated object as a moving VR platform”In some situations, the VR viewpoint may need be a part of a moving element, such as a ride or some vehicle. In this case, the VR floor position can be parented to an animated object.
- Have the VR system set up and working in Designer, with your project loaded.
- Create the animated object you want to parent the VR camera to.
- Open the virtual reality navigator from the Stage menu.
- In the VR navigator window, left-click on the “User parent” field.
- From the list of objects, left-click on the animated object you want to parent the VR camera to.
- The VR camera will now move along with the animated object.
To reset the VR camera back to the stage floor, left-click on the “User parent” field again and select “Stage” from the list.