Virtual Local Area Network (VLAN)
What is a VLAN?
Section titled “What is a VLAN?”A Virtual Local Area Network (VLAN) is a virtual network adaptor that operates over a physical network interface, such as a 1Gb, 10Gb, 25Gb, or 100Gb Ethernet port found on the back of a Disguise media server.
VLANs allow a single switched network to be segmented into multiple virtual networks using tagging. This eliminates the need for separate physical networks for different use cases, improving efficiency and flexibility.
A typical set of VLANs configured for a Disguise media server in a production or live experience may include:
- d3Net
- KVM Net
- Media Net
- Automation Net (PSN)
- NDI® Net
- Internet
- sACN/Artnet
- OSC/Control
- OmniCal
- PTZ Camera Control
- MGMT
The distinct separation of each network allows devices in:
- d3Net to be set in a
192.0.X.Xrange. - Whilst Artnet/SACN being in the Common
2.X.X.Xor10.X.X.X.
Yet both exist on the same network interface.
As outlined in the initial example, network protocols have different requirements and network settings.
This allows all data to exist in a singular physical interface but be be routed by a network switch.
Configuring VLANS and Teams
Section titled “Configuring VLANS and Teams”Within Disguise servers, VLANs can be created using different tools depending on the operating system:
- Windows 10: VLANs can be configured at the driver level using Intel PROSet.
- Windows 11: VLANs can be configured at the software OS level using Hyper-V.
Configuring VLANs and Teams with PROSET
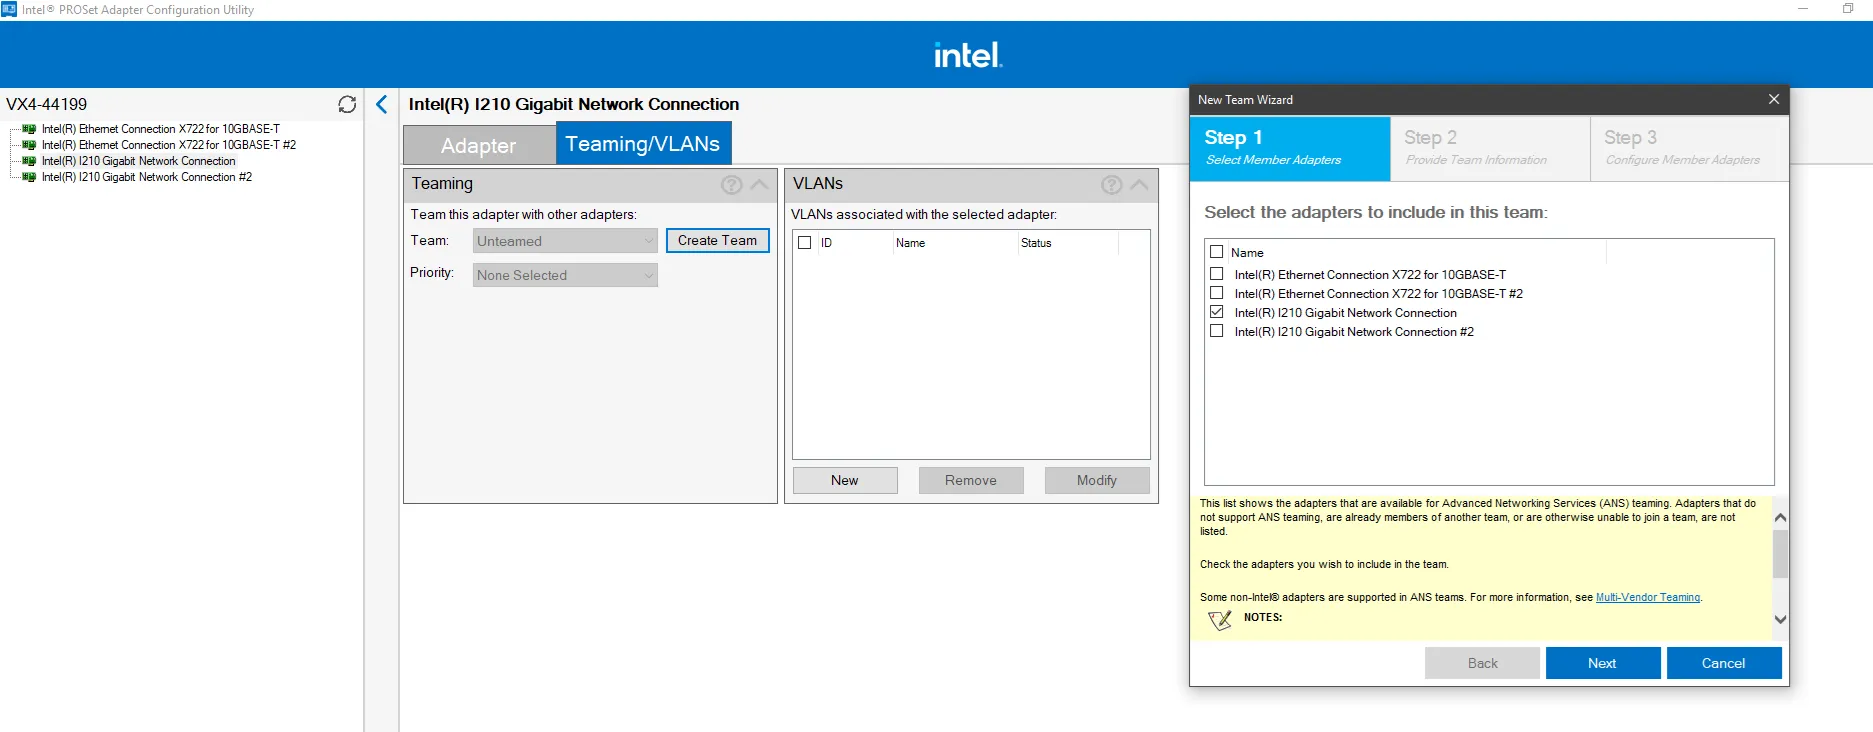
Create PROSet Team Via GUI
Section titled “Create PROSet Team Via GUI”If your system supports the Intel PROSet GUI for Windows Device Manager, you can use its graphical interface to configure VLANs and NIC Teams easily.
-
Sacrificial NIC: At least one Intel integrated NIC or server-grade adapter must be part of the team to allow configuration. - You may notice X722 Network 10GB interfaces require the use of L210 network port to allow configuration via PROSet.
-
VLAN Restrictions: Ensure your switch supports the configured VLAN IDs and is set up accordingly.
Open the Intel PROSet GUI:
Machines such as the GX 2C/VX 1/2 have PROSet installed as an application
Older Servers such as the solo have PROSet built in to the NIC adaptor settings
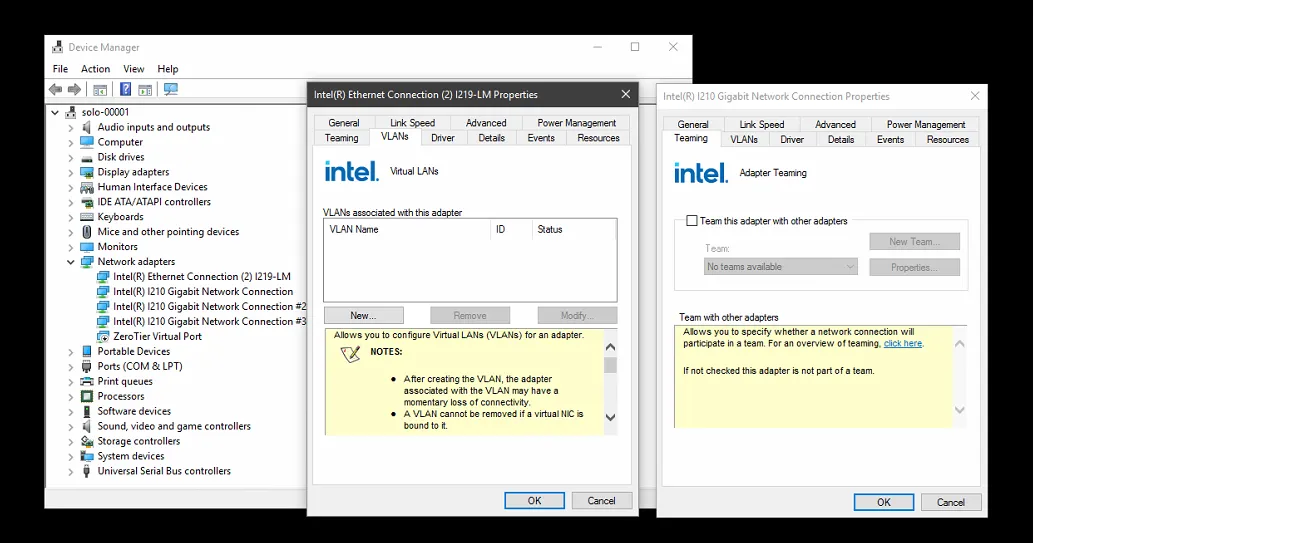
- Launch Windows Device Manager.
- Navigate to the properties of an Intel-supported NIC.
-
Create a Team:
- In the Team/VLAN tab, click on Create Team.
- Select the adapters you want to include in the team. (X722 require an additional 1gb)
- Choose a team mode (e.g., Adaptive Load Balancing, Static Link Aggregation). - Modes are outlined above the the guide.
-
Configure VLANs:
-
After creating the team, go to the TEAMEd interface and select the VLANs tab.
-
Scroll down and Select New Vlan
-
Click on Add VLAN and specify:
- VLAN IDs (e.g., 10, 20, 30).
- VLAN Name
-
Save your settings.
-
Configuring VLANs and Teams with INTELCMDLET
Create PROSet Team via CMDLETS
Section titled “Create PROSet Team via CMDLETS”For systems without Intel PROSet GUI support (Intel X722), use the IntelNetCmdlets module to configure NIC Teams and VLANs.
Identify Adapters: Use the following command to list available adapters:
Get-IntelNetAdapterCreate a Team: Execute the command to create a NIC Team:
New-IntelNetTeam -TeamMemberNames "Adapter1", "Adapter2" -TeamMode AdaptiveLoadBalancing -TeamName "MyTeam"Replace Adapter1 and Adapter2 with the actual adapter names obtained from Get-IntelNetAdapter.
Such as New-IntelNetTeam -TeamMemberNames "Intel(R) I210 Gigabit Network Connection","Intel(R) I210 Gigabit Network Connection #2" -TeamMode AdaptiveLoadBalancing -TeamName "MyTeam"
Check the team configuration:
Verify the Team:
Get-IntelNetTeam
**Set Team Properties (Optional)**:Modify team settings using:```powershellSet-IntelNetTeam -TeamName "MyTeam" -Property "PropertyName" -Value "PropertyValue"
Additional Information
Section titled “Additional Information”See the following pages to learn more about creating VLANs: