Changing the IP of Porta On Prem
After the initial set up of Porta VM and Porta On Prem, you may eventually want, or need, to make changes to your network, or otherwise change the static IP address of Porta VM.
This guide will walk you through the steps needed to ensure your VM and its applications are accessible at a new IP address.
1. Disable the current static IP
Section titled “1. Disable the current static IP”- Ensure your Porta VM is already running.
-
Using the native VirtualBox terminal window of the running virtual machine, log in to the VM:
- Type the username
portavmand hitEnter, - Type the password provided to you and hit
Enteragain to log in.
- Type the username
- Run the following command to disable the current static IP address and enter the
sudopassword when prompted:Terminal window sudo ./scripts/disable_static_ip.sh - Restart the VM with the command
sudo rebootand wait for it to display the log in screen once more.
2. Set up the new static IP
Section titled “2. Set up the new static IP”- Log in to the native VM terminal again.
- Follow the steps to set up a static IP address as outlined below:
- Ensure your Porta VM is already running.
-
Using the native VirtualBox terminal window of the running virtual machine, log in to the VM:
- Type the username
portavmand hitEnter, - Type the password provided to you and hit
Enteragain to log in.
- Type the username
- Run the following command to begin setting up a static IP address and enter the enter the
sudopassword when prompted:Terminal window sudo ./scripts/setup_static_ip.sh - The script will perform a network scan to find available IP addresses on your network.
- Select an IP address for the virtual machine by typing the number corresponding to one of the listed available IPs and pressing
Enter.- If you choose to enter a custom IP address:
- Enter the full IP address (e.g.,
192.168.1.100) - If the entered IP appears to be in use, you’ll be asked to confirm. If you are sure the IP is safe to use, type
yand pressingEnter.
- Next, select the machine role (also known as its type) by entering the number corresponding to one of the following options and pressing
Enter:- main
- backup
- arbiter
- The script will then proceed to configure the VM with the selected static IP address and machine role.
- You will see a lot of output in the terminal, including password prompts, but you can ignore it.
- When IP configuration is complete, the script will print “Static IP setup completed successfully! VM is now accessible at IP:” and list the new static IP address.
3. Use Porta Manager to fix Porta’s IP
Section titled “3. Use Porta Manager to fix Porta’s IP”- When static IP setup finishes, access and log in to the Porta Manager.
- In the Porta Manager sidebar, navigate to the
Porta Configuration Managementsection and click on theMachinesmenu item. - In the
Machinestable, locate the row for your Porta VM and clickEditon the right side of the row.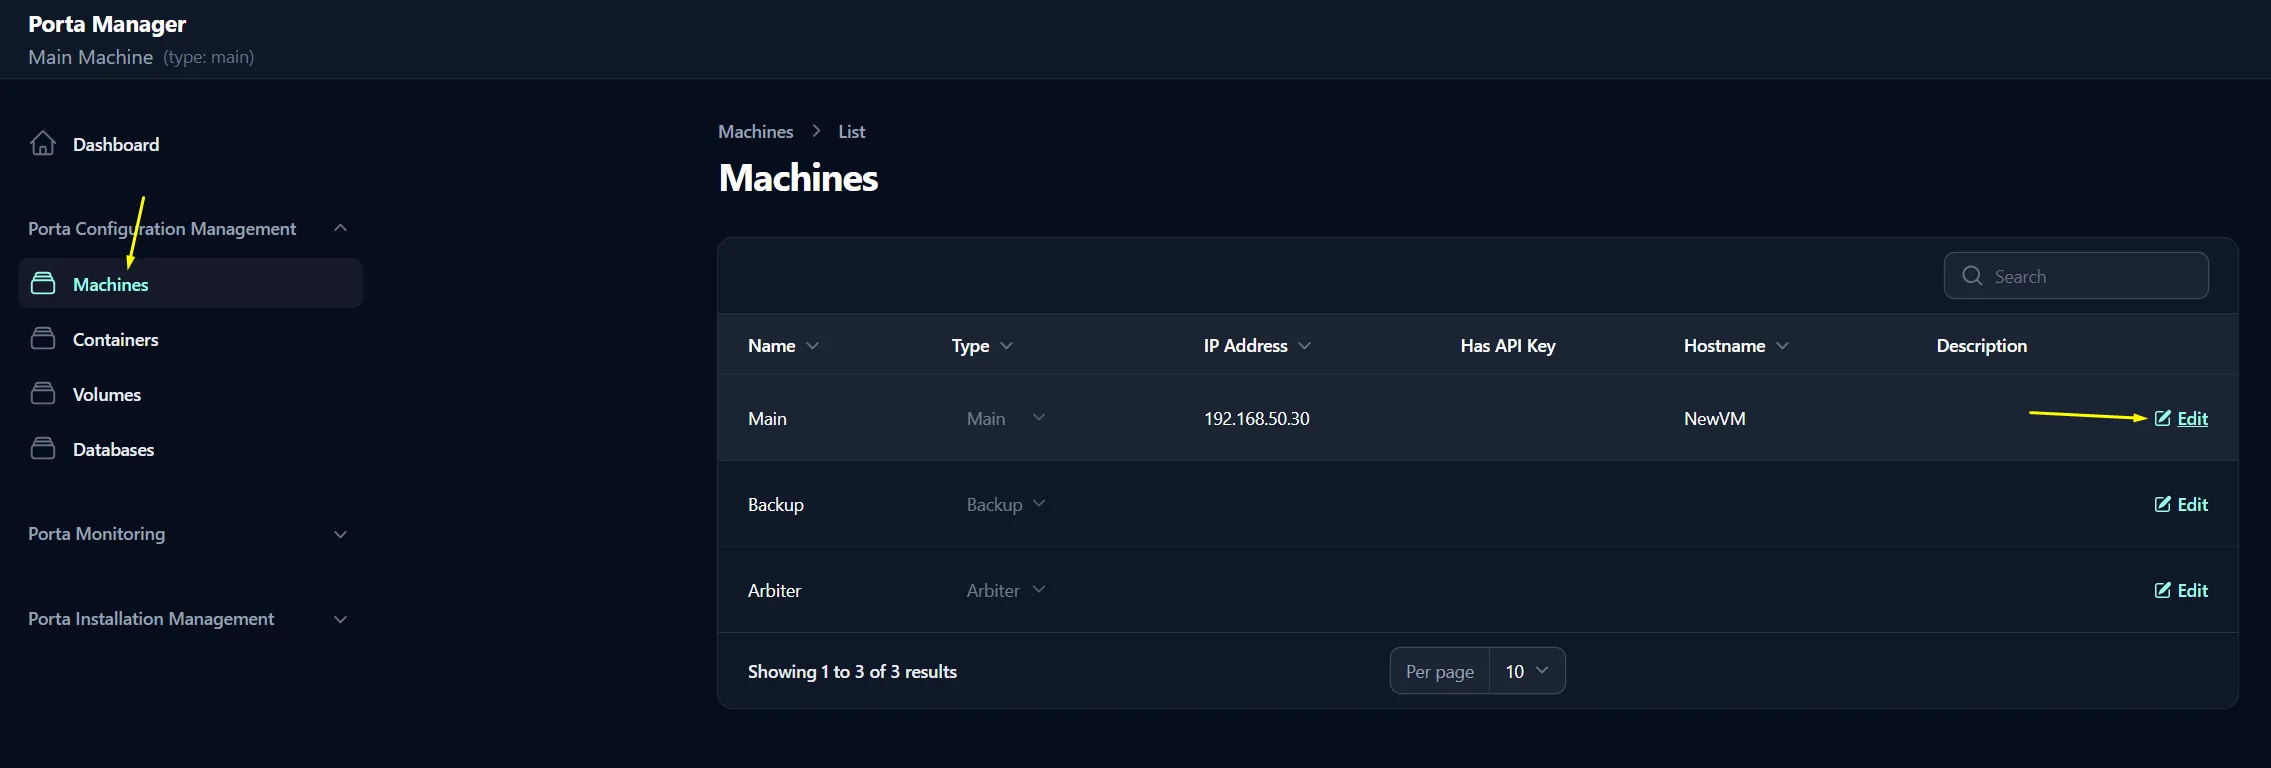
- On the
Edit Machinepage, update theIP Addressfield to match the new static IP address you just set for the VM, then clickSave Changes.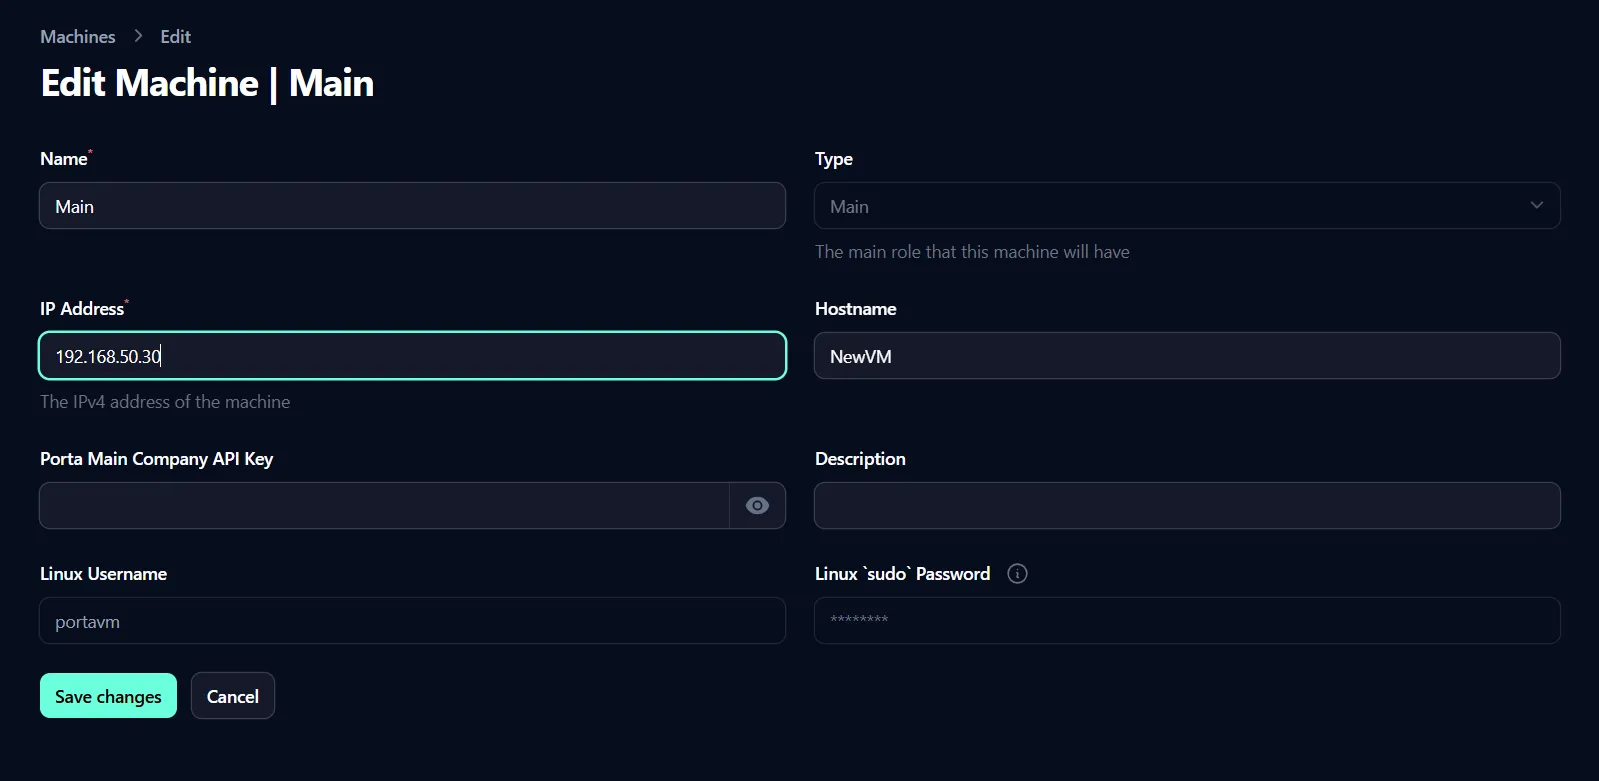
- Return to the Porta Manager dashboard by clicking on the
Dashboardmenu item in the sidebar. - On the Porta Manager dashboard, use the
Fix IP Settingsbutton to fix Porta’s IP.
- In the pop-up that appears, confirm that you want to update Porta’s IP address by clicking
Confirm.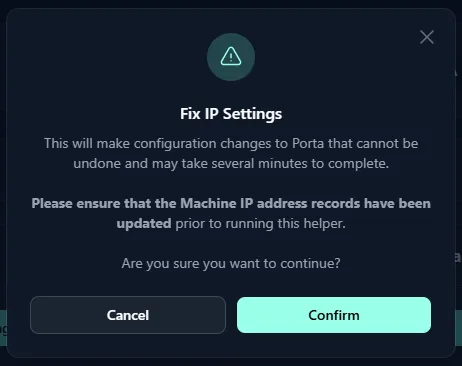
- Wait for the process to complete. You will see a success message indicating that Porta’s IP address has been updated successfully when it has finished.

- You should now be able to access and use Porta as usual.