Managing project folders
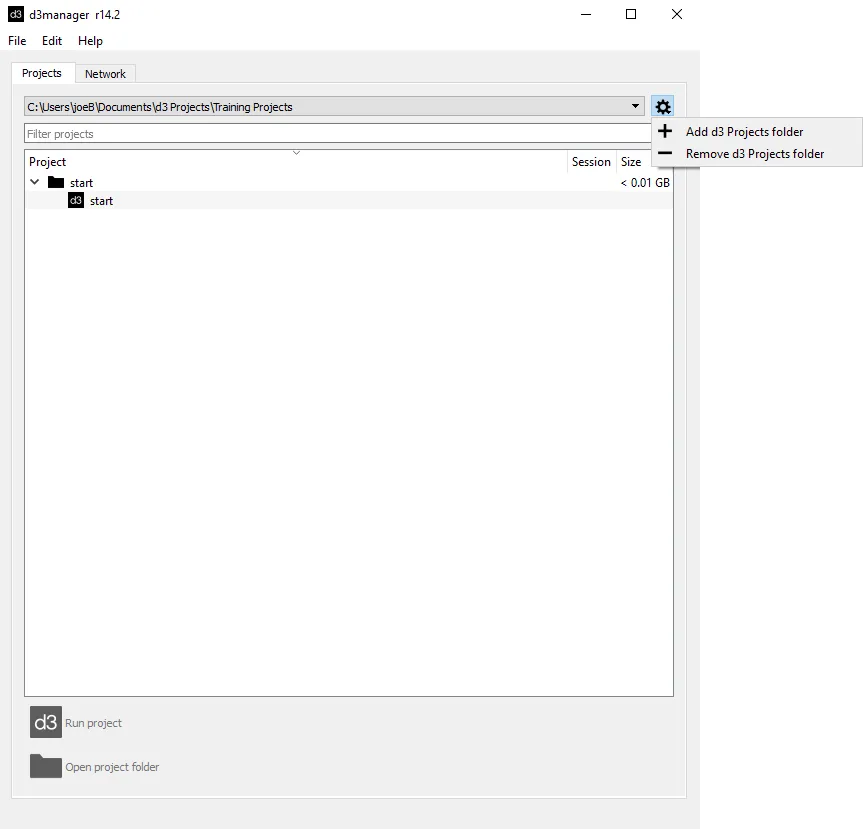
Adding and removing project folders allows you to add or remove multiple project folder locations, enabling you to have multiple project locations simultaneously.
Adding a project folder
Section titled “Adding a project folder”- Click the settings icon +
- Click + Add Disguise Projects folder in the drop down selection and select a new folder.

Removing a project folder
Section titled “Removing a project folder”- Click - Remove Disguise Projects folder. Notice that this will not delete the actual content of the folder, it just gets removed from the d3manager.
Expanding and collapsing projects folders
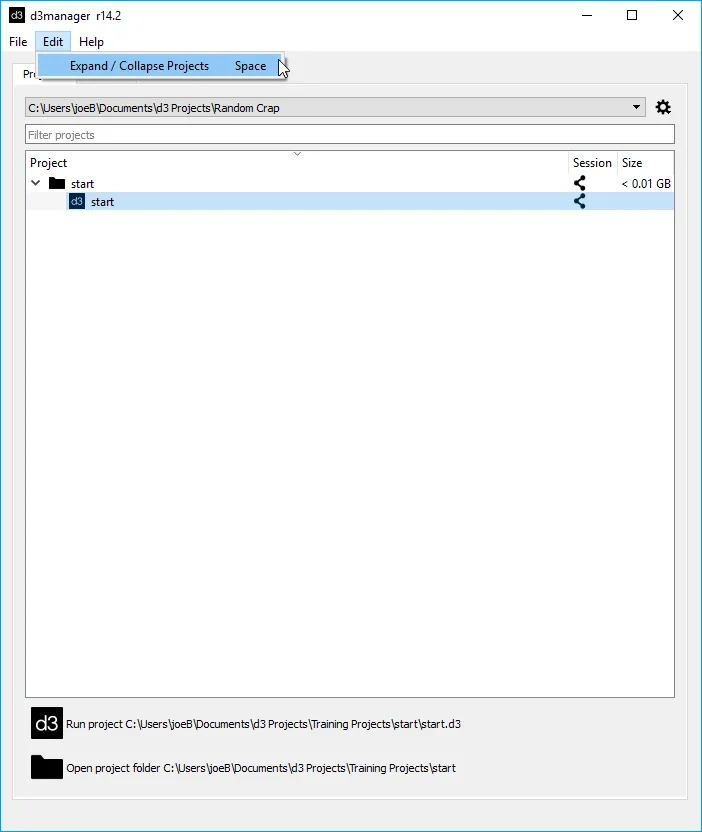
Section titled “Expanding and collapsing projects folders”This allows you to expand and collapse your project folder which enables you to see multiple project files within your project.
- Select Edit from the menu bar.
- Select Expand / Collapse from the drop down selection.

Project history files
Section titled “Project history files”Every time you run Designer, the .d3 project file (for example, myProject.d3 ) is automatically copied to a folder called History in your project folder.
Backup files location for a project, used in case the current .d3 project file becomes corrupted or fails to load
The file name of the backup copy is stamped with the date and time. The software manages the files in your history folder so that you always have ten versions created within the last hour, 24 within the last day, 7 within the last week, 4 within the last month, and 12 within the last year. If you should happen to lose or corrupt your project file for any reason, therefore, you can always access the project as it was five minutes ago (or whatever your auto save duration is; see the next section on ‘configuring auto save’).
Restoring an backed up .d3 project file
Section titled “Restoring an backed up .d3 project file”To restore a backup version of the project: 1.Copy the .d3 project file from the History folder up into your project folder. 2.Remove the date suffix and double-click it to run it.
Restoring an object after permanently deleting it
Section titled “Restoring an object after permanently deleting it”Objects emptied from the trash-can are permanently deleted in the current .d3 project file. To retrieve an object, restore a previous .d3 project file in the History folder. It is even possible to rollback an object to a previous version.
Autosave
Section titled “Autosave”By default, the software saves the complete project every 5 minutes, as long as video is not playing (this is because saving takes time, which interrupts video playback). Autosave also generates a snapshot of the current project in the history folder contained within the project folder.
Changing the frequency of autosave
Section titled “Changing the frequency of autosave”- Right-click the State tab to open up the Program settings menu. Select Project Settings.
- Edit the autosave frequency (min) property to the number of minutes between saves.
Autosave Frequency (Minutes) property of the Program Settings menu is used to edit the number of minutes between saves.
Manual save
Section titled “Manual save”To force the software to save all objects, press Alt+w. Only objects that have changed will be saved.