RAID Configuration
The drives used in this guide were for examples and you will likely have a different setup in your RAID. If you want to know information about what drives are required/recommended then please contact the Disguise Support team
Logging in to the RAID controller
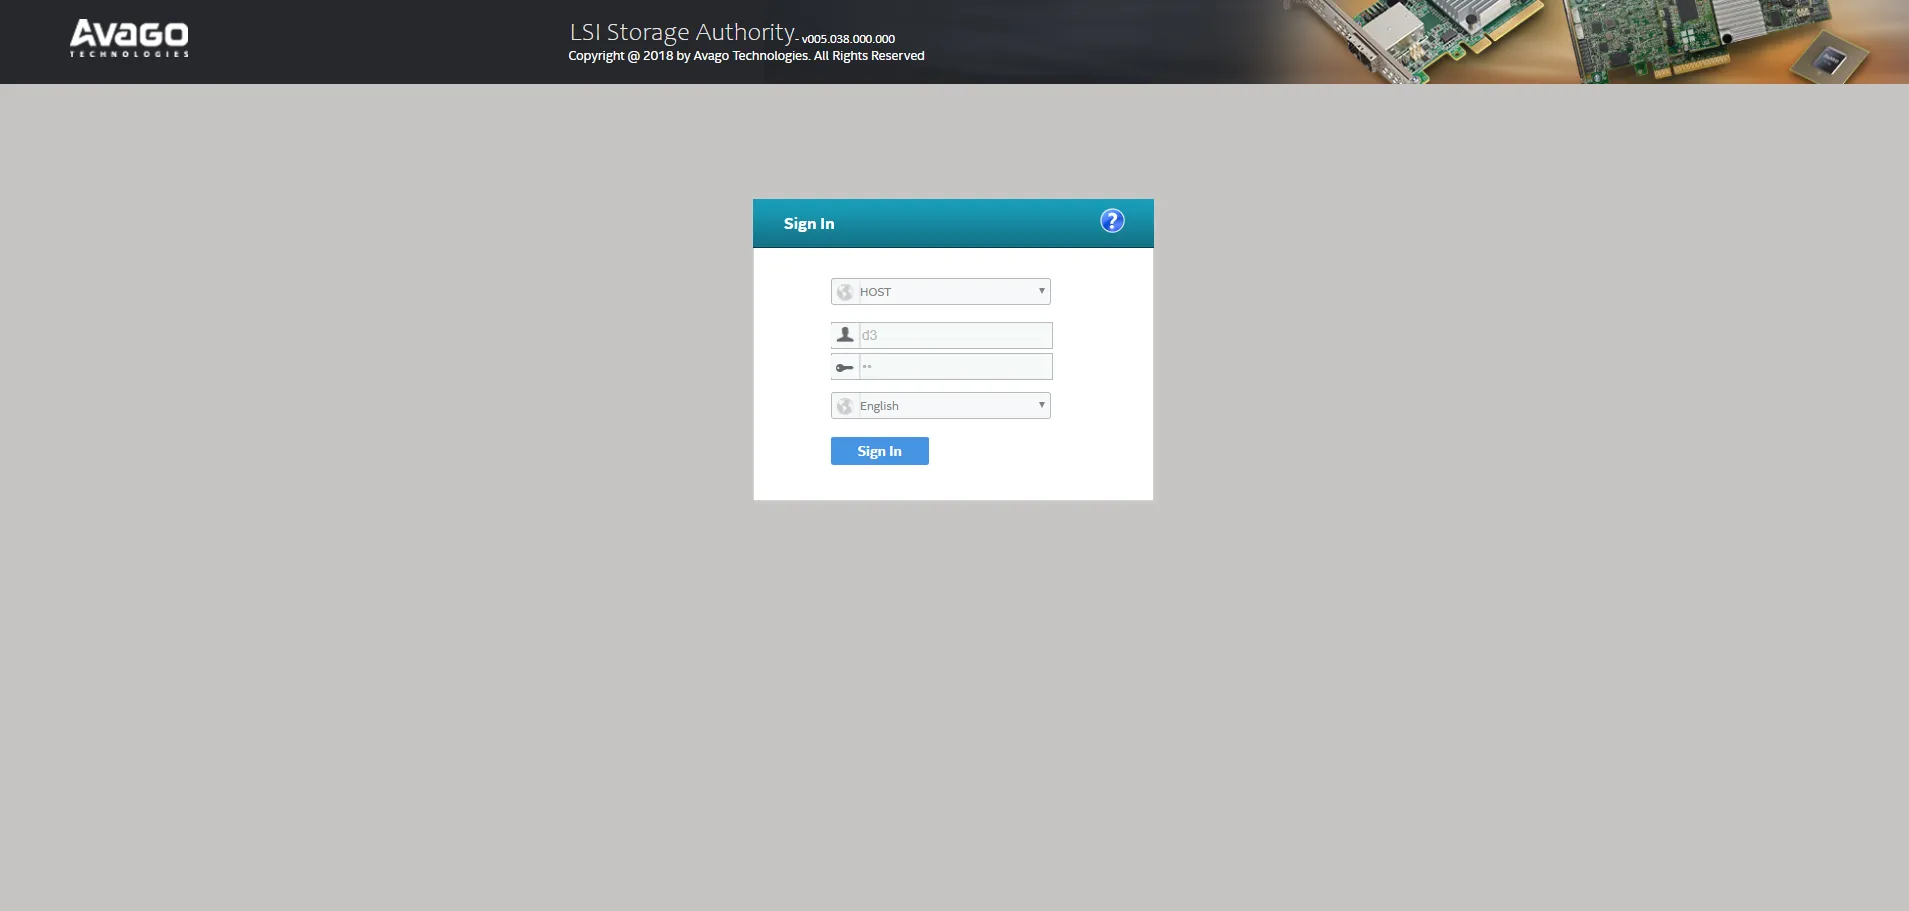
In order to login and configure your RAID, you must ensure that yourserver has a password setup for the user account.
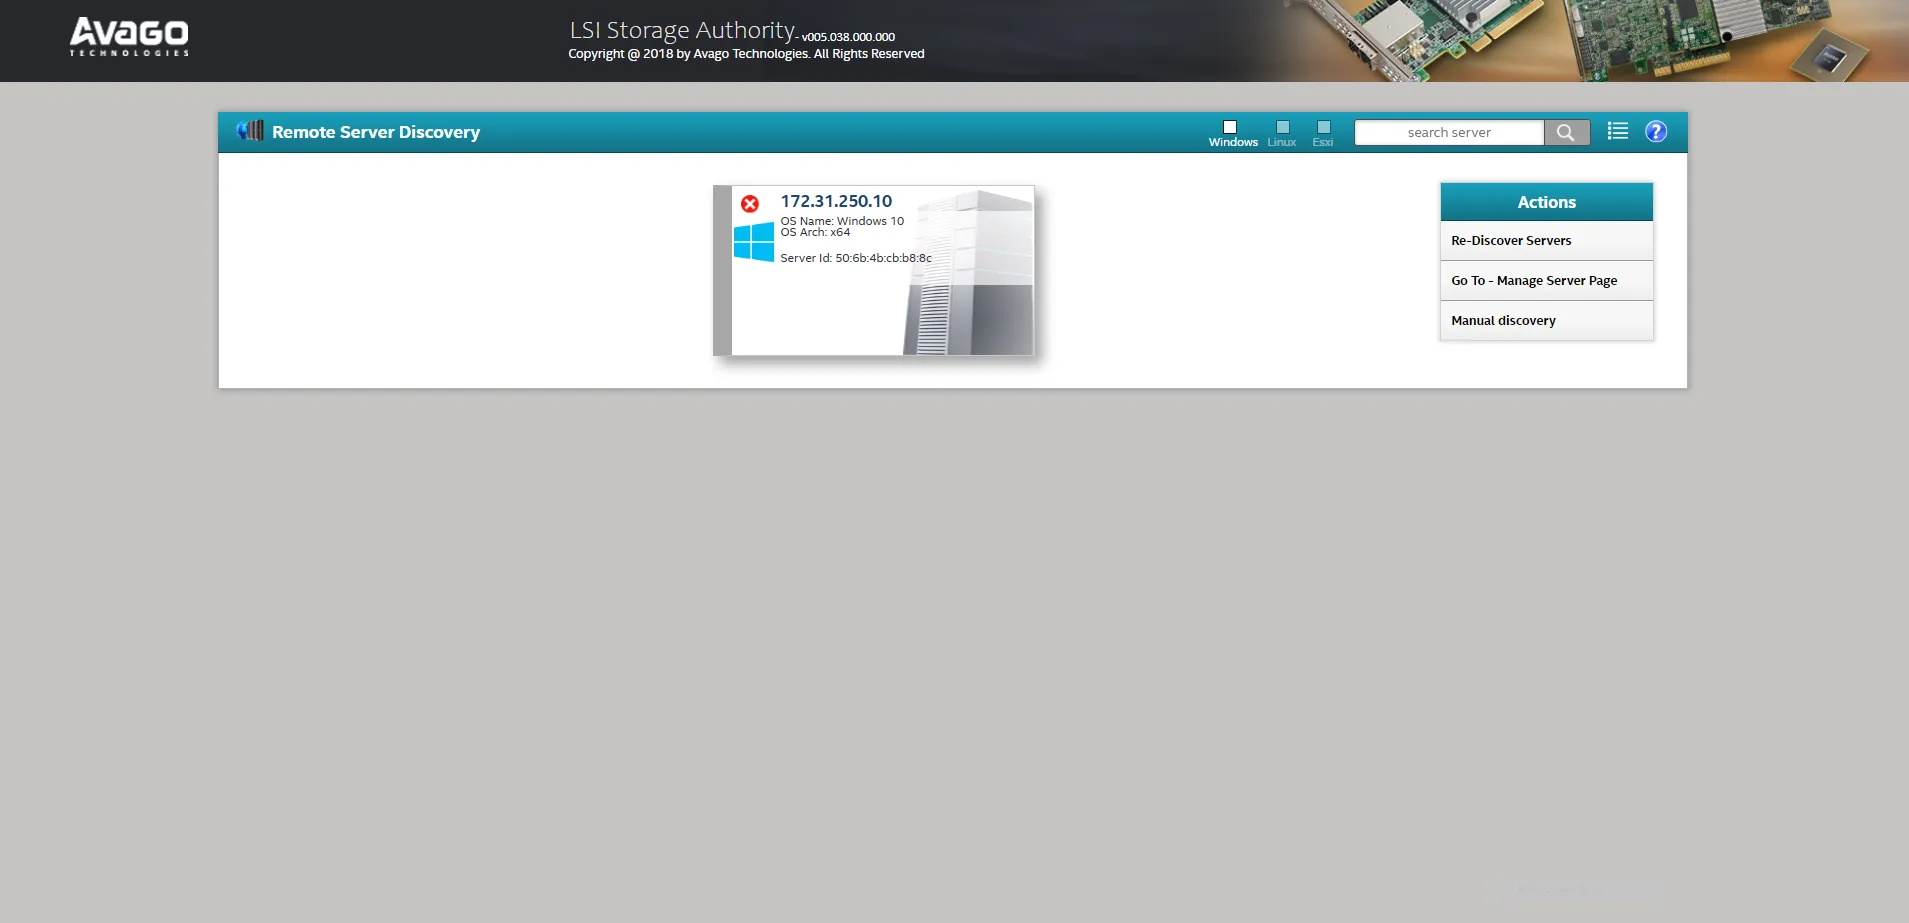
- Open the Windows start menu and select LSA.
- On the LSA landing page, select the server with your local IP address (multiple will show if on a network with more than one VX 4).
- Enter your login details of the local user account (default is Username: d3, Password: NOT SET)
Overview of the RAID
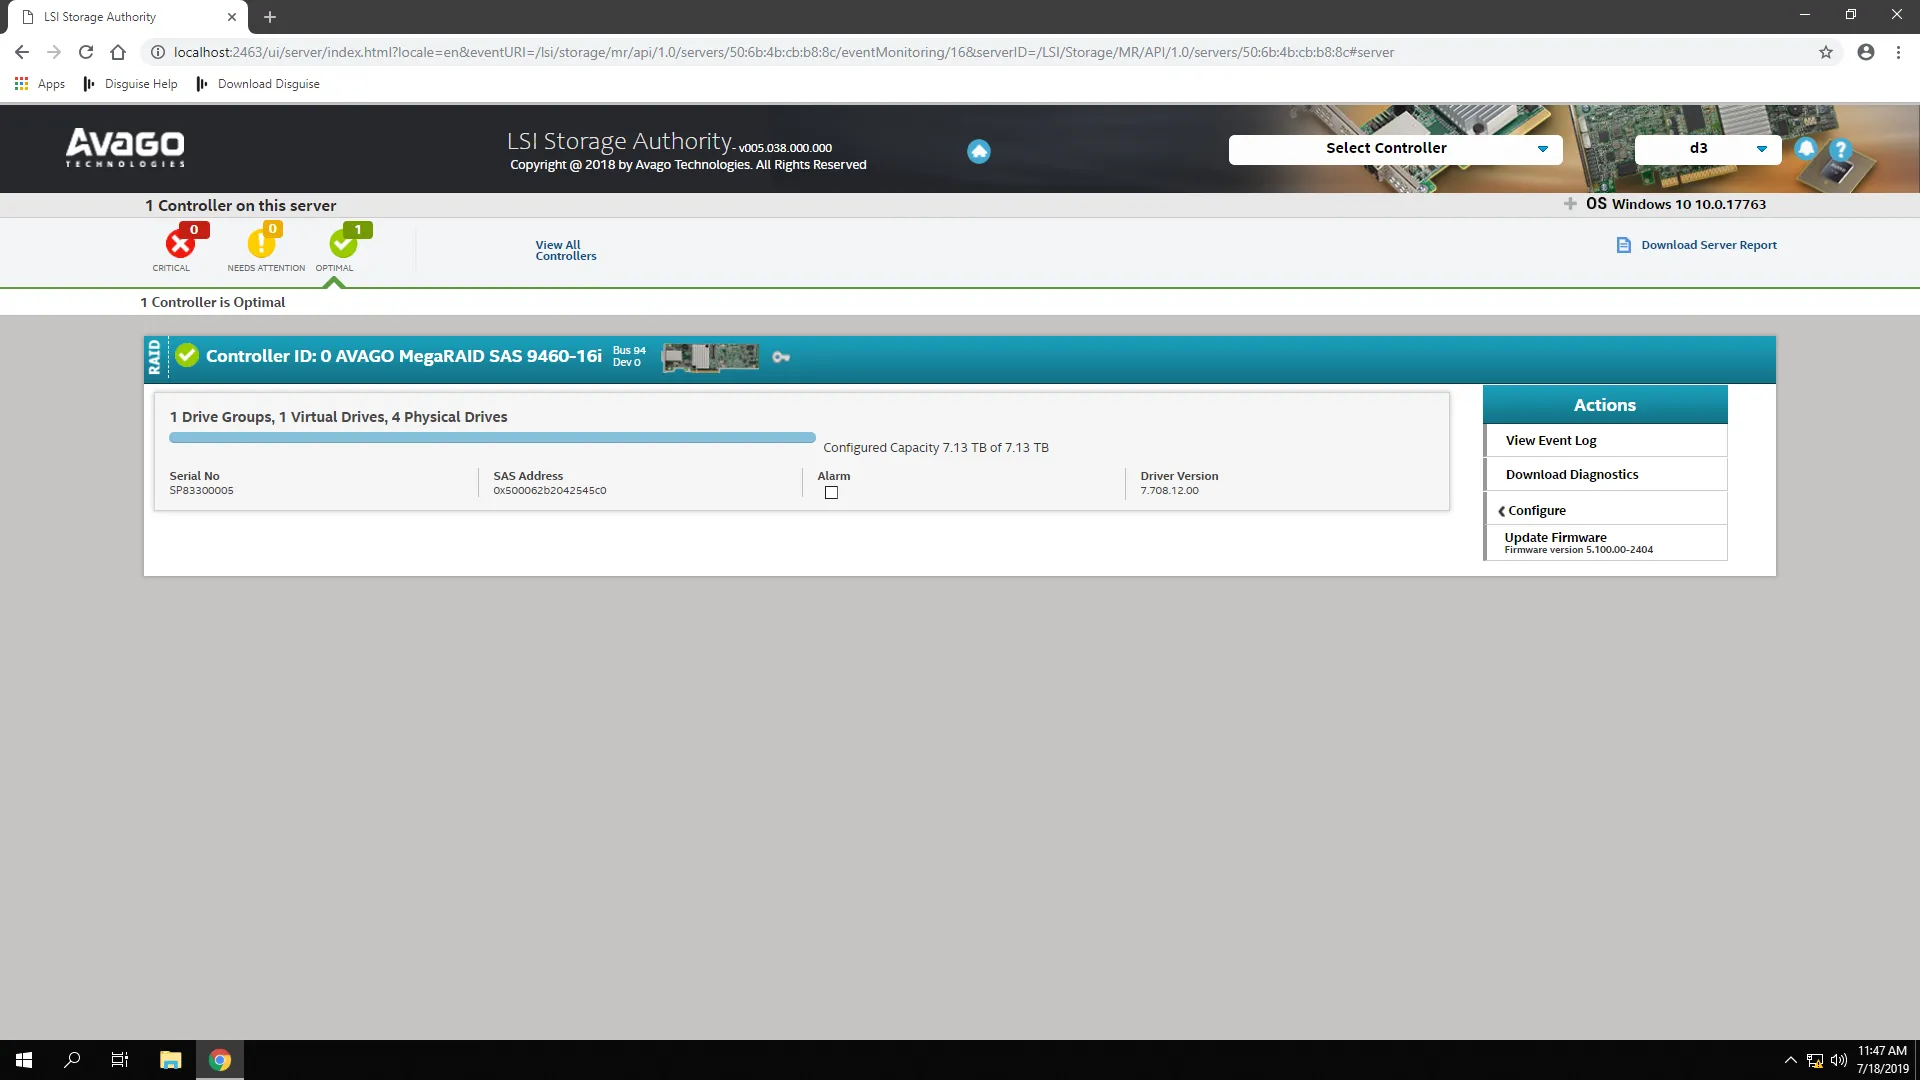
On the landing page you will see information about the controller within the system. This will alert you to any issues, the current capacity and how many drives are present.
- Select the controller from the Select Controller dropdown menu at the top of the page.
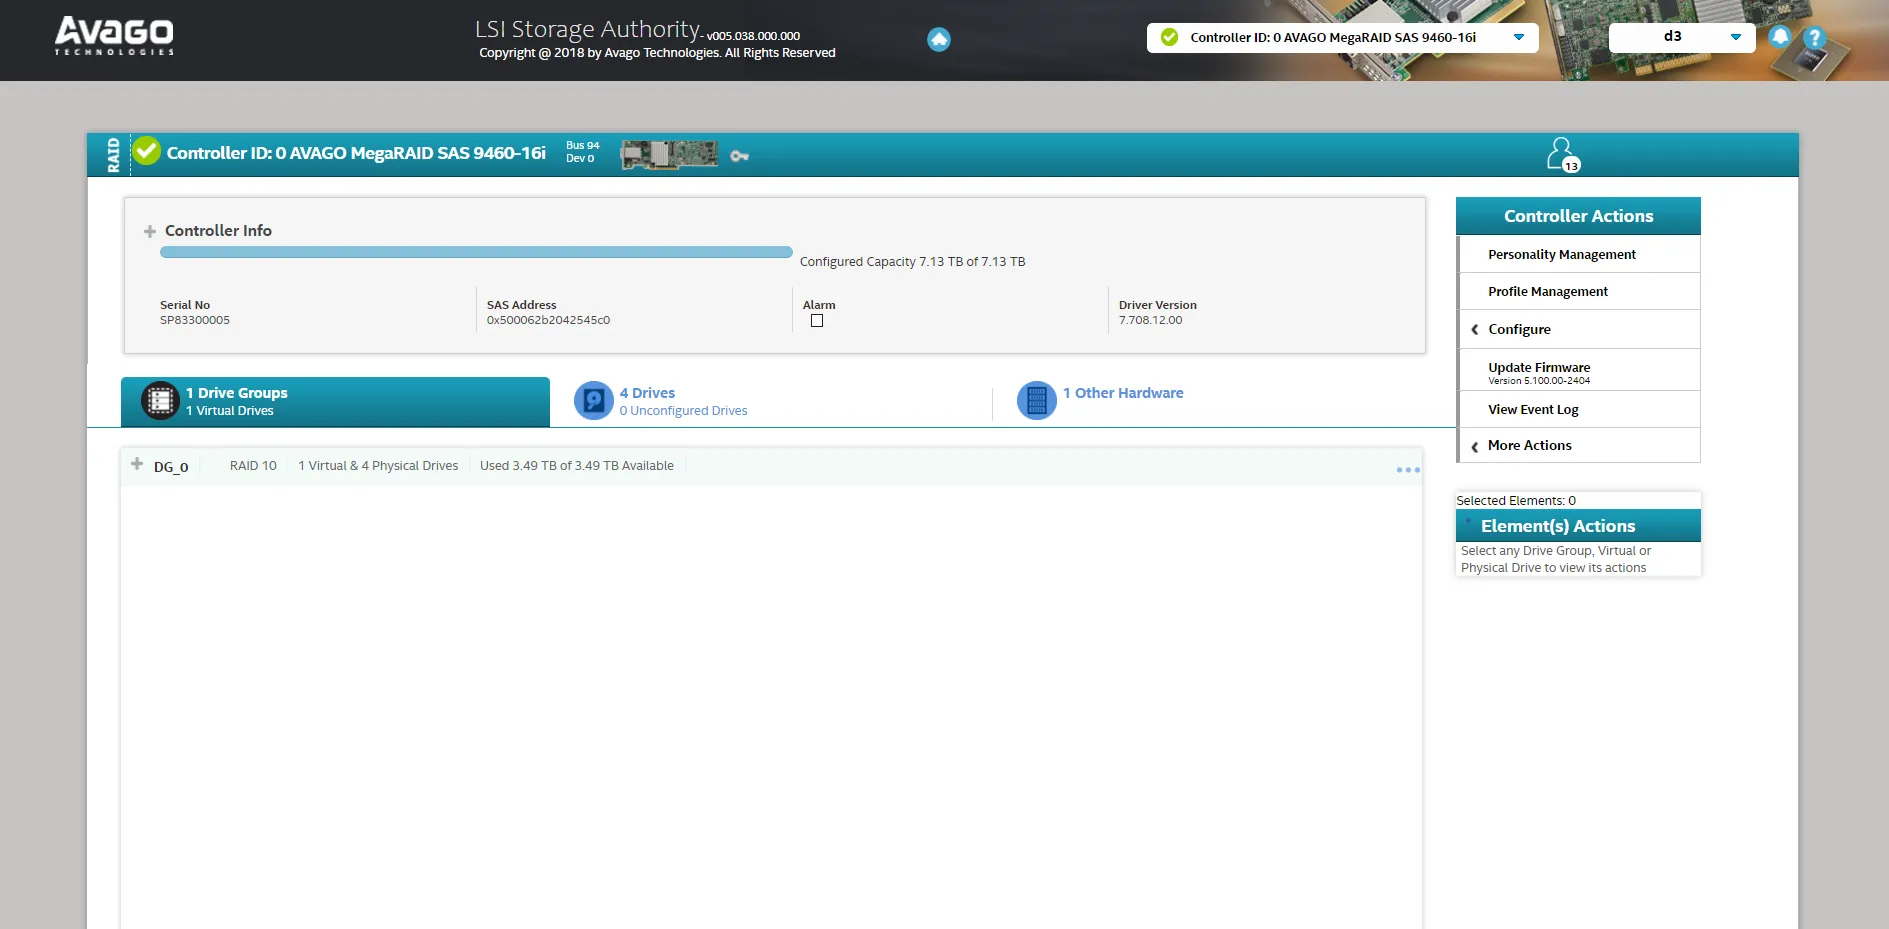
- On the controller landing page you are able to find out more detailed information about the controller itself and the drives within the system.
- The first tab shown contains extra information into the Virtual Drive. RAID Level etc.
- From the drive information page you should look to do any configuration.
Creating a RAID
- If you want to create a new RAID, click on the Configure tab on the far right of the page.
- Select Advanced Configuration to ensure you get all available options.
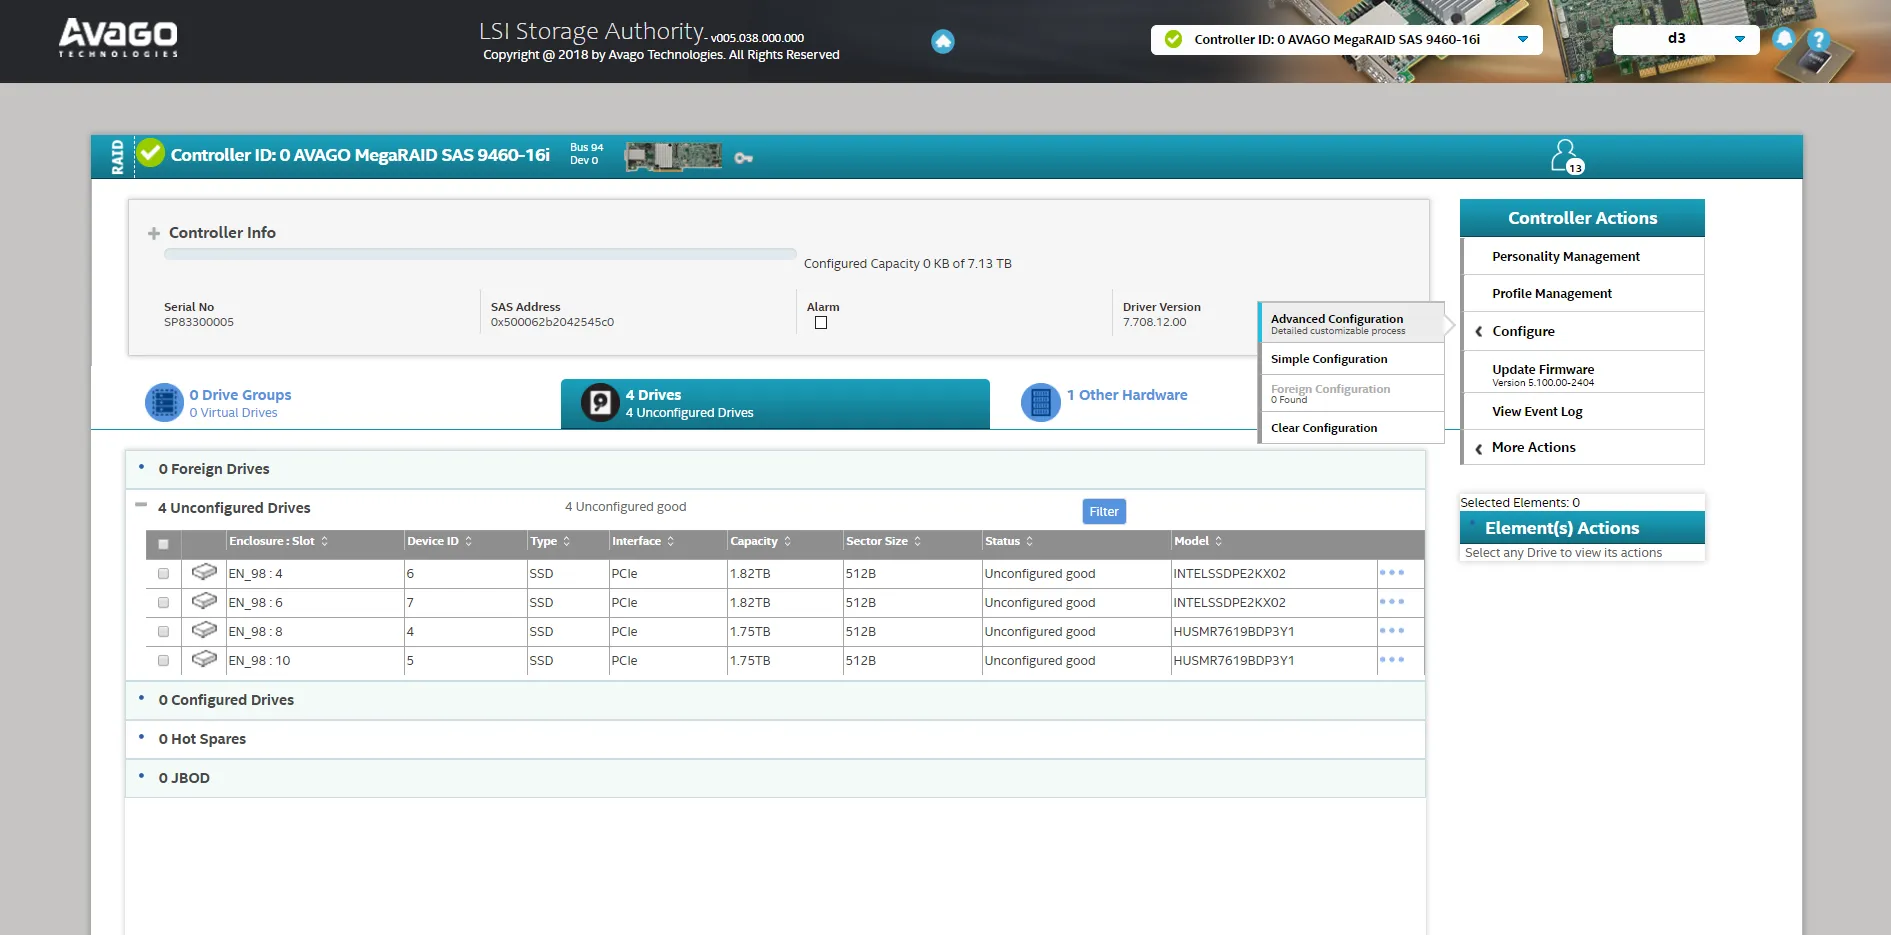
- The default and recommended setup is RAID 10. This should be selected to meet any performance stats released by disguise.
If the RAID is set up at a different level you could be at risk of losing your data without redundancy.
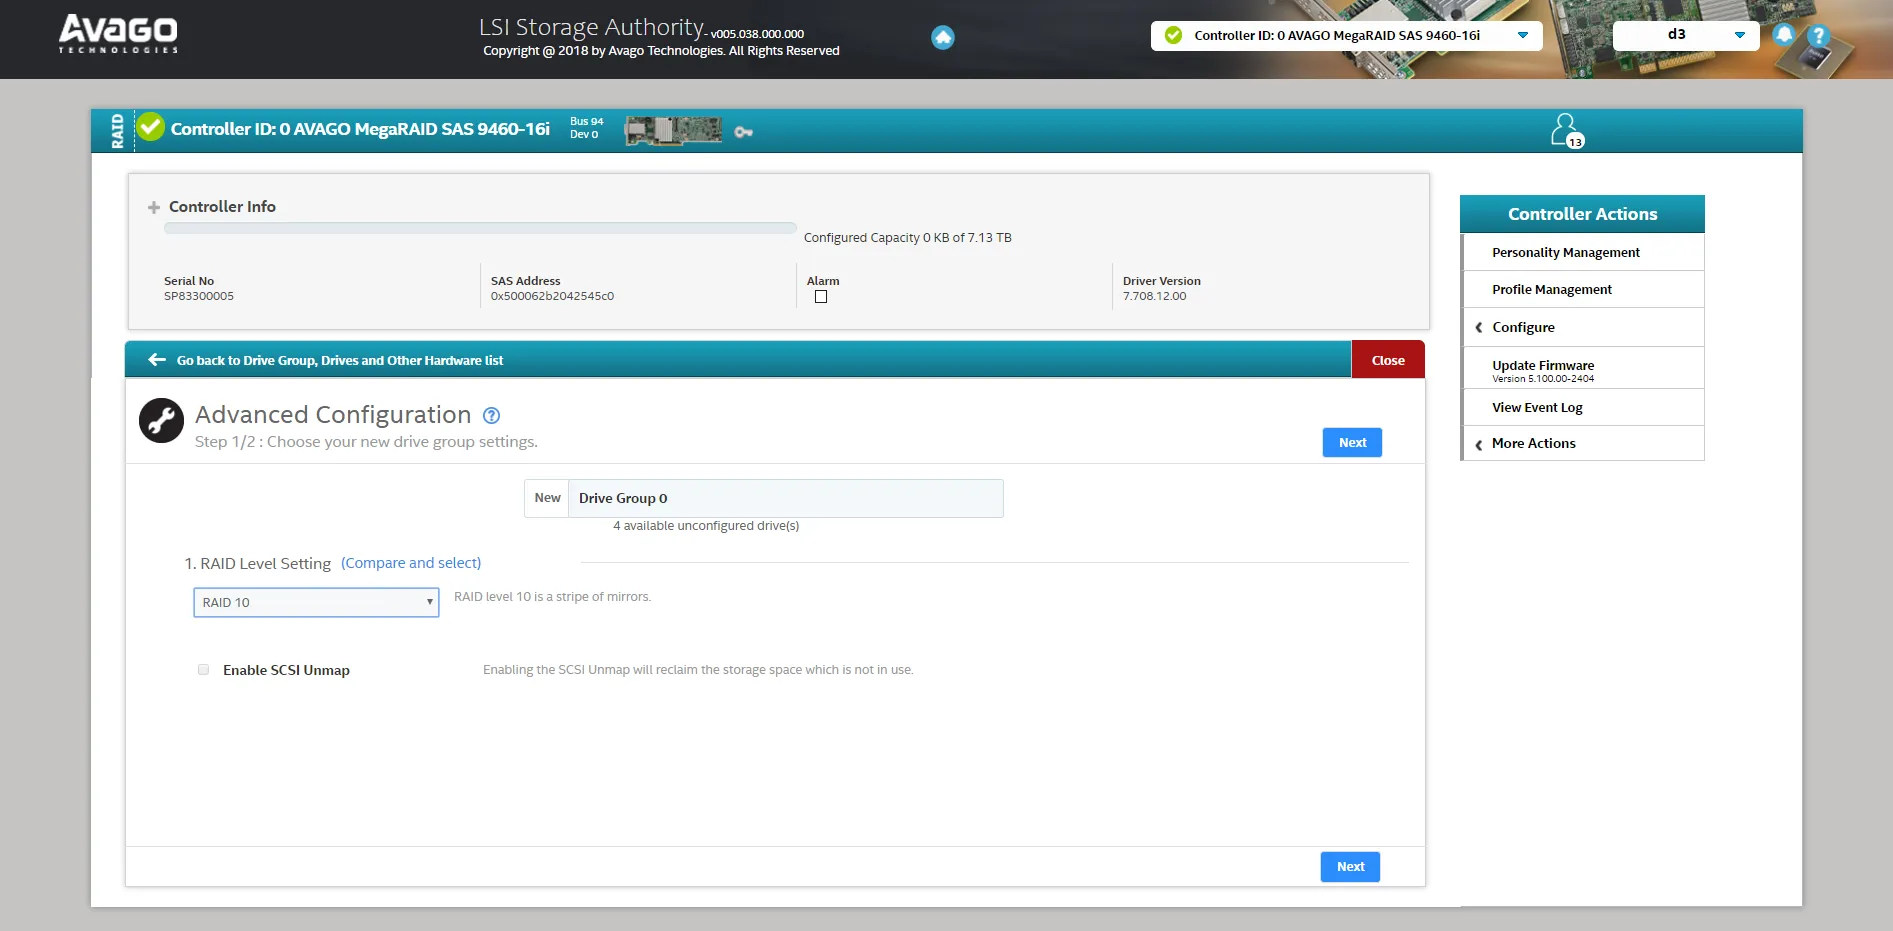
- Continue to the next page and select Add Physical Drives to choose which drives you are going to put into an array. RAID 10 requires a minimum of 4 drives to be set up.
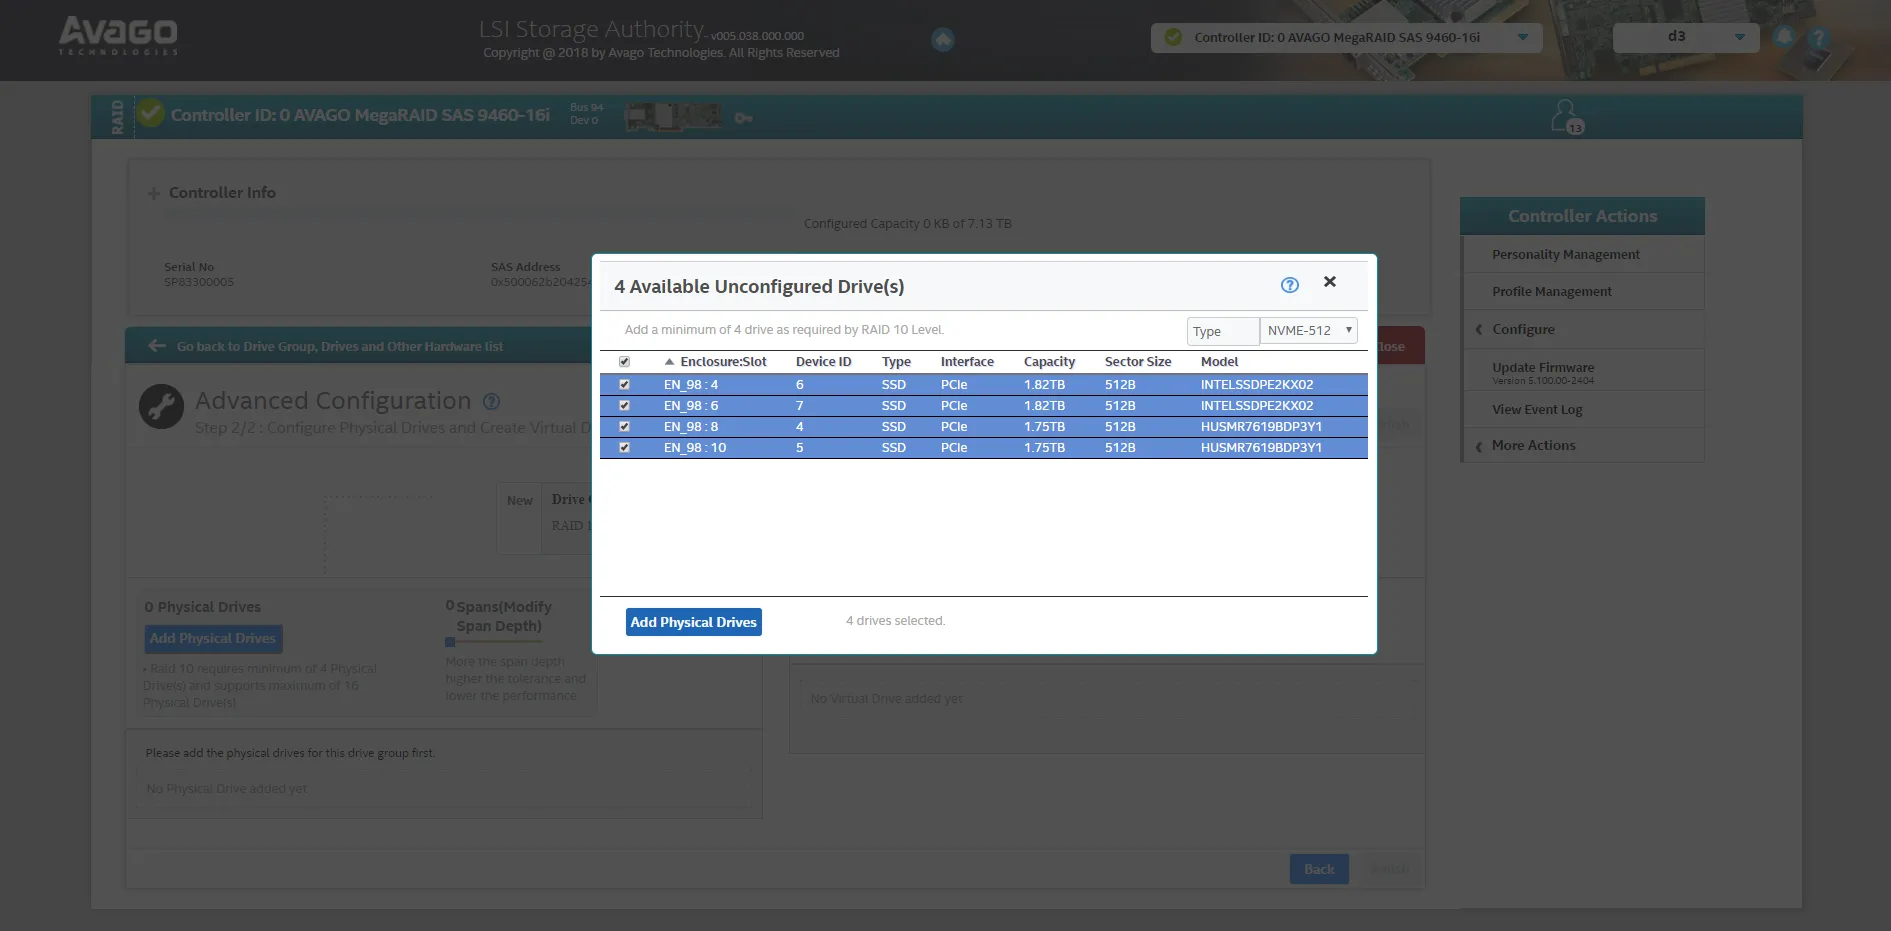
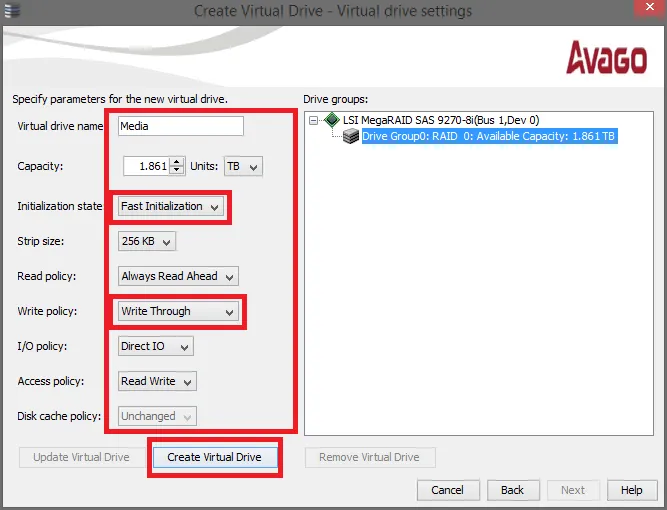
- Once the drives have been selected, click on Add Virtual Drives. The default configuration is as below and should be followed to ensure no issues.
- Virtual Drive Name - Media
- Strip size - 256 KB
- Initialization State - No Initialization
- Read Policy - Always Read Ahead
- Write Policy - Write Through
- I/O Policy - Direct IO
- Disk Cache Policy - Unchanged
- When all settings are set. Click Add Virtual Drives.
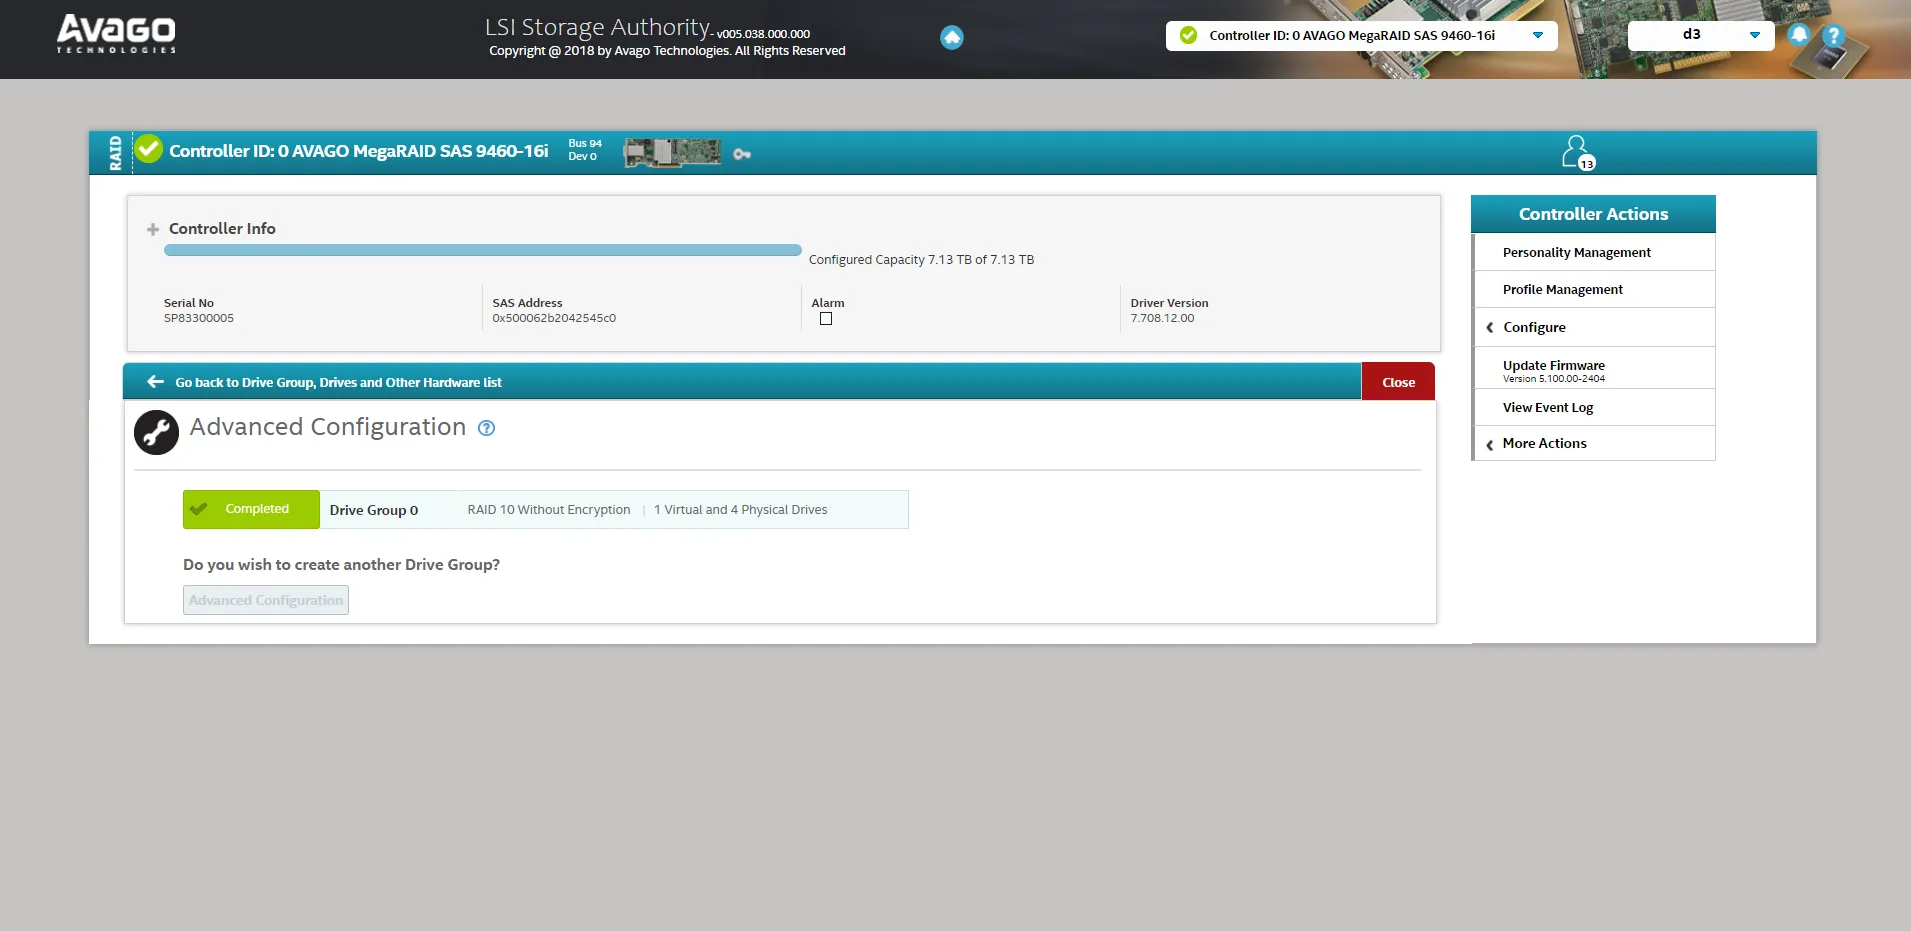
- Continue through the wizard by selecting Finish.
- You will then be presented a completion page showing the details of the configured RAID.
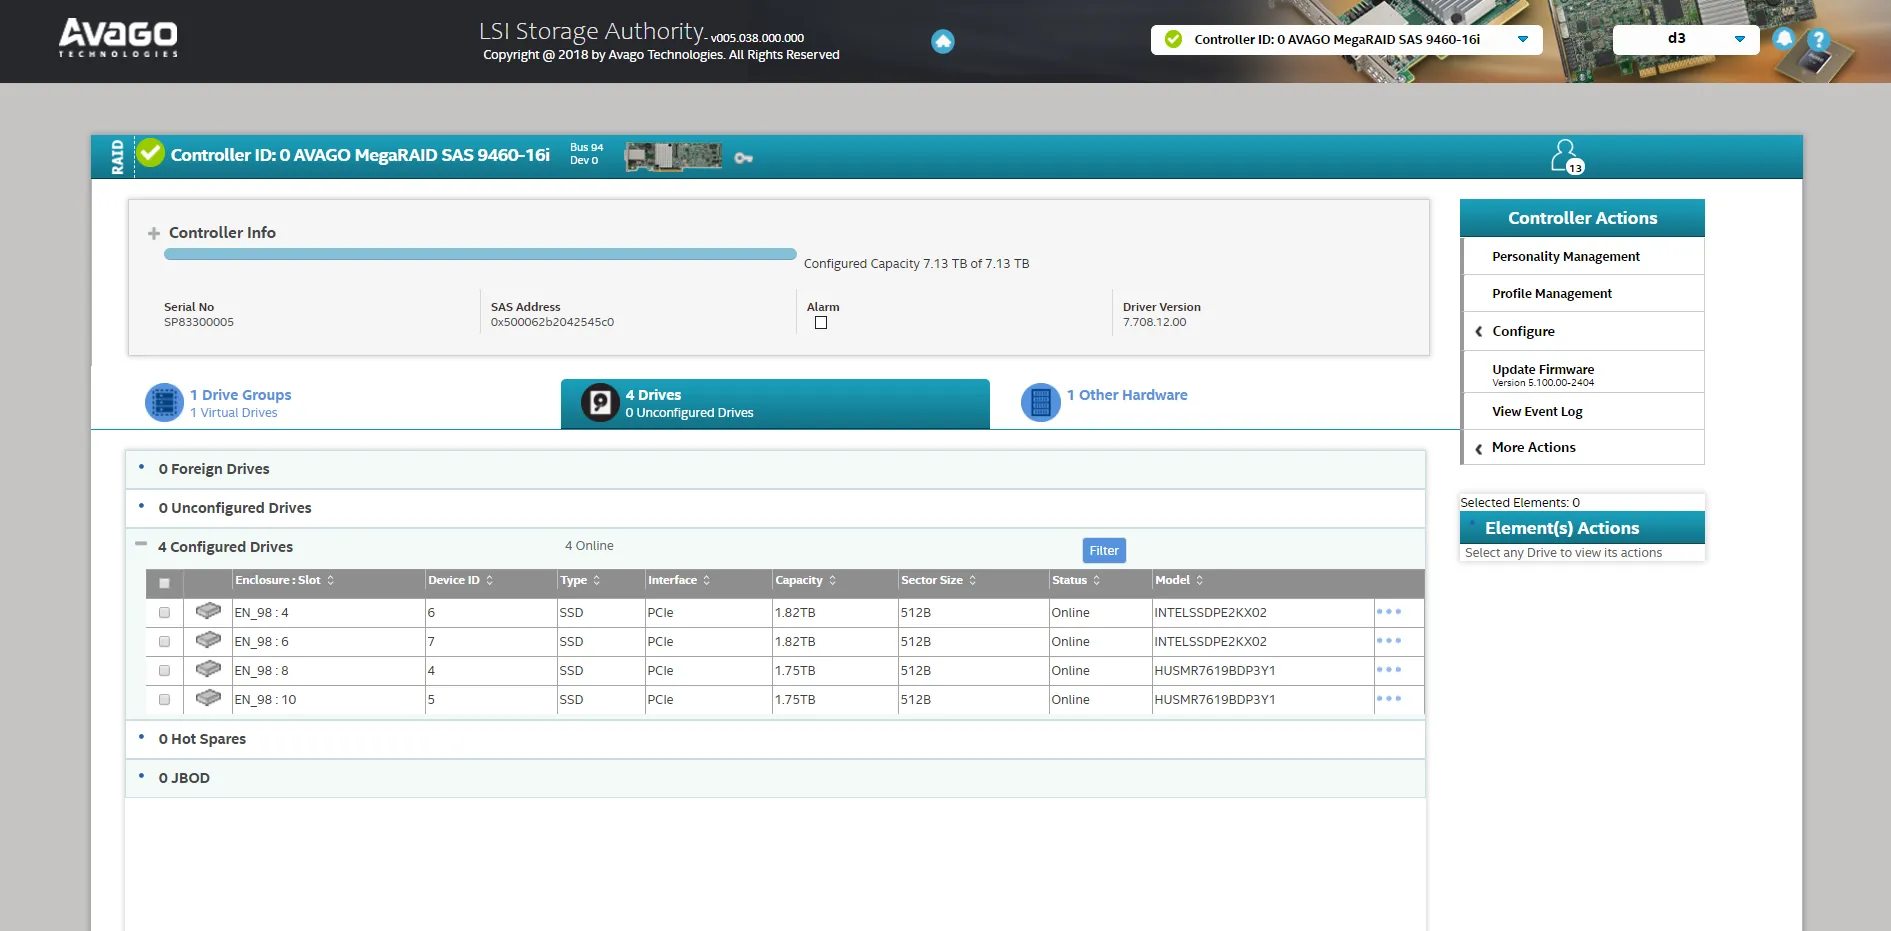
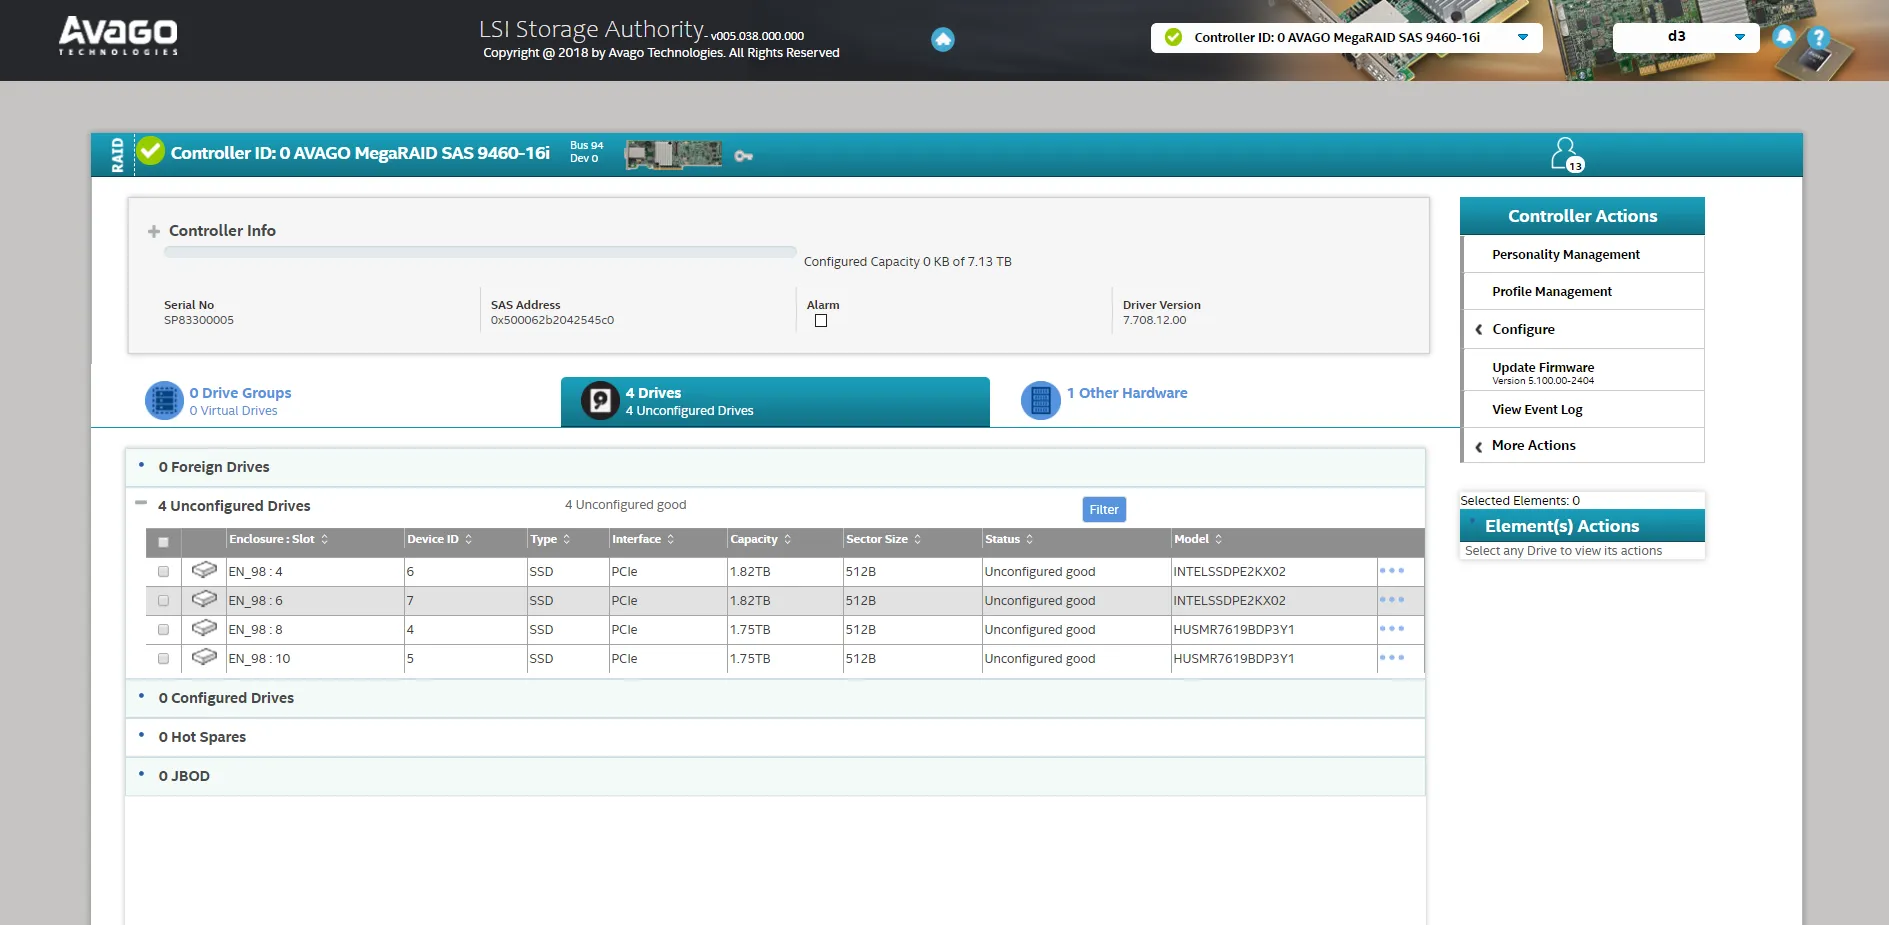
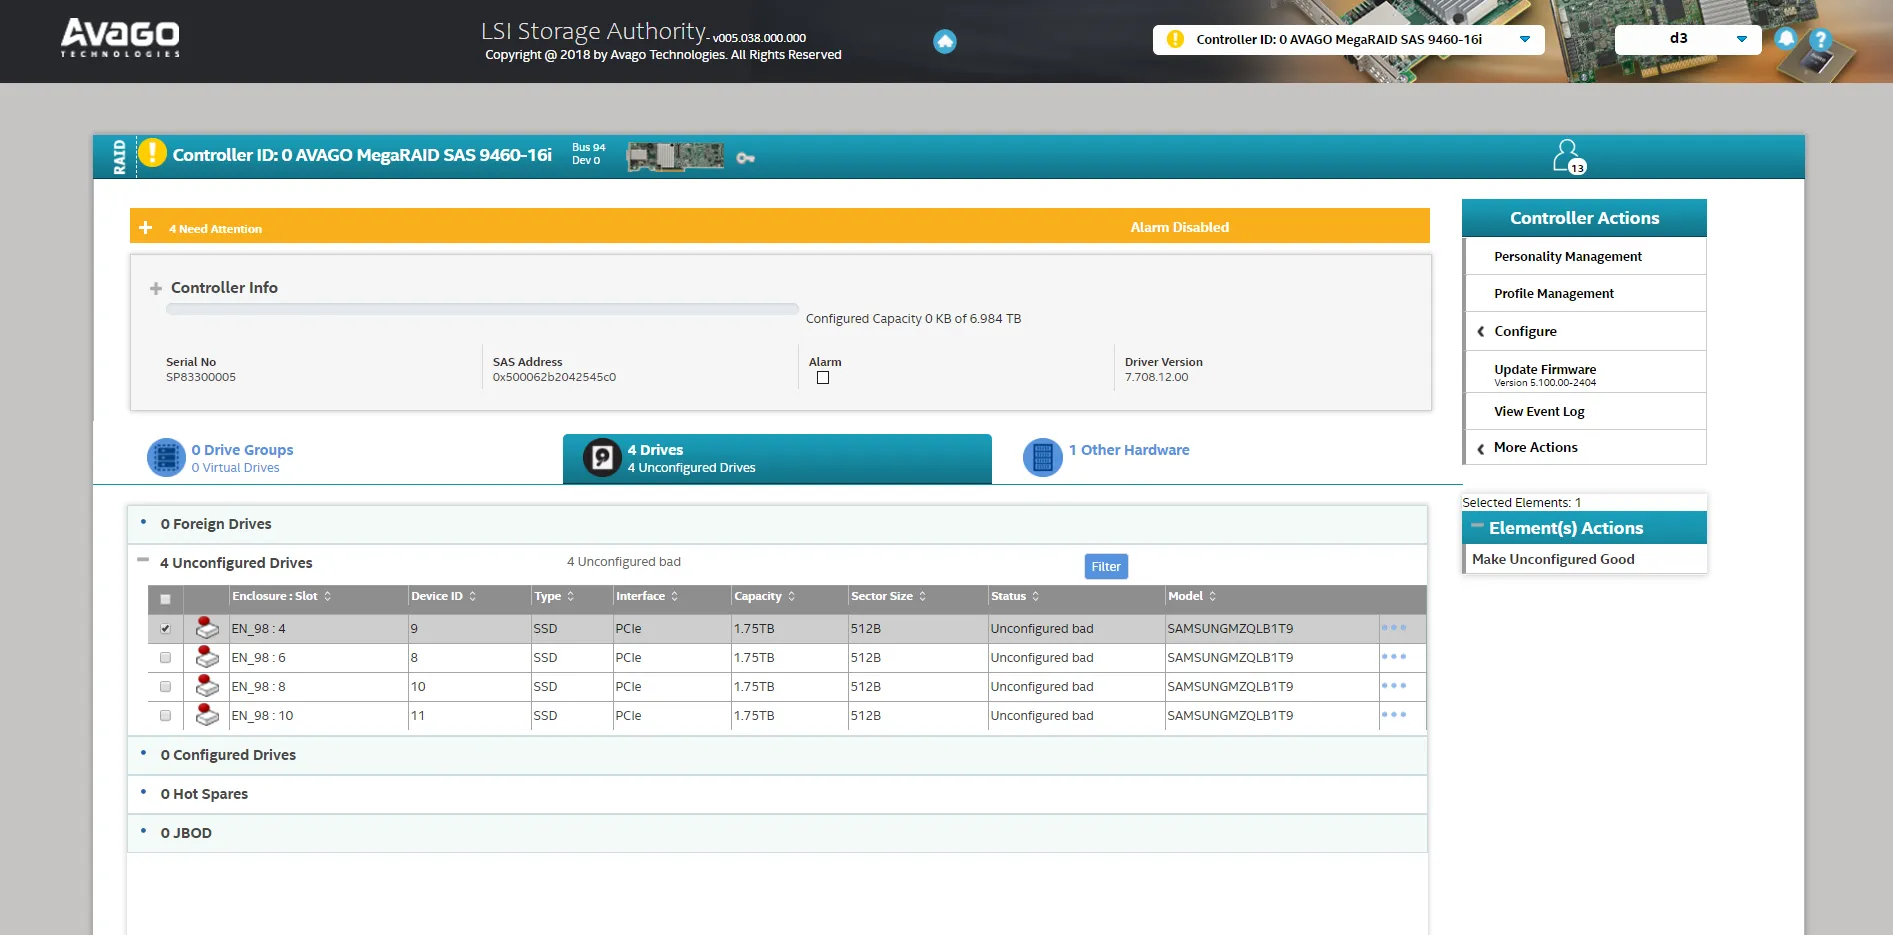
Unconfigured Good/Bad
Unconfigured Good drives are ready to be configured into a RAID.
Unconfigured Bad drives must first be made into unconfigured good drives before any configuration can be done. If a drive (or drives) is showing
up as unconfigured bad then select it (one by one) and click on Make Unconfigured Good on the right hand side.
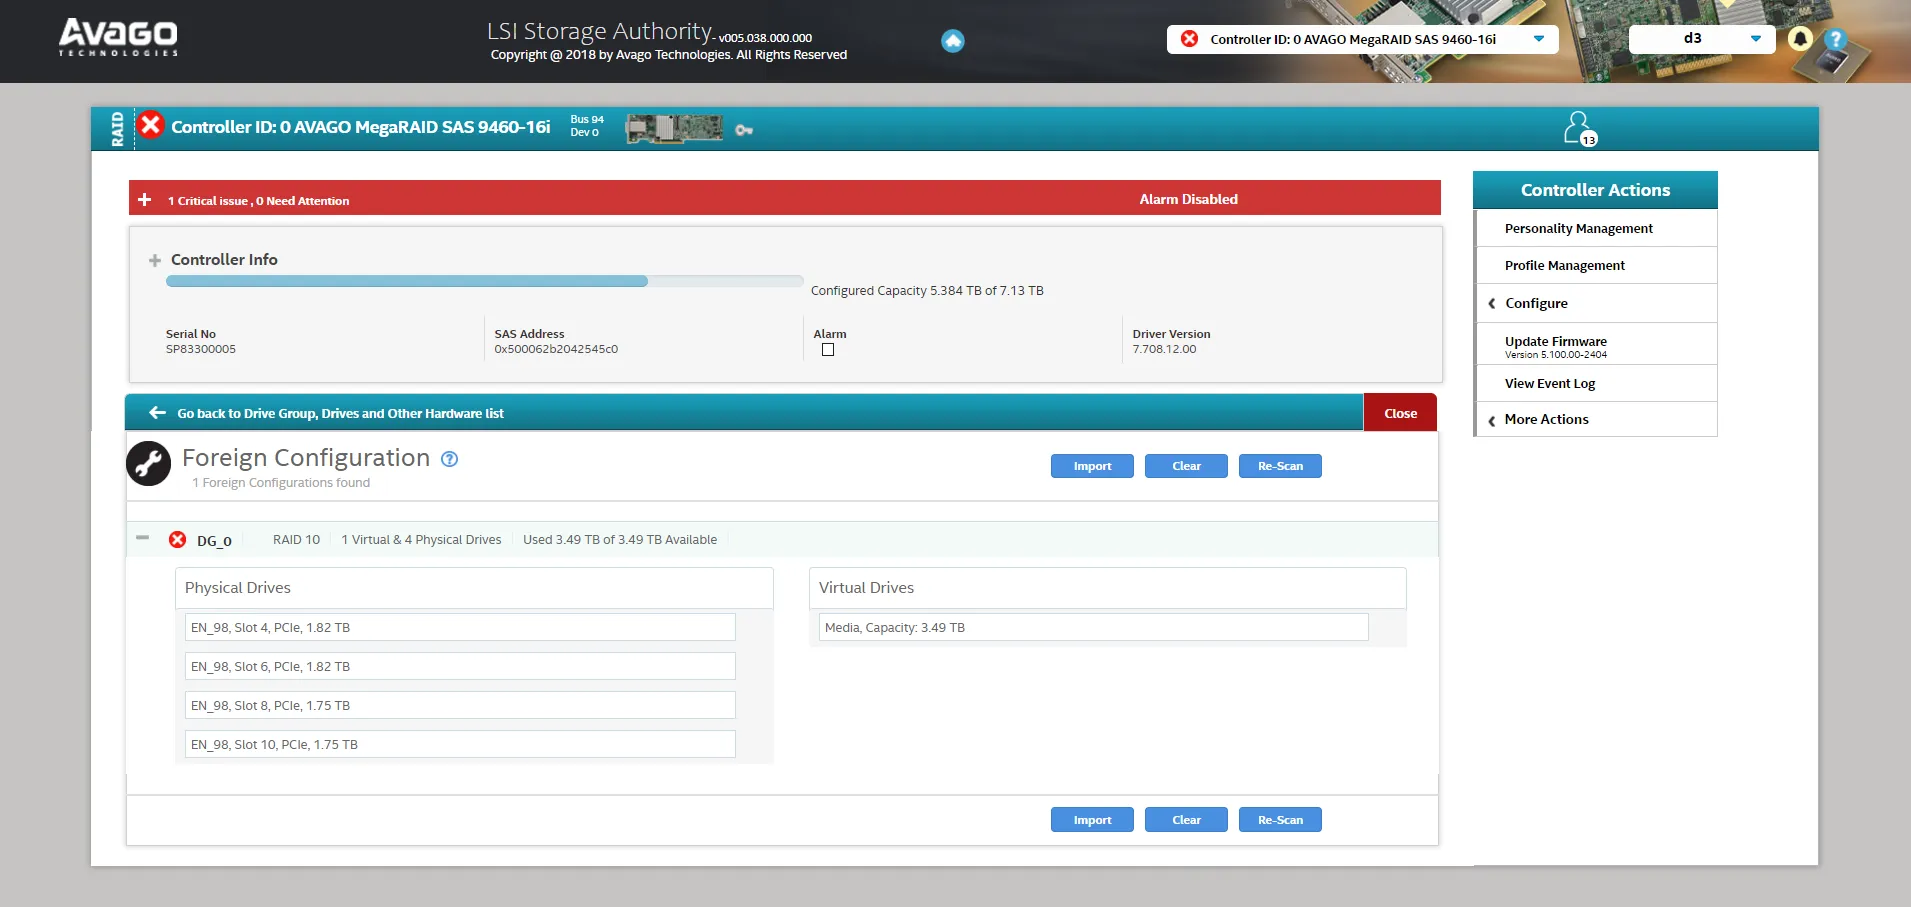
Importing Foreign Config
Drives that have been imported from another system or that have been changed from unconfigured bad may show up as foreign drives or a foreign configuration.
To import the drives, select the drives that are labelled under Foreign Drives and select Configure and Foreign Configuration from the right side menu.
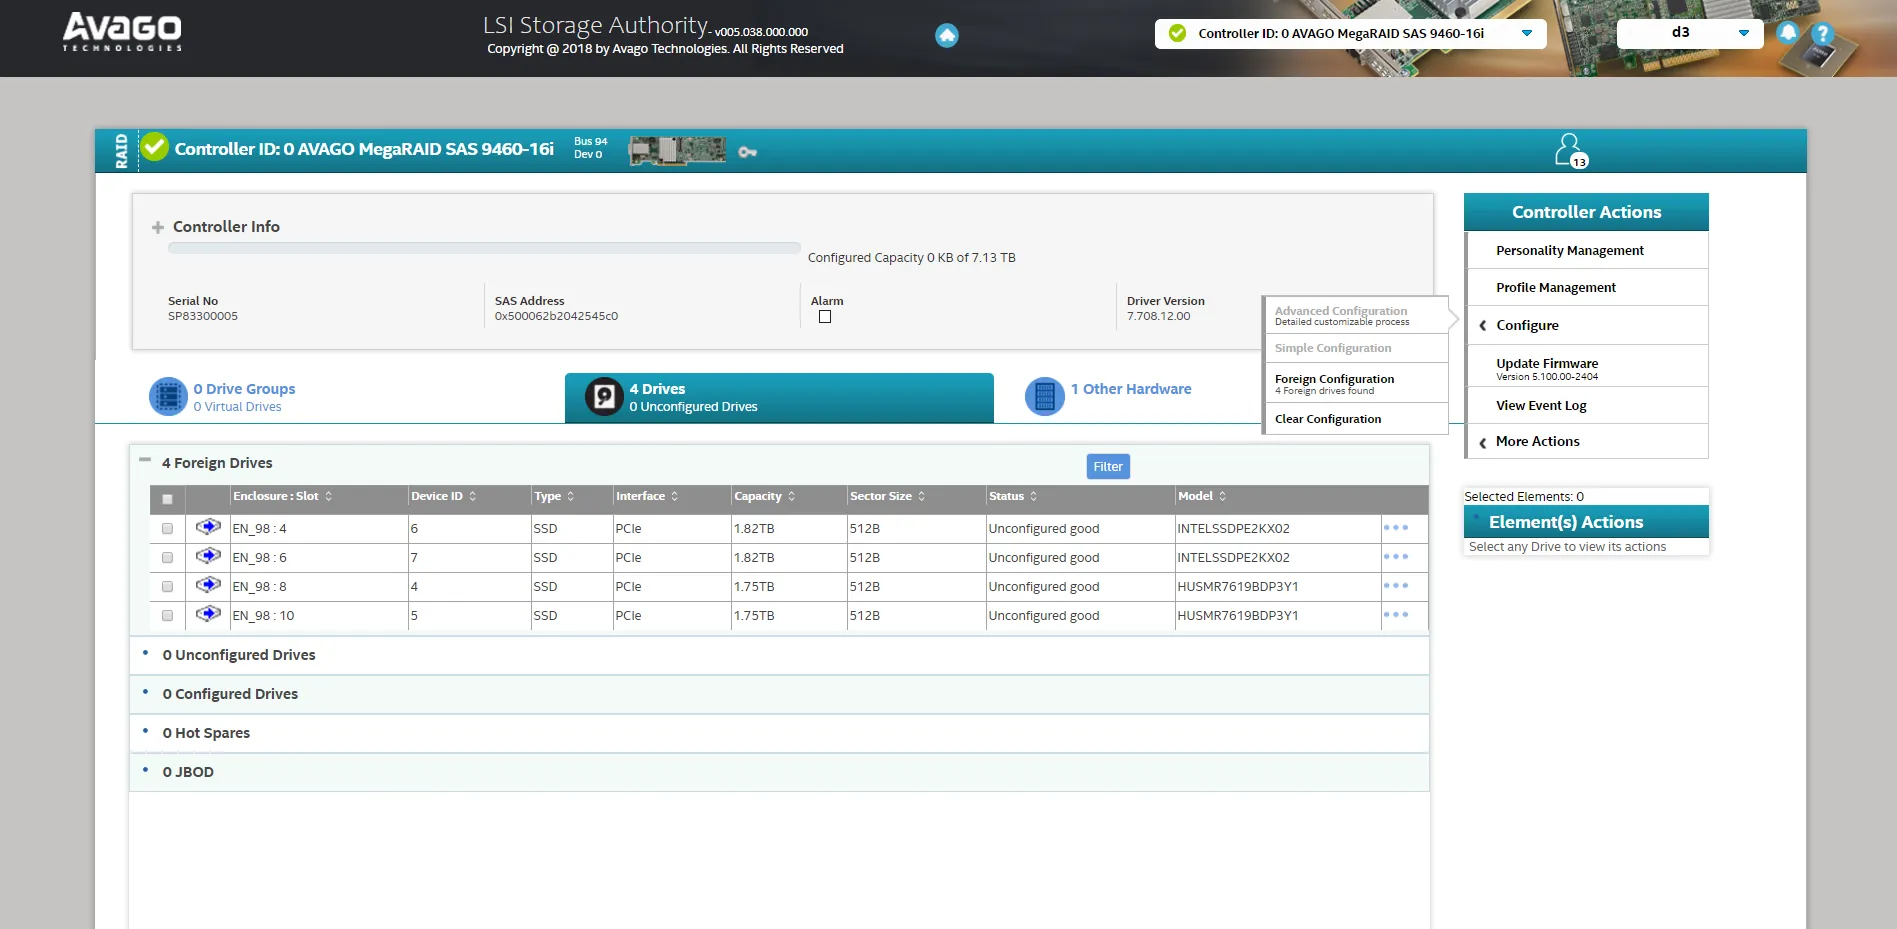
You will then be taken to a page where you can select ‘Import’ to adopt the foreign configuration. Details of the Virtual Drive will be shown on
this page.