2x2 plusUpdate & Restore
Update & restore is the process of doing an update or restore on the system using a bootable USB drive. This process does not affect the media drive.
This process can be used to update to a newer OS image, or revert to a previous OS image.
To tell what OS image your system is on please go to the help menu in Manager and select About Manager.
You will need
- A 16GB USB memory stick
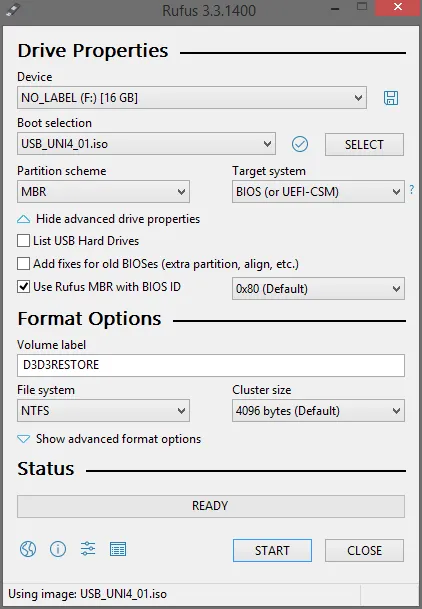
- A version of Rufus to turn it into a bootable disk. Make sure the volume name of the usb is: “REDISGUISE” as per image
- An internet connection to the machine you are re-imaging
- Download and install a version of 7Zip
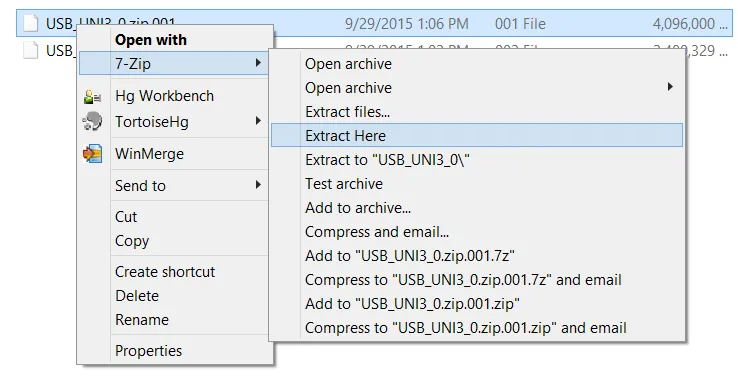
- Download and unzip the multifile archive using 7Zip
- OS images can be found here.
Create Bootable USB device
- Download and unzip the multifile archive using 7Zip (NOTE: you will only need to unzip file 001):
- Create Bootable USB stick with the unzipped ISO.
The settings should be:
- Partition scheme - MBR
- Target system - BIOS (or UEFI-CSM)
- Volume label - Automatically pulled from the ISO file
- File system - NTFS
Booting into the USB
- Insert the USB key and a keyboard into the system. (USB 3.0 will be the fastest).
- Invoke the BIOS whilst the system is posting by continuously pressing the DEL key.
- Navigate to the BOOT tab and select Hard Drive BBS Priorities.
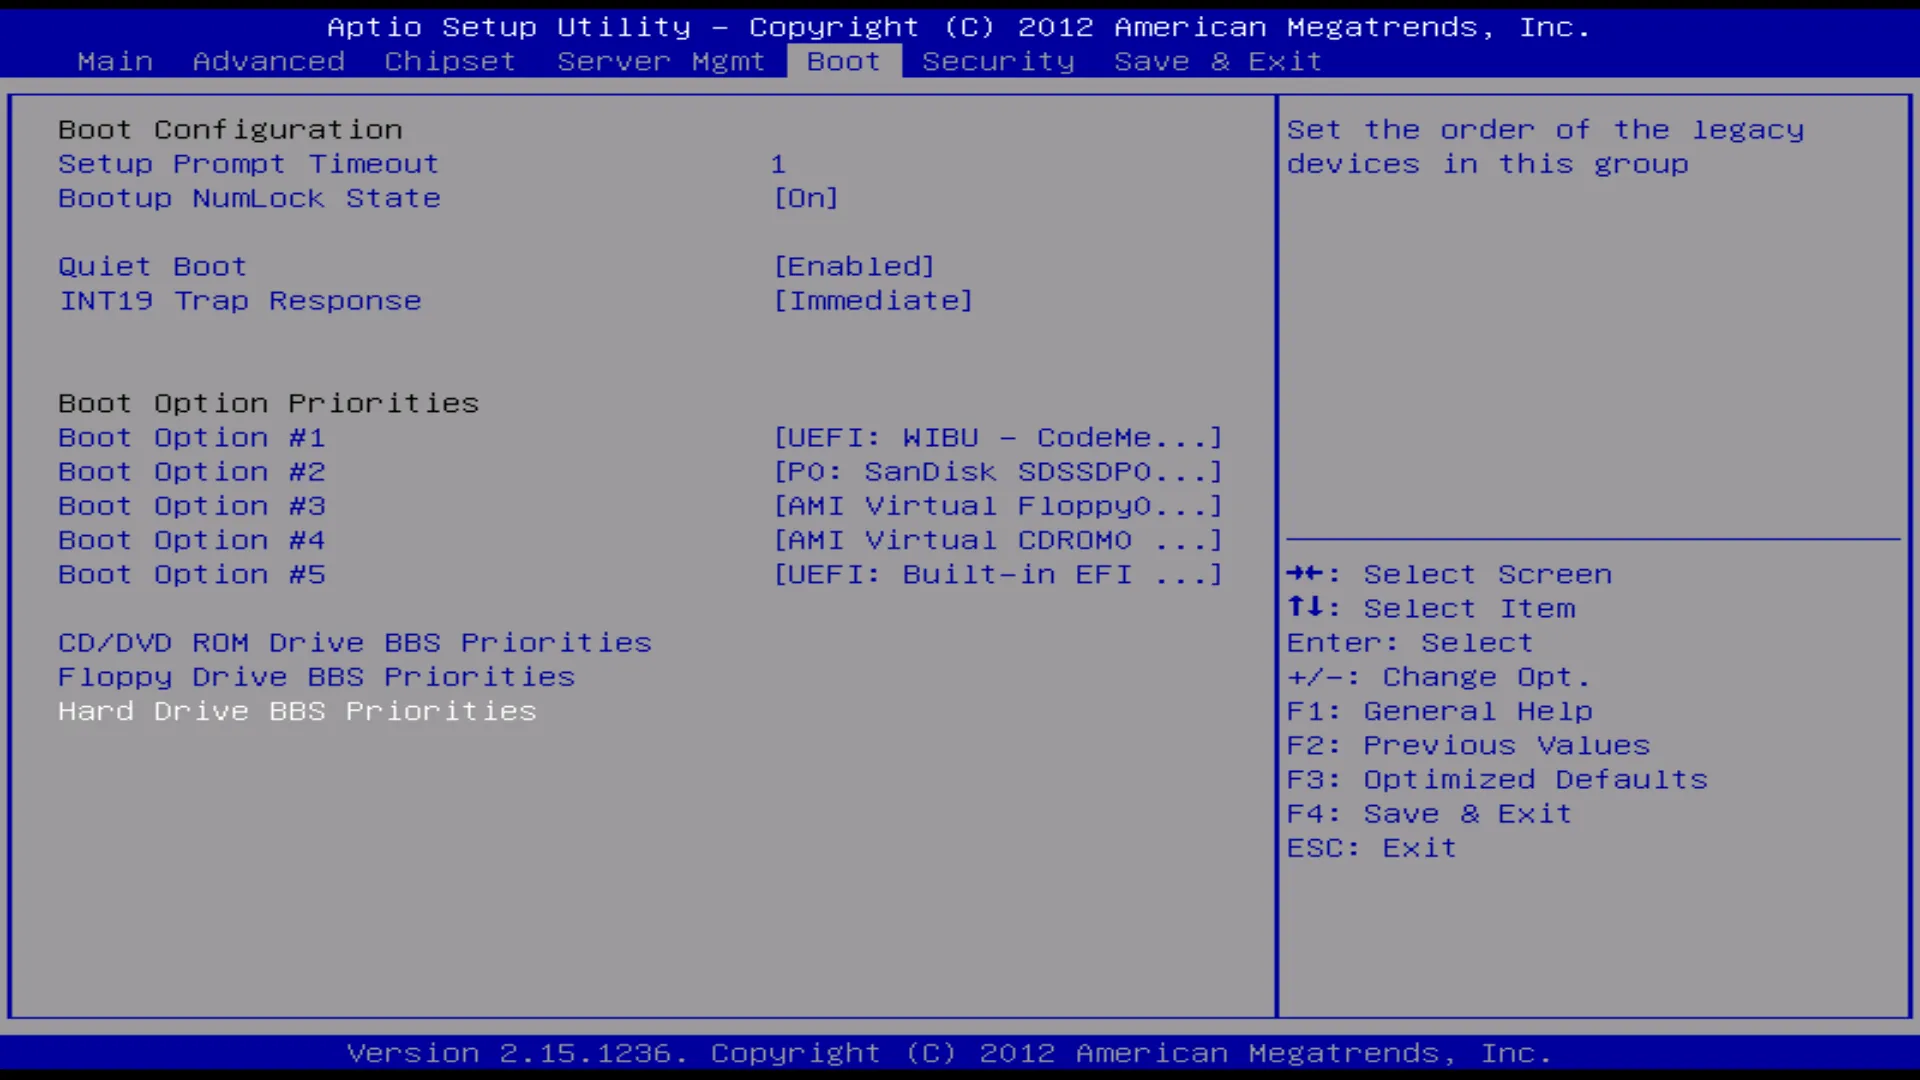
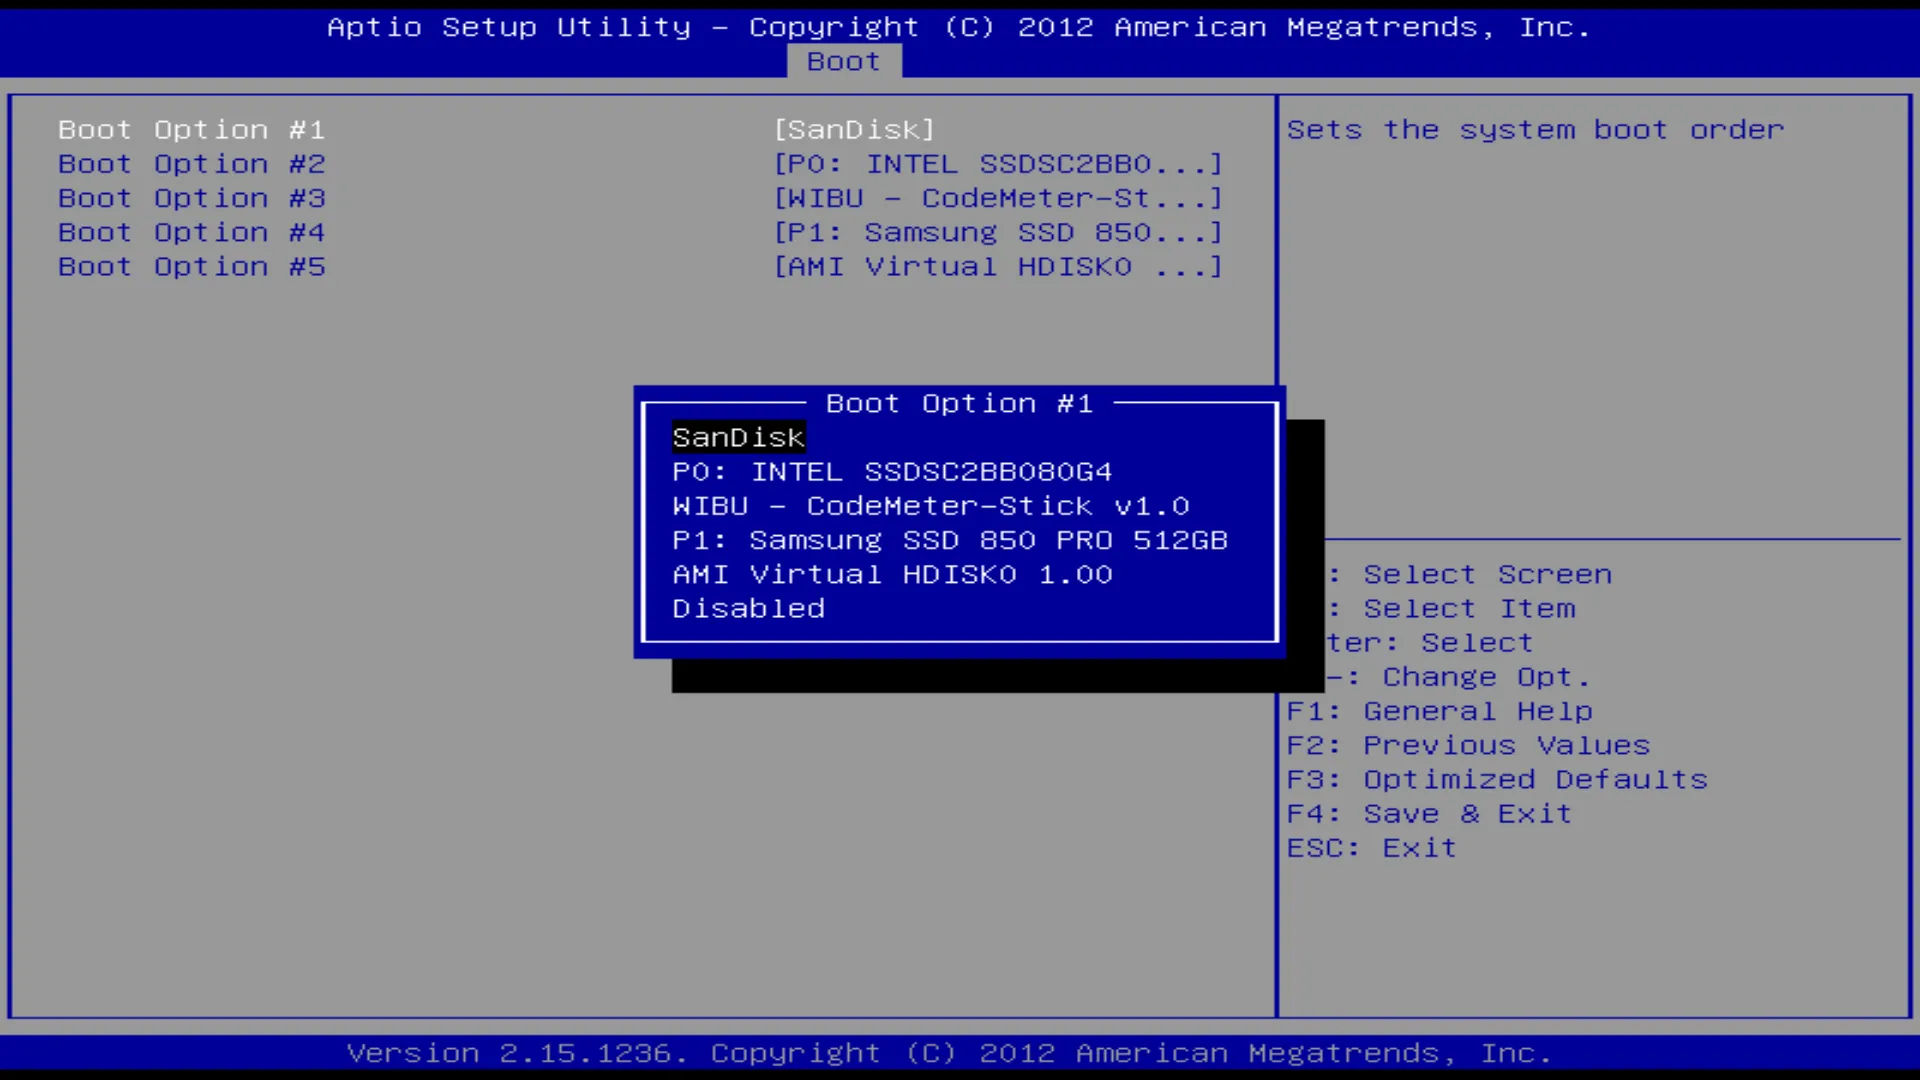
- Select Boot Option #1. Select your USB key from the menu. Normally it is listed as the name of the Vendor of the USB key (SanDisk).
- Select Boot Option #2. Please ensure this is listed as the OS drive (INTEL SSDSC2BB080G4).
- Please press F4 to Save configuration and exit. This should reset the computer and prompt you with a Press any key to boot from USB window.
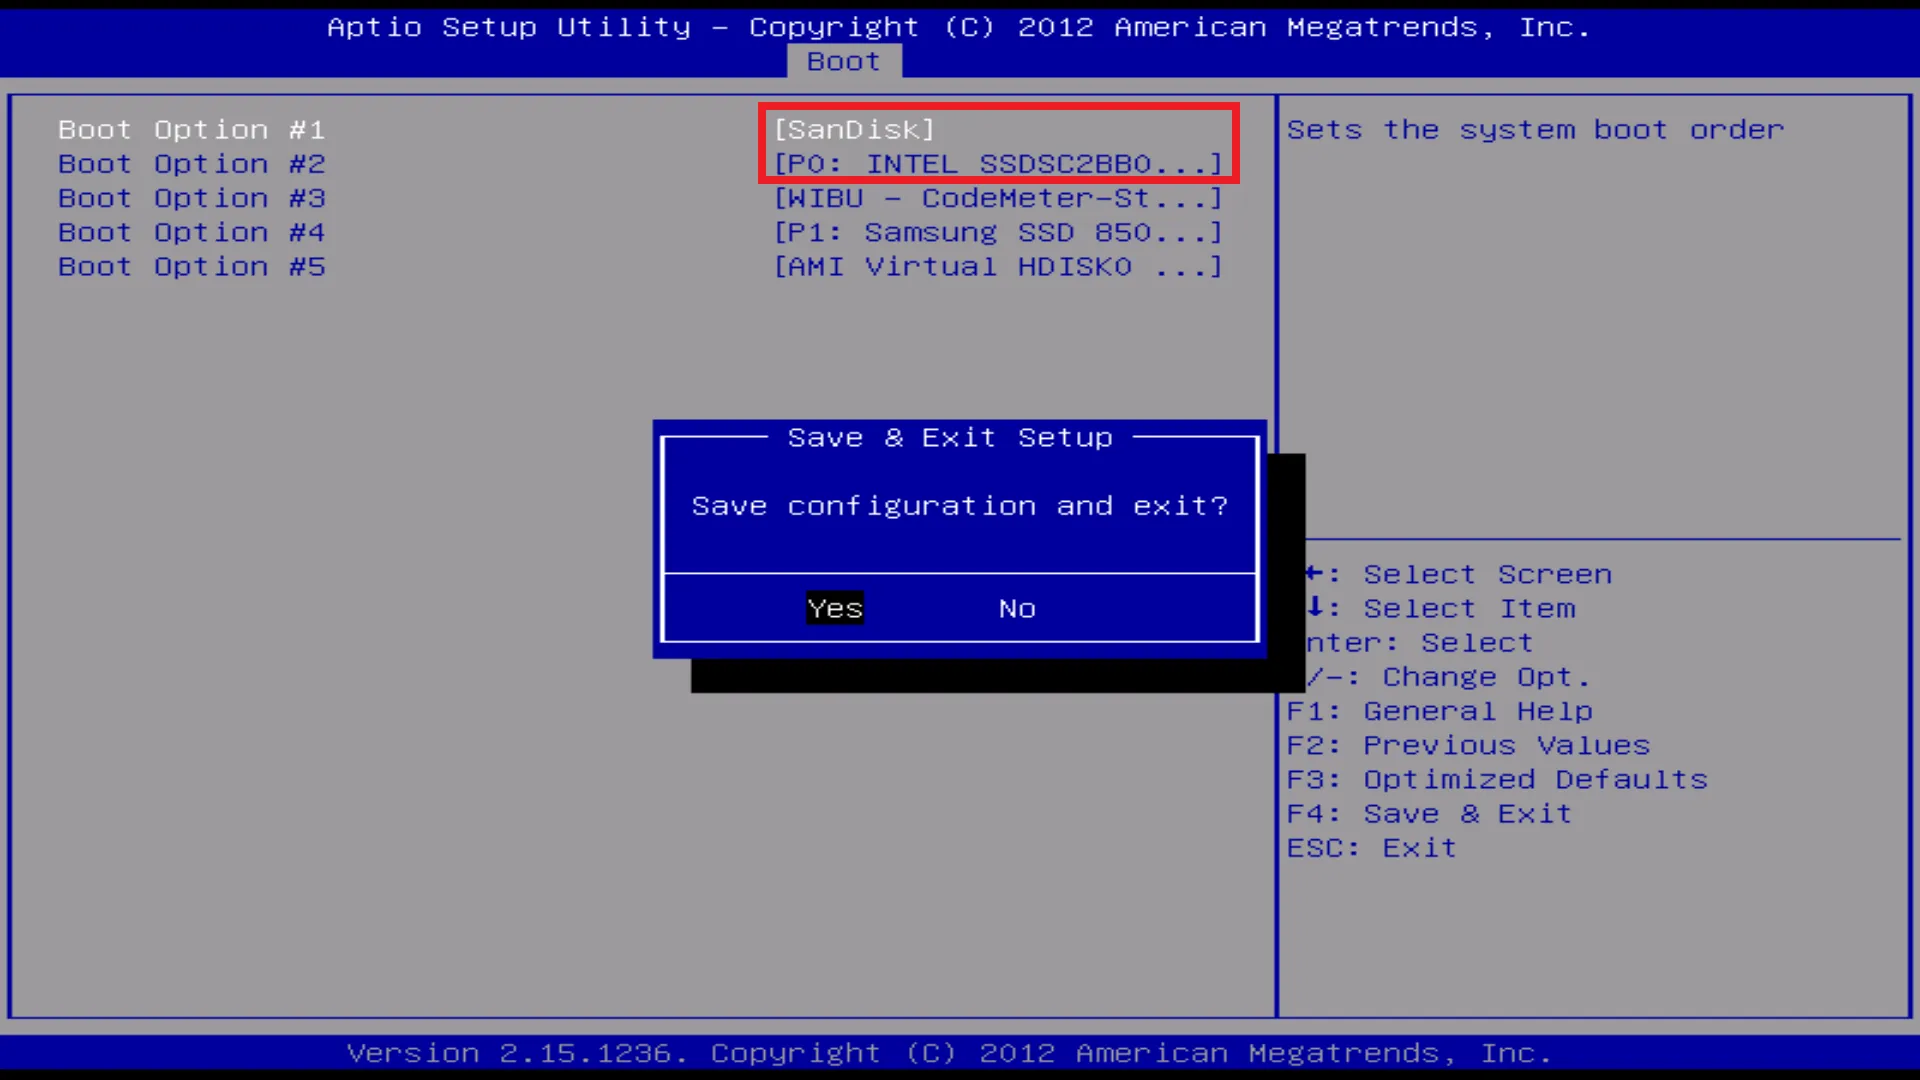
- Press enter when the “Press any key to boot from USB” window appears and you should be booting into the USB.

- After this you will need to press Enter once to boot into the usb and the re-imaging process will commence - it should take around 20 minutes or so to complete and two system restarts will be part of the automated process.
- The system will boot up in a Windows inactivated state. Wait 20-30 seconds or so, so Microsoft’s servers can successfully authorize the system. With a mouse connected to any of the USB ports right-click on the start icon on the task bar and select system. This will prompt the system to update its activation state.