4x4 Redisguise
USB Redisguise
Section titled “USB Redisguise”If you encounter any issues with the Redisguise process, please review the Notes/ Help section at the bottom of this page.
Redisguise is the process of updating and restoring on the system using a bootable USB drive.
This process can be used to update to a newer OS image, or revert to a previous OS image.
To identify which OS image your system currently runs, please go to d3Manager > Help and select About Manager.
You will need
Section titled “You will need”- A 16GB USB memory stick
- A version of Rufus to turn it into a bootable disk. Ensure the volume name of the USB is: “REDISGUISE” as per image
- An internet connection to the machine you are re-imaging.
- OS images can be found Hardware OS Imaging.
- Download and install a version of7Zip
Create a Bootable USB
Section titled “Create a Bootable USB”- Download the ISO from the Hardware OS Imaging.
- To create a Bootable USB stick open Rufus, click Select and browse to the downloaded ISO. Then click Start.[2]
The Partition scheme, Target system, and File System fields should appear automatically.[2]
- 7-Zip archive tool/file manager.
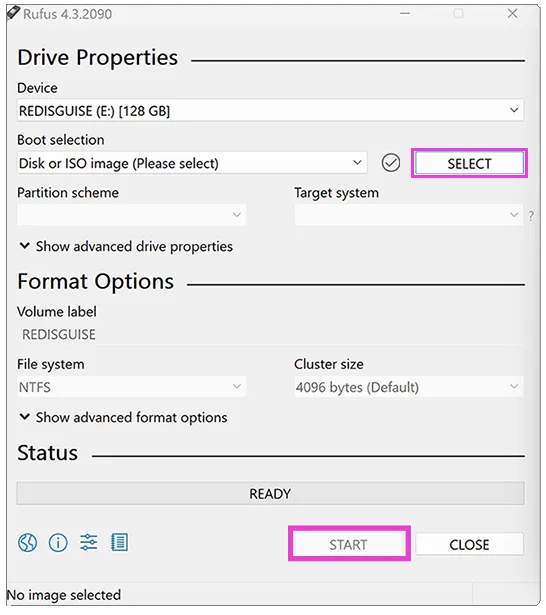
The settings should be [3]:
Partition scheme - GPTTarget system - UEFI - non CSMVolume label - Automatically pulled from ISO fileFile system - NTFSAdvanced Drive Properties[4]Add fixes for old BIOSes (extra partition, align, etc)Use Rufus MBR with BIOS ID | 0x80(Default)
Advanced Format OptionsQuick formatCreate extended label and icon files.
Booting into the USB
Section titled “Booting into the USB”- Insert the USB key and a keyboard into the system.
- Invoke the BIOS whilst the system is posting by continuously pressing the Delete key.
- Navigate to the BOOT tab and select Hard Drive BBS Priorities.
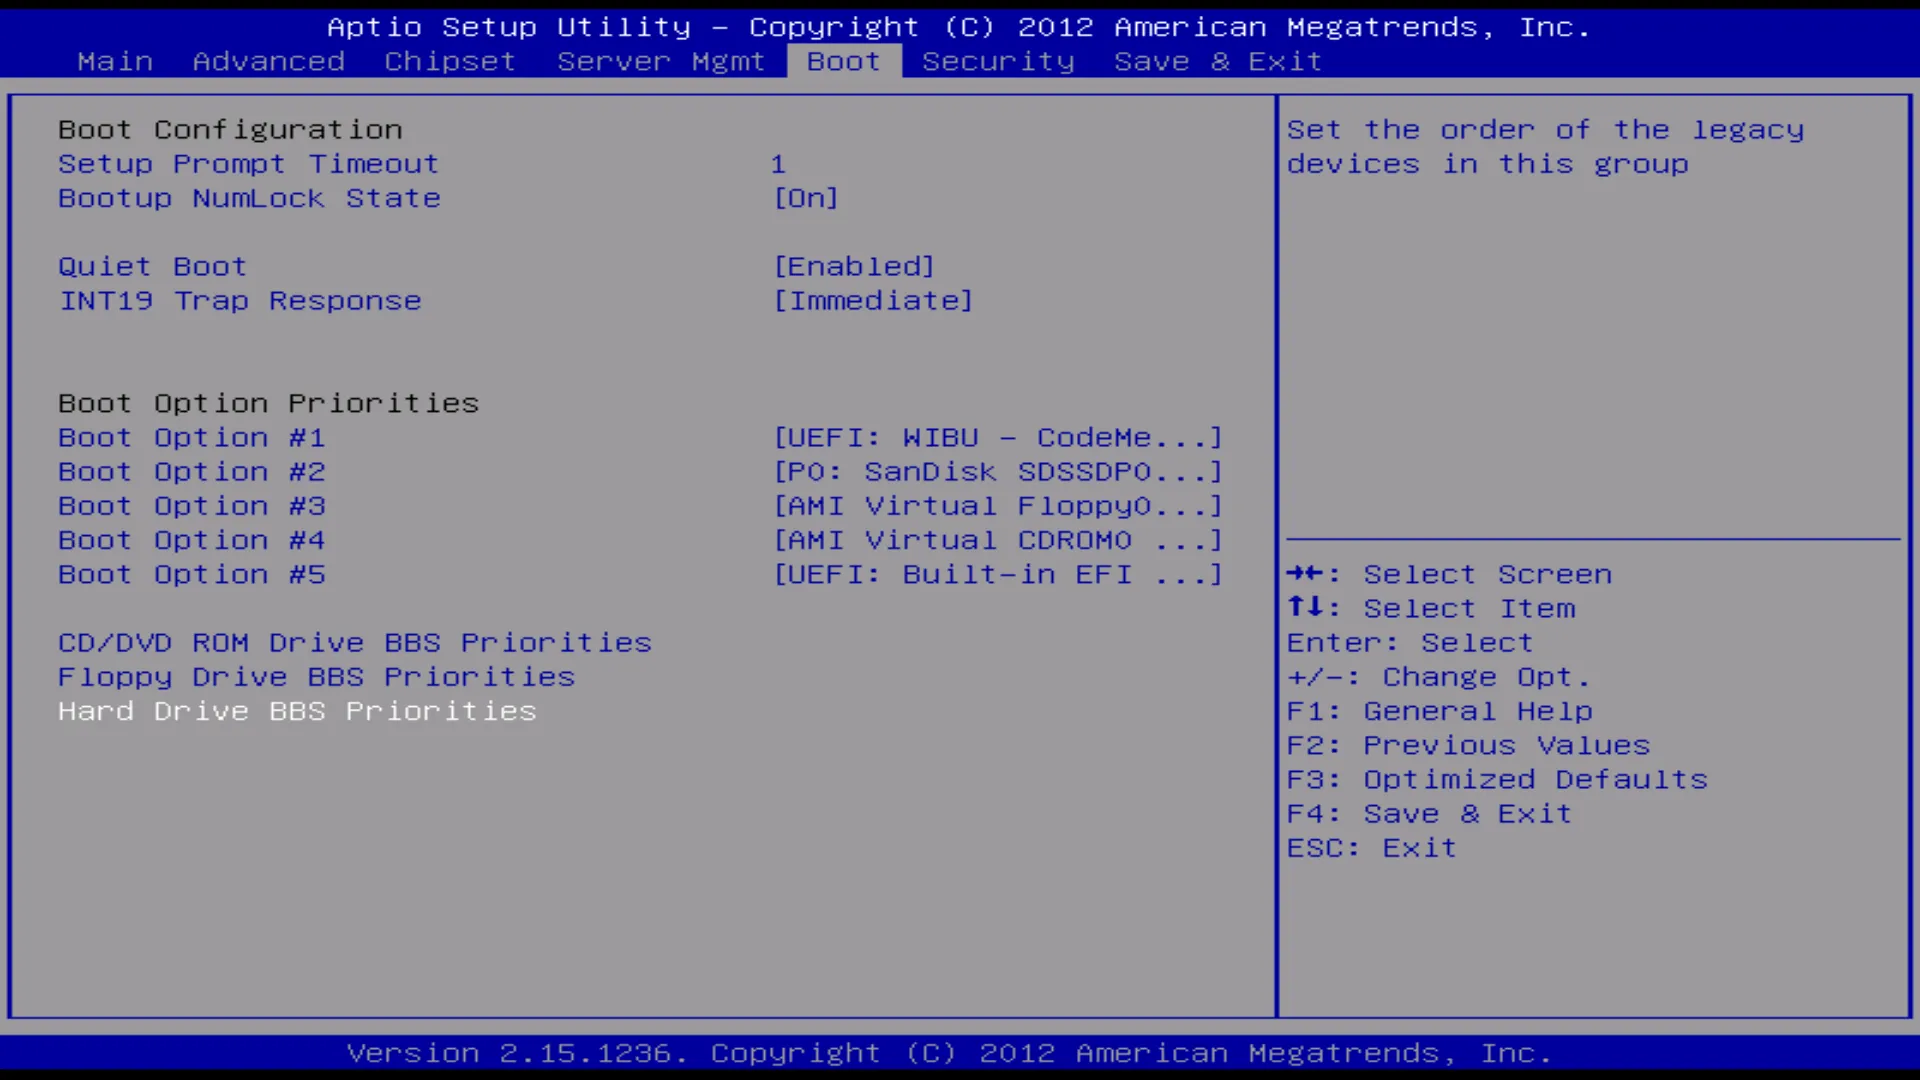
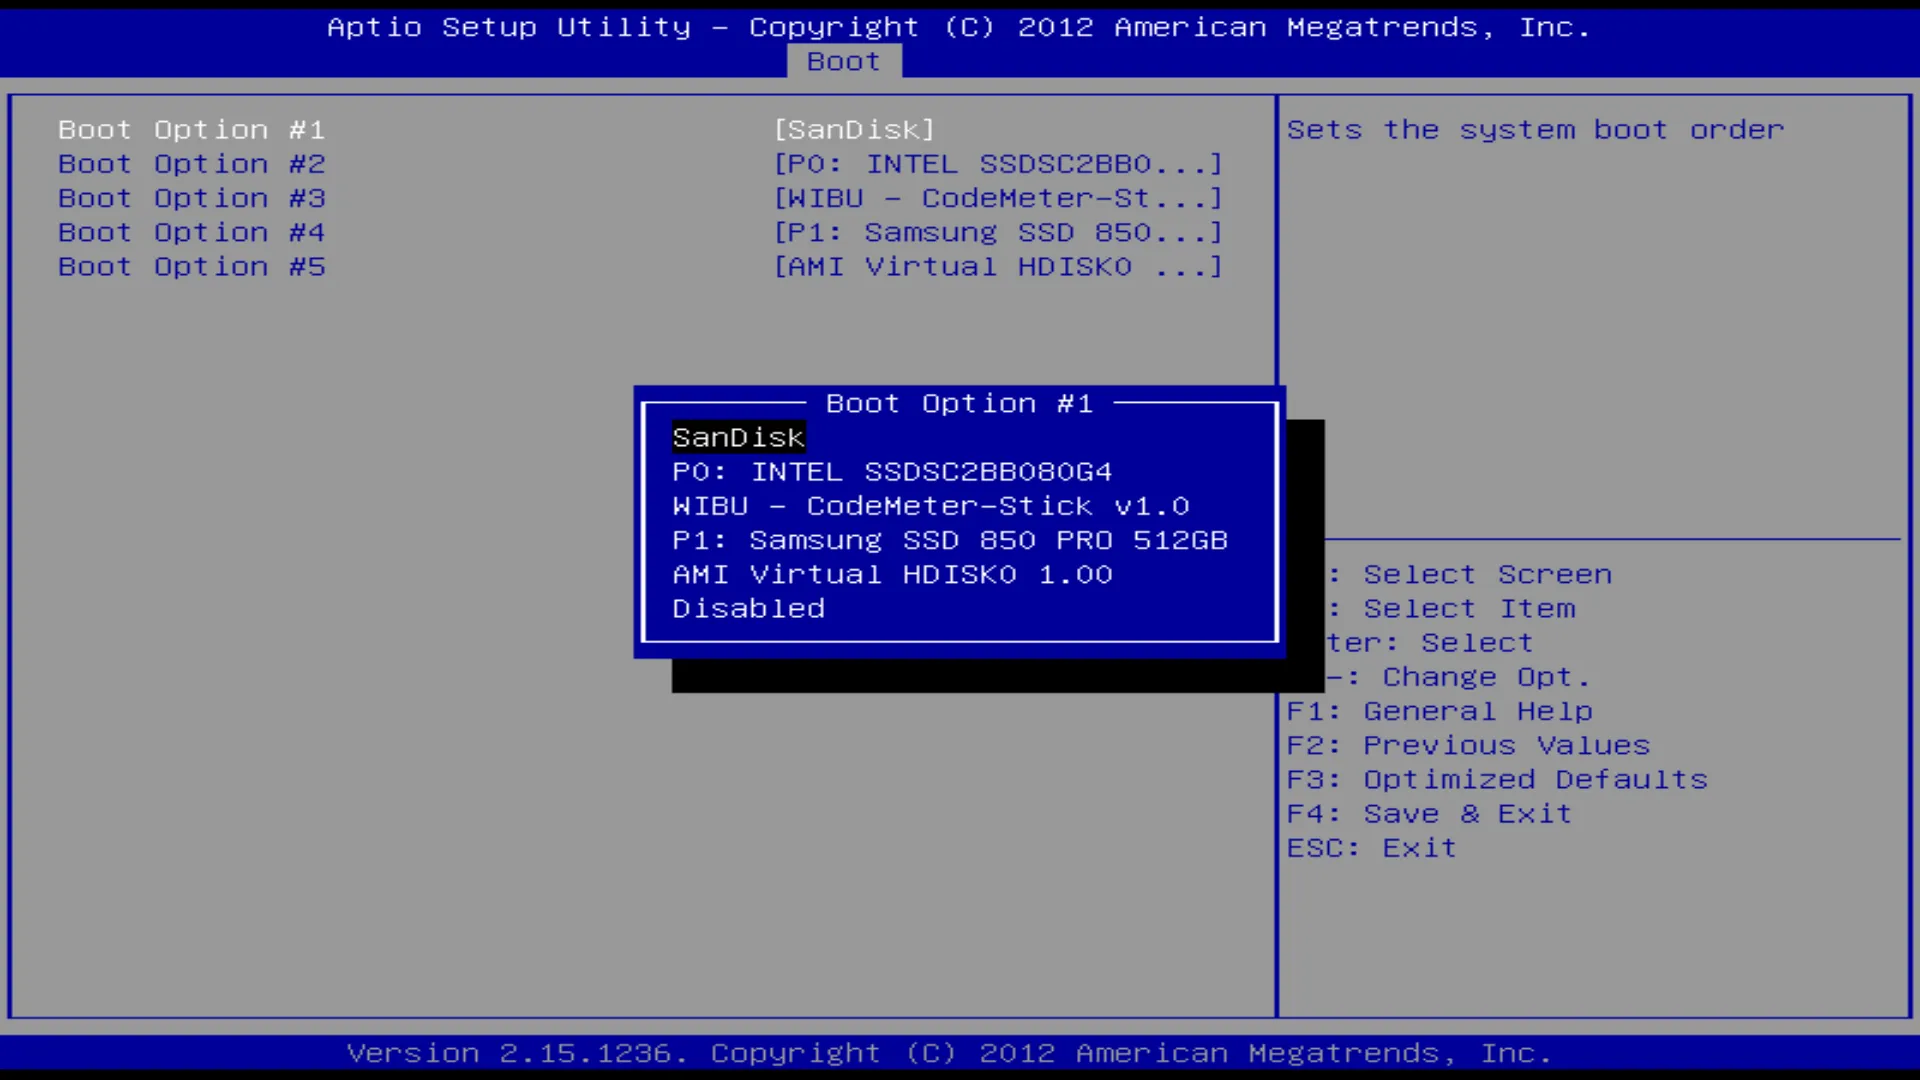
- Select Boot Option #1. Select your USB key from the menu. Normally it is listed as the name of the Vendor of the USB key (SanDisk).
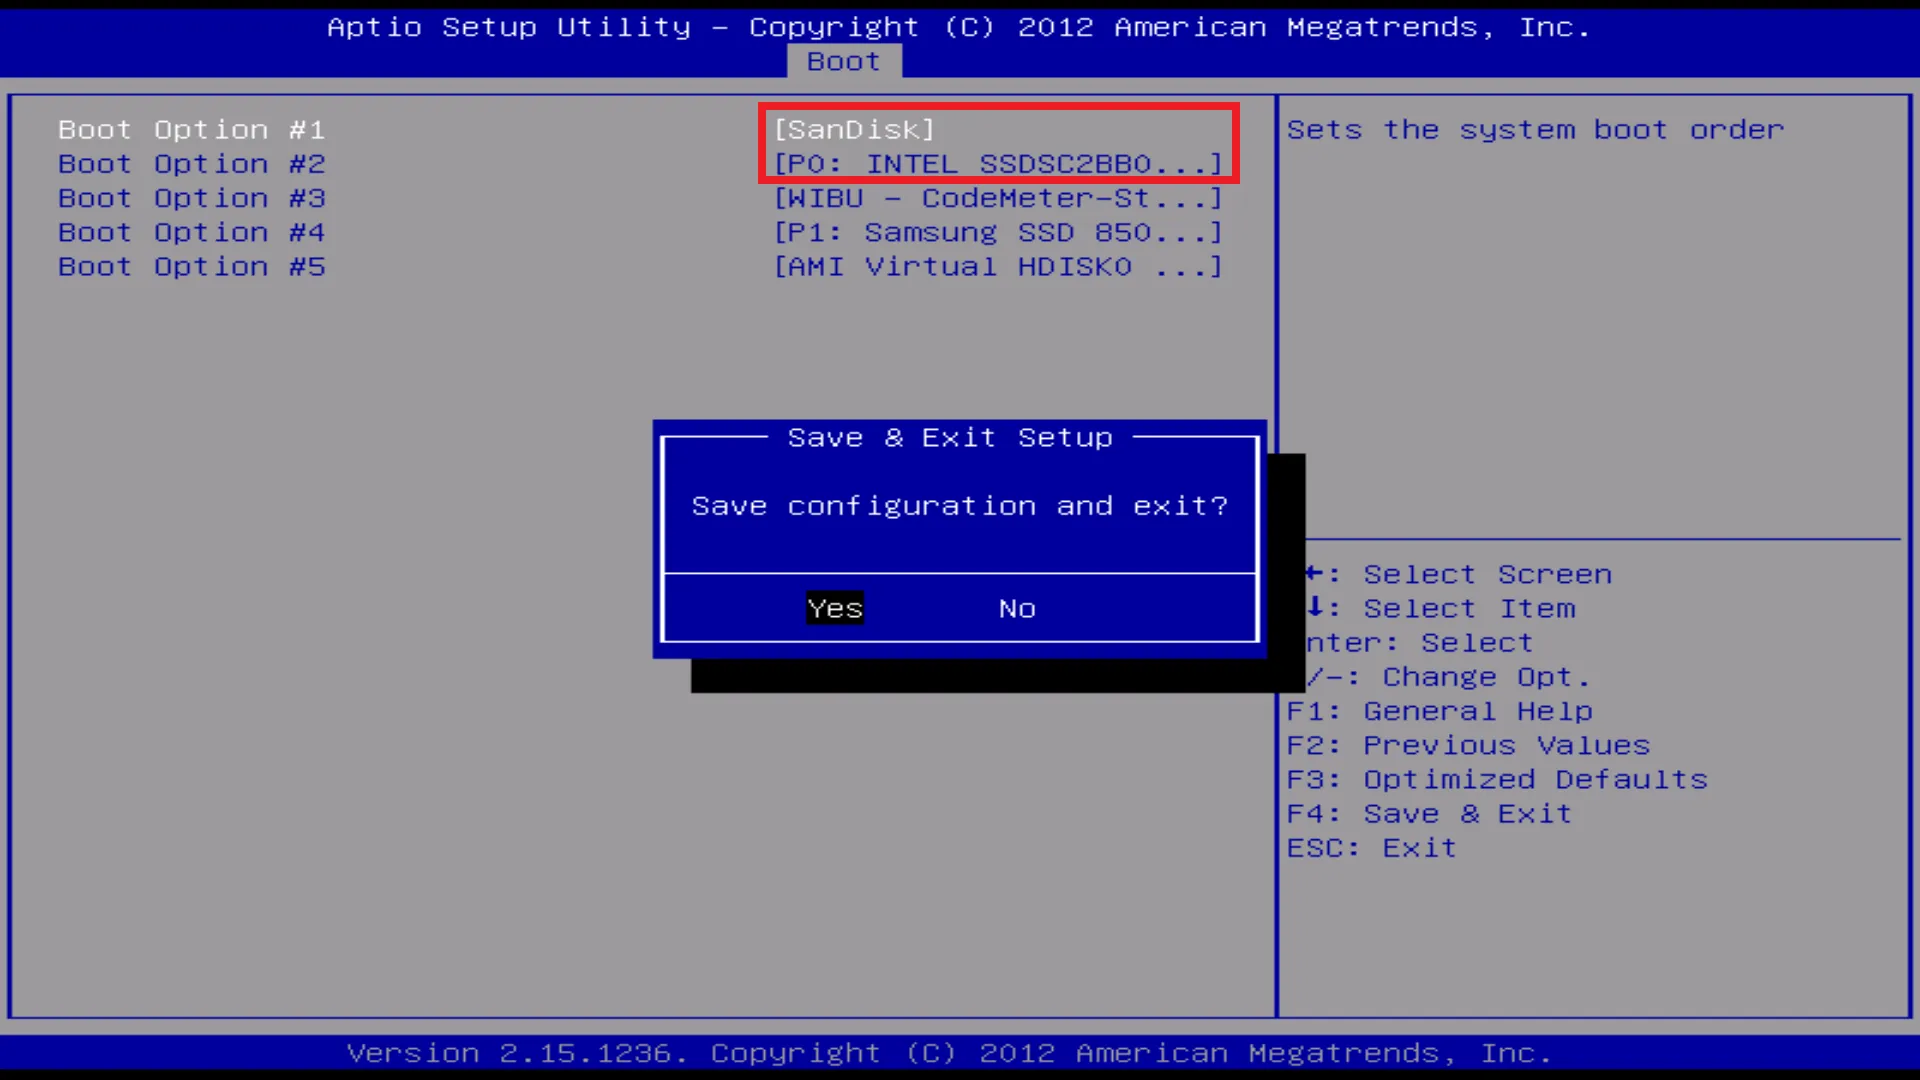
- Select Boot Option #2. Please ensure this is listed as the OS drive (INTEL SSDSC2BB080G4).
- Please press F4 to Save configuration and exit. This should reset the computer and prompt you with a Press any key to boot from USB window.
- Press Enter when the “Press any key to boot from USB” window appears and you should be booting into the USB.

- After this you will need to press Enter once to boot into the usb and the reimaging process will commence - it should take around 20 minutes or so to complete and two system restarts will be part of the automated process.
- The system will boot up in a Windows inactivated state. Wait 20-30 seconds or so, so Microsoft’s servers can successfully authorize the system. With a mouse connected to any of the USB ports right-click on the start icon on the task bar and select system. This will prompt the system to update its activation state.
The Redisguise process will run automatically until the reimaging has completed [5]. The system will reboot and run scripts on start-up. Please ensure you allow these to finish before beginning any other processes.
A log file will be automatically generated and stored on the USB memory stick. If you experience any problems during updating or restoring the system, or any of these instructions are unclear, please contact the Disguise support team along with the log that is stored on the USB.