Porta On Prem の IP の変更
Porta VM と Porta On Prem の初期セットアップ後、最終的にネットワークを変更したり、Porta VM の静的 IP アドレスを変更したりする必要が生じる場合があります。
このガイドでは、VM とそのアプリケーションに新しい IP アドレスでアクセスできるようにするために必要な手順を説明します。
1. 現在の静的 IP を無効にする
Section titled “1. 現在の静的 IP を無効にする”- Porta VM がすでに実行されていることを確認します。
-
実行中の仮想マシンのネイティブ VirtualBox ターミナルウィンドウを使用して、VM にログインします。
- ユーザー名
portavmを入力してEnterを押します。 - 提供されたパスワードを入力し、再度
Enterを押してログインします。
- ユーザー名
- 次のコマンドを実行して現在の静的 IP アドレスを無効にし、プロンプトが表示されたら
sudoパスワードを入力します。Terminal window sudo ./scripts/disable_static_ip.sh sudo rebootコマンドで VM を再起動し、再度ログイン画面が表示されるまで待ちます。
2. 新しい静的 IP を設定する
Section titled “2. 新しい静的 IP を設定する”- 再度ネイティブ VM ターミナルにログインします。
- 以下に示す手順に従って、静的 IP アドレスを設定します。
- Porta VM がすでに実行されていることを確認します。
-
実行中の仮想マシンのネイティブ VirtualBox ターミナルウィンドウを使用して、VM にログインします。
- ユーザー名
portavmを入力してEnterを押します。 - 提供されたパスワードを入力し、再度
Enterを押してログインします。
- ユーザー名
- 次のコマンドを実行して静的 IP アドレスの設定を開始し、プロンプトが表示されたら
sudoパスワードを入力します。Terminal window sudo ./scripts/setup_static_ip.sh - スクリプトがネットワークスキャンを実行し、ネットワーク上の利用可能な IP アドレスを検索します。
- 一覧表示された利用可能な IP のいずれかに対応する番号を入力して
Enterを押し、仮想マシンの IP アドレスを選択します。- カスタム IP アドレスを入力する場合:
- 完全な IP アドレス(例:
192.168.1.100)を入力します - 入力した IP が使用中と思われる場合は、確認を求められます。その IP を使用しても安全だと確信できる場合は、
yを入力してEnterを押します。
- 次に、以下のオプションのいずれかに対応する番号を入力して
Enterを押し、マシンのロール(タイプとも呼ばれます)を選択します。- main
- backup
- arbiter
- スクリプトが、選択した静的 IP アドレスとマシンロールで VM の構成を進めます。
- ターミナルにはパスワードプロンプトを含む多数の出力が表示されますが、無視して構いません。
- IP 構成が完了すると、スクリプトは「Static IP setup completed successfully! VM is now accessible at IP:」と新しい静的 IP アドレスを表示します。
3. Porta Manager を使用して Porta の IP を修正する
Section titled “3. Porta Manager を使用して Porta の IP を修正する”- 静的 IP のセットアップが完了したら、Porta Manager にアクセスしてログインします。
- Porta Manager のサイドバーで、
Porta Configuration Managementセクションに移動し、Machinesメニュー項目をクリックします。 Machinesテーブルで、Porta VM の行を見つけ、行の右側にあるEditをクリックします。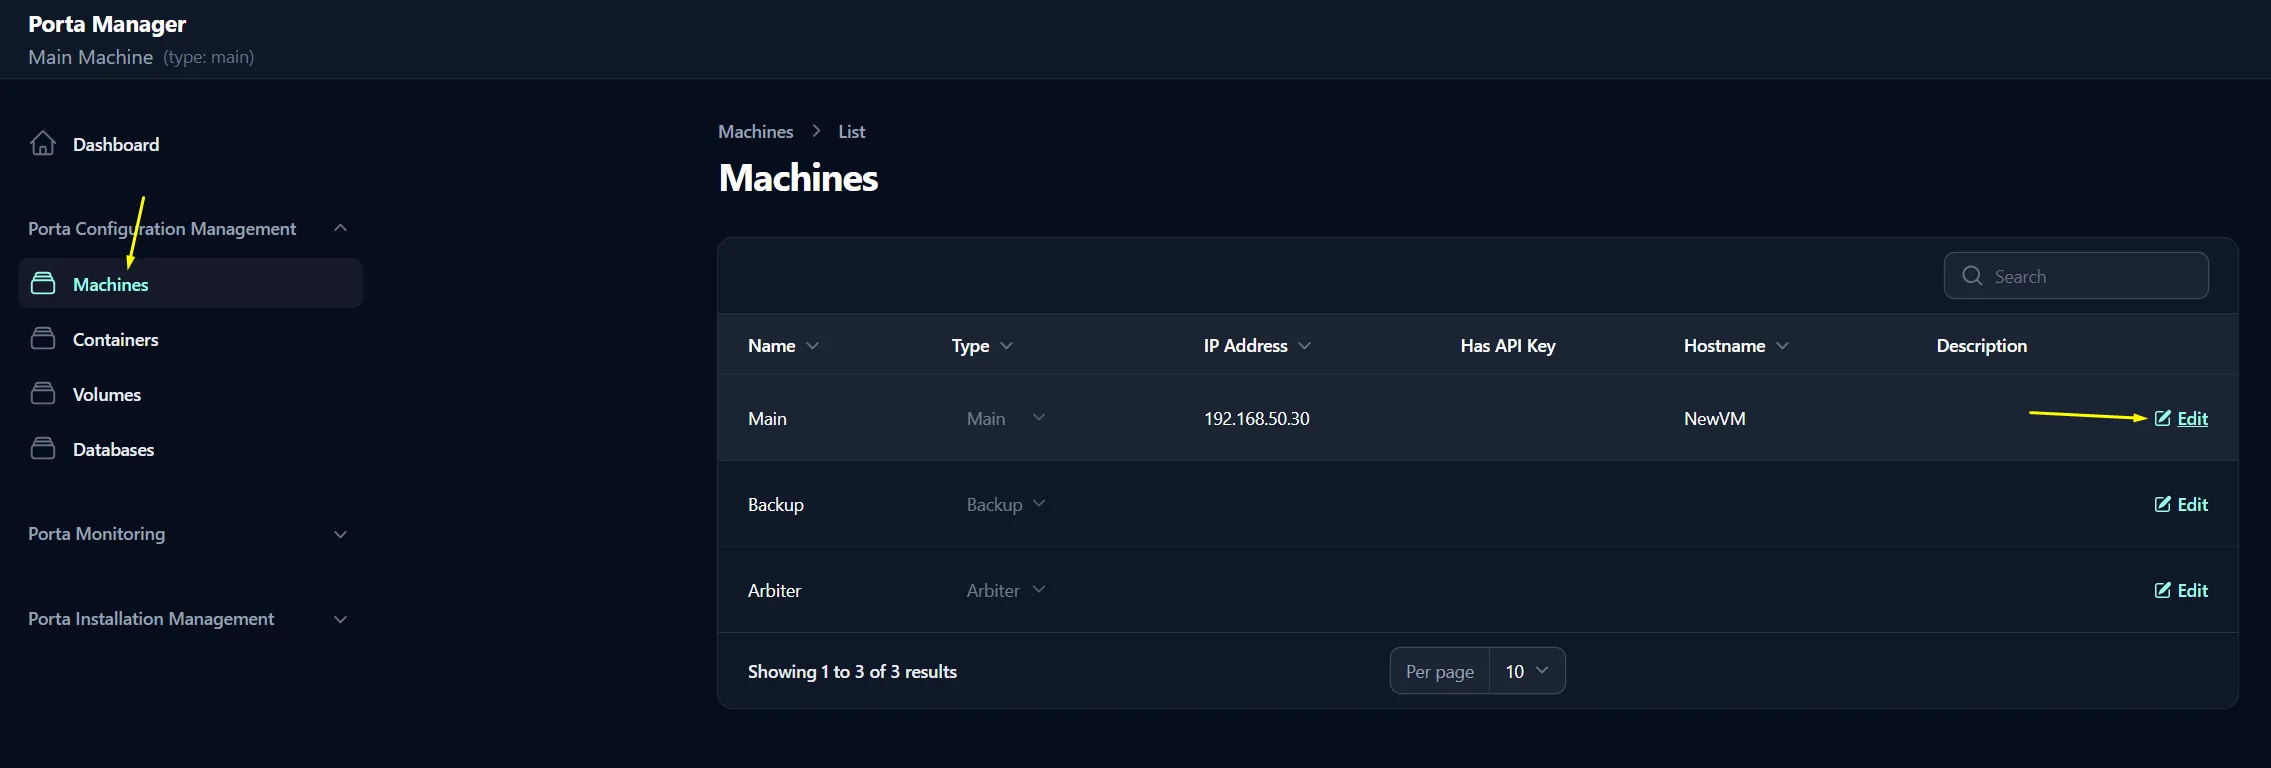
Edit Machineページで、IP Addressフィールドを VM に設定したばかりの新しい静的 IP アドレスに合わせて更新し、Save Changesをクリックします。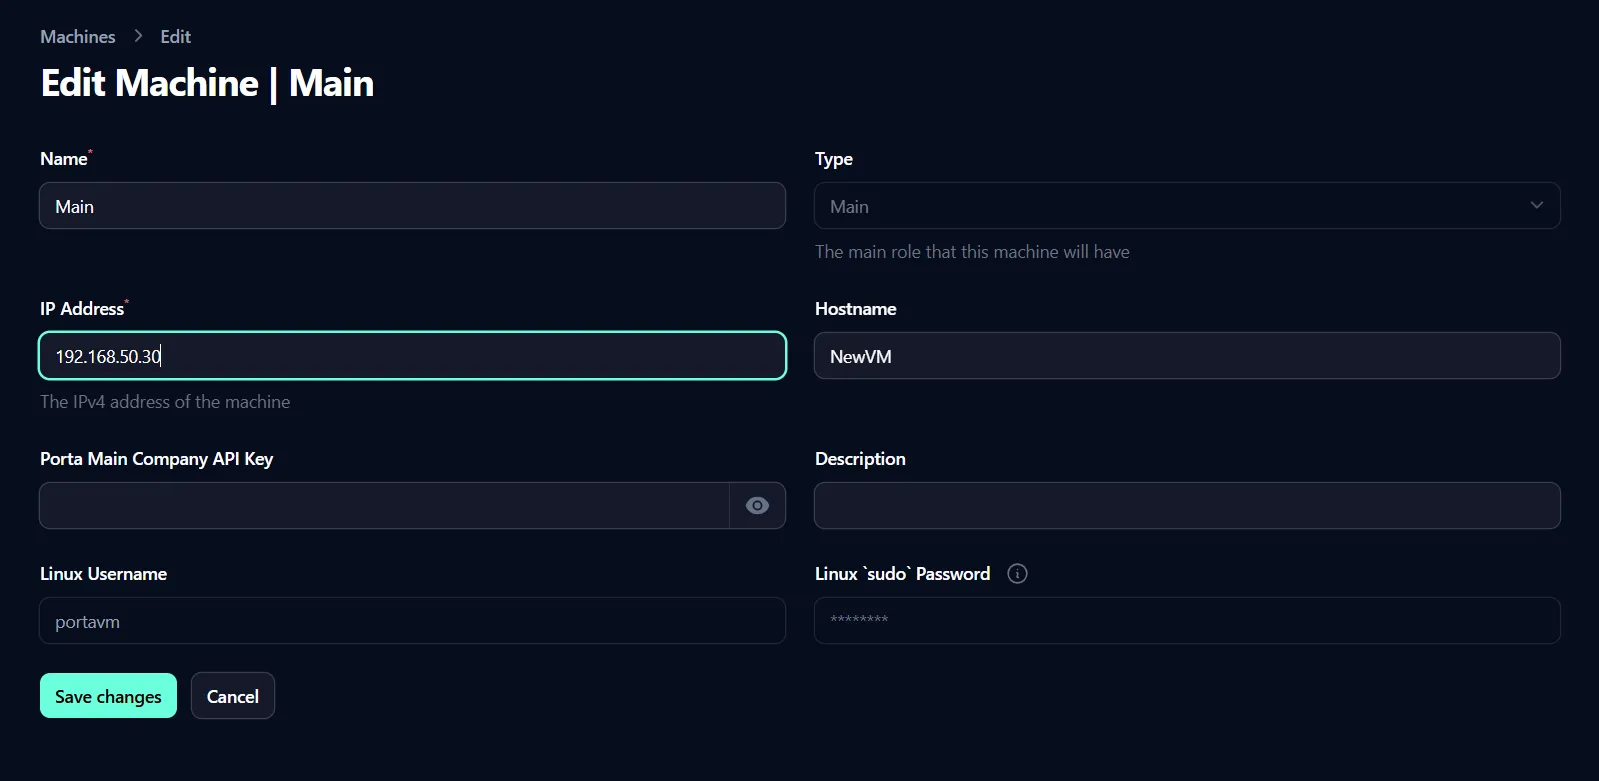
- サイドバーの
Dashboardメニュー項目をクリックして、Porta Manager ダッシュボードに戻ります。 - Porta Manager ダッシュボードで、
Fix IP Settingsボタンを使用して Porta の IP を修正します。
- 表示されるポップアップで、
Confirmをクリックして Porta の IP アドレスを更新することを確認します。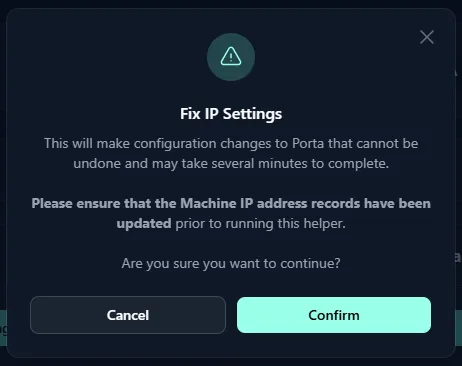
- プロセスが完了するまで待ちます。完了すると、Porta の IP アドレスが正常に更新されたことを示す成功メッセージが表示されます。

- これで、通常どおり Porta にアクセスして使用できるようになります。