Depth ワークフロー
Designer の深度ツールを使用すると、白黒の深度マップを使ってメッシュをリアルタイムで変形させ、平面的なプレートやビデオコンテンツからパララックスとボリュームを作り出せます。depth video workflow(深度ビデオワークフロー)は、Depth Map Meshes、Depth Map Mappings、Depth Video Layer を、ここで詳述する単一の反復可能なセットアップに結びつけます。
深度ビデオワークフローとは?
Section titled “深度ビデオワークフローとは?”深度ビデオワークフローは、Depth Map Mesh を変形可能なジオメトリとして使用し、その形状を深度マップの画像またはビデオによって駆動します。深度は主に 2 つの方法で適用できます。
- Depth Map Mapping — 推奨される柔軟なアプローチで、深度マップを出力する任意のレイヤーからメッシュを駆動できます。
- Depth Video Layer — 深度マップビデオを Depth Map Mesh に直接送信する専用のコンテンツレイヤーで、マッピングが利用できない場合(例: Layer Stack 内)に便利です。
いずれの場合も、メッシュは Field of view と Min/Max depth によって定義される錐台(frustum)を占有し、メッシュの頂点の z 位置は、コンテンツ内の深度値に基づいて動的に更新されます。
深度ビデオワークフロー
Section titled “深度ビデオワークフロー”このセクションでは、完全な深度ワークフローを構成するハウツーガイドをまとめます。
- Depth Map Mesh をセットアップする
- Depth Map Mapping を使用してメッシュを制御する
- 深度と錐台の設定を調整する
ワークフローの要素
Section titled “ワークフローの要素”- ステージに Depth Map Mesh オブジェクトを追加します。
- Depth Map Mapping を割り当てます。
- タイムラインに Depth Video Layer を作成します。
- 画像やビデオクリップなどの Depth map source content を割り当てます。
- Depth Map Mesh を使用してスクリーンまたはオブジェクトをターゲットにします。
Depth Map Mesh をセットアップする
Section titled “Depth Map Mesh をセットアップする”Depth Map Mesh はワークフローの中核です。これは深度マップによって変形されるジオメトリです。
- Stage ビューで、対象のステージオブジェクト(例: スクリーンやプロップ)を選択します。
- オブジェクトの Mesh プロパティで、新しい Depth Map Mesh を作成します。
- メッシュがデフォルトの錐台とともにステージに表示されることを確認します(必要に応じて、後でメッシュの Show frustum を有効にできます)。
この時点で、深度情報を受け取る準備ができたメッシュがありますが、深度コンテンツをマッピングするまでは平面のままです。
Depth Map Mapping を使用してメッシュを制御する
Section titled “Depth Map Mapping を使用してメッシュを制御する”最大限の柔軟性 と、既存のレイヤーや複雑なセットアップを再利用する機能が必要な場合は、このパスを使用します。
- タイムライン上に、depth map を出力するレイヤー(例: 深度マッププレートを再生する Video レイヤー)を追加するか特定します。
- 深度マップメディアをプロジェクト構造内(例:
objects/VideoFileの下)に配置し、レイヤーに割り当てます。 - Content Mapping パネルを開き、Depth Map Mapping タイプの新しいマッピングを作成します。
- マッピングで、(Depth Map Mesh を使用する)対象スクリーンを Screens 一覧に追加します。
- タイムラインをスクラブするか、トラックを再生します。スクリーンの Depth Map Mesh が、深度マップの輝度値(黒/白が相対的な深度を表す)に基づいて、リアルタイムで変形するはずです。
- Common Mapping Properties(クロップ、スケール、トランスフォーム)を調整して、深度マップをスクリーン上の可視コンテンツに合わせます。
このアプローチでは、深度コンテンツを標準のレイヤーに保持したまま、マッピングを変更するだけで、異なるメッシュやスクリーン間で再利用できます。
深度と錐台の設定を調整する
Section titled “深度と錐台の設定を調整する”メッシュが深度コンテンツによって駆動されるようになったら、そのプロパティを調整して、きれいなパララックスを得てアーティファクトを最小限に抑えます。
- Depth type
- 深度マップの解釈方法を選択します。
- Raw – 0 がニアプレーン、1 がファープレーンです。
- Relative inverse – 逆正規化で、0 がファープレーン、1 がニアプレーンです(多くの深度マップのデフォルト)。
- 深度マップの解釈方法を選択します。
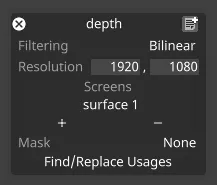
- Resolution
- メッシュの Resolution を、深度マップテクスチャの解像度に一致(またはおおよそ一致)するように設定します。解像度が高いほど変形は滑らかになりますが、より多くの頂点を使用します。
- Field of view
- 錐台がシーン内の関心領域を包含するように、メッシュの Field of view を調整します。これは、ステージに対して深度ボリュームがどれだけ「広い」かを制御します。
- Min/Max depth
- Min depth(ニアプレーン)と Max depth(ファープレーン)をメートル単位で設定します。
- これらの値は、テクスチャ内の正規化された深度を実世界の距離に変換します。
- Depth offset
- Depth offset を使用して、メッシュ原点を基準に錐台の視点を移動させます。これは、シーンの平均深度を中心にメッシュを配置するのに便利です。
- Blur / Dilate radius
- Blur と Dilate radius を増やして、エッジを柔らかくし、特に深度マップにノイズや急激な遷移がある場合に、オブジェクト周辺のアーティファクトを軽減します。
- Show frustum
- Show frustum を有効にして、ステージ内のボリュームを可視化し、メッシュの深度がカメラとシーンのスケールに一致していることを確認します。
高度なワークフロー
Section titled “高度なワークフロー”基本的な深度ビデオワークフローが機能したら、それを Designer の他のツールと組み合わせることができます。
- 他のコンテンツとのコンポジット
- 標準のビデオプレートや 2.5D アセットを同じスクリーンや関連ジオメトリにマッピングし、Depth Map Mesh を前景または背景の要素として使用します。
- Layer Stack の使用
- すでにエフェクト(例: ブラー、色調整)が含まれているプレートに対して、深度変形の前後に Depth Video Layer を Layer Stack 内に配置します。
- メッシュのアニメーション化やトラッキング
- Depth Map Mesh は単なる別のオブジェクトであることを忘れないでください。より複雑なバーチャルプロダクションのセットアップでは、親子付けしたり、アニメーション化したり、トラッキングデバイスで駆動したりできます。
- カメラの被写界深度に合わせる
- 深度ビデオワークフローをカメラの Focus 設定と組み合わせて、メッシュの錐台をカメラの想定フォーカス範囲に合わせることで、レンダーされたシーンに被写界深度を追加します。