Google API Integration
- Google Sheets
- Google Drive
- OAuth
Porta と Google 連携のための OAuth 構成
Section titled “Porta と Google 連携のための OAuth 構成”OAuth は、アクセス委任のためのオープン標準です。インターネットユーザーが、パスワードを渡すことなく、他のウェブサイト上の自分の情報へのアクセスをウェブサイトやアプリケーションに許可する方法として一般的に使用されます。
Google Cloud で新しいプロジェクトを作成し、Google Sheets と Google Drive API を有効にする
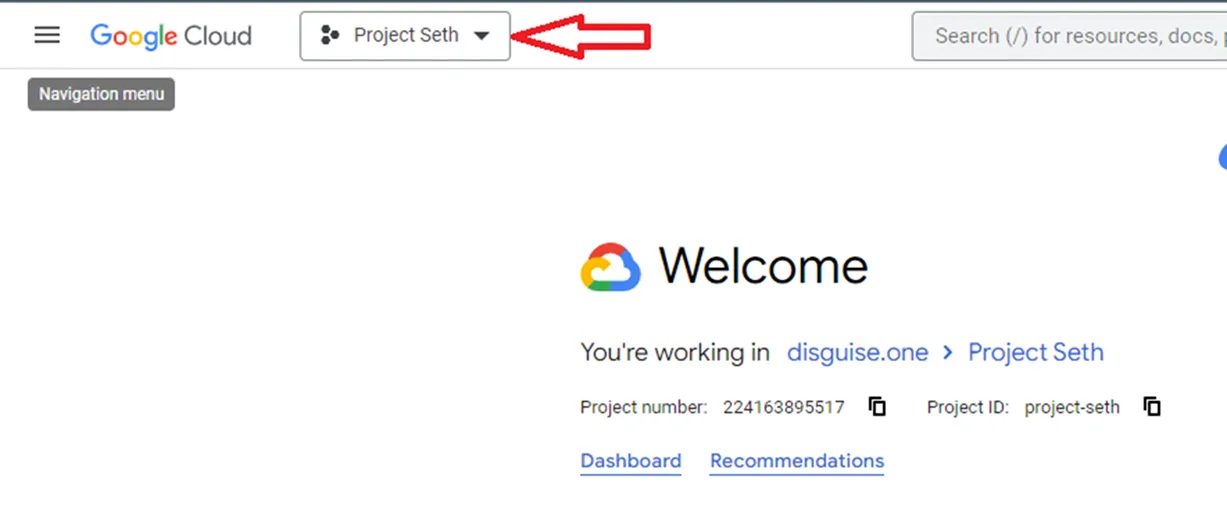
Section titled “Google Cloud で新しいプロジェクトを作成し、Google Sheets と Google Drive API を有効にする”- https://console.cloud.google.com/welcome に移動し、Google Cloud で新しいプロジェクトを作成します。
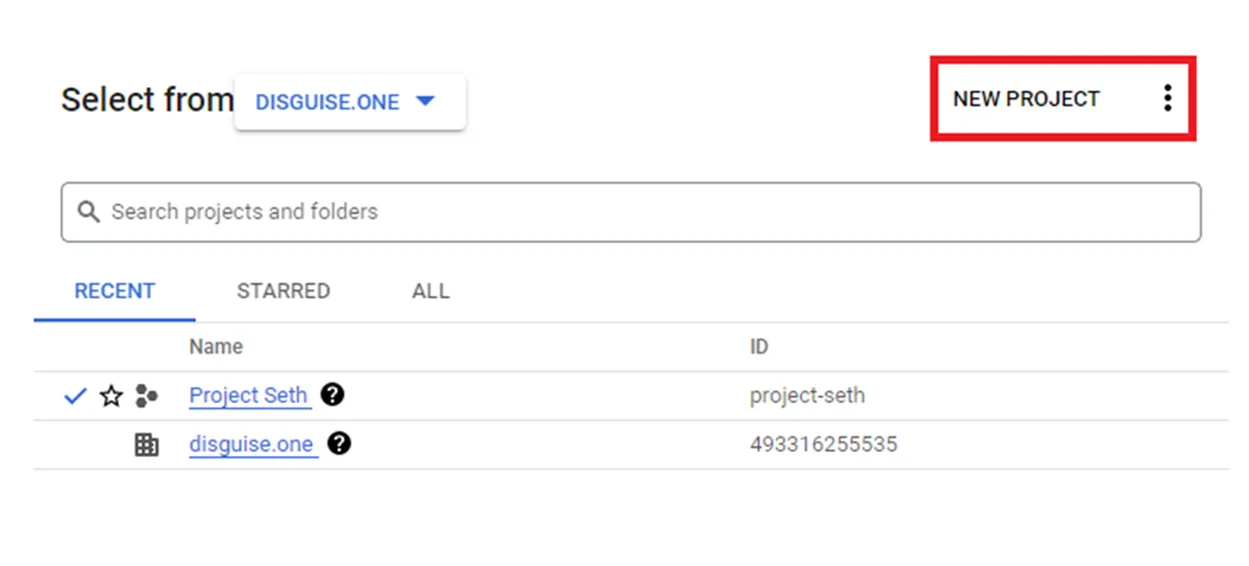
- NEW PROJECT をクリックします。
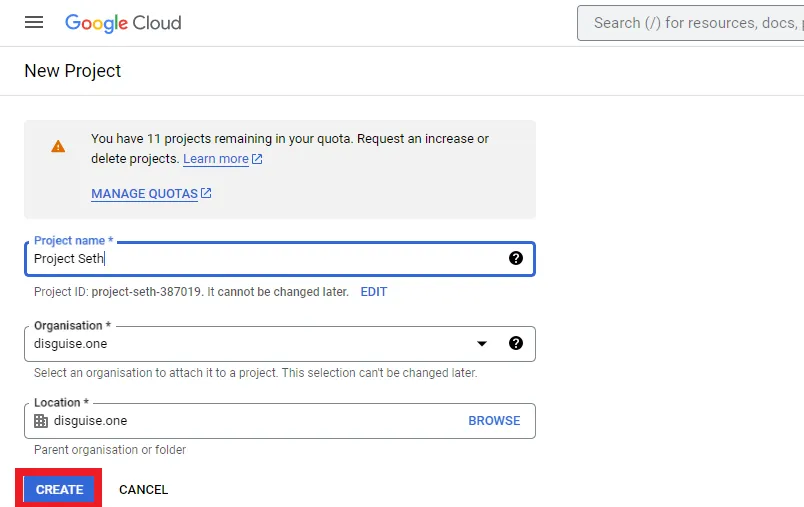
- プロジェクトの詳細を入力します。
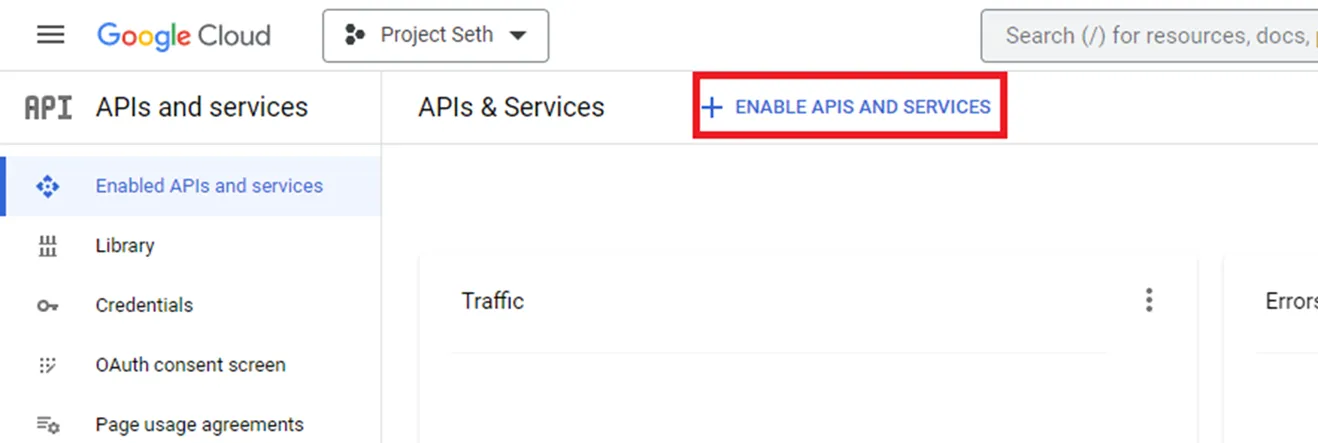
- APIs and services に移動し、サイドバーから Enabled APIs and services を選択します。
- + Enable APIs and services を選択します。
- Google Sheets API を検索して有効にします。次に同じ検索を繰り返して Google Drive API を有効にします。
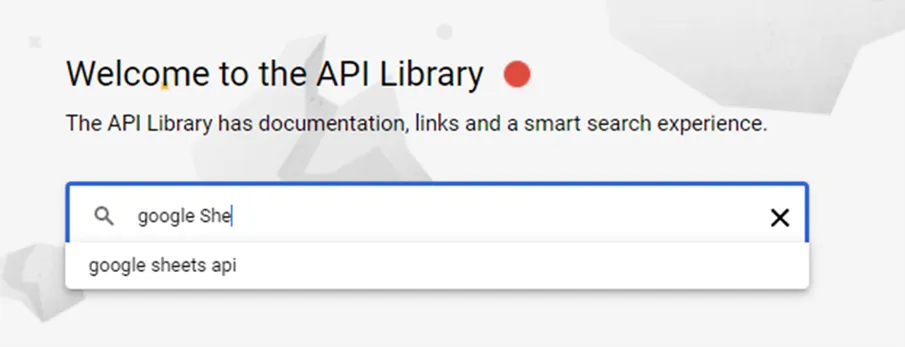
- Google Sheets API と Google Drive API の両方で Enable をクリックします。
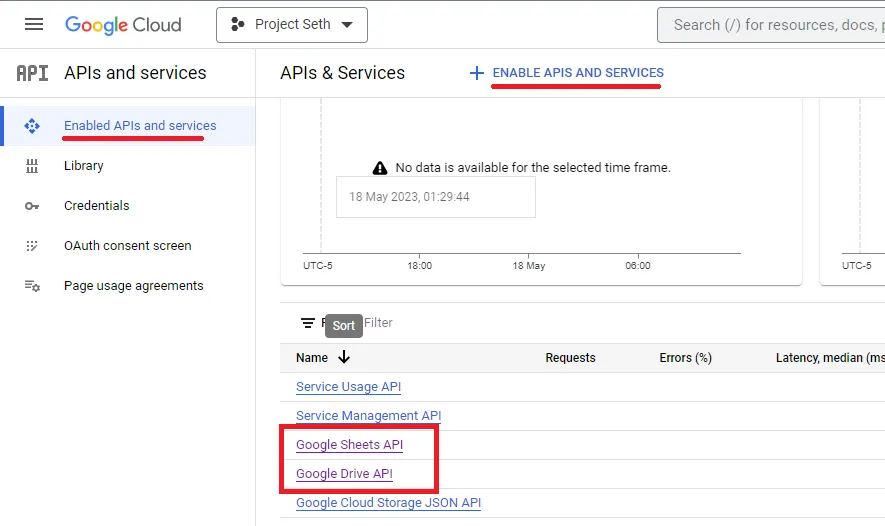
- Google Sheets API と Google Drive API が有効になっていることを確認します。
OAuth 同意画面を編集する
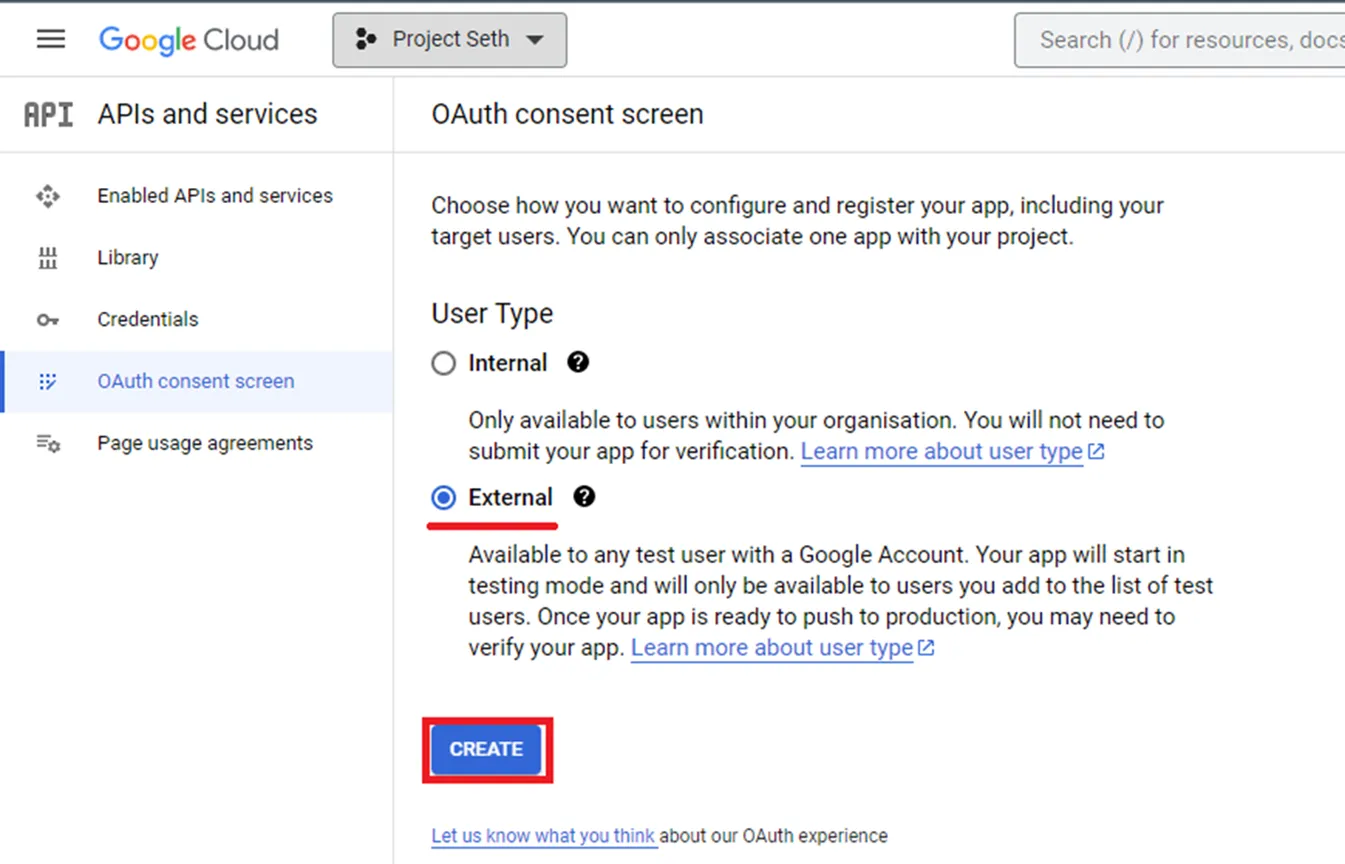
Section titled “OAuth 同意画面を編集する”- サイドメニューから OAuth consent screen を選択します。
- User Type で External を選択します。
- Create をクリックします。
- 以下の情報を入力します。
- App name -
eg., Porta Production or Porta Staging - User support email -
[your email address] - Application home page -
eg., https://staging.porta.solutions - Authorised Domain name -
porta.solutions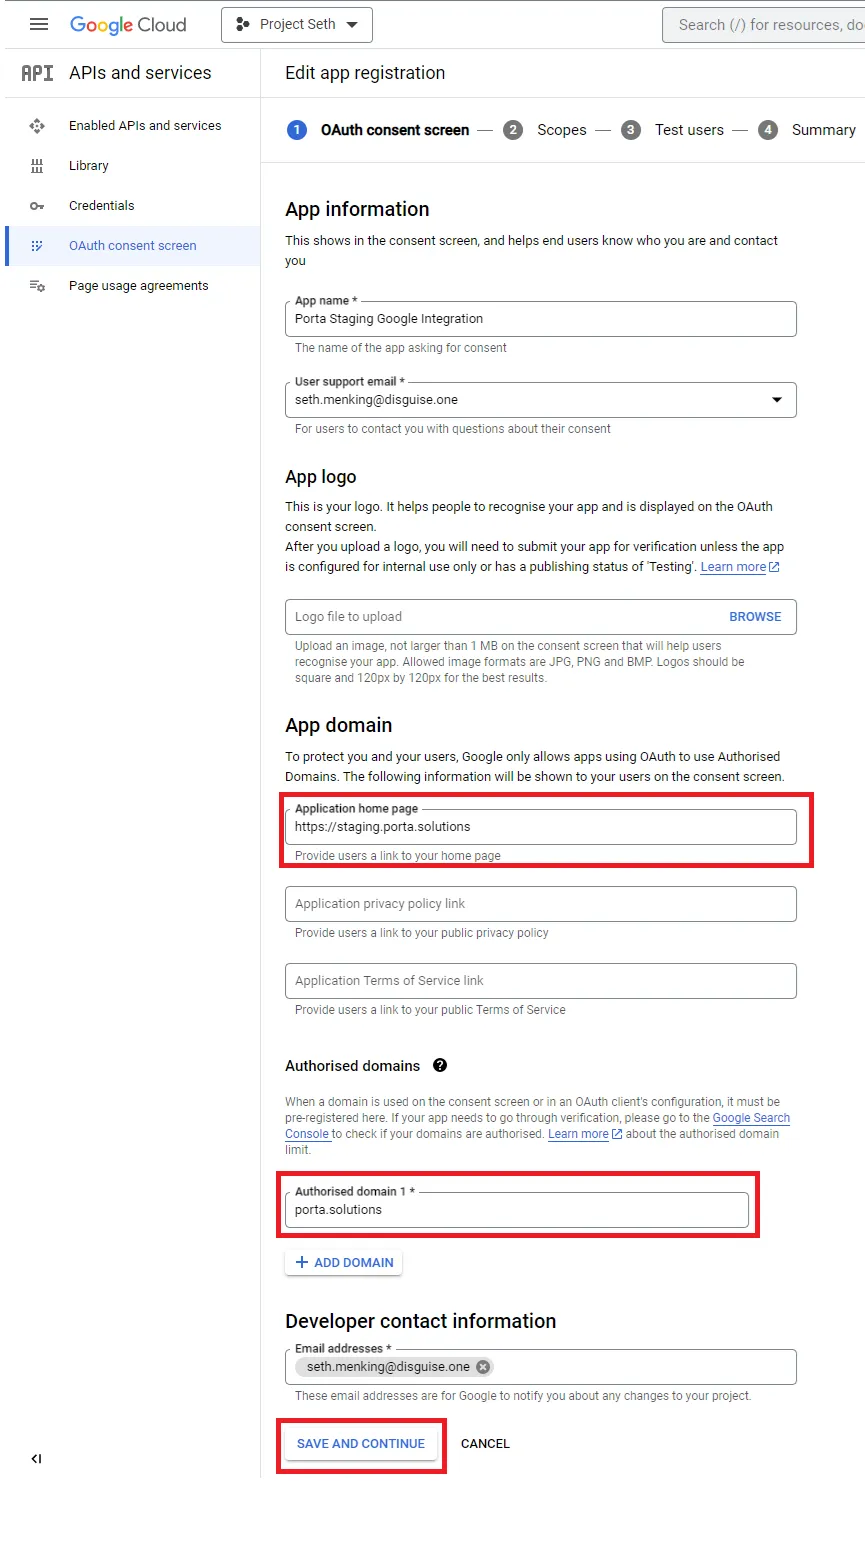
- SAVE AND CONTINUE をクリックします。
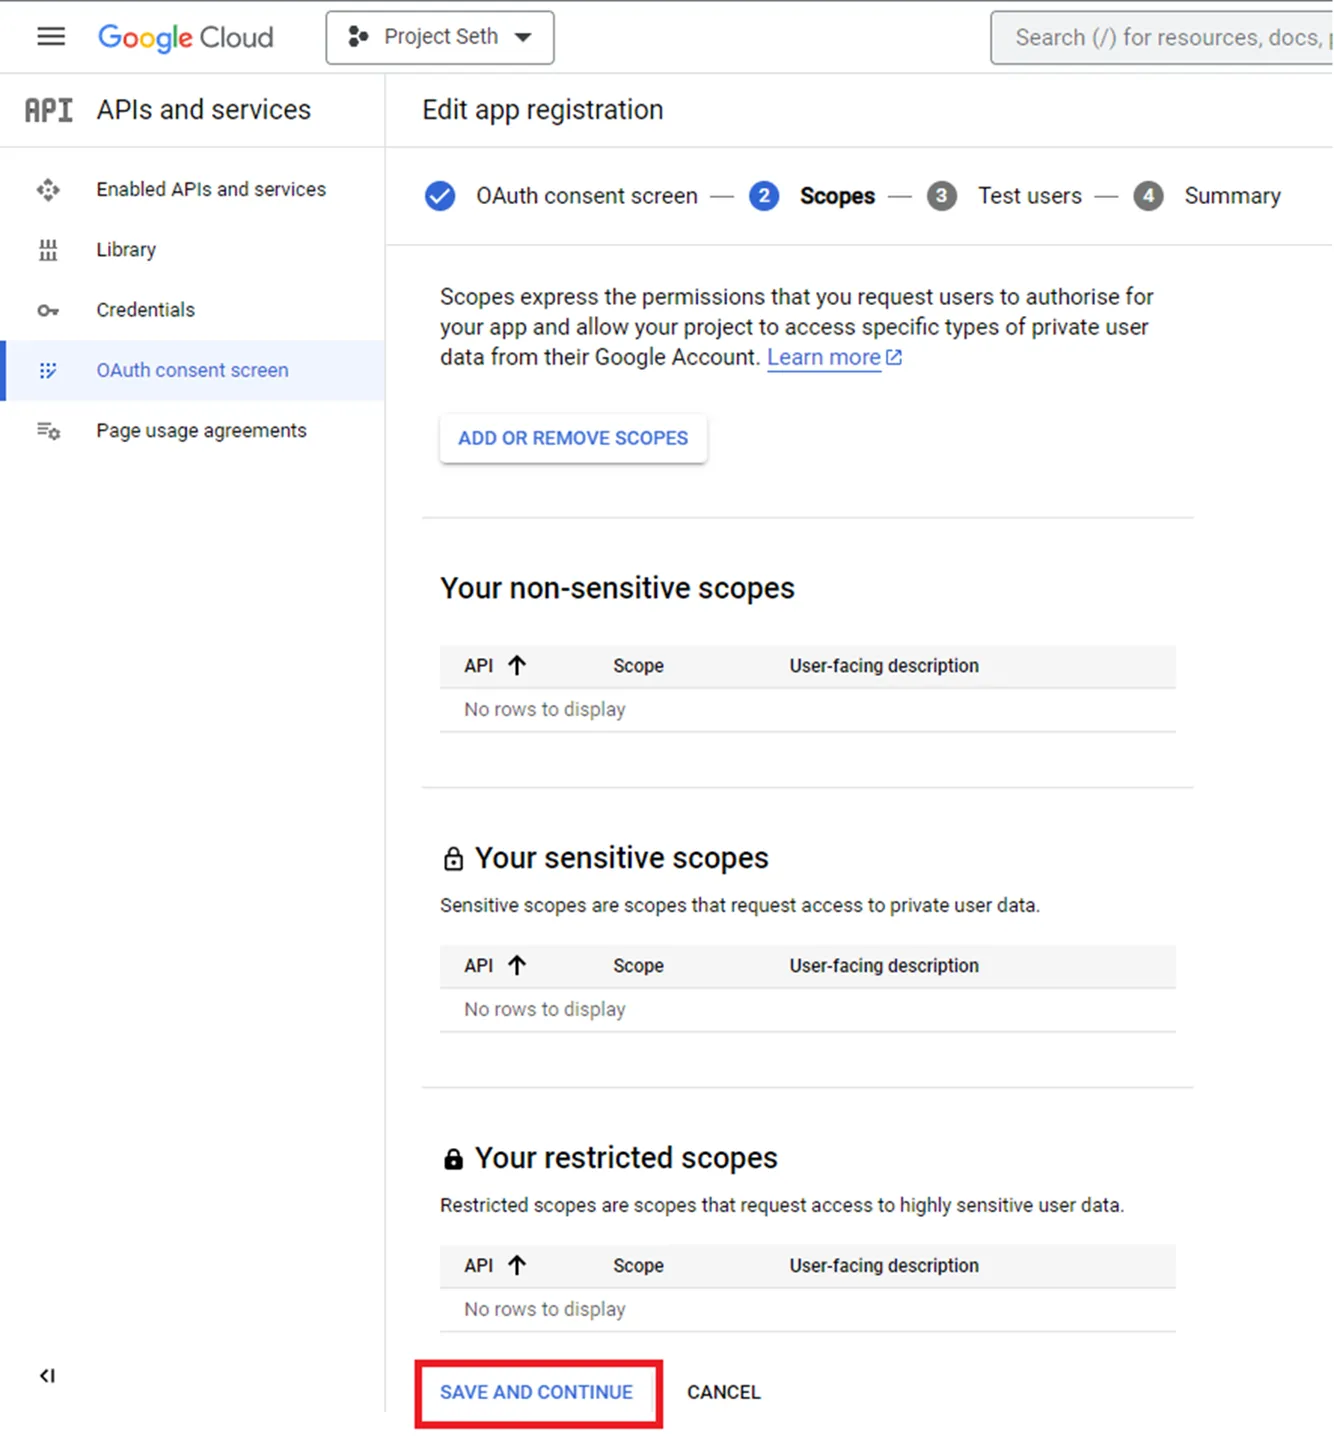
- scopes のデフォルト設定を確認し、SAVE AND CONTINUE をクリックします。
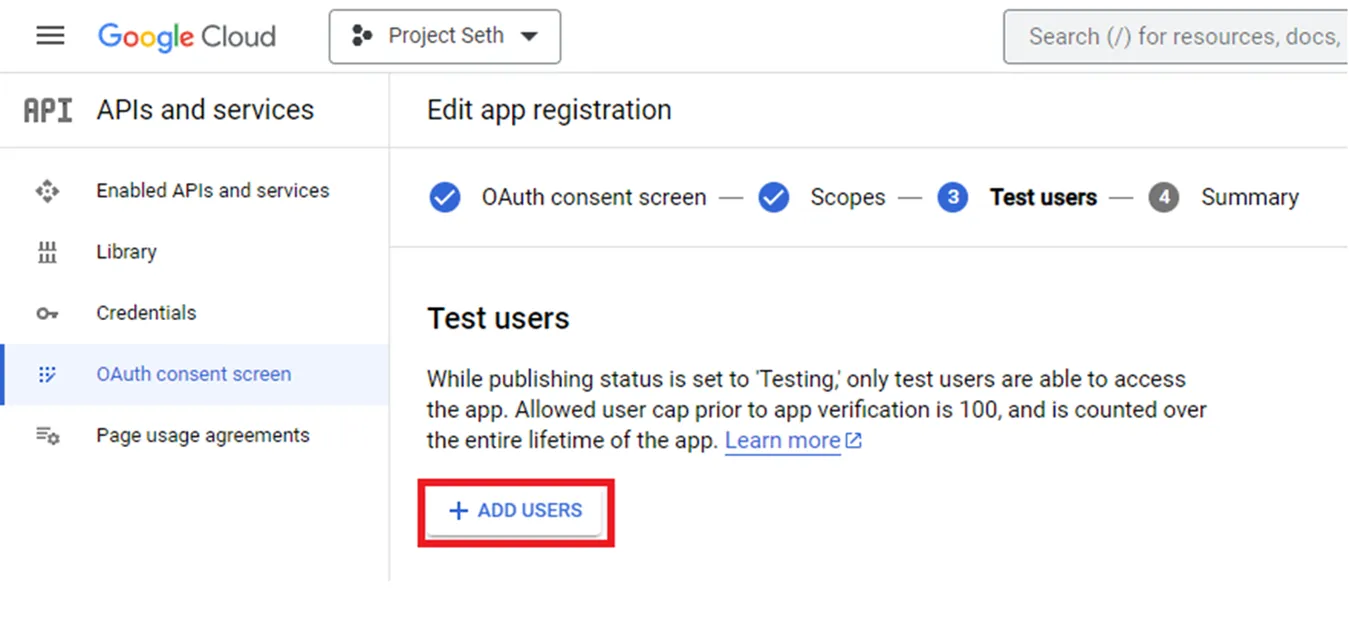
- +ADD USERS をクリックして Test users を追加します。
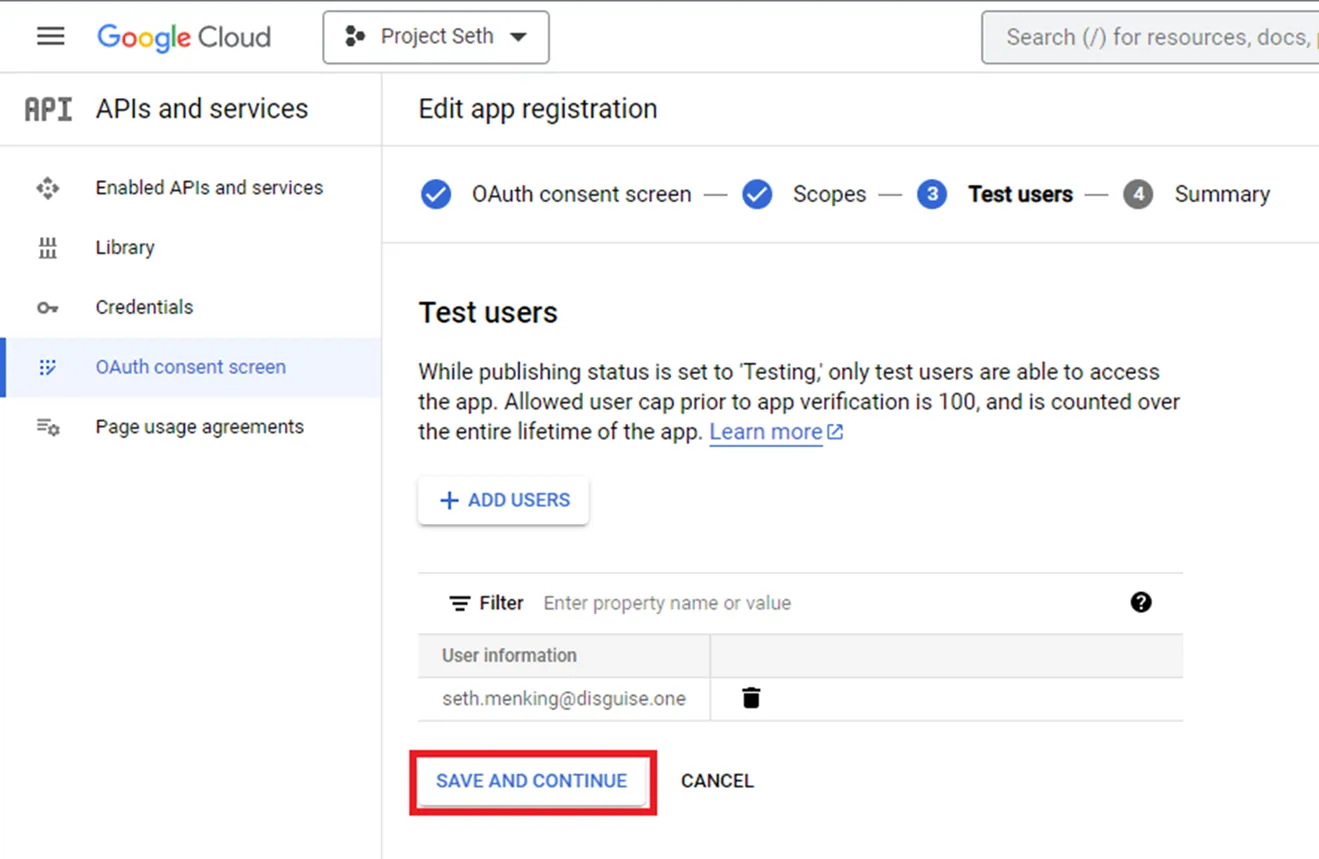
- Test User のメールアドレスを入力し、ADD をクリックします。
- Test User のメールアドレスが追加されたことを確認し、SAVE AND CONTINUE をクリックします。
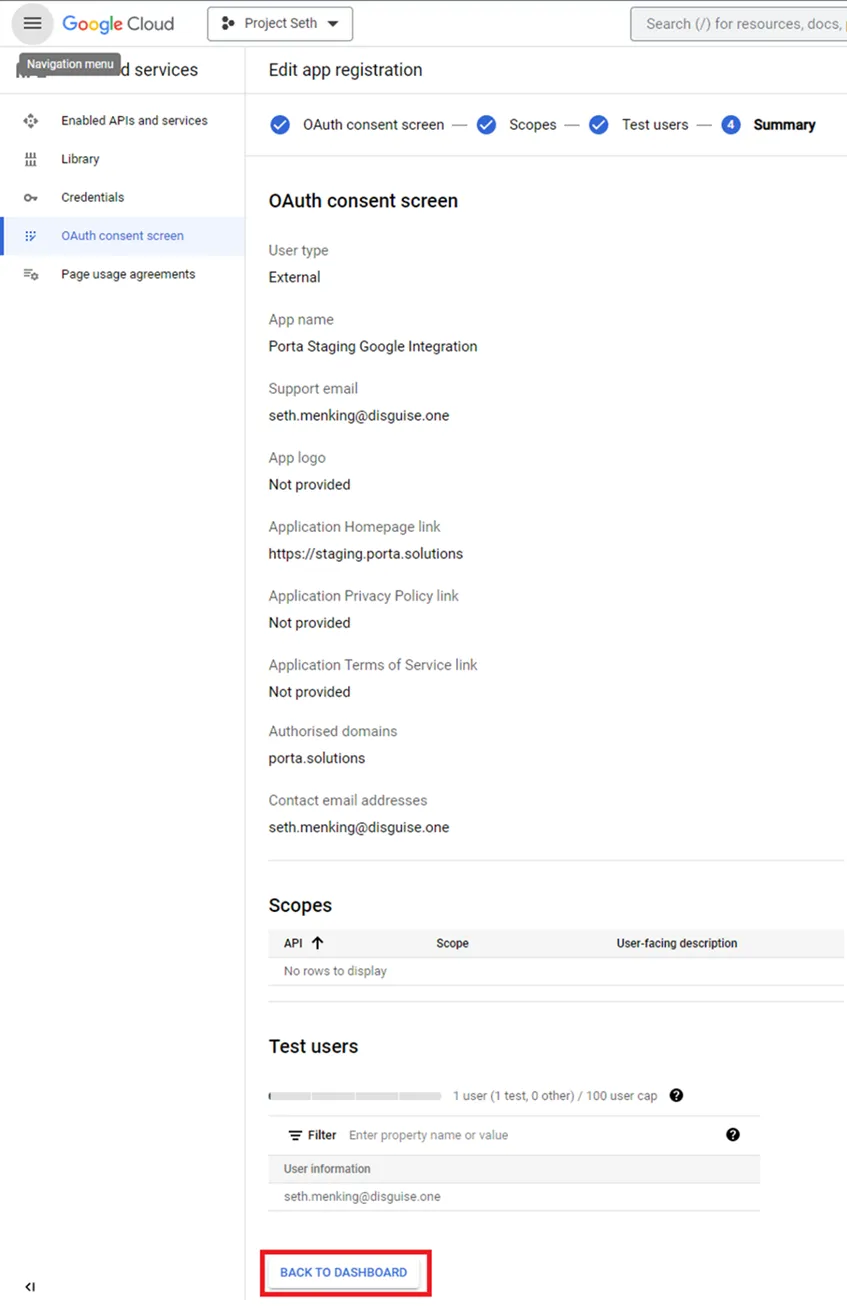
- サマリーページで詳細が正しいことを確認し、BACK TO DASHBOARD をクリックします。
認証情報を作成する
Section titled “認証情報を作成する”- サイドメニューから Credentials を選択します。
- + Create Credentials をクリックします。
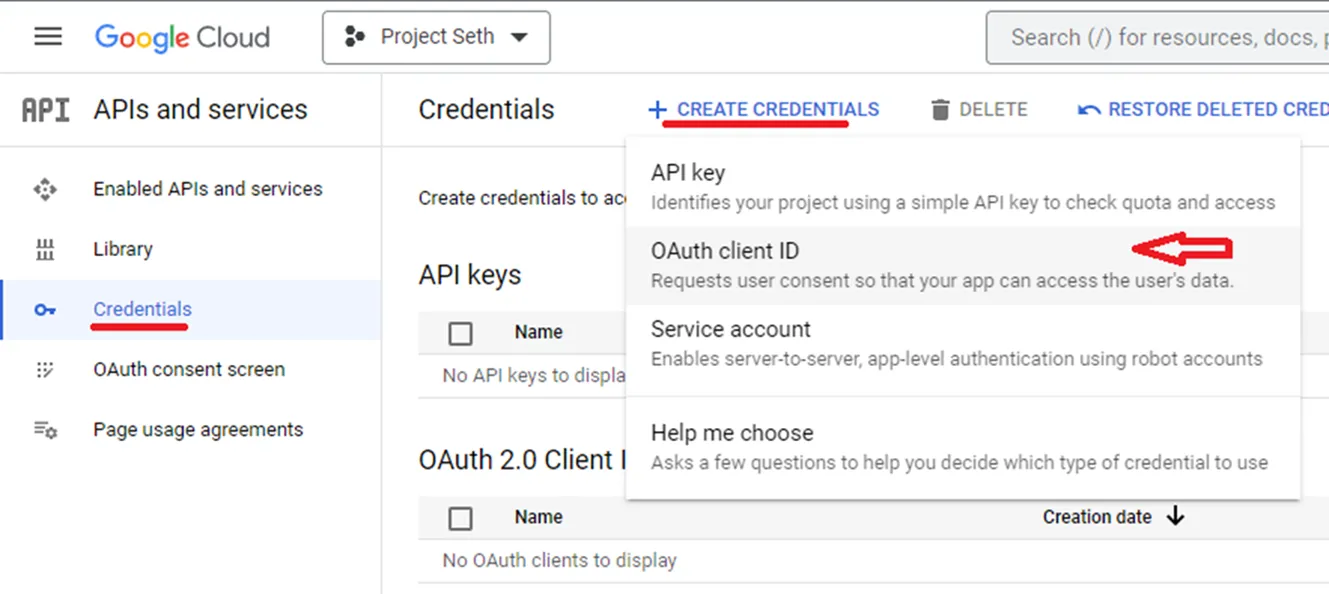
- リストから OAuth client ID を選択します。
- フォームに入力します。
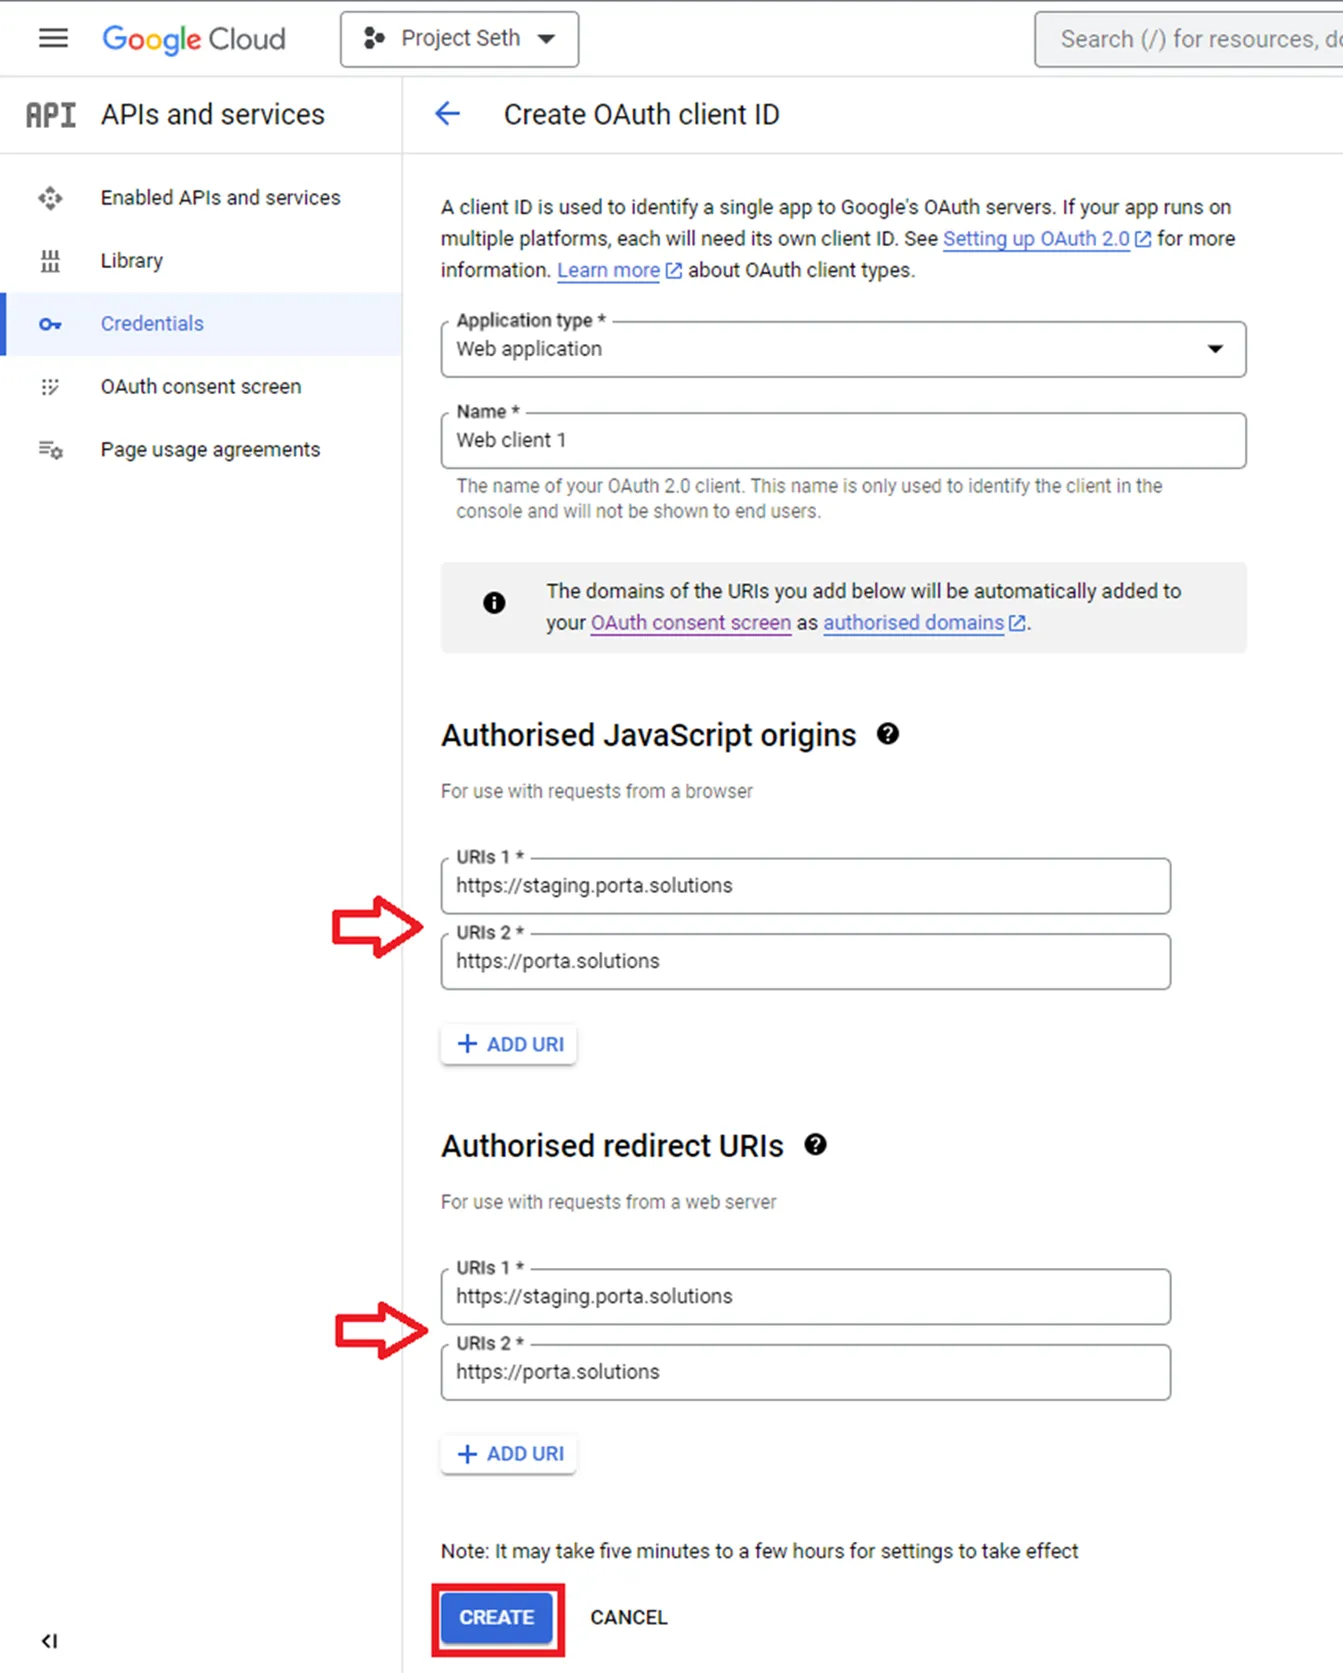
- Application type: Web Application
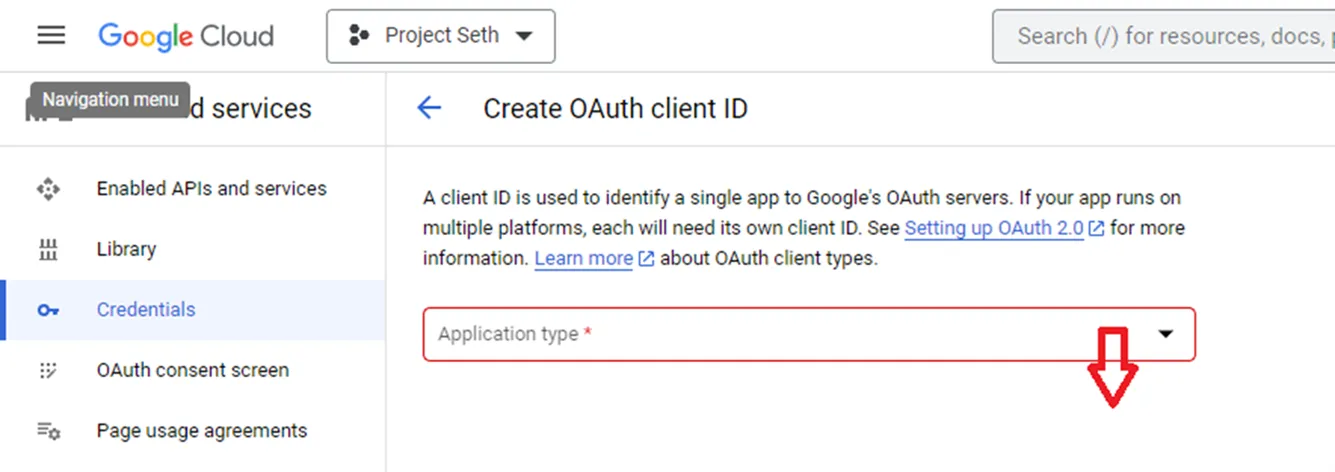
- Name: Web client 1
- Authorised Javascript origins - この OAuth を使用するドメインを入力します。
- 例:
- URIs 1: https://staging.porta.solutions
- URIs 2: https://porta.solutions
- Authorised redirect URIs - この OAuth を使用するドメインも入力します。
- URIs 1: https://staging.porta.solutions
- URIs 2: https://porta.solutions
- Application type: Web Application
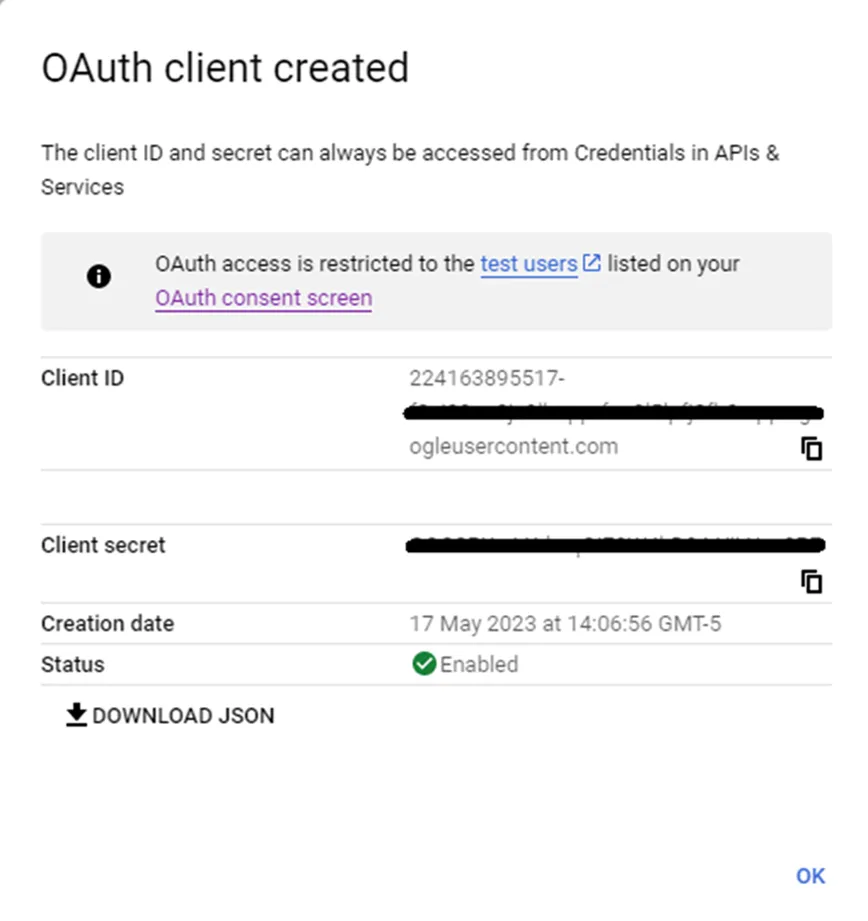
- Create をクリックします。
- Client ID と Client secret をコピーして保存し、Porta の設定を構成します。.JSON ファイルをダウンロードして手動でコピーすることもできます。
Porta の構成
Section titled “Porta の構成”- Settings > Integrations に移動します。
- Google Sheet、Google Drive XML、Google OAuth の各連携を有効化します。
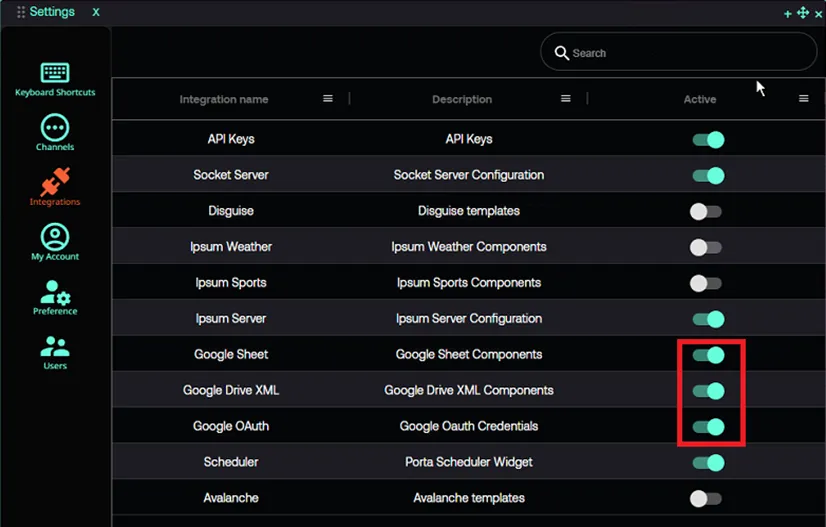
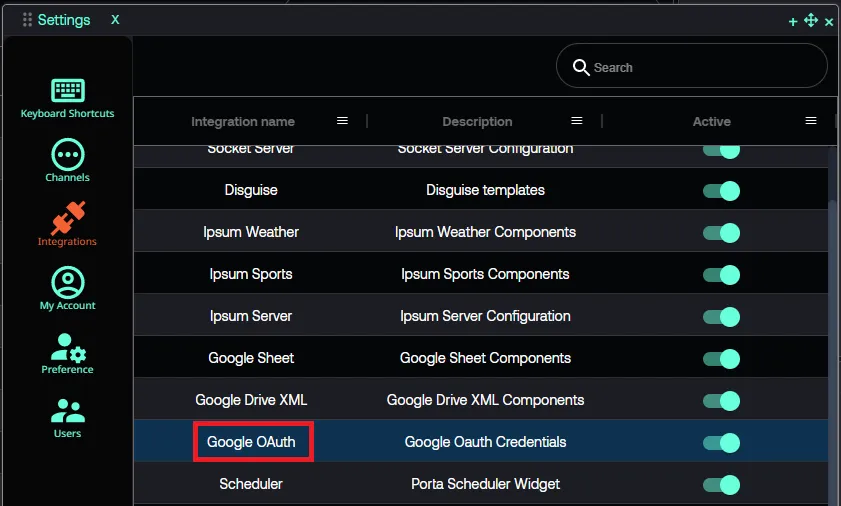
- 連携のリストから Google OAuth をダブルクリックします。
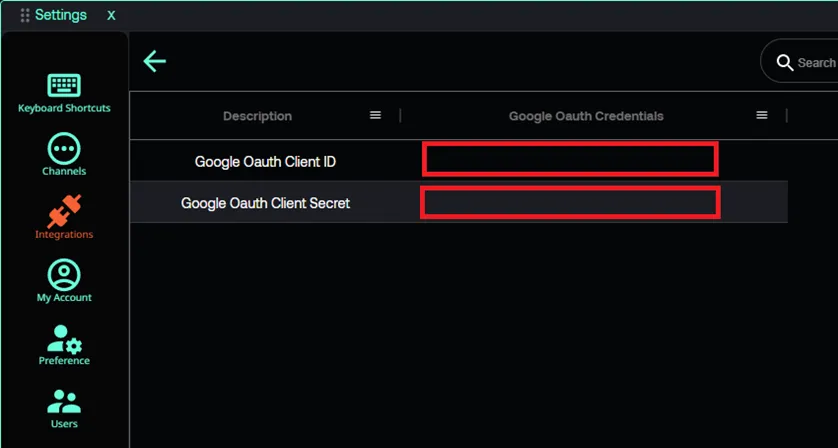
- Google OAuth ページで保存した Client ID と Client secret を追加します。
Porta で Google Sheets を使用する
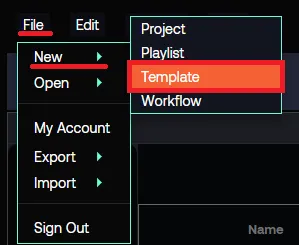
Section titled “Porta で Google Sheets を使用する”- File > New > Template をクリックして、新しいテンプレートを作成します。
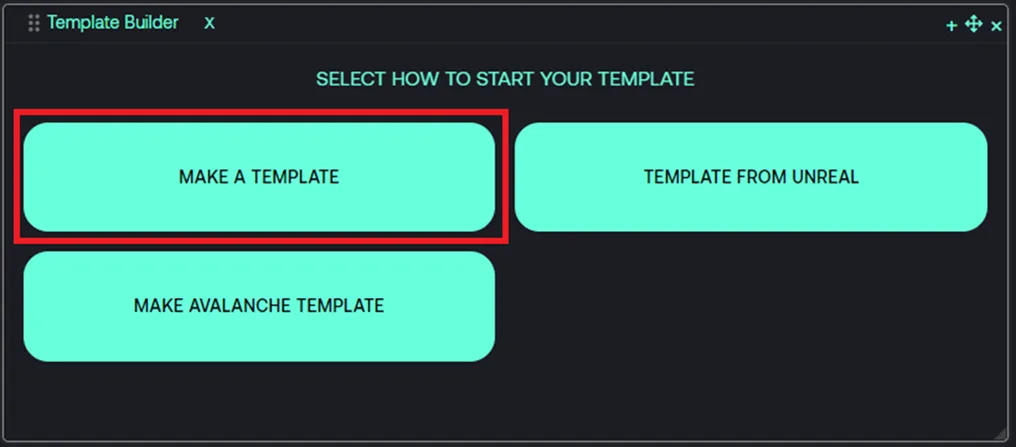
- MAKE A TEMPLATE をクリックします。
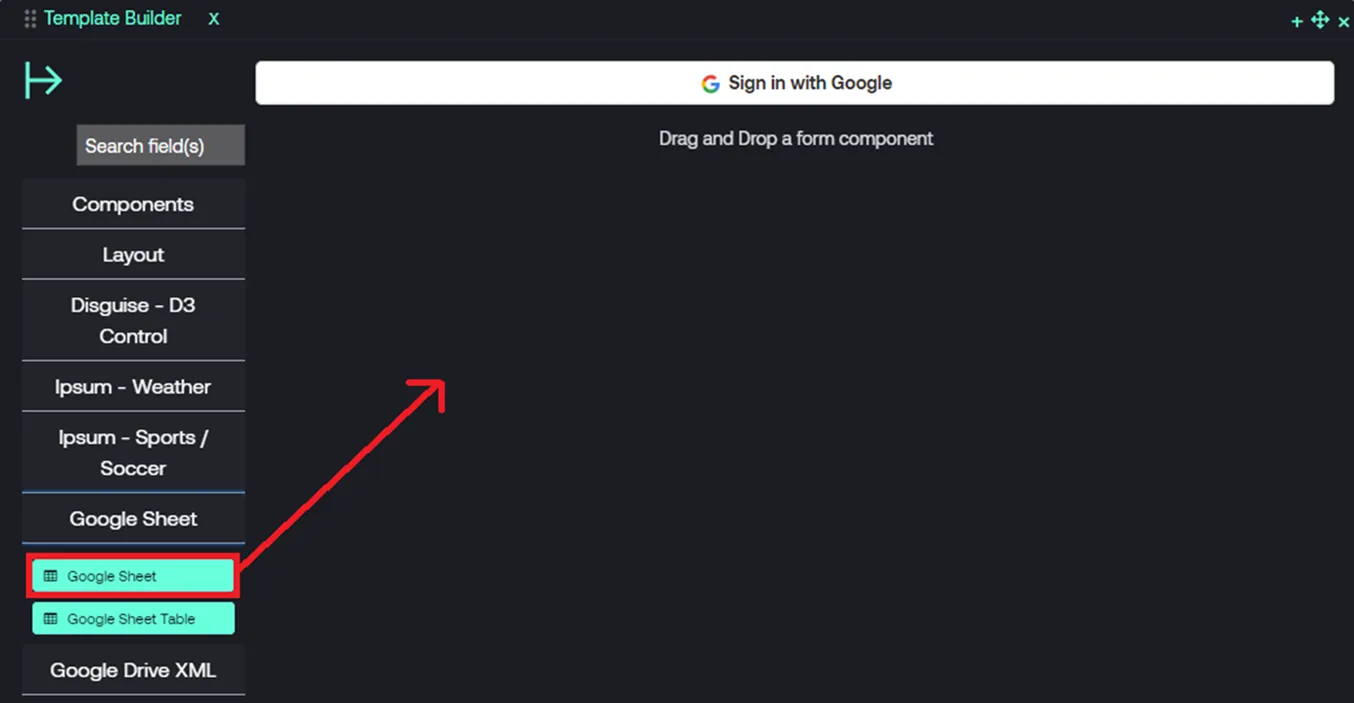
- Template Builder のオプションから Google Sheet を選択します。
- Google Sheet をクリックします。
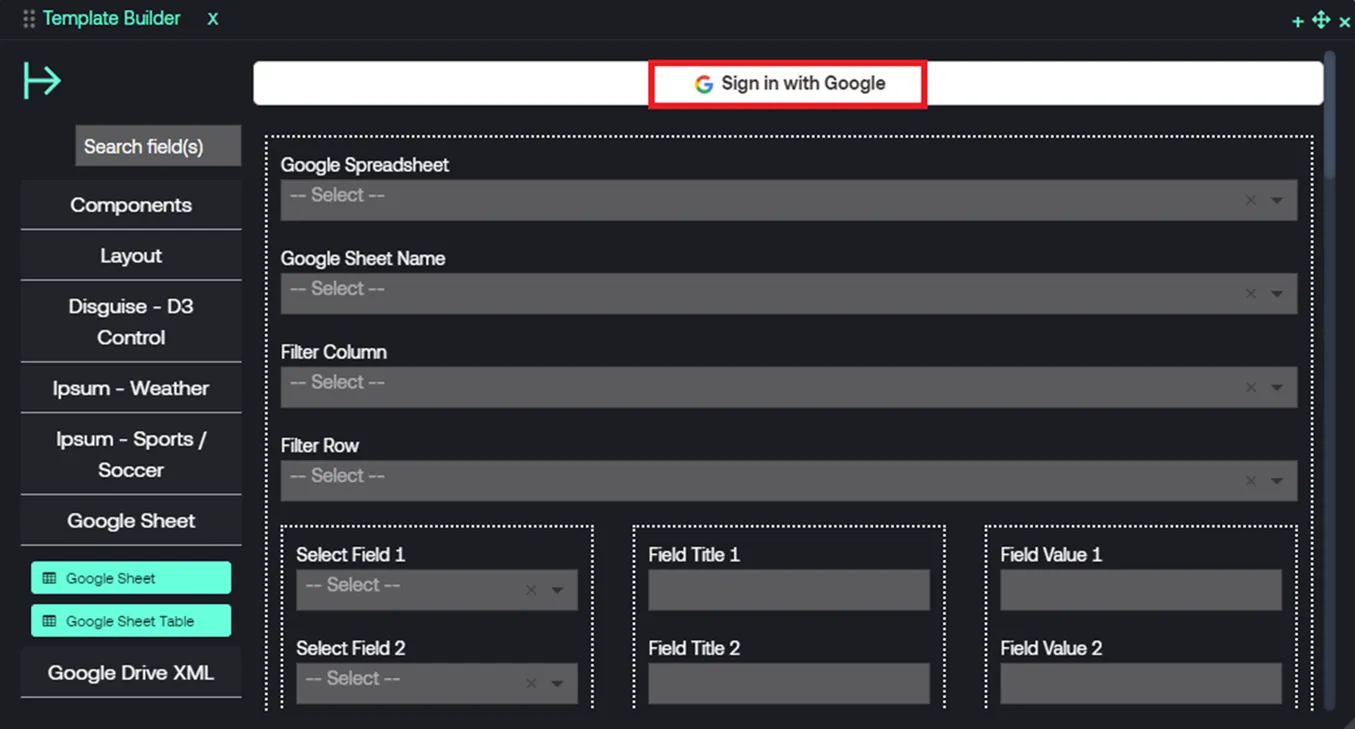
- Sign in with Google をクリックします。
- Google ユーザー認証情報をクリックして、Google アカウントを選択します。
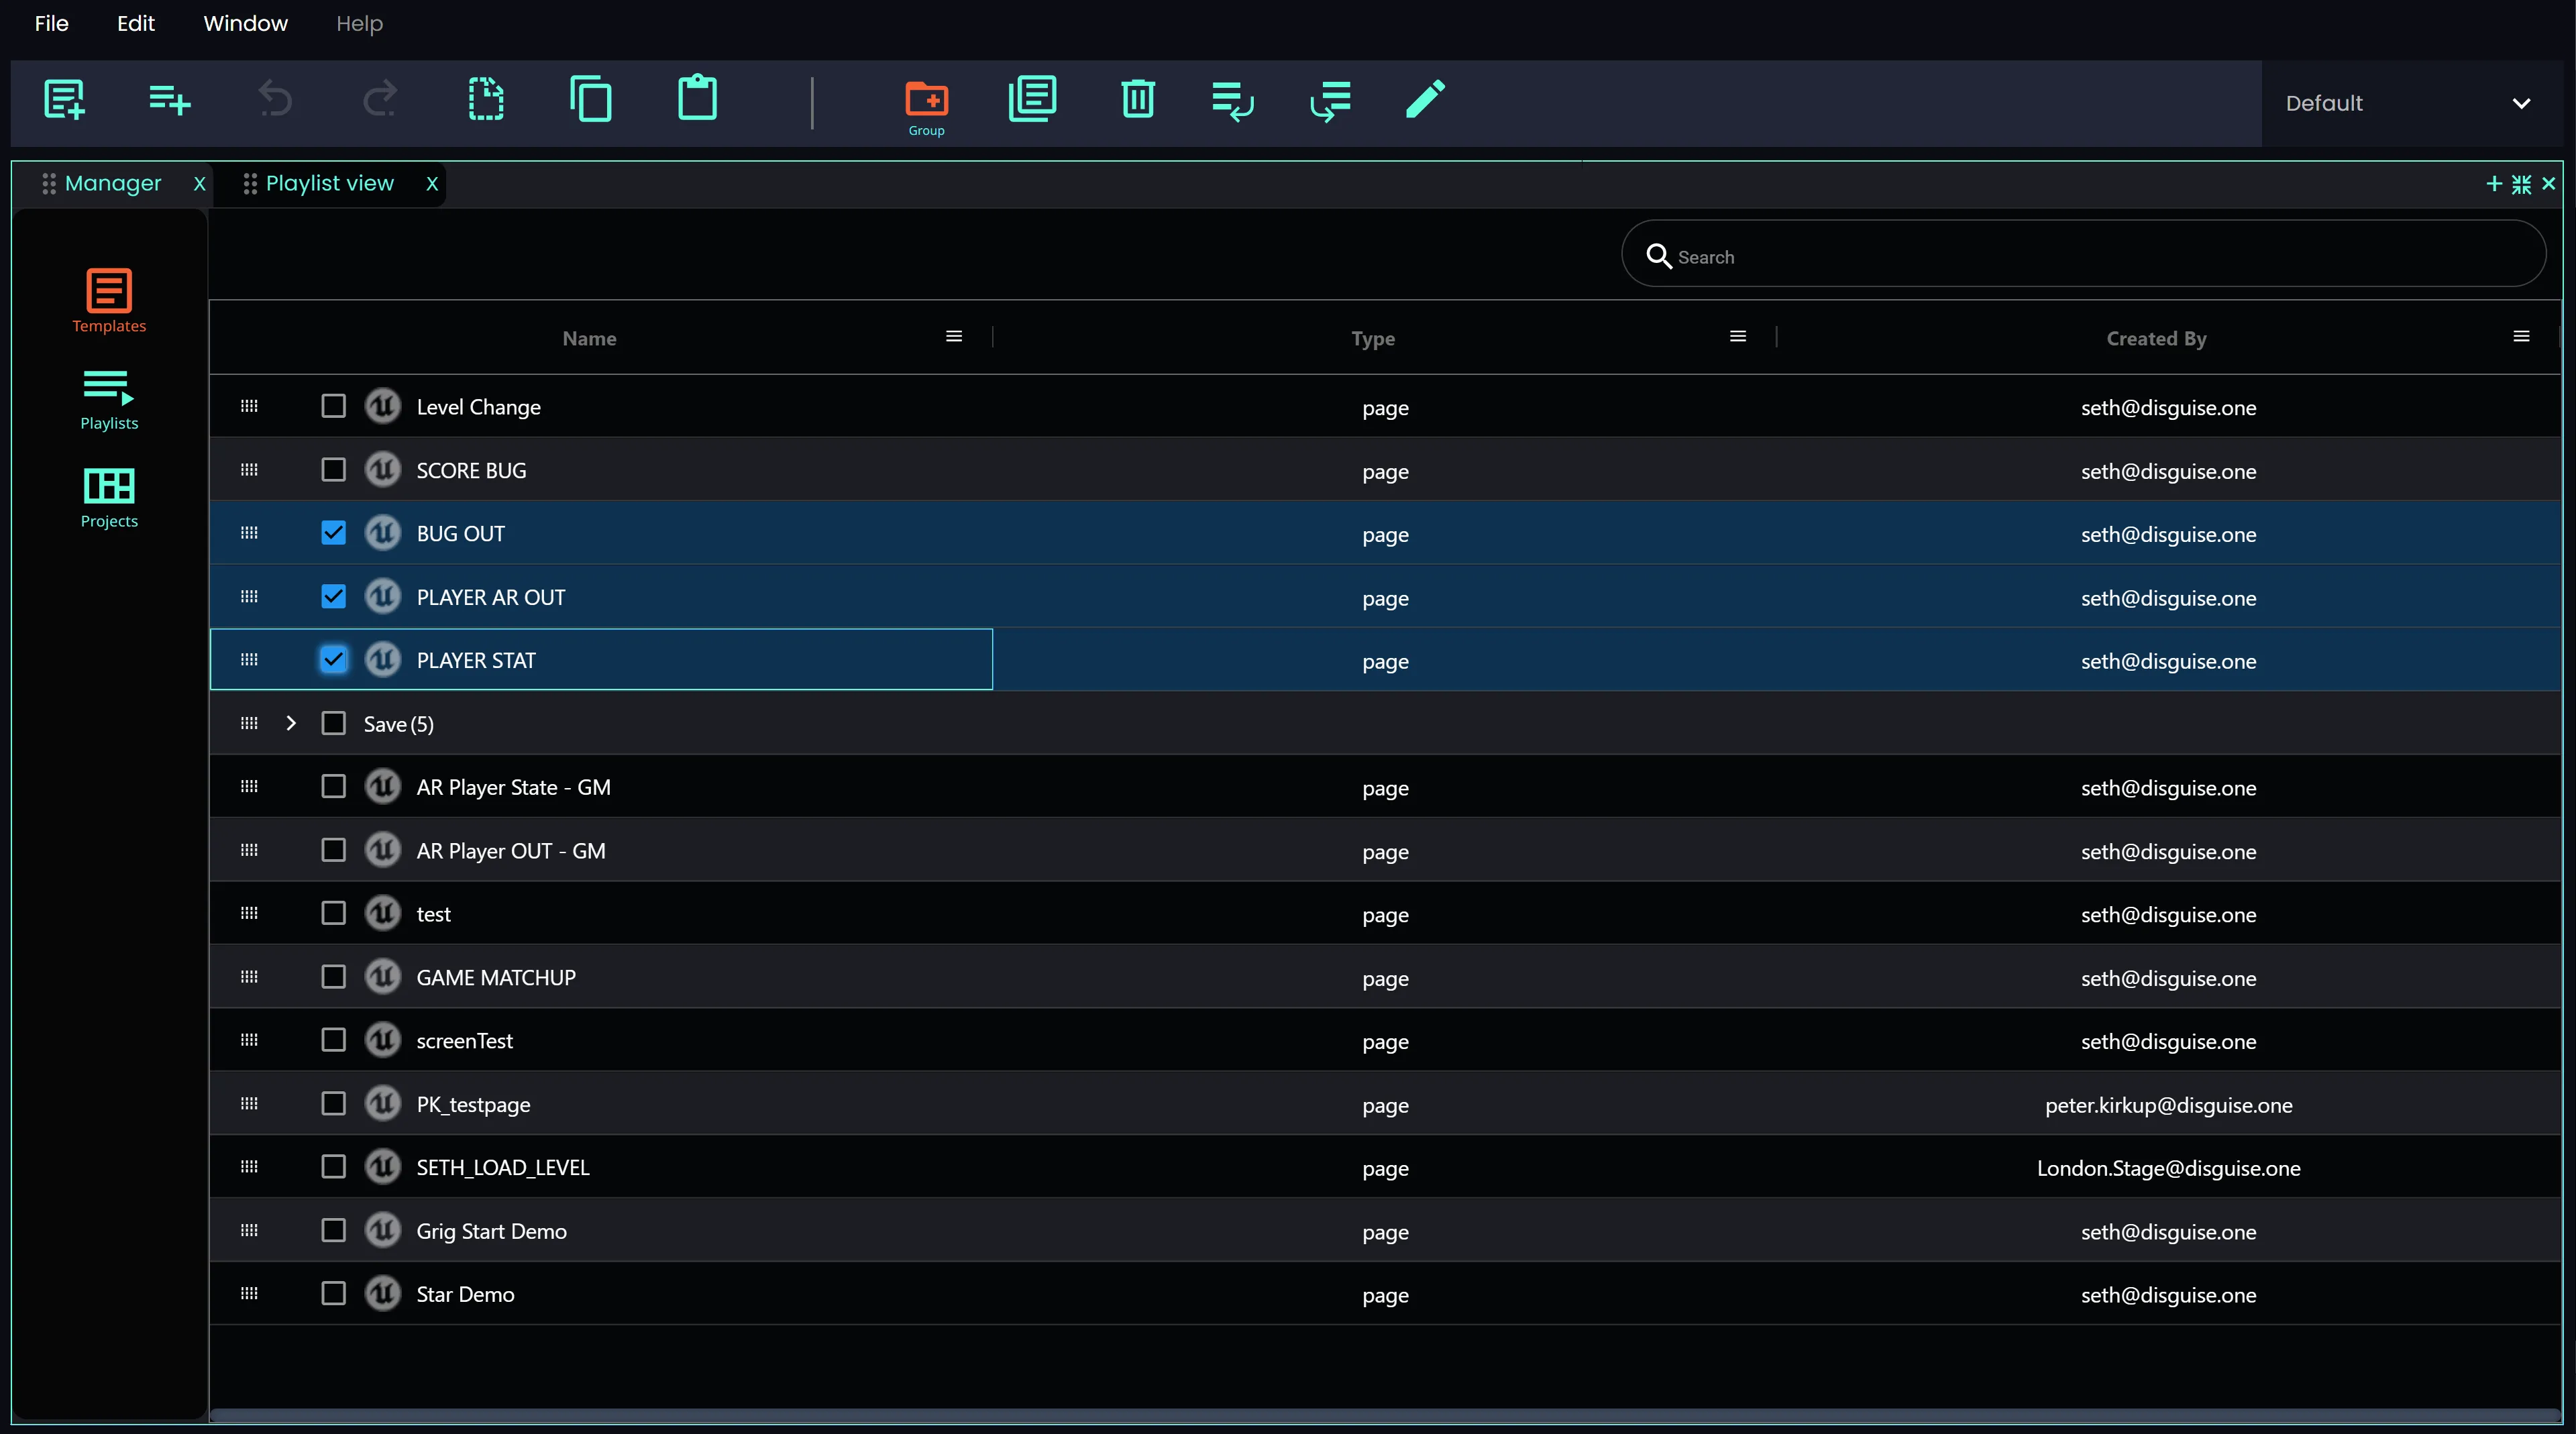
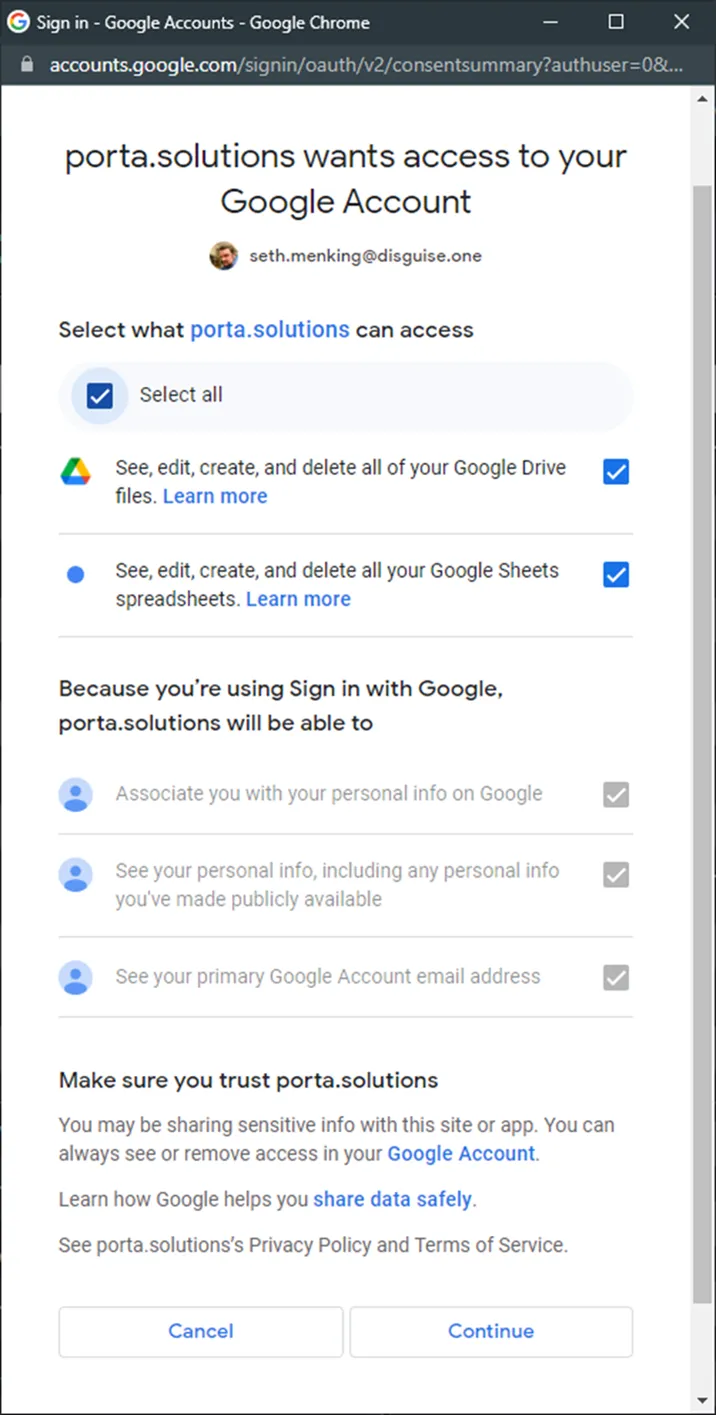
- Google Drive ファイルと Google Sheet スプレッドシートの表示・編集・作成・削除へのアクセスを許可します。
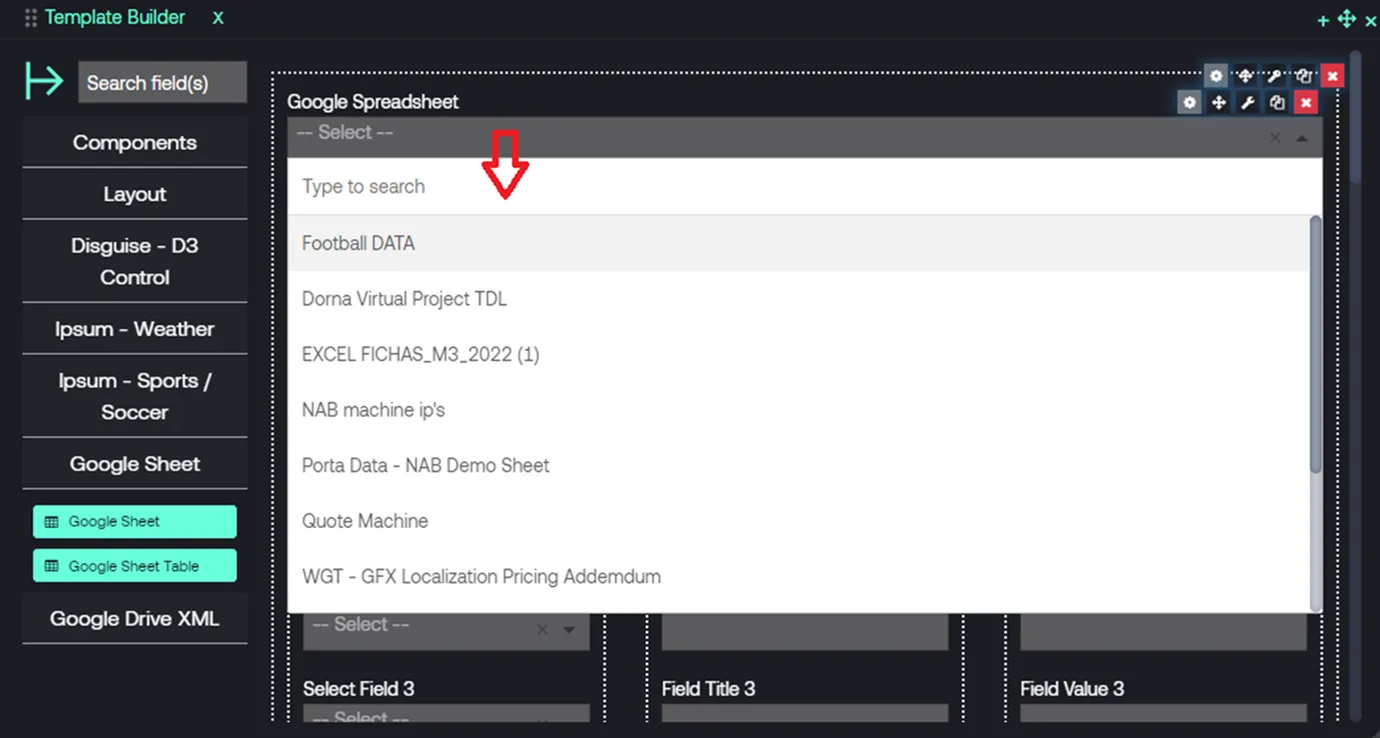
- ドロップダウンリストから Google Sheet を選択します。