Mask Blending
Mask ブレンドモードは Designer 内の独特なタイプのブレンドモードで、下にあるコンテンツに影響する標準のブレンドモードとは異なり、スタック内で上にあるレイヤーにマスクを適用します。このモードでは、以前に合成されたレイヤーから独立したブレンド操作が可能になり、マスキング要素をきめ細かく制御できます。
Mask ブレンドはマッピングごとに機能します。マッピングがマスクを設定・使用する主要な方法であり、同じマッピング Resource を使用しないレイヤーは Mask ブレンドモードの影響を受けません。
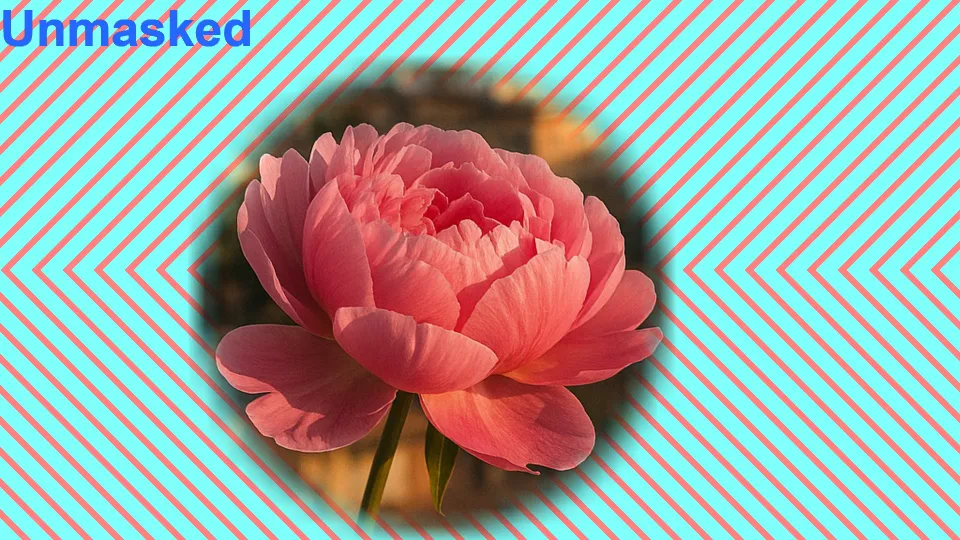
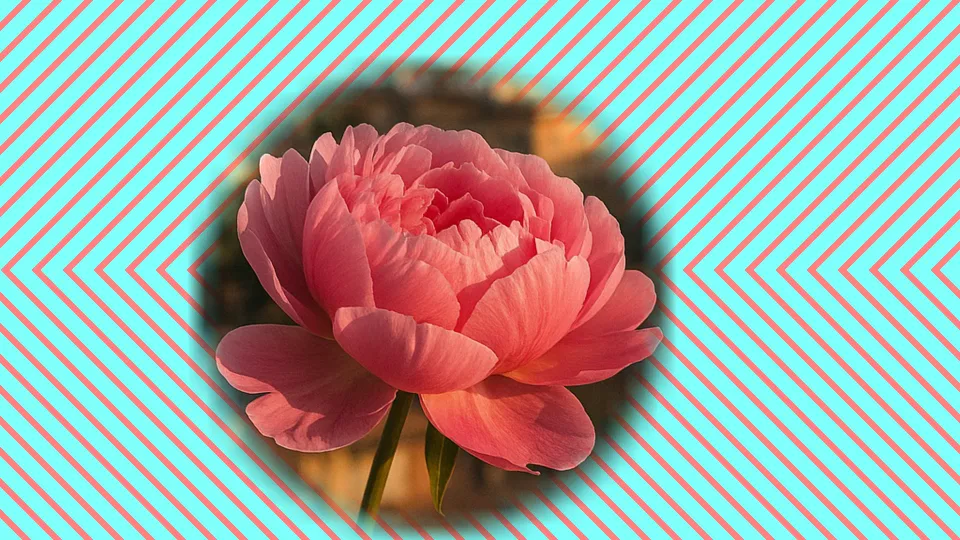
次の例では、花はシェブロン(山形模様)の背景の上に合成され、それ自体にはアルファチャンネルがありませんでしたが、背景と正しくブレンドされています。
マスクの仕組み
Section titled “マスクの仕組み”Mask ブレンドモードは、レイヤーの マッピングのマスク に対する一時的な上書きを提供します。この上書きは、現在のトランスポートの合成スタックが終わるまで続きます。つまり、マスクは特定のトラック内の合成の残りの部分で上書きされますが、マルチトランスポートにおいてトランスポート間に波及することはありません。
マッピングのマスクの仕組みは、すべてのチャンネルがコンテンツと組み合わされるというものです。緑と青の成分がなく、不透明度アルファが完全な赤のマスクは、このマッピングを使って適用される後続のコンテンツの赤とアルファのチャンネルだけを分離し、緑と青のチャンネルを 0 に設定します。
セットアップ例
Section titled “セットアップ例”Mask ブレンド
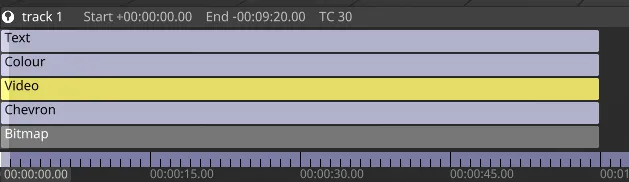
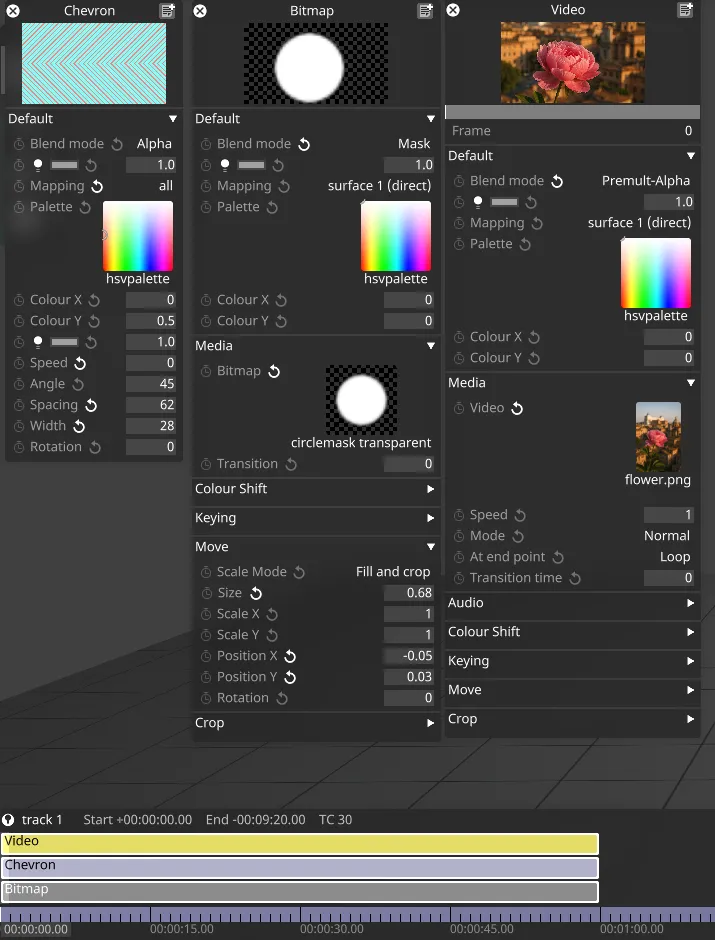
Section titled “Mask ブレンド”上記の花を分離した例では、次のレイヤー構成が使用されました。
Bitmap レイヤーは Chevron と Video レイヤーの両方の下にあり、その Mapping は「surface 1」に設定され、Mask ブレンドモードに設定されているため、マッピングのマスクを設定していることに注目してください。
Chevron は、Mapping が「surface 1」ではなく「all」に設定されているため、マスクの影響を受けません。
Video は、Mapping「surface 1」を共有しているため、マスクの影響を受けます。
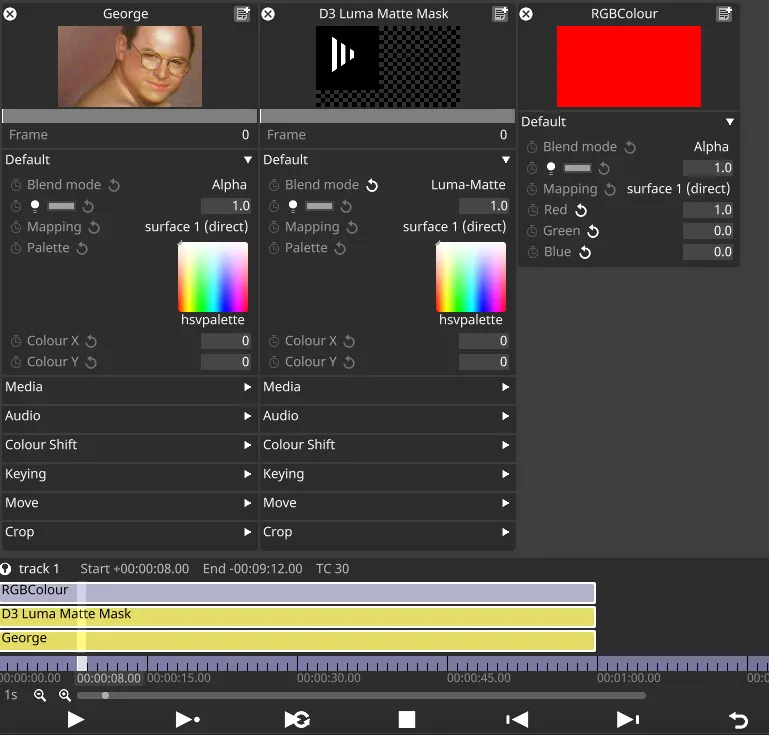
Luma Matte ブレンド
Section titled “Luma Matte ブレンド”
Mask ブレンドモードのもう 1 つの例は Luma Matte マスクです。上記の例では、マットの最も明るい領域が下のレイヤー(その上にさらに上のレイヤーが重ねられる)に対して不透明になり、黒い領域は透明になります。以下のレイヤー構成に示すように、3 つのレイヤーはすべて同じマッピング内にあります。
マスクのリセット
Section titled “マスクのリセット”マッピング自体に元々設定されていたマスクにマスクをリセットすることはできませんが、白い Colour レイヤーをレイヤースタックに挿入し、Mask ブレンドモードに設定して対象のマッピングを選択することで、マスクの効果をリセットすることは可能です。
この例では、Colour レイヤーの Mapping は「surface 1」と Mask ブレンドモードに設定されています。これは完全な不透明度の白を出力します。
text レイヤーも Mapping「surface 1」を使用しており、元々マスクされていた領域の外に表示できます。