RAID 構成
このガイドで使用するドライブはあくまで例です。お使いのシステムは異なる場合があります。必須または推奨されるドライブについては、Disguise サポートチーム までお問い合わせください。
RAID コントローラーへのログイン
Section titled “RAID コントローラーへのログイン”RAID を構成する前に、Windows ユーザーアカウントにパスワードが設定されていることを確認してください。
- Windows の スタートメニュー を開き、LSA を選択します。
- LSA ランディングページで、ローカル IP アドレスを持つサーバーを選択します。
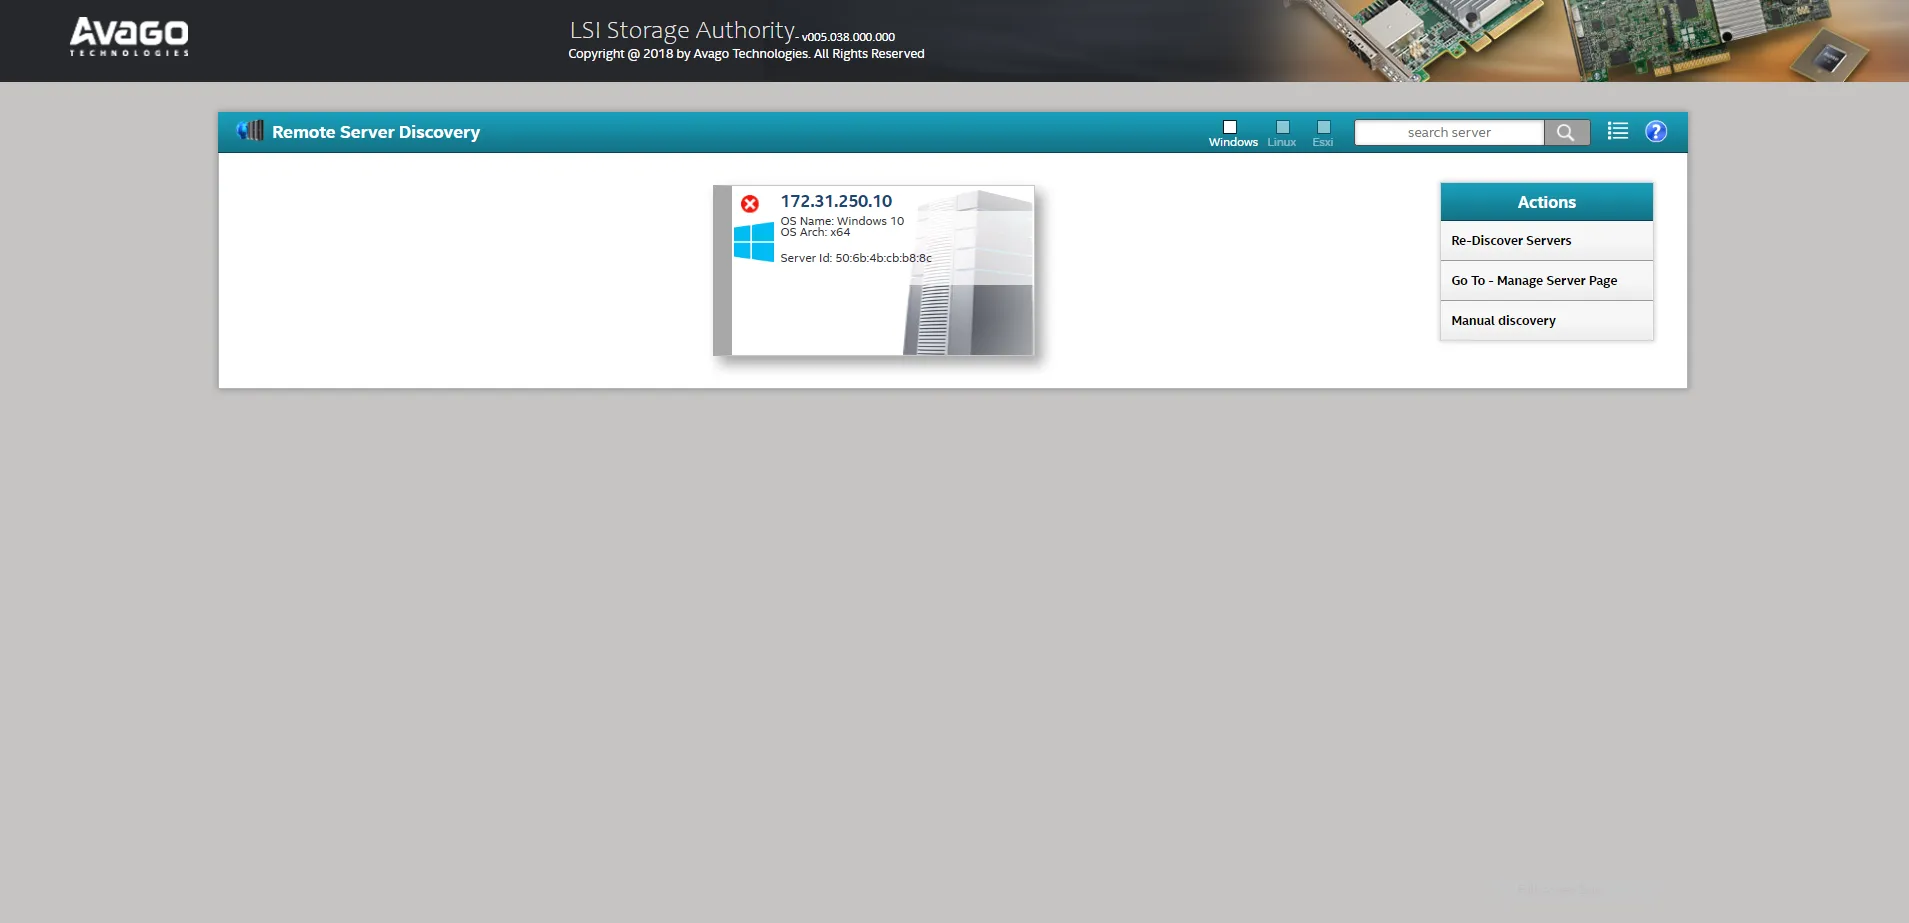
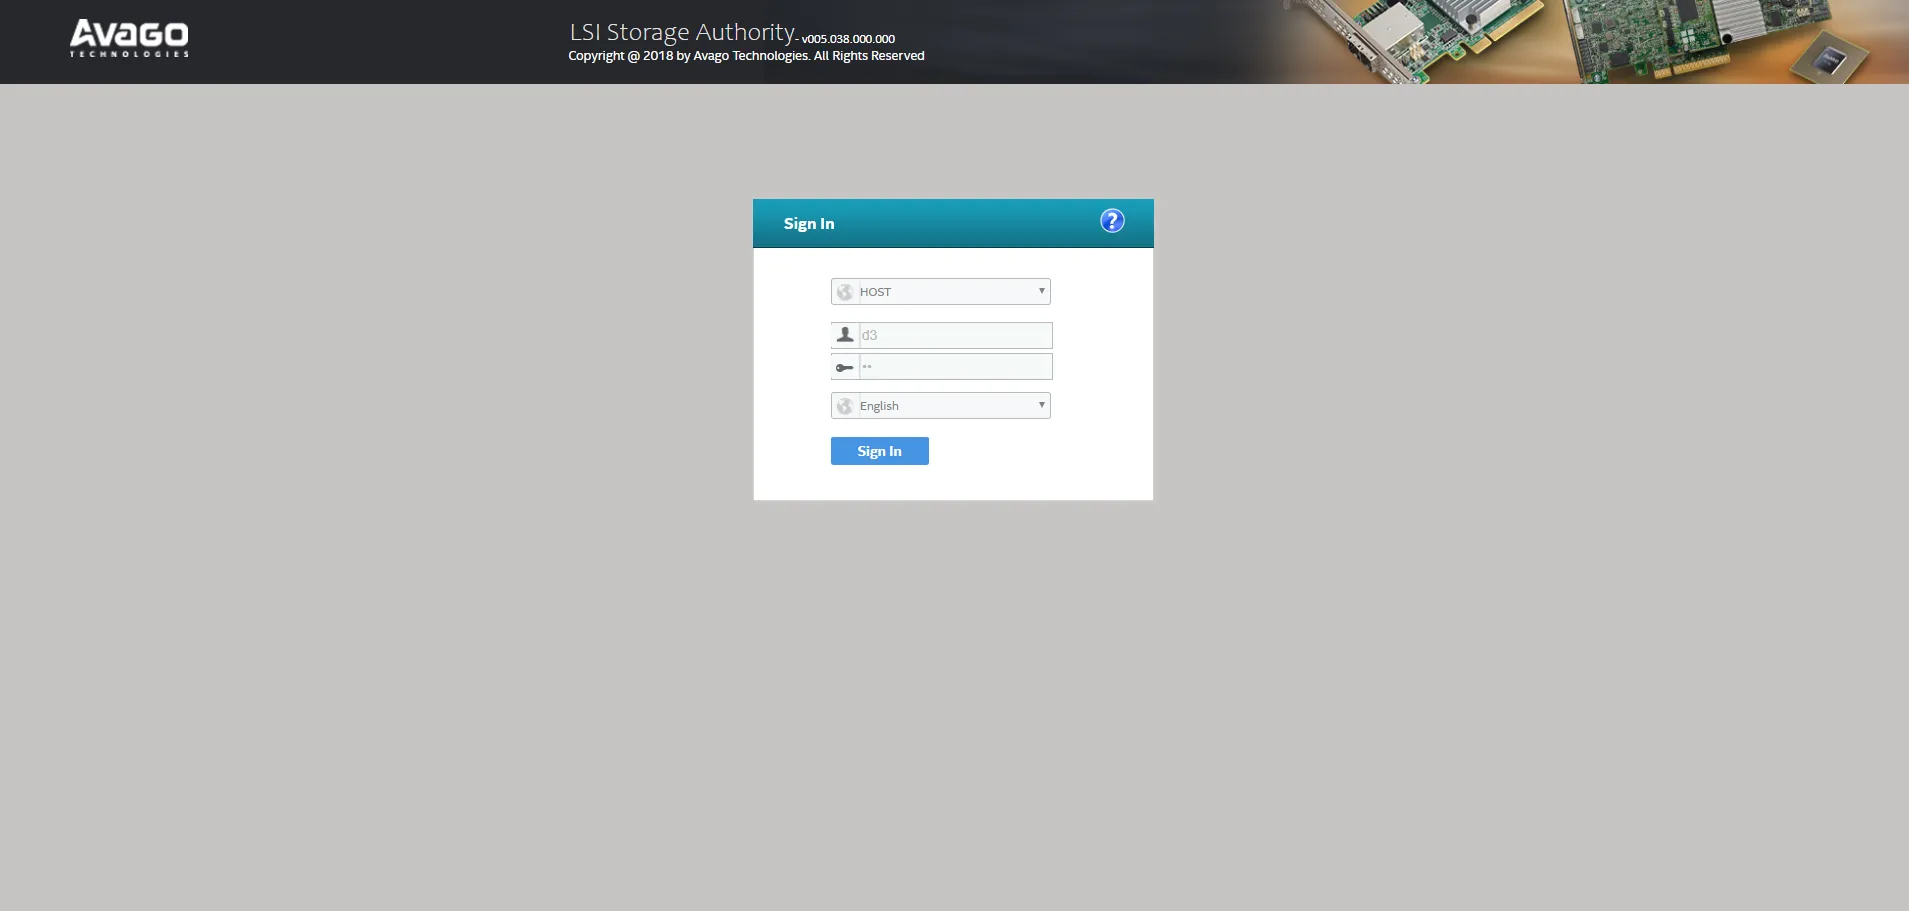
- ローカルユーザーアカウントのログイン情報を入力します。
- ユーザー名:
d3 - パスワード: 未設定
- ユーザー名:
LSA での RAID 構成の表示
Section titled “LSA での RAID 構成の表示”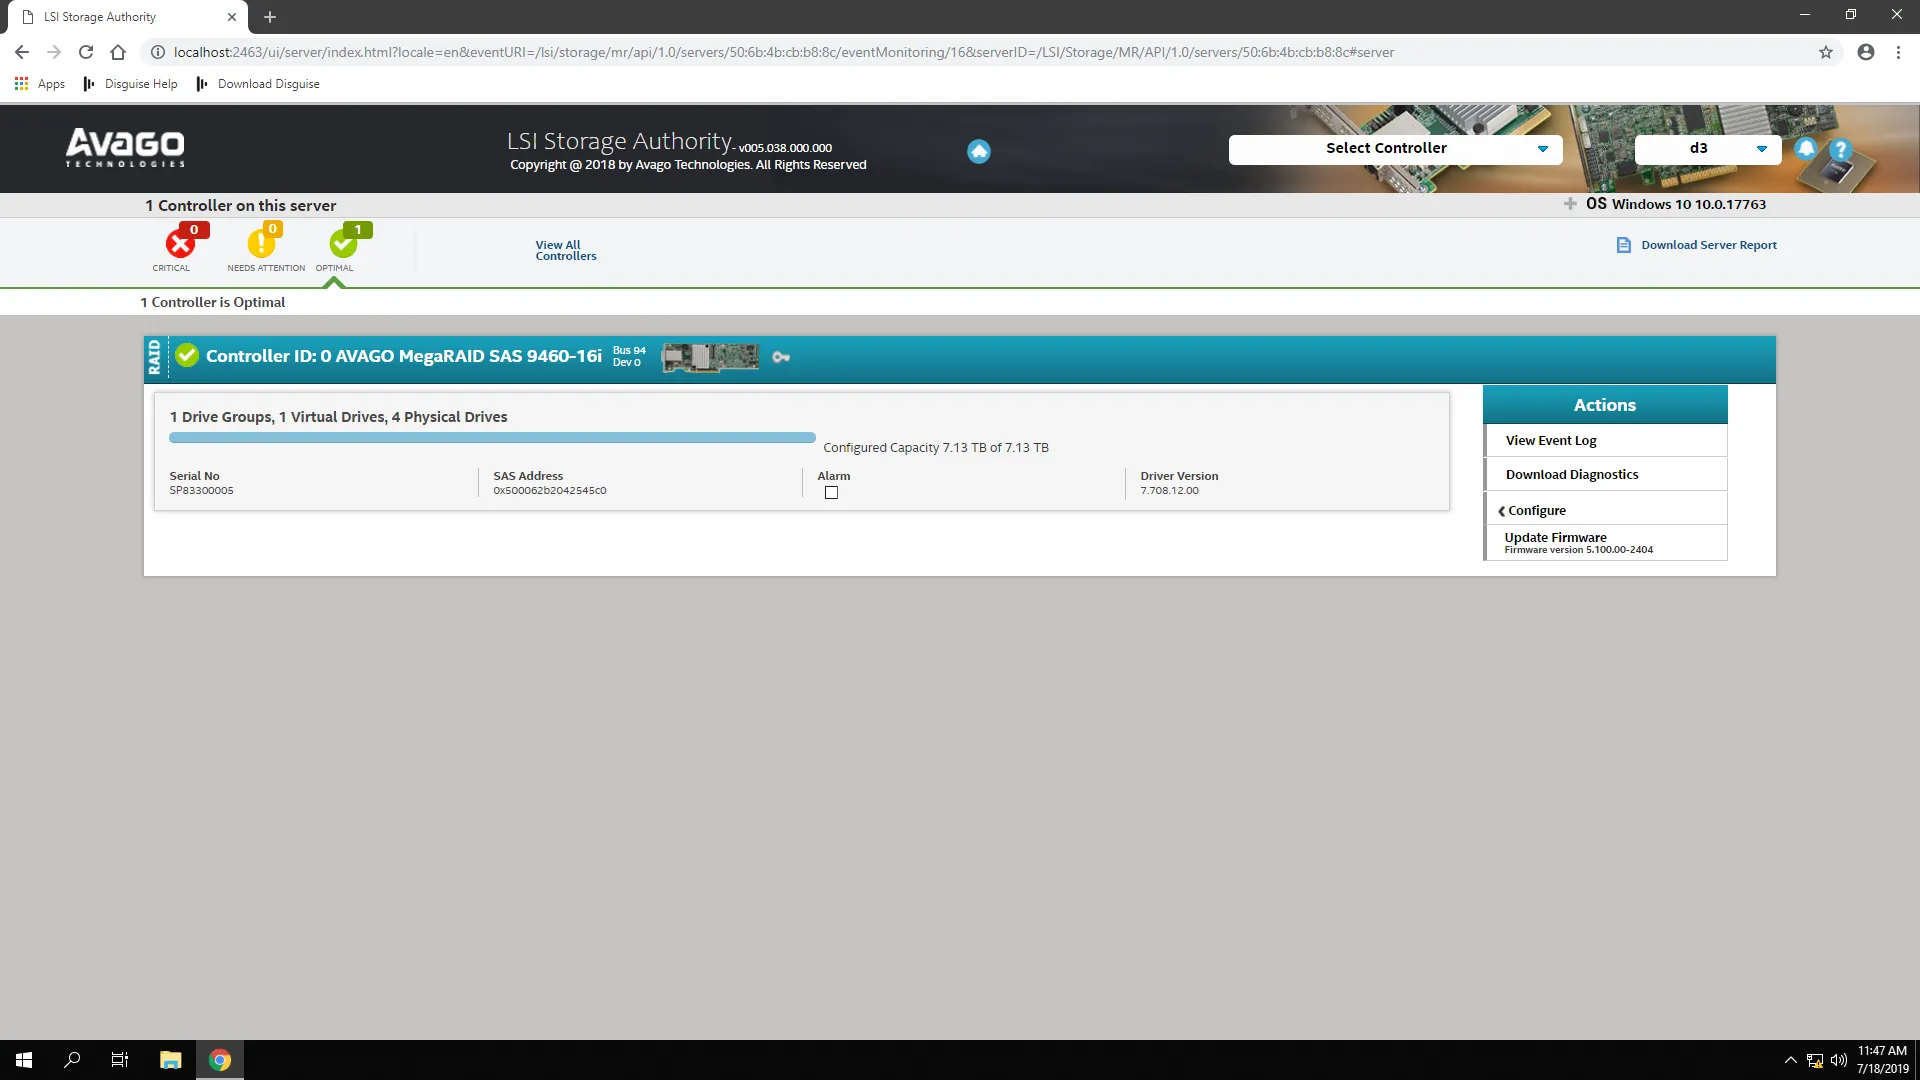
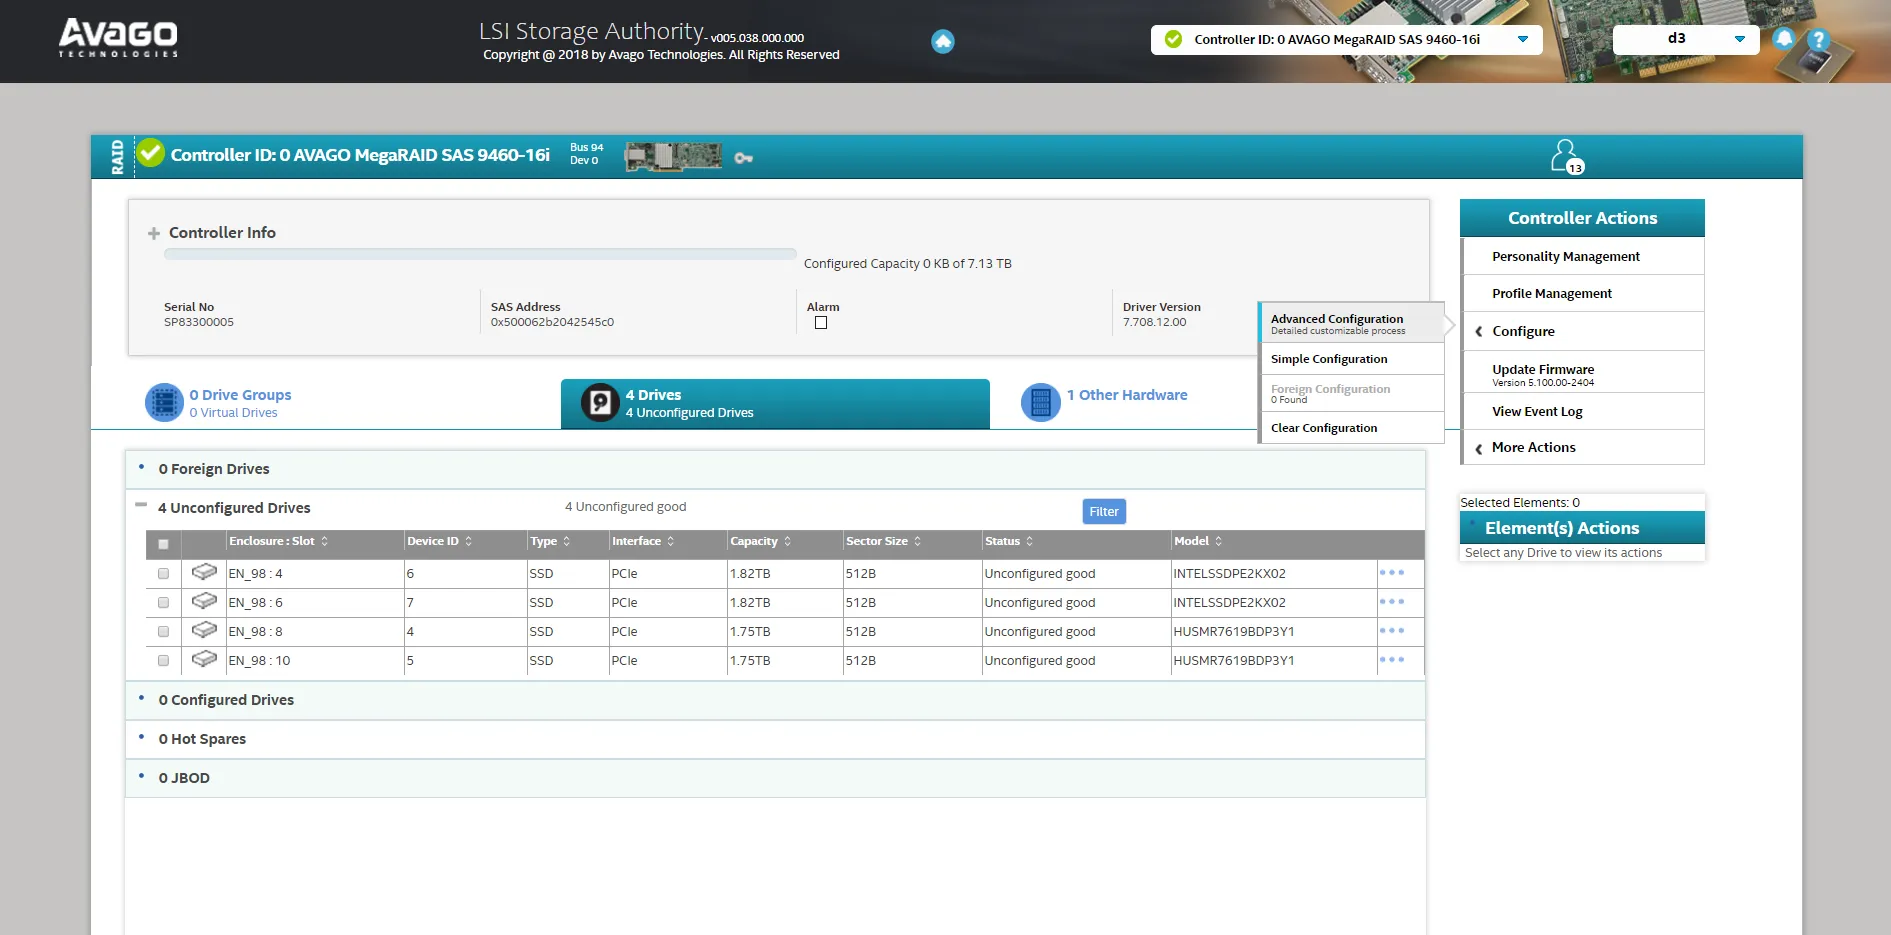
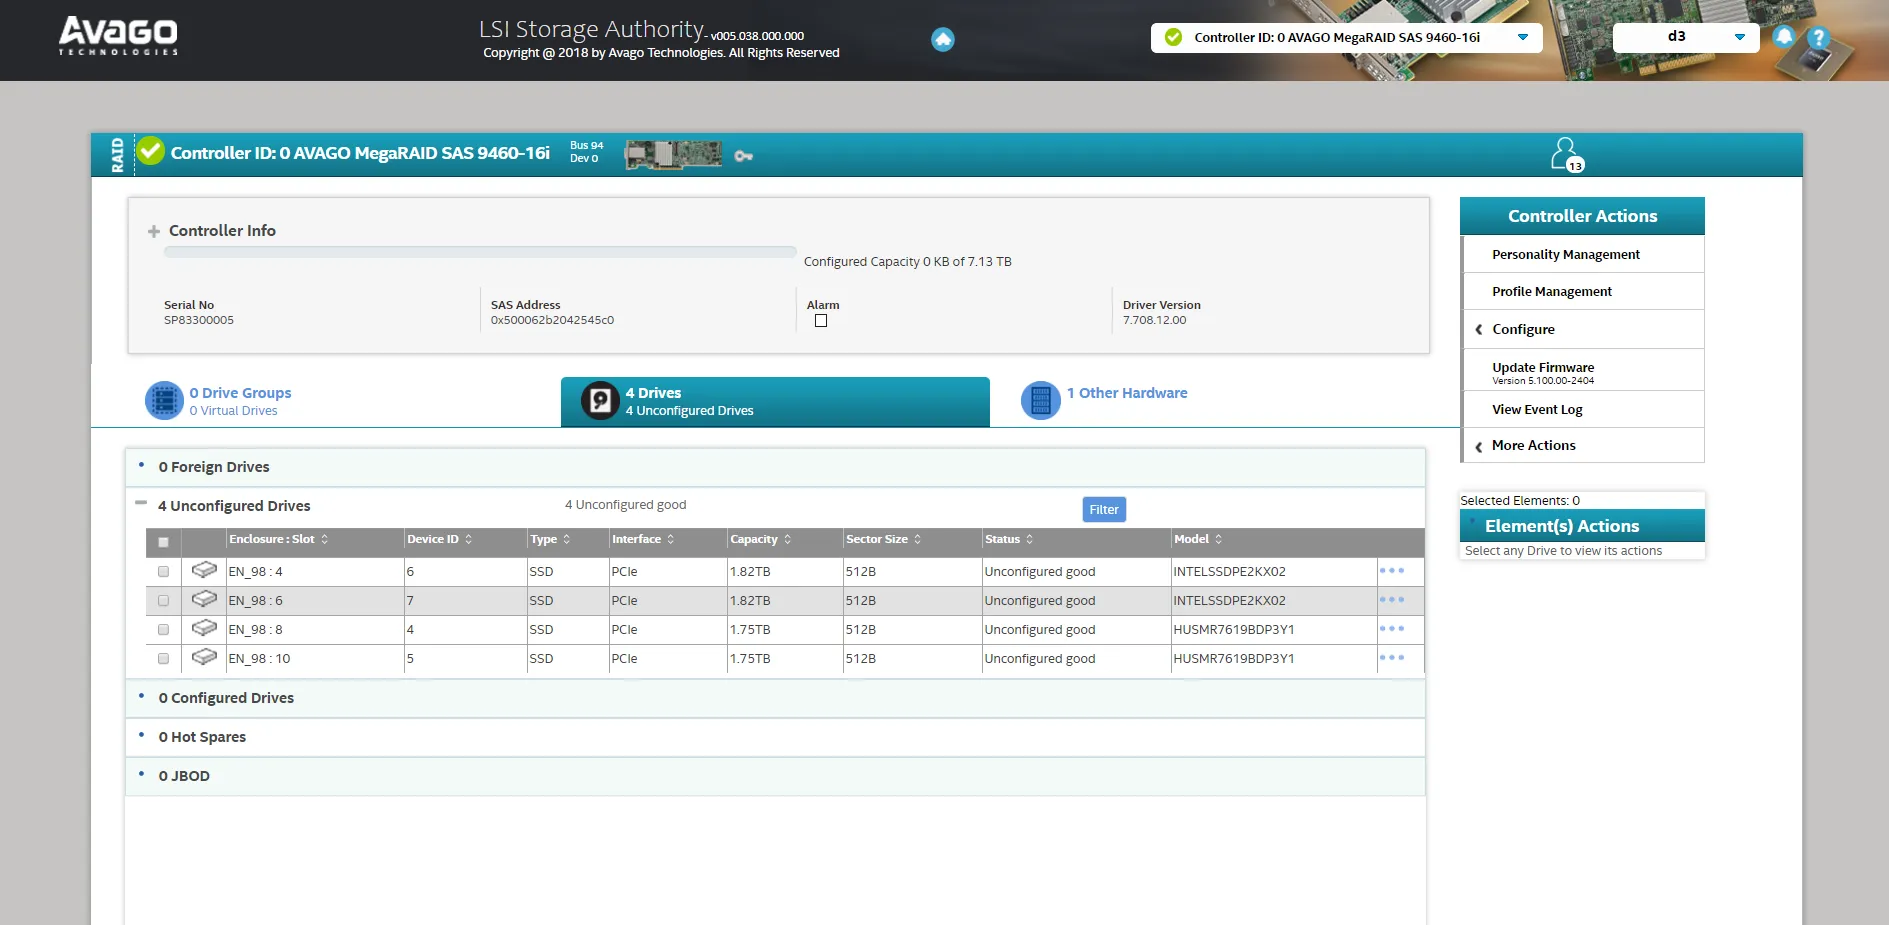
ランディングページには、システムヘルス、合計容量、検出されたドライブなどのコントローラー情報が表示されます。
- Select Controller ドロップダウンを開き、お使いのコントローラーを選択します。
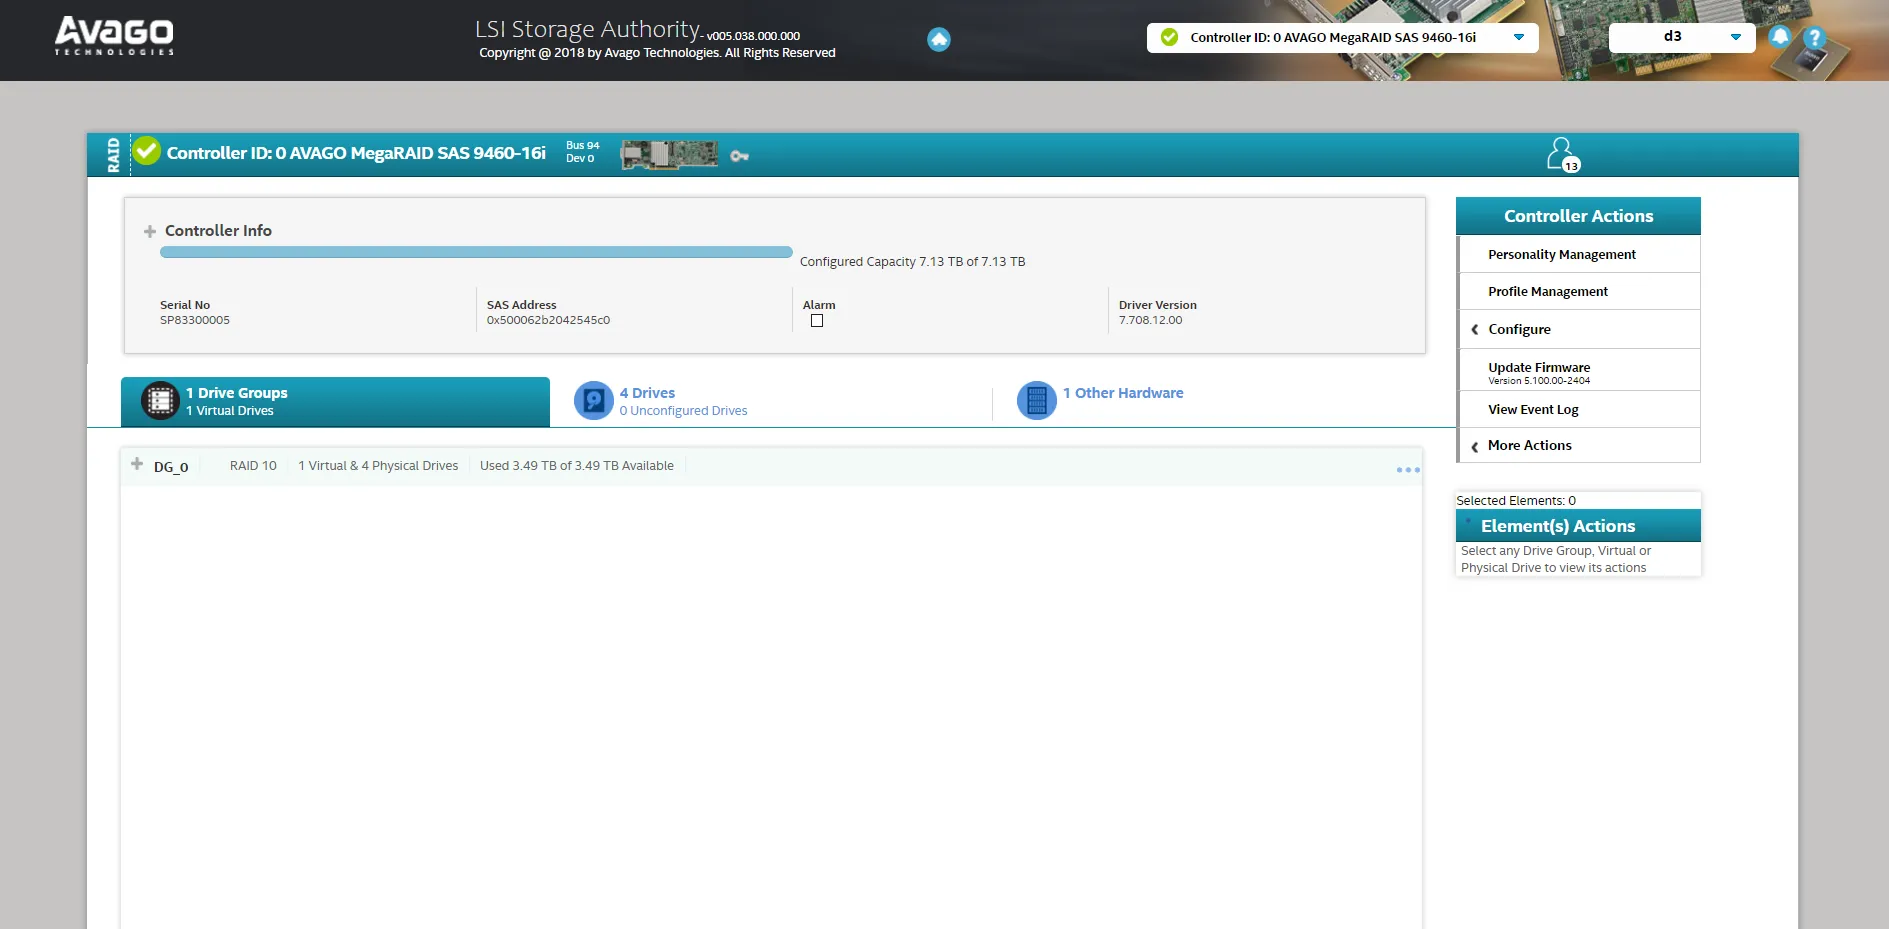
- コントローラーページで、ドライブ数・容量・ステータスを確認します。
- 最初のタブを開き、RAID レベルなどの仮想ドライブ (Virtual Drive) の詳細情報を表示します。

- この情報を使って構成タスクを開始します。
RAID の作成
Section titled “RAID の作成”既存の仮想ドライブがない場合に RAID を作成する手順は以下のとおりです。
- Configure タブを開きます。
- Advanced Configuration を選択します。
- 推奨構成である RAID 10 を選択します。これは Disguise が公表するパフォーマンス指標を満たすために選択されています。RAID が異なるレベルでセットアップされている場合、冗長性なしでデータを失うリスクがあります。
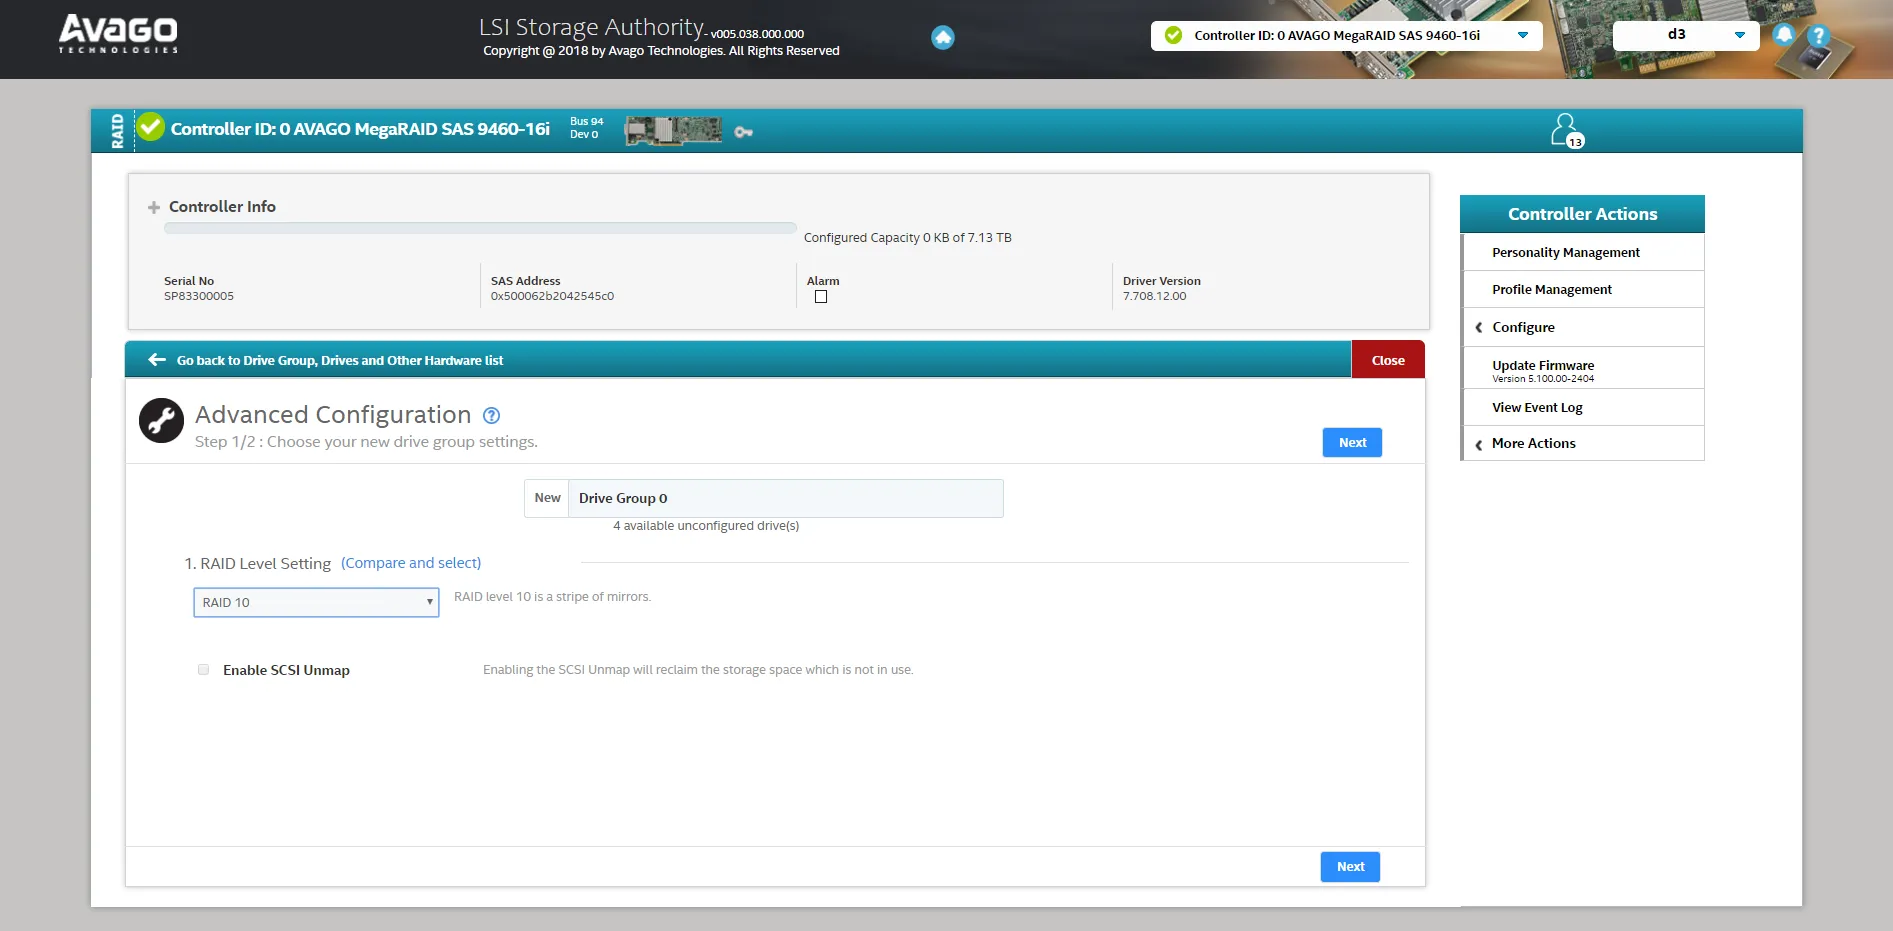
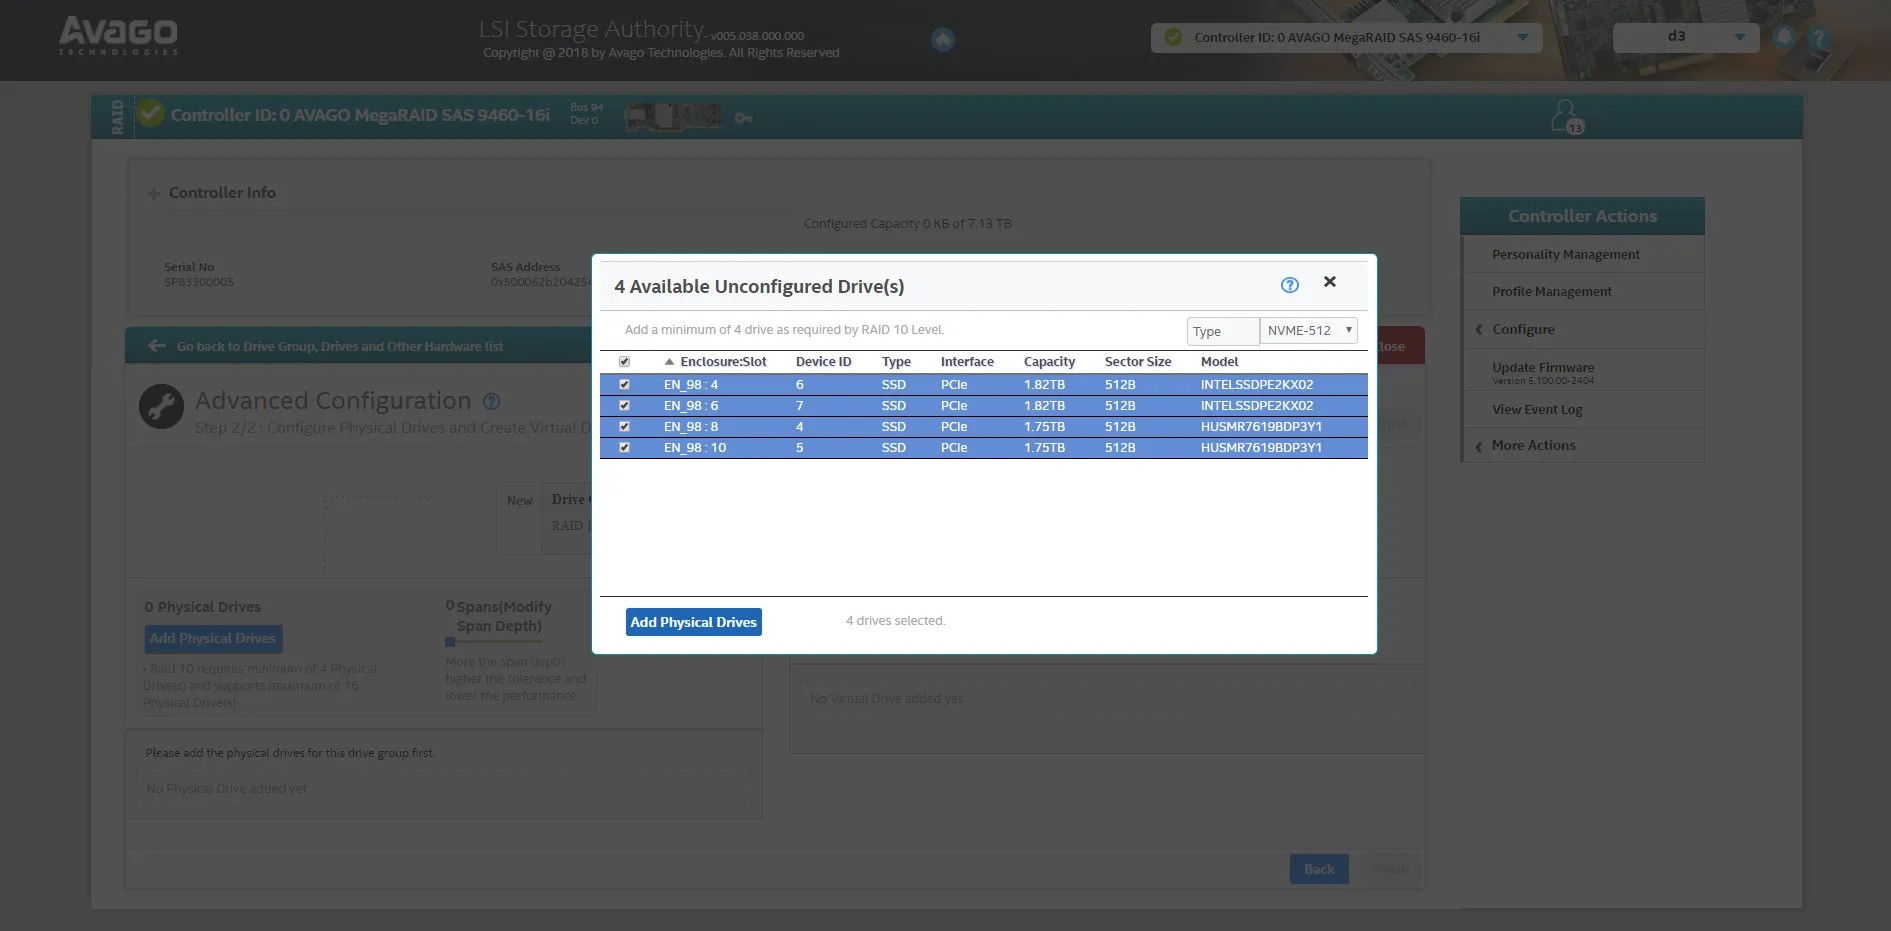
- 次のページに進み、Add Physical Drives を選択して、アレイに組み込むドライブを選びます。RAID 10 にはセットアップに最低 4 ドライブが必要です。
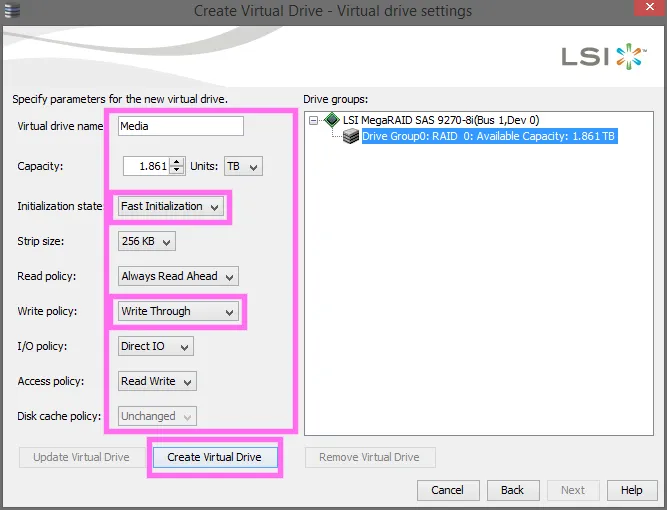
- Create Virtual Drive を選択し、以下の設定を適用します:
- Virtual Drive Name: Media
- Strip Size: 256 KB
- Initialization State: No Initialization
- Read Policy: Always Read Ahead
- Write Policy: Write Through
- I/O Policy: Direct IO
- Disk Cache Policy: Unchanged
- Create Virtual Drives を選択します。
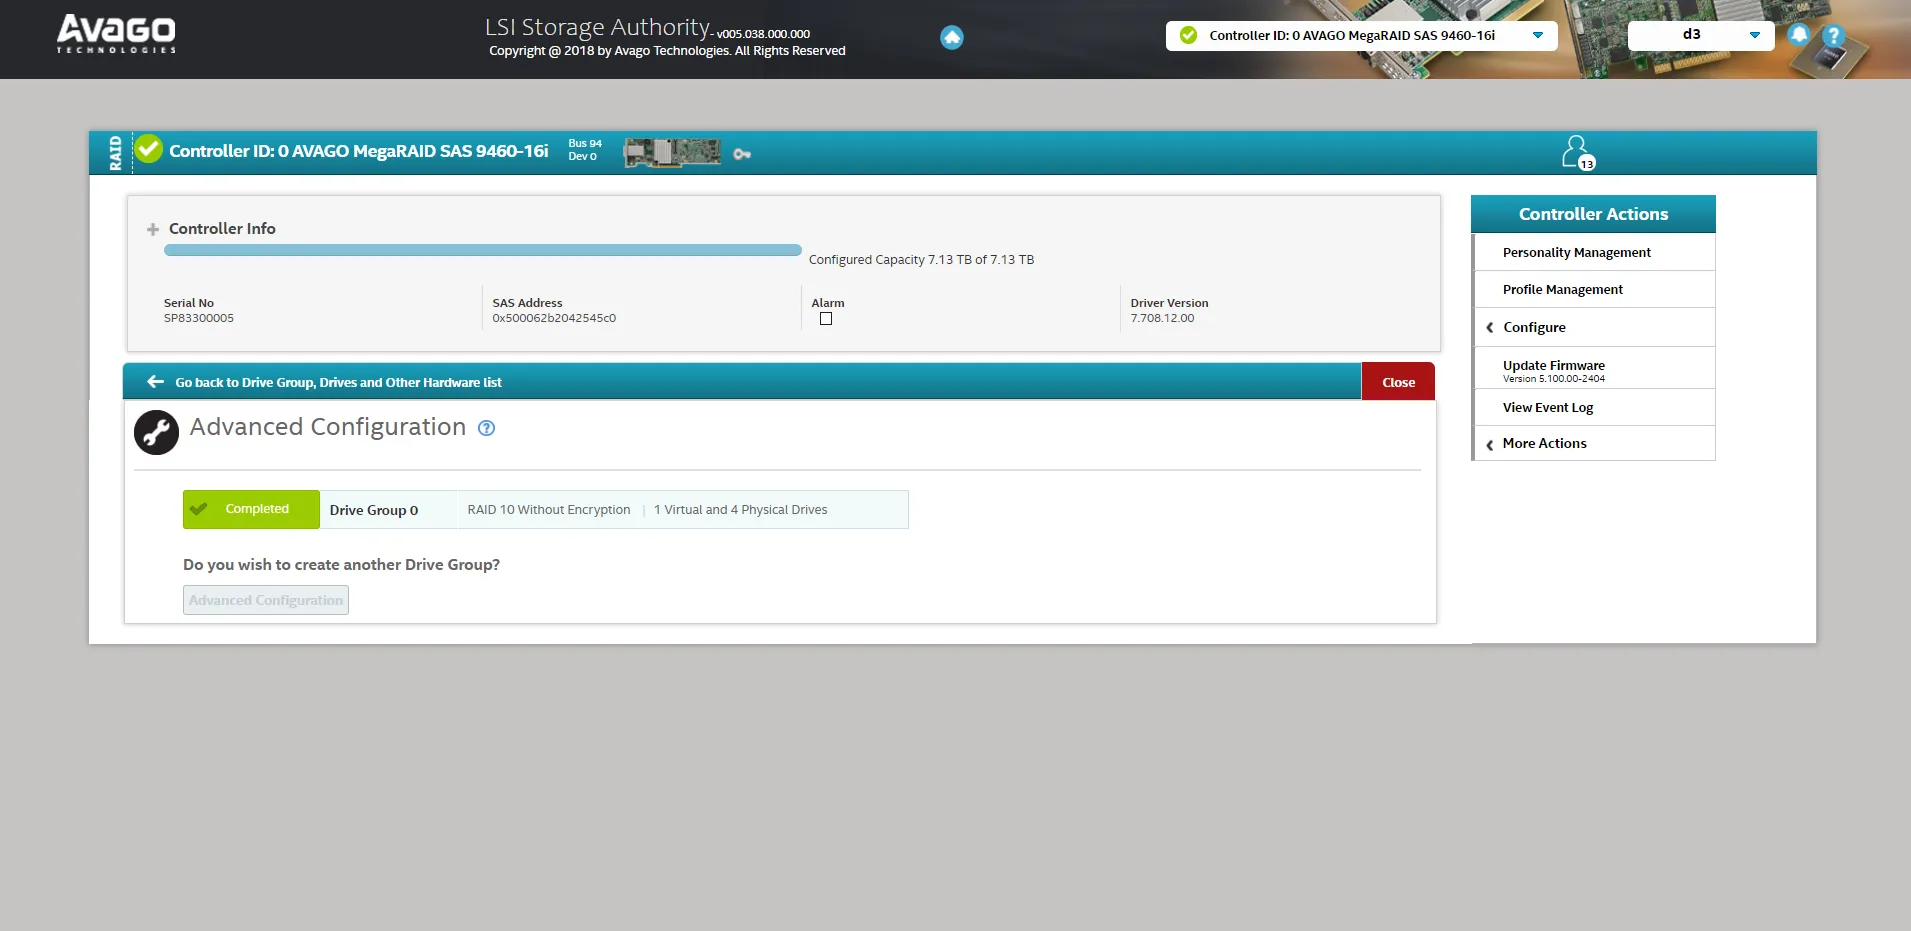
- Finish を選択してプロセスを完了します。
- 完了ページで RAID の詳細を確認します。
既存の仮想ドライブの置き換え
Section titled “既存の仮想ドライブの置き換え”既存の仮想ドライブを新しいドライブに置き換えるには、既存のドライブを削除してから新しい仮想ドライブを作成します:
- LSA を起動します。
- ユーザー:
d3 - パスワード: なし
- ユーザー:
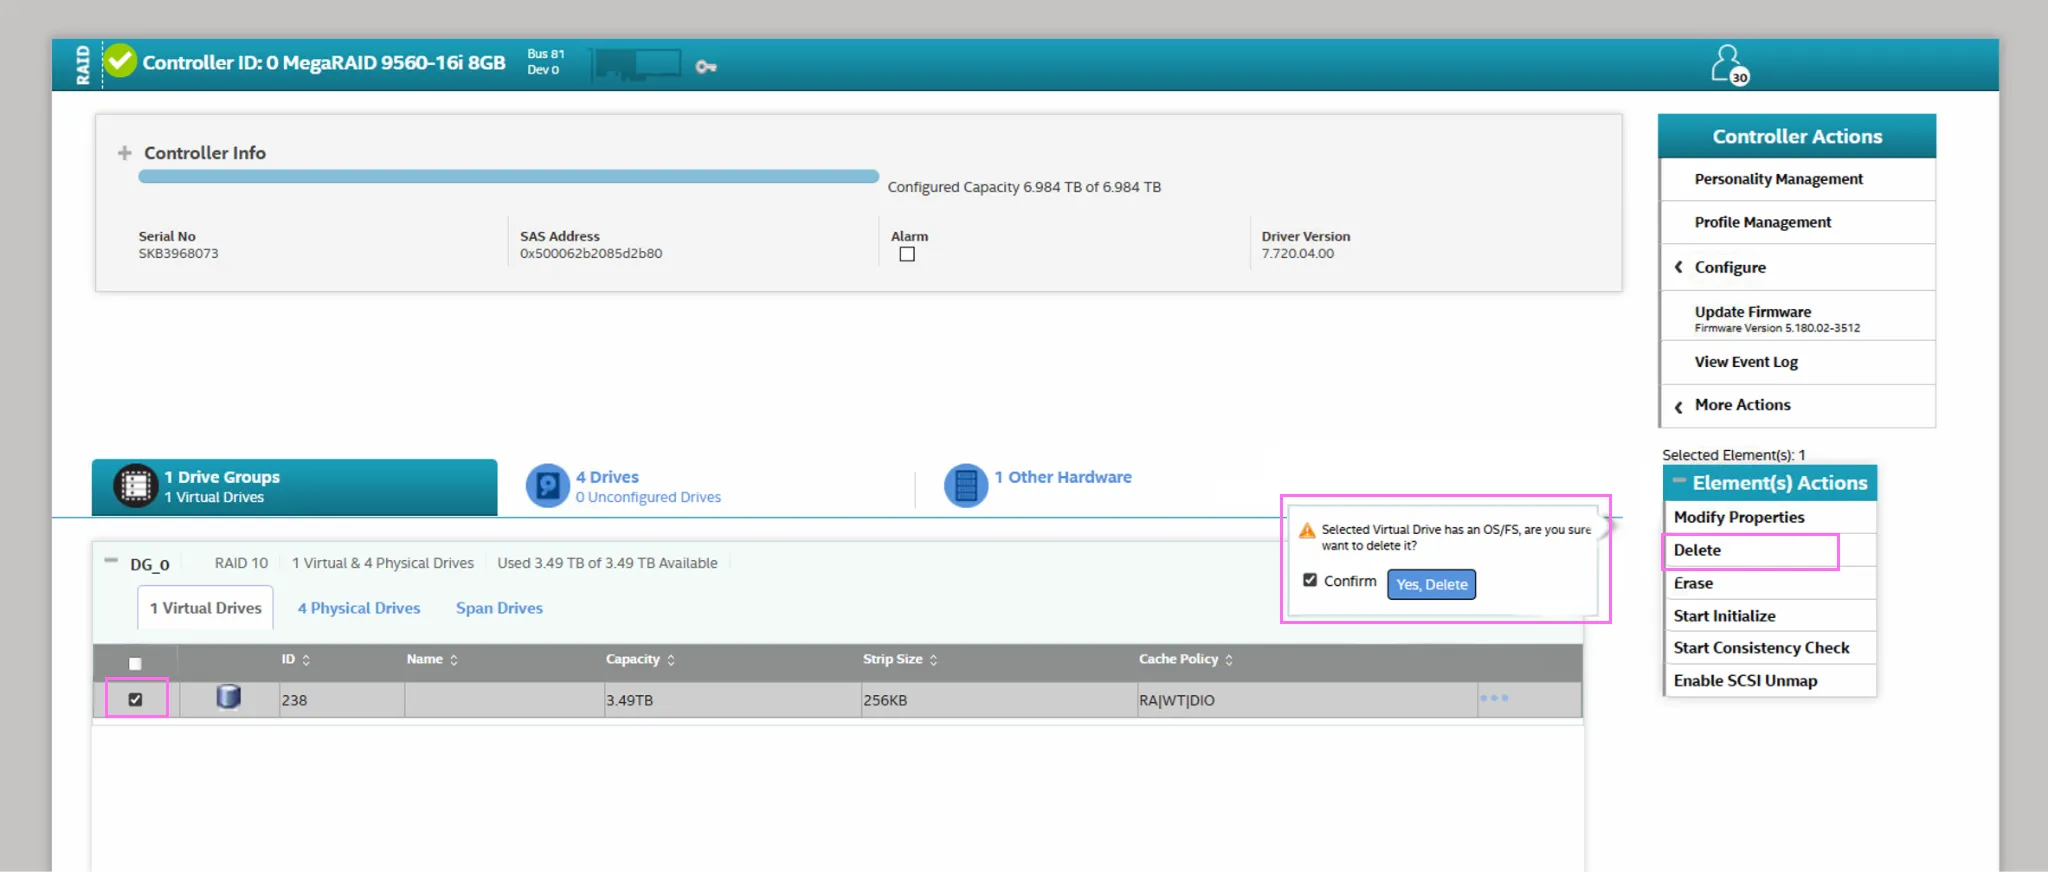
- Drive Groups の下で、ドライブのチェックボックスを選択し、Element(s) Actions から Delete を選択します。
- 新しいアレイに含める物理ドライブを選択します。
- Add Virtual Drives を選択し、以下の設定を適用します:
- Virtual Drive Name - Media
- Strip size - 256 KB
- Initialization State - No Initialization
- Read Policy - Always Read Ahead
- Write Policy - Write Through
- I/O Policy - Direct IO
- Disk Cache Policy - Unchanged
- Add Virtual Drives をクリックします。
- Finish を選択してプロセスを完了します。
- Windows が新しい仮想ドライブのフォーマットとパーティション設定を促します。必要に応じて手動で行うこともできます。詳細は下の Windows で手動フォーマット・パーティション設定 セクションを参照してください。
- 以下のフォーマット設定を使用します:
Capacity - DefaultFile System - NTFSAllocation unit size - Default allocation sizeVolume Label - You can leave this blank ('D:' is the default)Format options - Quick format since the RAID controller already handled drive initialization and health checks.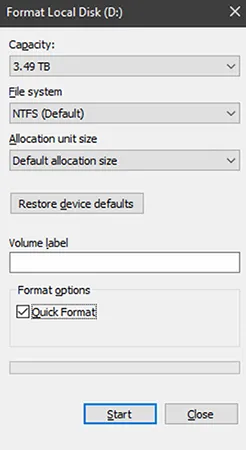
Unconfigured Good / Bad
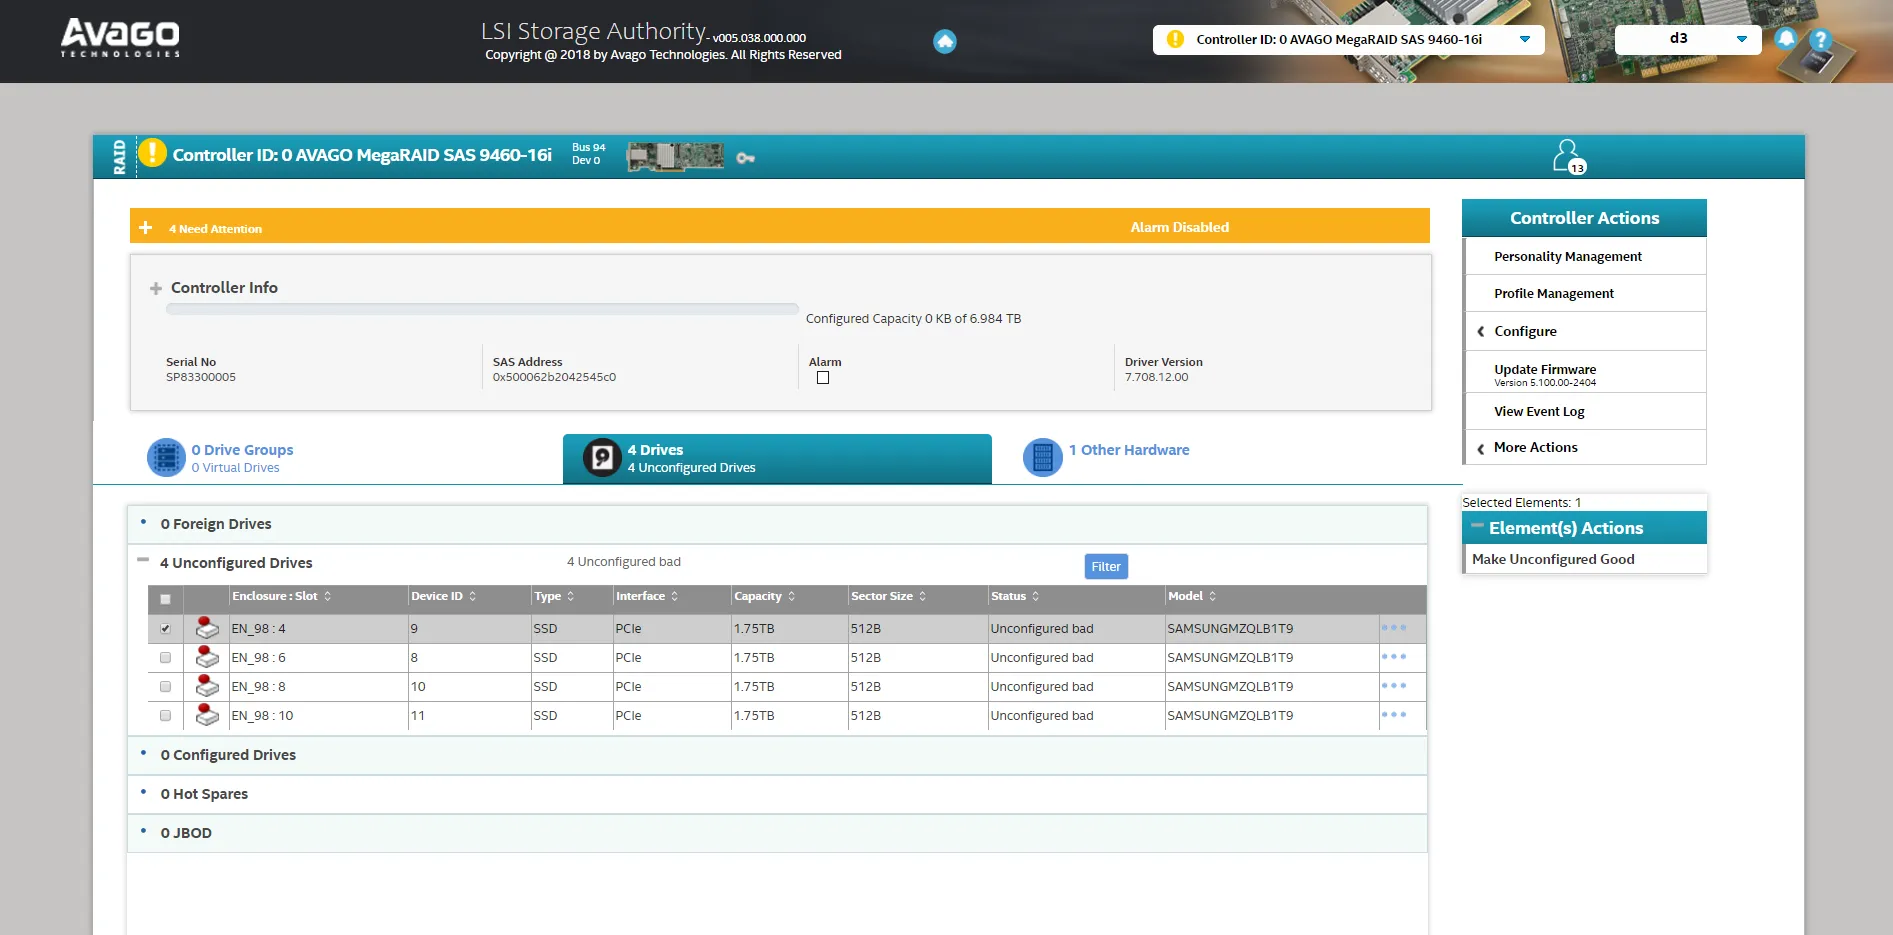
Section titled “Unconfigured Good / Bad”物理ドライブを交換すると、LSI コントローラーは新しいディスクを自動的に検出します。ドライブを RAID アレイに追加する前に、Unconfigured Good とマークされていることを確認してください。
ドライブが Unconfigured Bad とマークされている場合は、まず変換が必要です。
- Unconfigured Good とマークされているドライブを特定します - これらは RAID 構成にすぐに使用できます。
- Unconfigured Bad とマークされているドライブについては、各ドライブを個別に選択します。
- Element(s) Actions の下で Make Unconfigured Good を選択します。
Foreign Configuration のインポート
Section titled “Foreign Configuration のインポート”以前に別のシステムで使用されていたドライブ、または Unconfigured Bad から最近変更されたドライブには、Foreign Configuration が表示されることがあります。Foreign configuration は、RAID が正しく動作するように、確認・インポートが必要です。
- ドライブリストで Foreign Drives とマークされたドライブを選択します。
- Configure > Foreign Configuration に移動します
- Import を選択して Foreign configuration を採用します。

- 仮想ドライブの詳細を確認して、インポートが成功したことを確認します。
Manually format and partition on Windows
Section titled “Manually format and partition on Windows”- Start ボタンを押します。
- Disk Management と入力し、Create and format hard disk partitions を開きます。
- 下部パネルで、RAID 仮想ドライブを表すディスクを見つけます。
- ディスクの初期化を求められた場合は、GPT → OK を選択します。
- プロンプトが表示されない場合は、ディスクラベル (例: Disk 1) を右クリック → Initialize Disk → GPT を選択 → OK を押します。
- 未割り当て領域で右クリックし、New Simple Volume を選択します。
- デフォルトの全サイズを選択します。
- ドライブレターを選択します (例: D:)。
- 以下のフォーマット設定を使用します:
File system: NTFSAllocation unit size: DefaultVolume label: (any name you want)Check "Perform a quick format"
- Next をクリックし、Finish をクリックします。