Designer タイムラインコントロール
Porta Bridge を使用して接続を確立すると、Porta は Designer でプログラムされた timeline(タイムライン) と transport controls(トランスポートコントロール) にアクセスできます。これにより、Designer でキューを事前にプログラムし、運用中に Designer を操作することなくトリガーできます。
Designer のタイムラインとトランスポートの制御セットアップ
Section titled “Designer のタイムラインとトランスポートの制御セットアップ”ステップ 1: テンプレートを作成する
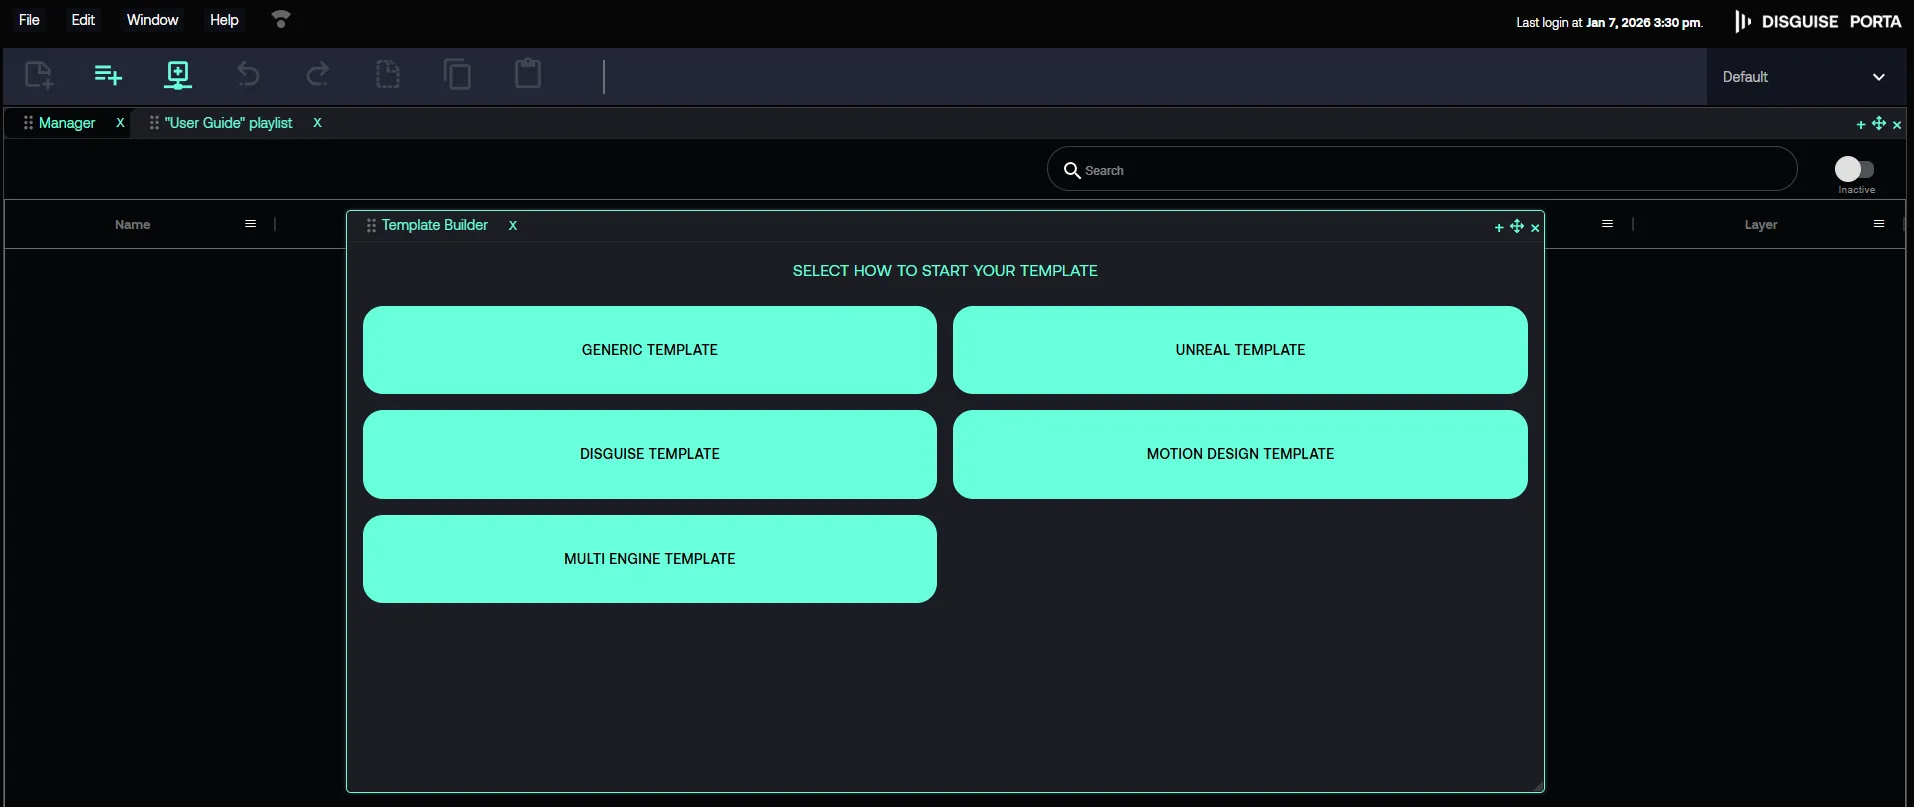
Section titled “ステップ 1: テンプレートを作成する”- Porta で File -> New -> Template に移動し、Template Builder(テンプレートビルダー) を開きます。
- Template Builder -> SELECT HOW TO START YOUR TIMELINE で、DISGUISE TEMPLATE をクリックします。
ステップ 2: チャネルを選択する
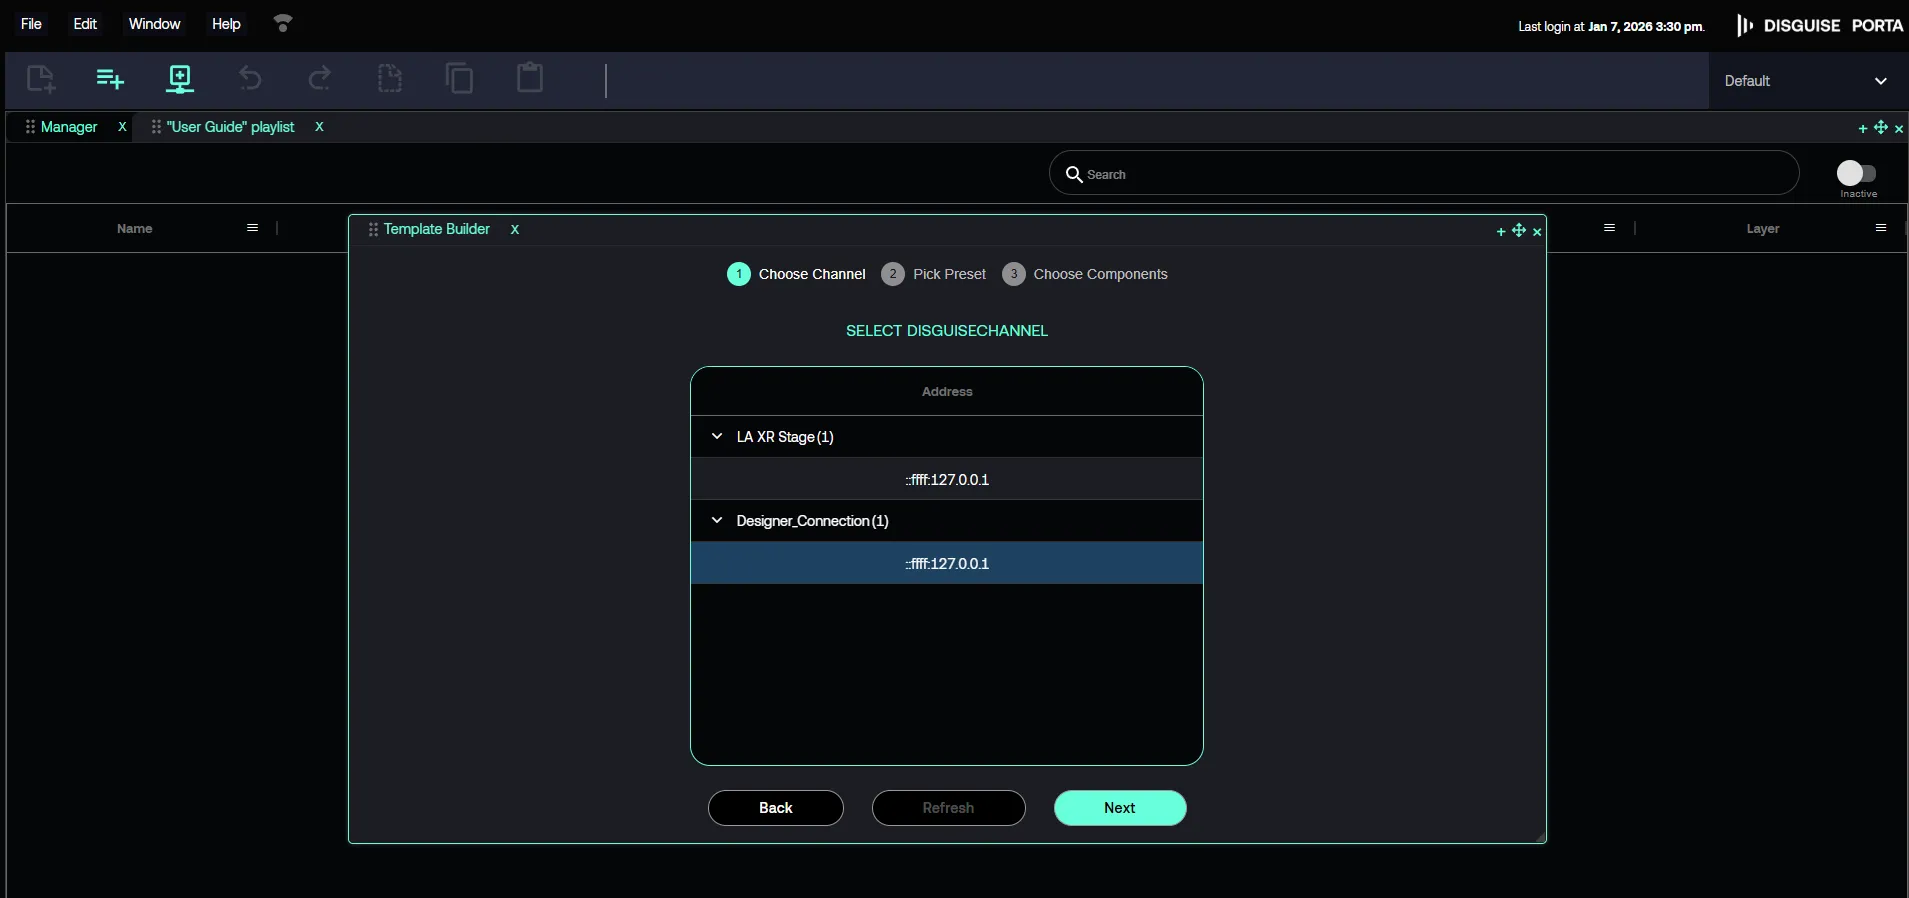
Section titled “ステップ 2: チャネルを選択する”- 確立済みの Channel(チャネル)を見つけて選択します。
- 公開パラメーターの選択を求められたら、何も選択せずに Next をクリックします。これはタイムラインおよびトランスポート制御には不要です。
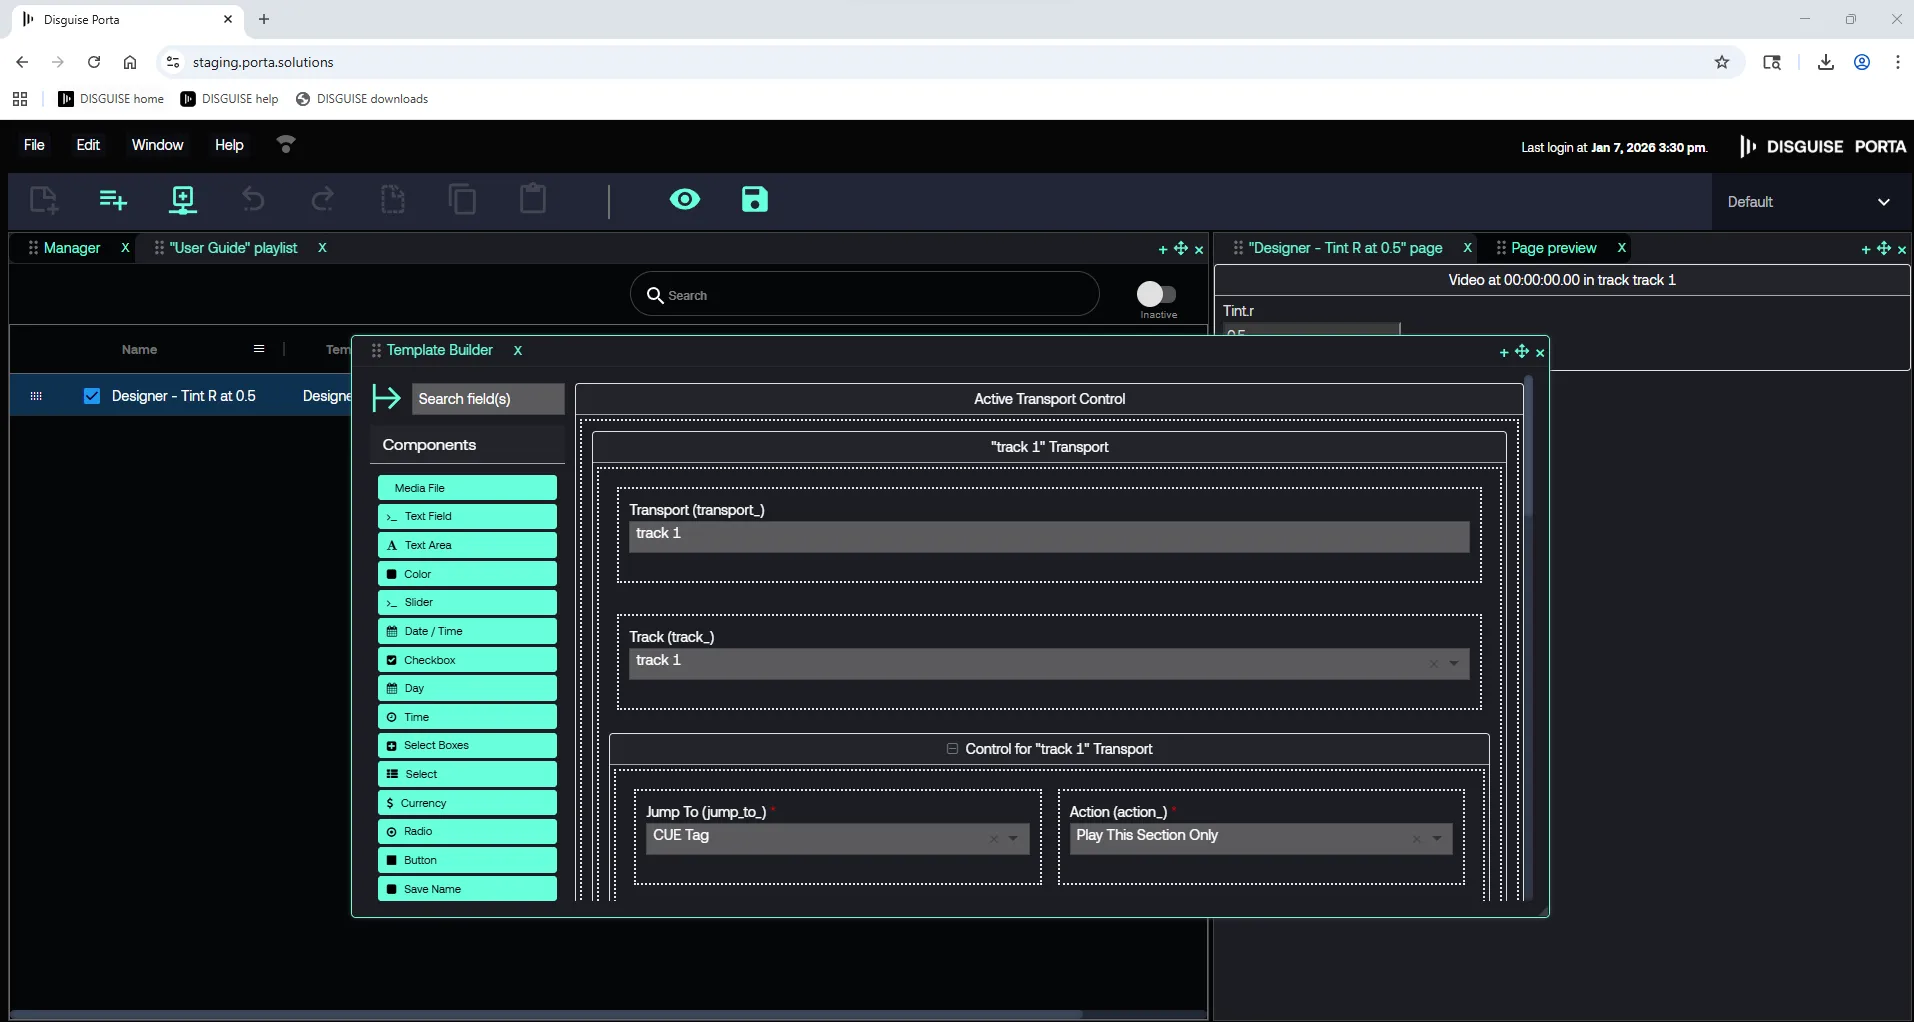
ステップ 3: 利用可能なタイムラインとトランスポートコントロールを取得する
Section titled “ステップ 3: 利用可能なタイムラインとトランスポートコントロールを取得する”Designer から、利用可能なタイムラインとトランスポートコントロールを取得します。
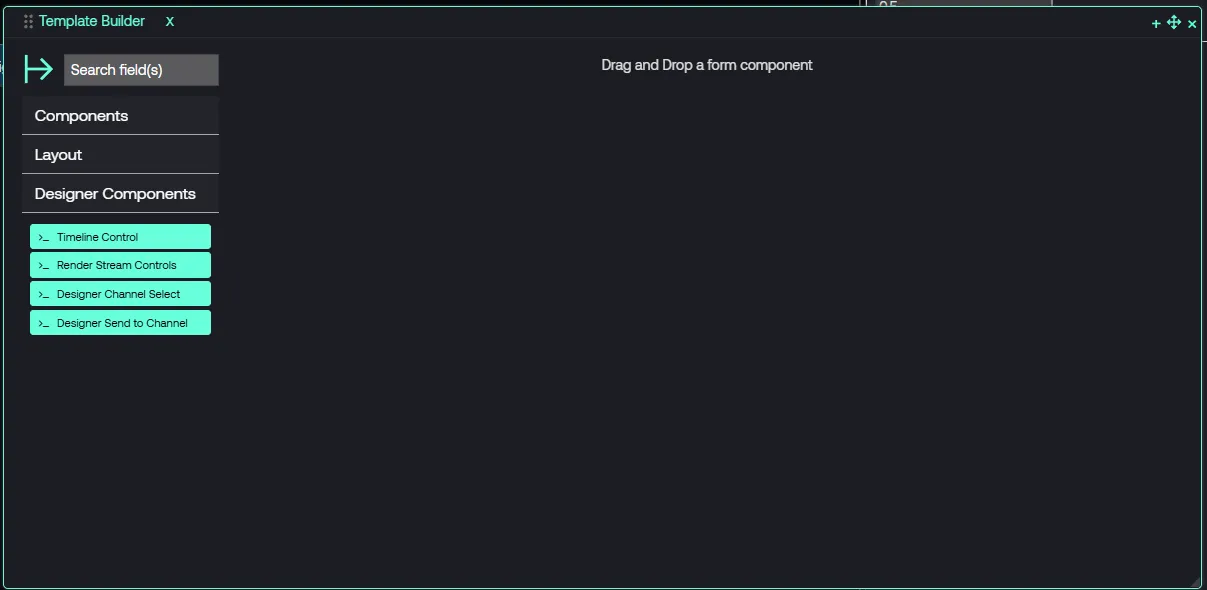
ステップ 4: タイムラインコントロールコンポーネントを追加する
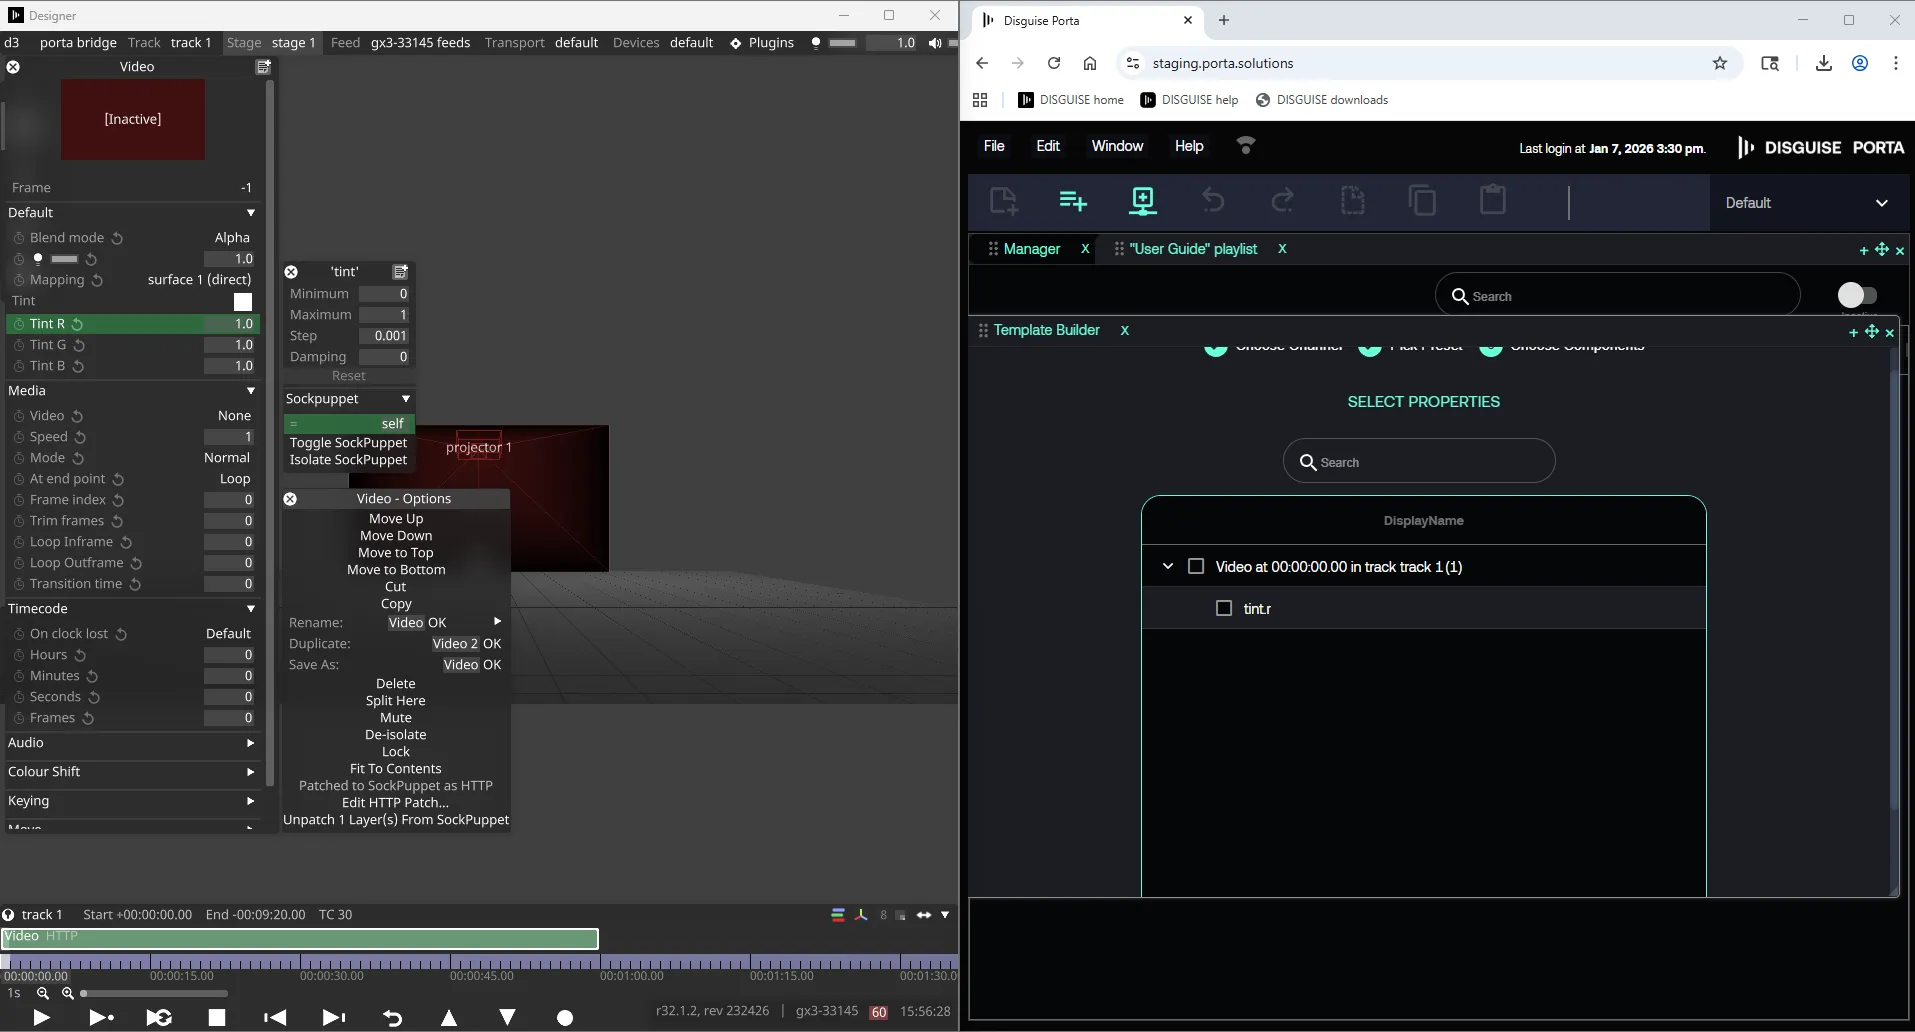
Section titled “ステップ 4: タイムラインコントロールコンポーネントを追加する”Designer Components コンポーネントの下にある Timeline Control(タイムラインコントロール) コンポーネントを、Template Builder 右側のフォームパネルにドラッグ&ドロップします。
これにより、利用可能なタイムラインとトランスポートコントロールが公開されます。
ステップ 5: テンプレートを保存してページを作成する
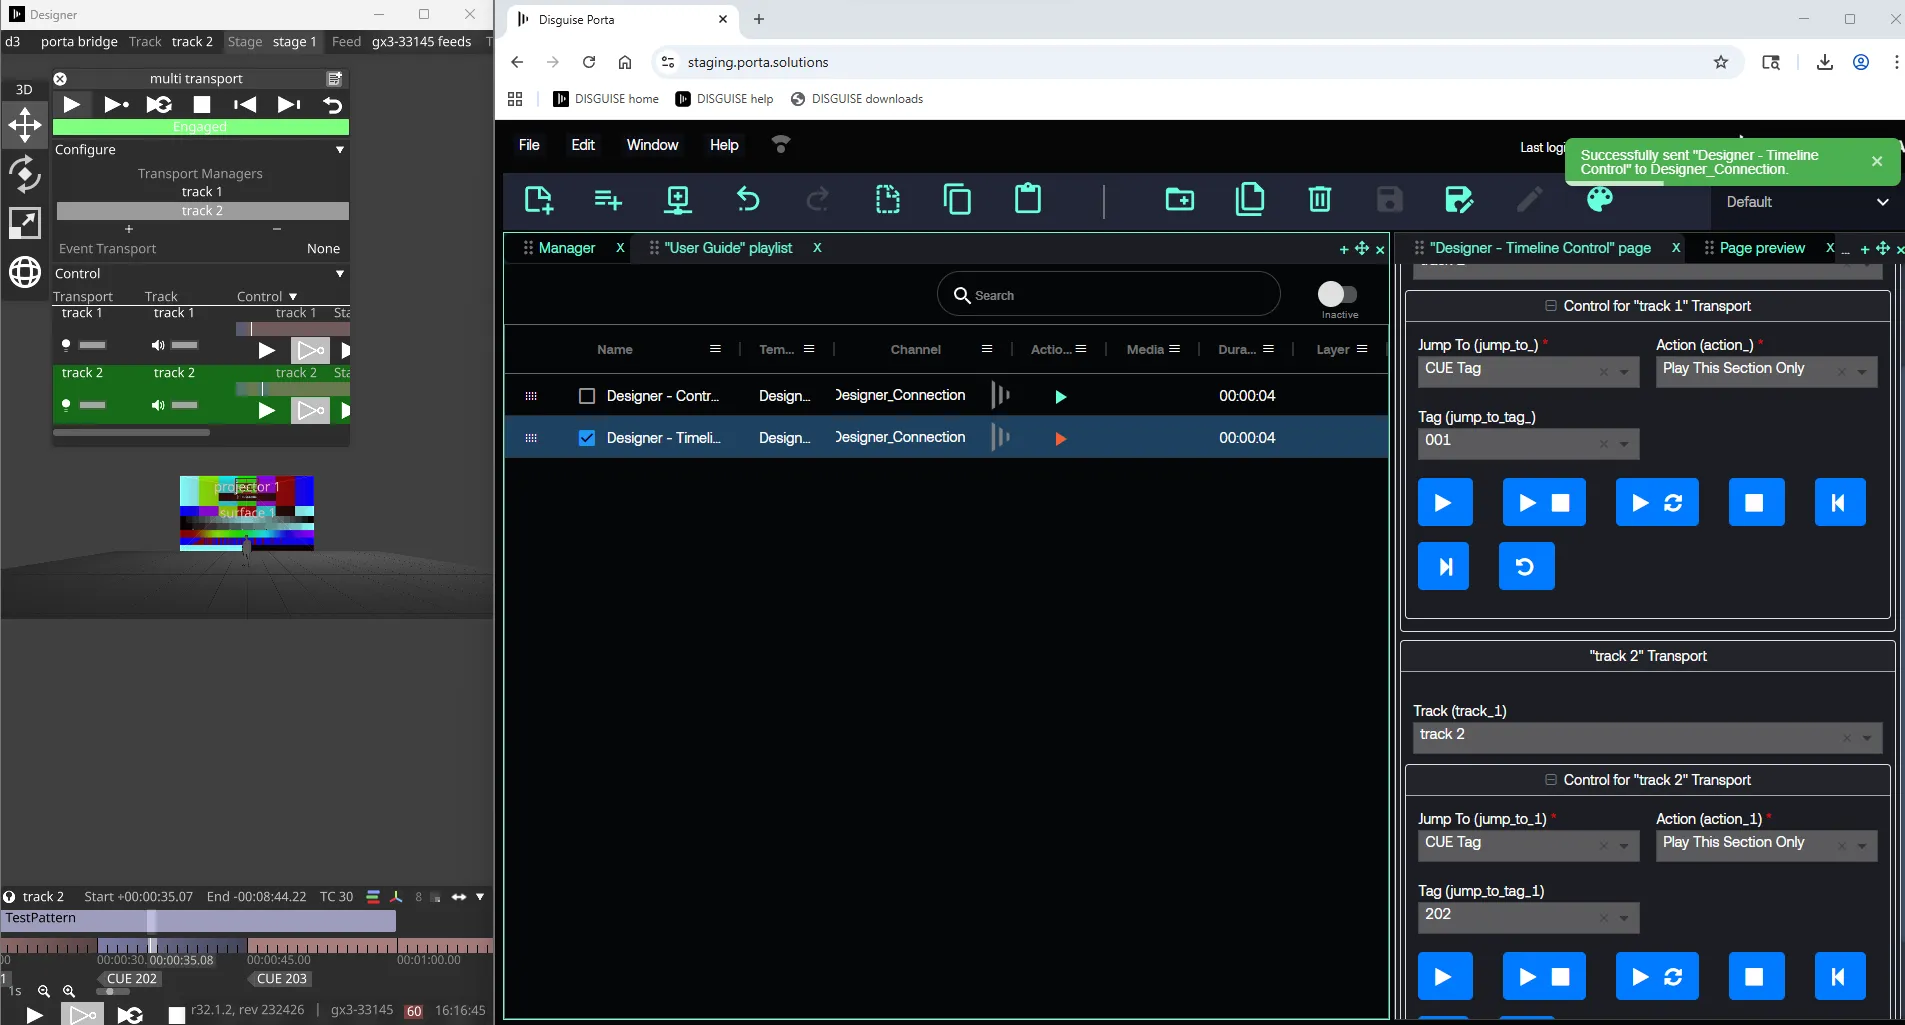
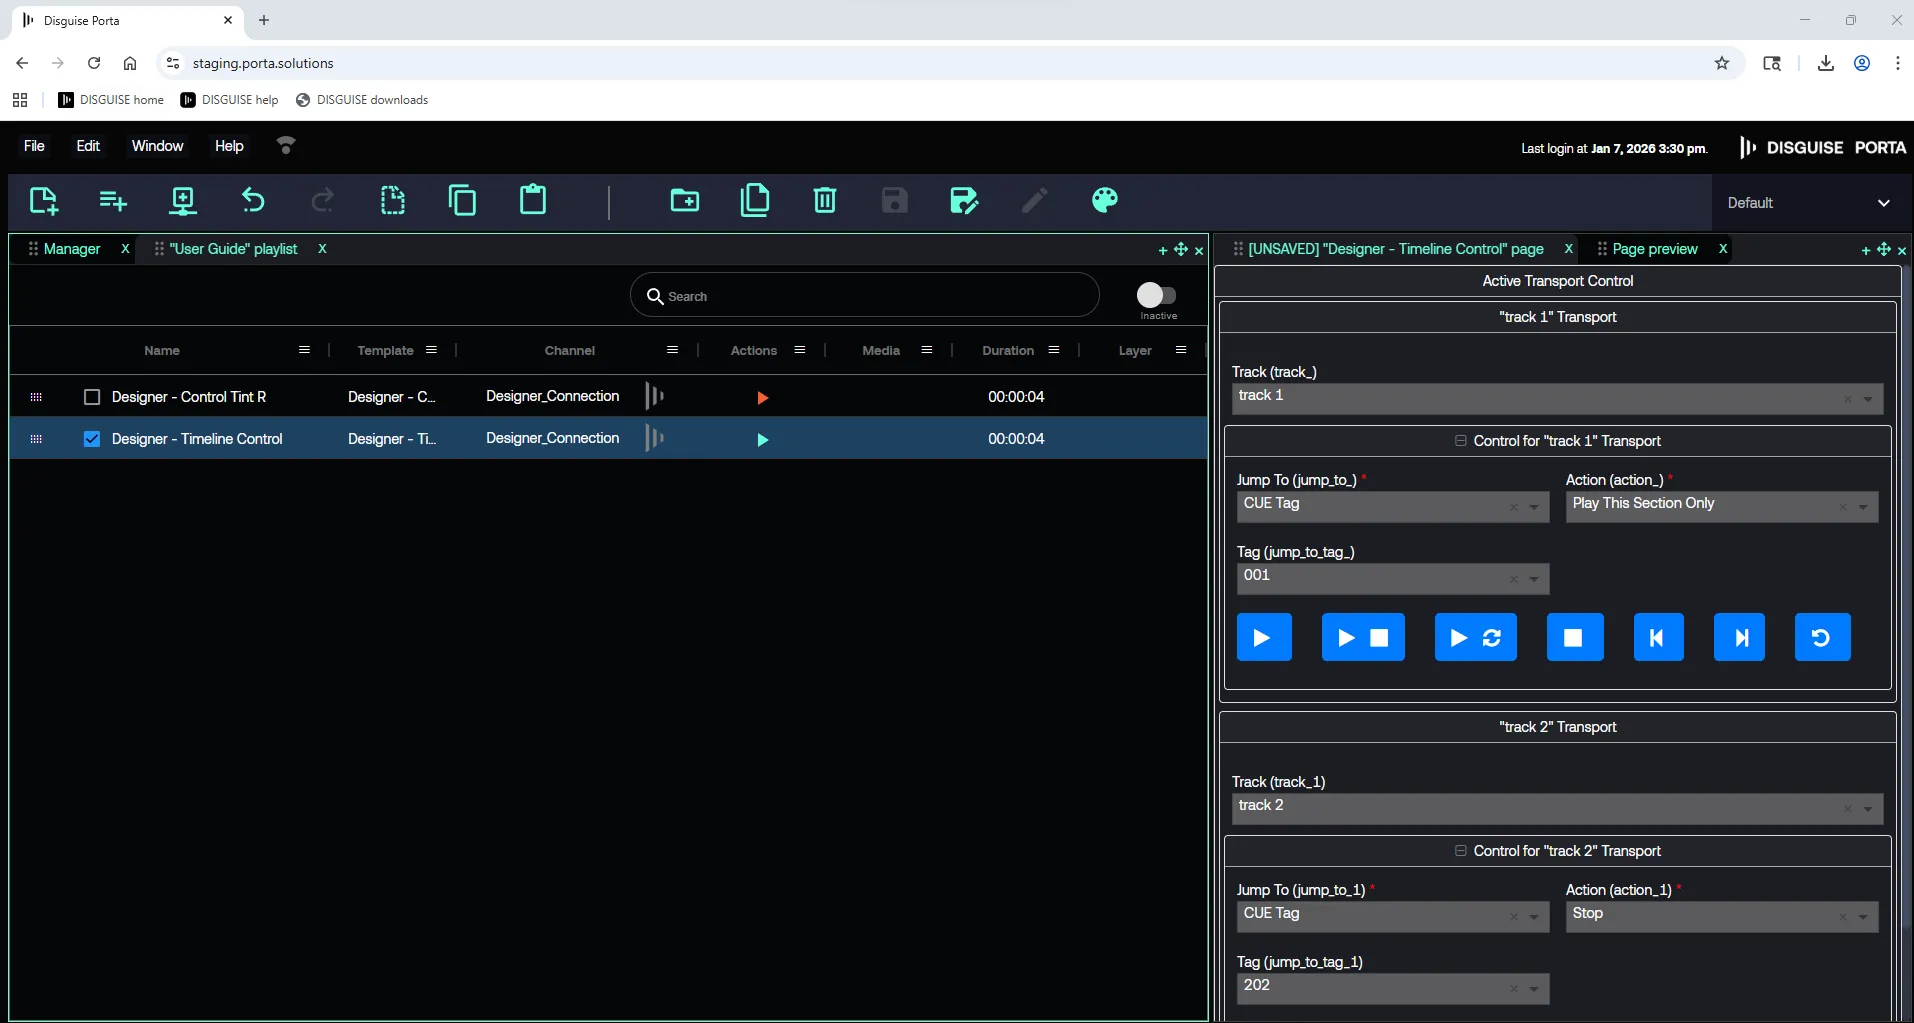
Section titled “ステップ 5: テンプレートを保存してページを作成する”テンプレートを保存し、このテンプレートを使用してページ Active Transport Control(アクティブトランスポートコントロール) を作成し、特定のプログラミングを保存します。
以下の例では、ページは次をトリガーします。
- Track 1 の CUE 001
- Track 2 の CUE 202
ページをプレイリストに追加すると、Active Transport Control パネルが利用可能になります。
ステップ 6: タイムラインキューをトリガーする
Section titled “ステップ 6: タイムラインキューをトリガーする”Porta の再生コントロールを使用して、Designer で直接 CUE の変更をトリガーします。